Table of Contents
Advertisement
Quick Links
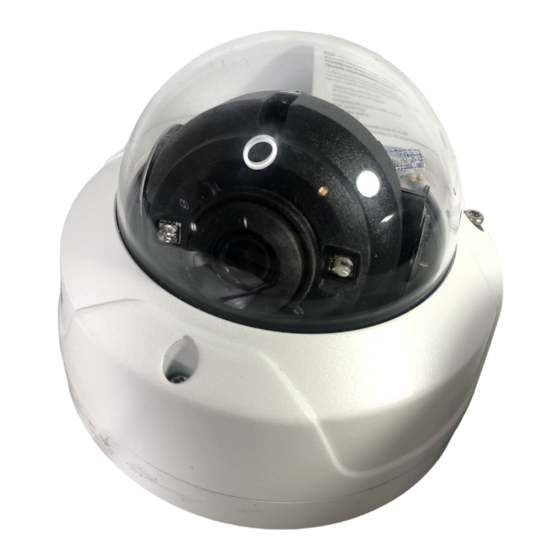
ALI-TS1022VR 2MP HD-TVI
Outdoor Dome Security Camera
Quick Installation Guide
The ALIBI ALI-TS1022VR dome camera include a new generation sensor with high sensitivity and advanced
circuit design technology. They feature high resolution, low image distortion and low noise features which
makes them suitable for surveillance and image processing systems. Features include:
2 Megapixel high-performance CMOS
•
HD-TVI HD output, up to 2 MP resolution
•
3.6 mm lens
•
True Day/Night, DNR, Smart IR, True WDR up to 120 dB
•
Up-the-coax OSD menu
•
65 ft Full Frame SMART IR
•
IP66 weatherproof
•
Requires Alibi HD-TVI compatible recorder (HD-TVI DVR)
•
Flange adaptor for pendant mounting (ALI-AF4) and junction box mounting (ALI-AJ4) are available
•
Cable
guide
Mounting
base
Dome
assembly
Dome
assembly
screw (3)
Drop cable
Hole for
mounting
screw (3)
Product
label
Camera mounting surface
Camera drop cable connectors
www.observint.com
1
What's in the box
•
•
•
•
•
Tools you need
To install the camera, you will need:
•
•
•
Installation
Before installation:
•
•
•
•
•
IR LED
Lens
During installation:
•
Cable
•
guide
Step 1.
These cameras can be mounted on a wall or ceiling that has sufficient strength to support it. The video/
power drop cable from the camera can be routed either through mounting surface or through a cable guide
on the edge of the mounting base.
NOTE
1.
2.
3.
HD-TVI video
BNC connector
Power
Connector
4.
Camera assembly
Mounting hardware
Security L-wrench
This instruction guide
Drill template
12 Vdc power source. See Specifications for requirements.
Tools and additional fasteners (may be required) for mounting the camera
Video and power extension cable
Make sure that the device is in good condition and all the assembly parts are included.
IR Reflection Prevention: Avoid mounting the camera near reflective surfaces. The IR light from
the camera can reflect back into the lens. Do not remove the plastic cover until the cover is installation
is complete.
Check the specification of the products for the installation environment.
Make sure that the wall or the ceiling is strong enough to withstand 3 times the weight of the camera.
To avoid fire or shock hazard, use only UL listed power supplies. Verify that the power supply will
provide the rated voltage and wattage for the camera. See the Specifications section.
Camera Lens: Handle the camera carefully to prevent scratching or soiling the lens. If the lens or IR
array shield becomes soiled, clean it only with approved products. See the
Power supply: Camera drop cable: The camera drop cable includes two connectors:
Video BNC connector: For transmission of the HD-TVI video signal across a coax (75 Ω)
—
extension cable.
Power connector: When applying Vdc power, observe the power polarity. See the drop cable
—
photo above for the connector polarity configuration.
Mounting the camera
This camera can be installed using a pendant mounting bracket with flange adapter or junction
box. Please refer to the instructions provided with those accessories for special considerations when
installing the camera with them.
Unscrew the three (3) dome assembly screws, and then separate the dome assembly from the
mounting base. The dome is tethered to the base with a strap. NOTE: To keep the lens assembly
clean, do not remove the plastic protective packaging applied to the lens at this time.
Using the mounting template or the mounting base, mark the holes for the camera mounting
screws.
Drill holes for the mounting screws into the mounting surface. The mounting screws and wall
inserts provided is appropriate for most surfaces. However, depending on the surface material and
strength, more appropriate fasteners may be required.
Drill a 3/4" hole through the mounting surface for the drop cable, if necessary.
section.
Cleaning
ALI-TS1022VR_CQ
161005
Advertisement
Table of Contents

Summary of Contents for ALIBI ALI-TS1022VR
- Page 1 This instruction guide • Drill template The ALIBI ALI-TS1022VR dome camera include a new generation sensor with high sensitivity and advanced • circuit design technology. They feature high resolution, low image distortion and low noise features which makes them suitable for surveillance and image processing systems. Features include: 2 Megapixel high-performance CMOS •...
- Page 2 It also can be used to block sensitive portions in the field of view (Privacy). You can open the OSD menu system from either the HD-TVI DVR Live View display or through remote login to the ALIBI recorder. The PTZ Control window direction buttons and the Iris + and Iris - keys are used to navigate the OSD menu and set configuration options in the camera.
- Page 3 • GLOBAL: GLOBAL refers to the normal exposure mode, used when adjusting for unusual lighting direction keys and the Iris + and Iris - buttons in the ALIBI HD-TVI DVR PTZ control panel. See above. — distribution, variations, non-standard processing, or conditions of under exposure to get an The function of the directional keys and Iris buttons are defined in the table below.
- Page 4 WDR (Wide Dynamic Range): The wide dynamic range (WDR) function helps the camera MIRROR: DEFAULT, H, V, and HV are selectable for mirror. — • DEFAULT: The mirror function is disabled. provide clear images even under back light circumstances. WDR balances the brightness level of —...
- Page 5 Clean the camera dome with an approved glass cleaning solution and a lint free cloth. Dust can be removed from the unit by wiping it with a soft damp cloth. To remove stains, gently rub • the surface with a soft cloth moistened with a mild detergent solution, then rinse and dry it with a soft cloth.


Need help?
Do you have a question about the ALI-TS1022VR and is the answer not in the manual?
Questions and answers