
Related Manuals for Bosch DIVAR IP all-in-one 6000


Summary of Contents for Bosch DIVAR IP all-in-one 6000
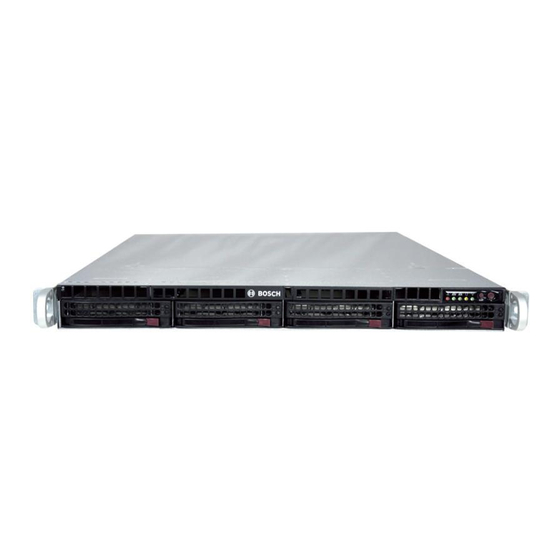
- Page 1 DIVAR IP all‑in‑one 6000 DIP‑6440IG‑00N | DIP‑6444IG‑4HD | DIP‑6448IG‑4HD | DIP‑644IIG‑4HD Installation manual...
-
Page 3: Table Of Contents
DIVAR IP all-in-one 6000 Table of contents | en Table of contents Safety Safety message explanation Installation precautions Electrical safety precautions ESD precautions Operating precautions Service and maintenance precautions 1.6.1 Cleaning Cybersecurity precautions FCC compliance Software precautions 1.9.1 Use latest software 1.9.2... - Page 4 | Table of contents DIVAR IP all-in-one 6000 8.6.1 Configuring RAID5 8.6.2 Recovering the unit Configuring IPMI settings Troubleshooting Service and repair Decommissioning and disposal Additional information 12.1 Additional documentation and client software 12.2 Support services and Bosch Academy 2022-10 | V02 | F.01U.407.903...
-
Page 5: Safety
DIVAR IP all-in-one 6000 Safety | en Safety Read, follow, and retain for future reference all of the following safety instructions. Safety message explanation Warning! Indicates a hazardous situation which, if not avoided, could result in death or serious injury. -
Page 6: Electrical Safety Precautions
| Safety DIVAR IP all-in-one 6000 Notice! If you install this device in an enclosure, make sure that the enclosure is adequately ventilated according to the manufacturer’s instructions. Caution! Installation precaution Do not place this device on an unstable stand, tripod, bracket, or mount. The device may fall, causing serious injury to persons and damage to the device. - Page 7 DIVAR IP all-in-one 6000 Safety | en Notice! Permanently connected devices must have an external, readily operable mains plug or all‑pole mains switch in accordance with installation rules. Notice! Pluggable devices must have an easily accessible electrical outlet installed near the equipment.
-
Page 8: Esd Precautions
| Safety DIVAR IP all-in-one 6000 Warning! Use only one hand when working with powered-on electrical equipment. This is to avoid making a complete circuit, which will cause electrical shock. Use extreme caution when using metal tools, which can easily damage any electrical components or circuit boards they come into contact with. -
Page 9: Service And Maintenance Precautions
State of California to cause birth defects and other reproductive harm. Notice! Video loss is inherent to digital video recording; therefore, Bosch Security Systems cannot be held liable for any damage that results from missing video information. -
Page 10: Cleaning
Limit local network access to trusted devices only. Details are described in the following documents which are available in the online product catalog: – Network Authentication 802.1X – Cybersecurity guidebook for Bosch IP video products 2022-10 | V02 | F.01U.407.903 Bosch Security Systems B.V. Installation manual... -
Page 11: Fcc Compliance
Bosch assumes no liability whatsoever for any damage caused by operating its products with outdated software components. You can find the latest software and available upgrade packages in the Bosch Security and Safety Systems download store under: https://downloadstore.boschsecurity.com/ 1.9.2 OSS information Bosch uses Open Source Software in the DIVAR IP all-in-one products. - Page 12 | Safety DIVAR IP all-in-one 6000 You can find the licenses of the used Open Source Software components on the system drive under: C:\license txt\ The licenses of Open Source Software components used in any further software installed on...
-
Page 13: Introduction
Introduction This manual is written for professional system integrators and PC technicians. It provides information for the installation of DIVAR IP all-in-one 6000. The installation should be done by experienced and qualified technicians only. Before you start the installation, read and follow the safety instructions. - Page 14 | Introduction DIVAR IP all-in-one 6000 2022-10 | V02 | F.01U.407.903 Bosch Security Systems B.V. Installation manual...
-
Page 15: System Overview
IP network. It seamlessly combines IP cameras and encoders, provides system- wide event and alarm management, system health monitoring, user and priority management. DIVAR IP all-in-one 6000 is based on the operating system Microsoft Windows Server IoT 2022 for Storage Workgroup. -
Page 16: Device Views
| System overview DIVAR IP all-in-one 6000 Device views Front view Information tag with device 2 USB 2.0 ports (Type A) identification data Information LED NIC1 and NIC2 LEDs HDD LED (not used) Power LED Reset button Power button Hard drive carrier LEDs... -
Page 17: Hard Drive Tray Leds
DIVAR IP all-in-one 6000 System overview | en Control panel buttons Button Description The power button is used to apply or remove power from the power supply to the system. Note: Turning off system power with this button removes the main power, Power but keeps standby power supplied to the system. -
Page 18: Lan, Ipmi And Uid Leds
| System overview DIVAR IP all-in-one 6000 LED state Description Upper hard Green flashing Indicates HDD activity. drive tray Lower hard Solid red Indicates HDD failure. drive tray Red flashing (1 Indicates HDD re-build and hot spare. Red flashing (4 Identify the HDD from a remote location through IPMI. -
Page 19: Preparing For Installation
DIVAR IP all-in-one 6000 Preparing for installation | en Preparing for installation Read this section in its entirety before you begin the installation. Choosing the installation location – Place the system near at least one grounded power outlet. – Place the system in a clean, dust-free area that is well ventilated. Avoid areas where heat, electrical noise and electromagnetic fields are generated. -
Page 20: Installation Considerations
| Preparing for installation DIVAR IP all-in-one 6000 – Always keep the rack’s front door and all panels and components on the system closed when not servicing to maintain proper cooling. Installation considerations Ambient operating temperature If installed in a closed or multi-unit rack assembly, the ambient operating temperature of the rack environment may be greater than the ambient temperature of the room. -
Page 21: Rack Installation
A standard Phillips screwdriver. Procedure To install DIVAR IP all-in-one 6000 in a rack, you must do the following: Installing the inner rail extensions on the chassis, page 21 . Installing the outer rails to the rack, page 22 . -
Page 22: Installing The Outer Rails To The Rack
| Rack installation DIVAR IP all-in-one 6000 Repeat these steps for the other inner rail extension. Installing the outer rails to the rack Each outer rail consists of two sections, a long section and a short section. Both sections are delivered separate and must be assembled, before installing the outer rail to the rack. -
Page 23: Installing The Outer Rails In A Square-Hole Rack
DIVAR IP all-in-one 6000 Rack installation | en Measure the distance between the front rack post and the rear rack post. Adjust the distance between the long section and the short section of the outer rail, so that it matches the distance between the front and the rear rack post. -
Page 24: Installing The Outer Rails In A Round-Hole Threaded Rack
| Rack installation DIVAR IP all-in-one 6000 5.2.3 Installing the outer rails in a round-hole threaded rack To install the outer rails in a round-hole threaded rack: Remove the screws, which secure the mounting brackets to the outer rail and remove the mounting brackets at both ends of the outer rail. -
Page 25: Installing The Outer Rails In A Round-Hole Rack
DIVAR IP all-in-one 6000 Rack installation | en 5.2.4 Installing the outer rails in a round-hole rack To install the outer rails in a round-hole rack: Remove the screws, which secure the mounting brackets to the outer rail and remove the mounting brackets at both ends of the outer rail. -
Page 26: Installing The Chassis In The Rack
| Rack installation DIVAR IP all-in-one 6000 Installing the chassis in the rack Warning! Stability hazard Before sliding the unit out for servicing make sure that the rack stabilizing mechanism is in place, or the rack is bolted to the floor. Failure to stabilize the rack can cause the rack to tip over. - Page 27 DIVAR IP all-in-one 6000 Rack installation | en Bosch Security Systems B.V. 2022-10 | V02 | F.01U.407.903 Installation manual...
-
Page 28: Installing A Sata Hard Drive
Bosch based on available failure rates. Bosch is not liable for any data loss or damages, or system failures of units equipped with hard drives that are not supplied by Bosch. - Page 29 DIVAR IP all-in-one 6000 Installing a SATA hard drive | en 1 Release button 2 Hard drive tray handle Notice! Except for short periods of time (swapping hard drives), do not operate the unit with the hard drives removed from the bays.
-
Page 30: Installing A Non-Bosch-Supplied Hard Drive
Bosch based on available failure rates. Bosch is not liable for any data loss or damages, or system failures of units equipped with hard drives that are not supplied by Bosch. - Page 31 DIVAR IP all-in-one 6000 Installing a SATA hard drive | en Notice! Except for short periods of time (swapping hard drives), do not operate the unit with the hard drives removed from the bays. Installing a hard drive into a hard drive tray Notice! This description applies only to DIP‑6440IG‑00N units.
- Page 32 | Installing a SATA hard drive DIVAR IP all-in-one 6000 2022-10 | V02 | F.01U.407.903 Bosch Security Systems B.V. Installation manual...
-
Page 33: Turning On The Unit
Plug the power cord from the power supply unit into a high-quality power strip that offers protection from electrical noise and power surges. Bosch recommends to use an uninterruptible power supply (UPS). Push the power button on the control panel to turn on the unit. -
Page 34: System Setup
| System setup DIVAR IP all-in-one 6000 System setup The Microsoft Windows Server IoT 2022 for Storage Workgroup operating system provides a user interface for initial server configuration, unified storage appliance management, simplified setup and storage management, and support for Microsoft iSCSI Software Target. -
Page 35: First Sign-In And Initial System Setup
DIVAR IP all-in-one 6000 System setup | en Notice! Recorded video streams need to be configured in a way that the maximum bandwidth of the system (BVMS/VRM base system plus iSCSI storage expansions) is not exceeded. First sign-in and initial system setup Notice! Do not change any operating system settings. -
Page 36: Choosing Operation Mode Bvms
| System setup DIVAR IP all-in-one 6000 – Under the Software tab, select BVMS Appliances from the list, then click Select. A list of all available software packages is displayed. – Locate the ZIP file SystemManager_[software version].zip and save it to a storage medium such as a USB stick. -
Page 37: Choosing Operation Mode Vrm
DIVAR IP all-in-one 6000 System setup | en Read and accept the license agreement, then click Install to continue. The installation starts and the installation dialog box shows the installation progress. Do not turn off the system and do not remove the storage media during the installation process. -
Page 38: Signing In To The Administrator Account
| System setup DIVAR IP all-in-one 6000 Signing in to the administrator account Signing in to the administrator account in BVMS operation mode To sign in to the administrator account in BVMS operation mode: On the BVMS desktop, press CTRL+ALT+DEL. -
Page 39: Recovering The Unit
You receive the confirmation that the operation was successful. 19. Select OK, then press Enter to continue. 20. Press F4 and Enter to save and exit. The DIVAR IP all-in-one 6000 unit restarts. 8.6.2 Recovering the unit To recover the unit: Turn on the unit and press F7 during the BIOS power-on-self-test to enter Windows PE. -
Page 40: Configuring Ipmi Settings
DIVAR IP all-in-one 6000 has a dedicated IPMI port on the rear side. Each DIVAR IP all-in-one 6000 unit is delivered with the default user name ADMIN and with an initial password. The initial password is unique for each unit. You can find it on the label at the rear of the unit, below the IPMI port. -
Page 41: Troubleshooting
DIVAR IP all-in-one 6000 Troubleshooting | en Troubleshooting Overheating Problem Solution An overheating condition has occurred. – Make sure that no cables obstruct the airflow in the system. – Make sure that the fan is present and The system status LED is solid red. -
Page 42: Service And Repair
The storage equipment is shipped with an original manufacturer service and support agreement for hardware. The Bosch technical support is the single point of contact in case of failure but the service and support obligations are fulfilled by the hardware manufacturer or a partner. -
Page 43: Decommissioning And Disposal
DIVAR IP all-in-one 6000 Decommissioning and disposal | en Decommissioning and disposal At a certain point in the life cycle of your product, it might be necessary to replace or to take out of order the device itself or a component. As the device or the component may hold sensitive data, like credentials or certificates, use the proper tools and methods to make sure that your relevant data is securely deleted during decommissioning or before disposal. -
Page 44: Additional Information
For more information, software downloads, and documentation, visit http:// www.boschsecurity.com and go to the respective product page in the product catalog. You can find the latest software and available upgrade packages in the Bosch Security and Safety Systems download store under: https://downloadstore.boschsecurity.com/ 12.2... - Page 45 DIVAR IP all-in-one 6000 Additional information | Bosch Security Systems B.V. 2022-10 | V02 | F.01U.407.903 Installation manual...
- Page 46 | Additional information DIVAR IP all-in-one 6000 2022-10 | V02 | F.01U.407.903 Bosch Security Systems B.V. Installation manual...
- Page 48 Bosch Security Systems B.V. Torenallee 49 5617 BA Eindhoven Netherlands www.boschsecurity.com © Bosch Security Systems B.V., 2022 Building solutions for a better life. 202210051732...
Need help?
Do you have a question about the DIVAR IP all-in-one 6000 and is the answer not in the manual?
Questions and answers
Is this model have redundant power supply