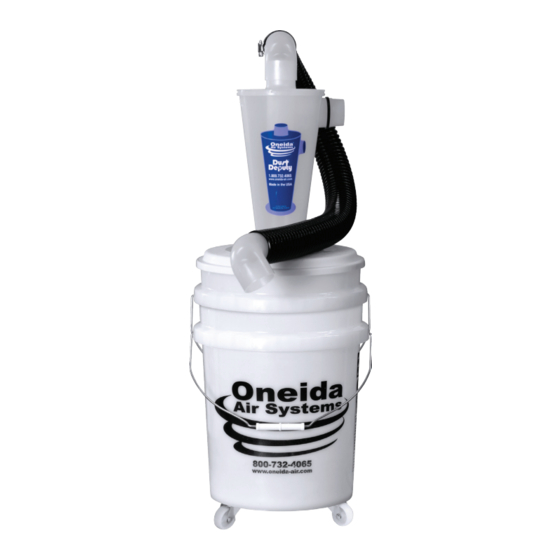
Oneida Air Systems Dust Deputy Deluxe Manual
Hide thumbs
Also See for Dust Deputy Deluxe:
- User manual ,
- Owner & user manual (32 pages) ,
- Manual (24 pages)

Related Manuals for Oneida Air Systems Dust Deputy Deluxe


Summary of Contents for Oneida Air Systems Dust Deputy Deluxe
- Page 1 Dust Deputy Deluxe 2.5 Dust Deputy Deluxe # AXD000004B # AXD250004 US Pat. 6833016, 7282074, D933321, and patent pending Rev: A 20220614LL Appearance may vary slightly Doc. # ZBM000036DELC...
- Page 2 Oneida Air Systems...
-
Page 3: System Start-Up Information
System Start-Up Information READ THE SAFETY PRACTICES INSTALLATION Ÿ AND MAINTENANCE INSTRUCTIONS AND YOUR WET/ DRY VACUUM’S OWNER’S MANUAL BEFORE ASSEMBLING AND USING THE DUST DEPUTY 1. Do not vacuum anything that is burning or smoking, such as cigarettes, matches, hot ashes, or any hot substance! 2. - Page 4 Dust Deputy Deluxe Dimensions Nominal dimensions shown. Dimensions subject to slight variations in manufacturing. 6-3/4" 17-3/4" 171 mm 451 mm 8" 203 mm 2-1/2" 64 mm Tapered Inlet and Outlet 2" O.D. 1-7/8" I.D. 51 mm O.D. 48 mm I.D.
- Page 5 Dust Deputy 2.5 Deluxe Dimensions Nominal dimensions shown. Dimensions subject to slight variations in manufacturing. 2-5/16" I.D. 17-3/4" 58 mm 451 mm 8-1/2" 216 mm 7-5/8" 194 mm 2-1/2" O.D. 64 mm 2-5/16" I.D. 58 mm 32-1/8" 816 mm 30-1/4" 769 mm 15-5/8"...
- Page 6 Double Sided Tape AHX000032 Caster Pack RHC000013 38mm Polypropylene Wheels ATS000014 14 MM Caster Wrench RHS000004 Tether Pack AFS080375 #8 x 3/8 Sheet Metal Screw AFB148000 D ring with clip AFC000007 PSA Retainer Clip AFB100000 Split ring AFH343800 Lanyard Oneida Air Systems...
- Page 7 System Contents (Continued) oneida-air.com...
- Page 8 AXD200036A 2" x 36" Hose AXD600103A 2" Elbow ACB320000 Clamp Band AFO990225 O Ring INCLUDED ONLY WITH AXD250004 AXD250054 2.5" x 4.5' Hose Please unpack the parts carefully and confirm you have received each item listed here. Oneida Air Systems...
- Page 9 System Contents (Continued) oneida-air.com...
- Page 10 Bolts (C1), six Washers (C2), and six Hex Nuts (C3) as shown in [FIG. 1]. Note: Tighten hardware evenly to eliminate air leaks. DO NOT OVERTIGHTEN! On the Lid there are hex-shaped recesses for ease of installation of the nuts. FIG. 1 Oneida Air Systems...
- Page 11 Assembly Instructions (Continued) Thread the Wheels (I1) into the threaded insert on the bottom of the Caster Mounts (G). Securely tighten using the included Wrench (I2) [FIG. 2]. Threaded Insert FIG. 2 Ensure that the surfaces on the Bucket (F) and Caster Mounts (G) are clean and dry.
- Page 12 Flip the Bucket (F) upside down and arrange the Caster assemblies evenly around the bottom edge [FIG. 4]. Note: We recommend arranging the Caster Assemblies at 90° increments from each other for the most stable setup. 90° FIG. 4 Oneida Air Systems...
- Page 13 Assembly Instructions (Continued) The Caster assemblies must be adhered to the Bucket (F) with a single smooth motion so that the bottom edge of the Bucket fits within the recessed channel of the Caster Mount [FIG. 5a]. Remove the backing paper from the Double Sided Tape (H) on the Caster assembly.
- Page 14 Assembly Instructions (Continued) The Dust Deputy Deluxe can be attached to your wet/dry vacuum to move as one unit. The Tether Pack (J) includes a variety of components to meet the needs of any make/ model vacuum. Examine your vacuum configuration first to review what option works best.
- Page 15 Assembly Instructions (Continued) FIG. 6b FIG. 6c oneida-air.com...
- Page 16 5 gallon Bucket [FIG. 7b]. It is normal for the lid to fit loosely on the bucket; it will seal securely under vacuum pressure once your wet/dry vac is turned on. FIG. 7b FIG. 7a Oneida Air Systems...
- Page 17 Assembly Instructions (Continued) For AXD250004 continue to step 9 on page 18. Attach one Elbow (L) to the top outlet of the Cyclone (A) and affix Hose (K) to the tapered end of the Elbow. Attach the other open end of Hose to the second Elbow and attach to the inlet of your wet/dry vacuum.
- Page 18 Connect the Cyclone's (A) outlet (top port) to your vacuum with the provided Hose (O), your hose, or ductwork [FIG 9]. Both inlet and outlet accept standard 2.5" hose cuffs (OD ≈ 2.25"). To wet/dry vacuum To Tool FIG. 9 Oneida Air Systems...
- Page 19 Assembly Instructions (Continued) Make sure there are no air leaks at the connections. Review [FIG. 10] for common leak points. Note: Any air leak in the lid or drum will affect separation performance. Make sure to check your dust drum frequently so you do not overfill it.
- Page 20 Alternate Sidecar Ideas You are only limited by your imagination. Below are Ÿ some alternate sidecar setups that customers have created. Oneida Air Systems...
- Page 21 Adding Cyclones to Improve Performance Attach in Series To Tools Increases particle efficiency and helps in very fine dust situations. Top View Attach in Parallel To Tools Same particle efficiency but increases the CFM. Top View 200 CFM 100 CFM 100 CFM Multiple Vacuums More CFM/airflow to larger...
- Page 22 Install the Metal Tape (D) to the Cyclone (A) so that the inlet, outlet, and flange are attached by a continuous, conductive path. The tape should wrap 1/4" around the edge of each opening [FIG 11]. FIG. 11 Oneida Air Systems...
- Page 23 Optional Grounding Instructions (Continued) For added grounding, attach a self-supplied wire with a ring terminal on one end and a washer tied to the other end when installing one of the bolts in step 1 on page 10. The wire must be long enough for the washer to lie on the floor [FIG 12].
-
Page 24: Troubleshooting
2. Use a hose clamp. 3. Wrap the inlet and outlet of the Dust Deputy with a layer of electrical tape to increase the friction fit. 4. Secure hose with a sheet metal screw. Oneida Air Systems... - Page 25 FAQ (Continued) How do I get the gasket out of the cyclone? Use needle-nose pliers or tongs if you cannot simply reach your hand into the bottom of the cyclone and pull it out. NEVER REMOVE THE TOP PORTION OF THE DUST DEPUTY! Can I remove the top portion of the Dust Deputy? No, it is not advised and can cause damage to the cyclone and is not covered under warranty.
- Page 26 Ohms. What do I need to hook up my Dust Deputy to my vacuum? Our Dust Deputy Deluxe Kit is ready to go right out of the box for most wet-dry vacuums. However, not all wet-dry vacuums are identical and may need an adapter to attach. Please visit our site for adapters at oneida-air.com/flex-hose/adapters.
- Page 27 What is the minimum air watts needed for the Dust Deputy? Rather than worrying about what specs your vacuum needs (e.g. air watts, cfm, static lift, etc.), we at Oneida Air Systems have a much simpler approach - simply match the size of your vacuum's inlet to the size of the Dust Deputy cyclone's ports.
- Page 28 1" to 3" in diameter. Connecting 4" tools to the Dust Deputy cyclone's 2" ports will result in significant losses in airflow and suction power. Larger ports (4" and larger) will instead require one of our Super Dust Deputy cyclones. Oneida Air Systems...
- Page 29 Accessories 2.5" x 5.5 Wire Reinforced Vacuum Hose #AXD250066 • Crush-resistant, flexible hose with a smooth- wall inner lining that minimizes air resistance. 1.25" x 1.5" Hose Adapter Kit #AKD000000 • Includes reducers, adapters, and O-rings for connecting smaller vacuum hoses to standard 2"...
- Page 30 1.5" x 6.5' Dust Extraction Hose Whip #AHE000001 • This highly flexible vacuum hose fits onto the dust collection ports of common portable power tools. Includes 2.5" rotating swivel cuff. Oneida Air Systems...
-
Page 31: Warranty Information
Limited Warranty – Activate online at oneida-air.com/warranty Oneida Air Systems®, Inc. (OAS) warrants the Dust Deputy for a period of 1 year, to the original purchaser from the date of purchase, unless otherwise specified. Items not manufactured by Oneida Air Systems are limited to their own manufacturer’s warranties. All electrical items such as magnetic starters, remotes, sensors, pumps, bin sensors, bag grippers, etc. - Page 32 Regardless of where you purchased your Oneida Air Systems' product, if you have any questions or issues with missing / damaged parts, please call Oneida Air Systems first to let us help resolve your problem. We fully stand behind the quality of our products and place the utmost value on the satisfaction of our customers.
Need help?
Do you have a question about the Dust Deputy Deluxe and is the answer not in the manual?
Questions and answers