
Subscribe to Our Youtube Channel
Related Manuals for Wohler RMQ Series


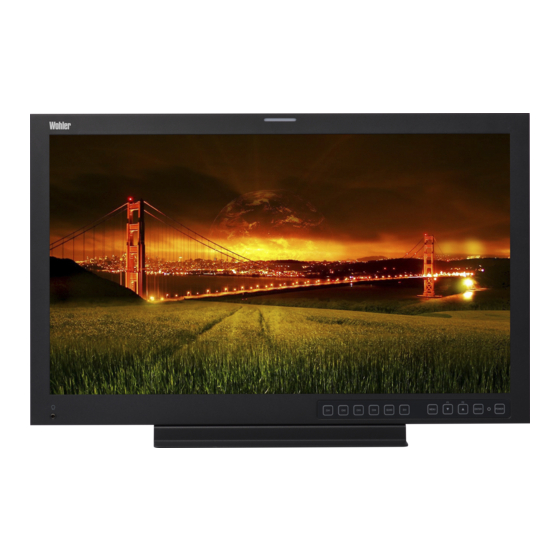
Summary of Contents for Wohler RMQ Series
- Page 1 RMQ Series • RMQ-230-3G • RMQ-230-SD • RMQ-230-A • RMQ-200-3G • RMQ-200-SD • RMQ-200-A • RMQ-170-3G • RMQ-170-SD • RMQ-170-A Quad-Split, LCD, Multi-Viewer Audio/ Video Monitors User Guide Part Number 821097, Revision A...
- Page 2 Wohler Technologies, Inc. reserves the right to change or improve our products at any time and without notice. In no event will Wohler Technologies, Inc. be liable for direct, indirect, special, incidental, or consequential damages resulting from any defect in the hardware, software, or its documentation, even if advised of the possibility of such damages.
-
Page 3: Table Of Contents
RMQ Series Introduction Overview The RMQ Series quad split, LCD video monitors are high-performance, professional LCD monitors that support advanced 10-bit digital processing technology and also 3D comb filter and de-interlace, accurate scaling engine, GAMMA correction and color temperature adjustment to achieve the best possible image display. -
Page 4: Safety
Unplug the equipment during lightning storms or when unused for long periods of time. Use of a cart is neither recommended nor approved by Wohler. Refer all servicing to qualified service personnel. Servicing will be required under all of the following conditions: •... -
Page 5: Installation Recommendations
RMQ Series I n s ta l la t i o n R e c o m me n d a t io n s Safety Symbols WARNING: The symbol to the left warns of electric shock hazard inside the unit. -
Page 6: Unpacking And Installation
R M Q S e r i e s U n p a c k i n g a n d I n s t a l l a t i o n Note: HDMI 1.3 or 1.4 cable lengths of 2m (6 feet) are guaranteed to work well. - Page 7 • User guide CDROM • Warranty card Mounting The RMQ Series monitor comes standard with two table top stands: one fixed and one adjustable. Alternatively, you can order the rack mount kit separately. Refer to Figure 1–1 on page 5 while installing the fixed base onto the monitor.
-
Page 8: Features
Connect the signal inputs to the rear panel. Press the Power switch (DC IN) on the rear panel of the monitor. Features The RMQ Series monitors provide the following features: • 178° viewing angle • Multi-format analog and digital audio signals •... -
Page 9: Front Panel Features
RMQ Series F r o n t P a n e l F e a t u r e s Front Panel Features The following feature descriptions refer to Figure 1–2 below. Figure 1–2 RMQ Front Panel Level Meters In-Monitor... - Page 10 R M Q S e r i e s F r o n t P a n e l F e a t u r e s • Timecode: The display format for the timecode is HH: MM: SS: FF. In the event no timecode is available, the monitor will display --:--:--:--.
- Page 11 RMQ Series F r o n t P a n e l F e a t u r e s • F1/Up and F2/Down: After pressing the MENU button, press to move within submenus. When not in mode, Down MENU are programmable hot keys.
-
Page 12: Rear Panel Features
R M Q S e r i e s R e a r P a n e l F e a t u r e s Figure 1–4 RMQ Waveform/Vector Display Vector or Waveform Displays Rear Panel Features The descriptions of the rear panel connectors refer to Figure 1–5 below Figure 1–6... - Page 13 RMQ Series R e a r P a n e l F e a t u r e s Figure 1–6 RMQ Rear Panel - Left • DC IN (jack): Accepts included power plug from an adapter. • Power (Rocker Switch): Toggles power to the monitor on or off.
- Page 14 R M Q S e r i e s R e a r P a n e l F e a t u r e s • Tally (DB-9 F): Tally input. • Audio Inputs (8 RCA) and Outputs (2 RCA): Each input pair (one for each channel) accepts standard analog audio.
-
Page 15: Using The Osd Menu
RMQ Series U s i n g t h e O S D M e n u Using the OSD Menu Configuring the RMQ Series monitors is accomplished in the MENU . Each of the menus in the OSD MENU is explained below. - Page 16 R M Q S e r i e s U s in g t h e O SD M e n u Status Menu Note that none of the options displayed on the STATUS menu are editable. Table 1–2 Status Menu Default Parameters Domain Range...
- Page 17 RMQ Series U s i n g t h e O S D M e n u Table 1–3 Color Temp Menu (Continued) Default Parameters Domain Range Value RED BIAS Factory GREEN BIAS Calibrated BLUE BIAS Resets gain and bias to their factory defaults.
- Page 18 R M Q S e r i e s U s in g t h e O SD M e n u Table 1–4 Marker Menu (Continued) Default Parameters Domain Range Value Setting the picture safe area size marker for the aspect ratio (determined by the button to which the aspect function is assigned) and scan control, where:...
- Page 19 RMQ Series U s i n g t h e O S D M e n u Audio Config Menu The menu sets up the audio sources for each channel according to the last button pressed. Speakers and the analog Audio...
- Page 20 R M Q S e r i e s U s in g t h e O SD M e n u Table 1–5 Audio Config Menu (Continued) Default Parameters Domain Range Value Control the audio level meter with the audio source: ACTIVE ONLY (enabled) or (disabled)
- Page 21 RMQ Series U s i n g t h e O S D M e n u Table 1–6 User Config Menu (Continued) Default Parameters Domain Range Value Select the function to assign to the function button: • MARKER Marker F1 BUTTON •...
- Page 22 IMD COLOR • GREEN • YELLOW • WHITE The IMD text can contain up to 16 WOHLER characters including all letters, IMD CHARACTER numbers, and some symbols. = Displays SD-SDI ANC-VITC/ TC DISPLAY LTC. (Timecode) = Does not display.
- Page 23 RMQ Series U s i n g t h e O S D M e n u Table 1–7 OSD Config Menu - IMD Display Default Parameters Domain Range Value Select to display the video information: • FORMAT DISPLAY •...
- Page 24 R M Q S e r i e s U s in g t h e O SD M e n u IMD Display Table 1–8 OSD Config Menu - IMD Protocol Default Parameters Domain Range Value Select the IMD protocol you want to use: •...
- Page 25 RMQ Series U s i n g t h e O S D M e n u Table 1–8 OSD Config Menu - IMD Protocol Default Parameters Domain Range Value Select the IMD tally mode: • • • T1T2 IMD TLY MODE •...
-
Page 26: Specifications
R M Q S e r i e s S p e c if i c a ti o n s Specifications The general specifications of the RMQ Series monitors are listed in Table 1–9 below. Table 1–9 RMQ Specifications... - Page 27 RMQ Series S p e ci f i c a t i o n s Table 1–11 below distinguishes each of the RMQ models. Table 1–11 RMQ Distinctions Among Each Model Category Specification 1080p: (60/59.94/50) 1080i: (60/59.94/50) 720p: (60/59.94/50) 1035i: (60/59.94) 3G-SDI ...
-
Page 28: Technical Function Overview
SD: <700 ps Technical Function Overview Figure 1–9 below illustrates the overall functionality of the RMQ Series monitors. 8 2 1 0 9 7 : R M Q S e r i e s Us e r G u i d e... - Page 29 RMQ Series T e ch n ic a l F u n ct i o n O v e r vi e w Figure 1–9 RMQ Block Diagram 8 2 1 0 9 7 : R M Q S e r i e s U s e r G u i d e...
Need help?
Do you have a question about the RMQ Series and is the answer not in the manual?
Questions and answers