
Related Manuals for Wohler HDM-215-3G-TT


Summary of Contents for Wohler HDM-215-3G-TT
-
Page 1: User Guide
HDM-215-3G-TT 21.5” Audio/Video Tabletop Monitor User Guide User Guide Part Number 821818, Revision A... - Page 2 In no event will Wohler Technologies, Inc. be liable for direct, indirect, special, incidental, or consequential damages resulting from any defect in the hardware, software, or its documentation, even if advised of the possibility of such damages.
-
Page 3: Table Of Contents
TABLE OF CONTENTS Contents User Guide ..................1 TABLE OF CONTENTS................3 Contents ......................3 CHAPTER 1: Installation ................5 Introduction ....................5 Overview....................5 Features ....................5 Safety......................5 Instructions ...................5 Safety Symbols..................6 Mounting....................6 Heat Dissipation..................7 Sympathetic Vibration................7 Mechanical ....................7 Electrical Interference ................7 Power ....................7 Compliance .....................8 FCC ......................8 ICES-003 ....................8 CHAPTER 2: Local Operation ..............9... - Page 4 Marker Page ....................37 Audio Page ....................38 Display Page....................39 Close Caption Page..................39 Config Page ....................40 Color Temperature Page.................. 41 Function Key Page..................41 IMD Page ...................... 42 GPI Page ....................... 43 System Page ....................44 Page 4...
-
Page 5: Chapter 1: Installation
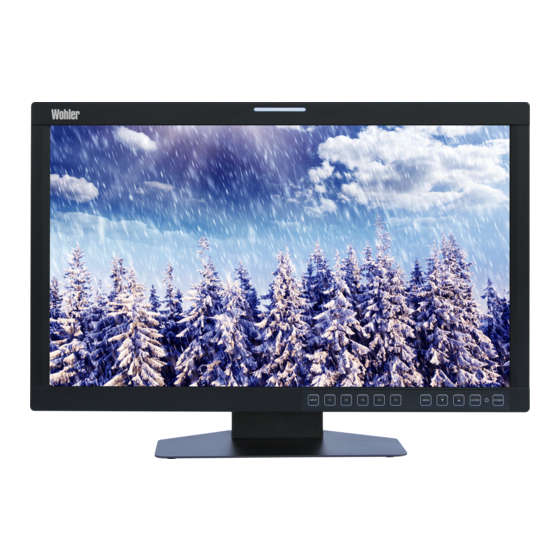
CHAPTER 1: Installation Introduction Overview The HDM-215-3G-TT monitor sets a new standard in LCD monitors for broadcast and professional video applications. It provides a 21.5”, 8-bit, 1920 x 1080 resolution, 16:9 format, anti-glare IPS LCD screen. All video formats are scaled to fit on the screen in the highest quality using 12-bit digital processing, precision scaling and gamma correction to produce the best images possible. -
Page 6: Safety Symbols
Mounting The HDM-215-3G-TT is designed to be placed on a tabletop or other flat surface. Position either unit at ear/eye level for best high frequency response and visual observation of the display screen. Please adhere to the following clearances:... -
Page 7: Heat Dissipation
Heat Dissipation The ambient temperature near the product should not exceed 40° Celsius (104° Fahrenheit). When rack mounting, adjacent devices can be rack mounted in proximity to the unit if this temperature is not exceeded. Otherwise, allow a 1RU (1.75”/44.45mm) space above and below the unit for air circulation. For table top operation, in warm environments, allow an inch of space above and below the unit for air circulation. -
Page 8: Compliance
Compliance This equipment has been tested and found to comply with the limits for a Class A digital device, pursuant to part 15 of the FCC Rules. These limits are designed to provide reasonable protection against harmful interference when the equipment is operated in a commercial environment. -
Page 9: Chapter 2: Local Operation
CHAPTER 2: Local Operation The HDM-215-3G-TT front and rear panels are described in this chapter. Front Panel Figure 2–1: Front Panel Layout 1. Tally Lights: This tri-color (red/green/amber) light is controlled through a RJ45 connector or through the GPI connector on the rear panel. For more information about the RJ45 connector, refer to the Rear Panel section of this chapter. -
Page 10: On-Screen Display Features
4. Input: The Input button selects the video/audio input to be monitored from the various connectors on the rear panel. The currently selected input source is indicated when the Input button is pressed. Repeated presses change the input source. 5. Function Keys: Press F1, F2, F3, F4, or F5 to activate the assigned function. The default assignments are as listed in Table 2-1. - Page 11 SDI stream. The de-embedded Timecode from the HD/SD-SDI source displays on the lower part of the screen. Choose LTC, VITC or D-VITC types in the Display Menu. Figure 2-2: Display Features Wohler HDM-215-3G SDI1 Input Status 1080I59.94...
-
Page 12: Rear Panel
7. Timecode: The de-embedded timecode from the HD/SD-SDI source displays on the lower part of the screen. The timecode setting is located in the Display Menu. Refer to Table 2-9. 8. Waveform/Vectorscope: This can be displayed only for SDI signals. The waveform and vector of the input signal display are configurable in the Display Menu. - Page 13 Use of another power adapter provided by the user may negate the compliance or not perform properly. Wohler Technologies cannot accept any responsibility for the outcome in such cases. 1. SDI 1 In: This input connector accepts 3G/HD/SD-SDI video signals. It is compliant with SMPTE 424M, SMPTE 259M, SMPTE292M/ITU-R BT601.
- Page 14 up to a 5dBu signal. These inputs are selected when the LINE 1 selection button is pressed. 15. Audio In 2: A pair of analog audio inputs related to the Line 2 video signal is provided on RCA jacks. They have a 47K input impedance and will accept up to a 5dBu signal.
-
Page 15: Rear Panel Connectors
Rear Panel Connectors The following figure and tables detail the connections of the General Purpose Inputs (GPI) and RS-485 connectors on the rear panel. The tables are also silkscreened on the rear panel of the unit for your convenience. Table 2-2: GPI Input Connections GPI Terminal Name GPI 1 GPI 2... -
Page 16: Using The Quick Menu And The Osd Menus
Using the Quick Menu and the OSD Menus In the following descriptions, refer to Figure 2-5 for the location of each control button. Figure 2-5: Screen Control Buttons Quick Menu The Quick Menu provides quick access to a few commonly used features, as listed in Table 2-4. -
Page 17: Osd Menus
1. Press the Menu button to display the Main Menu. 2. Use the Up and Down buttons to navigate through the submenus. 3. Press the Enter button to enter the parameter selections in the chosen submenu. 4. Use the Up or Down buttons to cycle through the submenu selections. 5. - Page 18 Table 2-6: Input Menu Structure Input Parameters Default Value Domain Range Description SDI 1 OFF, ON SDI 2 OFF, ON Enables or disables the input choices LINE 1 OFF, ON available in the OFF, CVBS, LINE 2 (Y/C), Input Select Menu LINE 2 CVBS LINE 2 (YPBPR)
- Page 19 Table 2-7: Marker Menu Structure Marker Parameters Default Value Domain Range Description MARKER Turn all markers on OFF, ON ENABLE or off. If 16:9 aspect ratio: OFF (close area marker), 4:3, 13:9, 14:9, 15:9, Set area marker size 1.85:1, 2.35:1 AREA MARKER 15:9 according to the aspect ratio.
- Page 20 Table 2-8: Audio Menu Structure Audio Parameters Default Value Domain Range Description EXT: Analog Inputs Select the audio EBD: SDI & HDMI Inputs source among the AUDIO SOURCE UNDEF: No audio available signals. Select the input channel for the For an AUD Source: SPEAKER L AUD 1L left speaker,...
- Page 21 Table 2-9: Display Menu Structure Display Parameters Default Value Domain Range Description Turn status display off, on, or automatic. If STATUS DISPLAY AUTO OFF, ON, AUTO automatic, it will display for 15 seconds after each change. Turn AFD display on only AFD DISPLAY ON, OFF when status display is set...
- Page 22 Table 2-10: Line Wave Number vs. Input Signal Input Signal Default Value Domain Range 576i50 23 - 623 480i60 22 - 524 720p 26 - 745 1080i50 1080i60/59.94 21 - 1123 1080sf23/23.97 1035i60 41 - 1120 1080p 42 - 1121 Table 2-11: Closed Caption Menu Structure Closed Caption Parameters...
- Page 23 Table 2-12: Config Menu Structure Config Parameters Default Value Domain Range Description Enable or disable FAST MODE ON or OFF fast mode. Enable or disable FILM MODE DETECT OFF ON or OFF film mode detection. Select Picture by Picture (PbP) or SUB IN TYPE Picture in Picture (PiP).
- Page 24 Table 2-13: Color Temp Menu Structure Color Temp Parameters Default Value Domain Range Description D32, D50, D56, D65, Set the color COLOR TEMP D93, USER1, USER2 temperature. RED GAIN Set the gain for GREEN GAIN 0 to 256 each color. BLUE GAIN RED BIAS Set the offset for...
- Page 25 Table 2-14: Function Key Menu Structure Function Key Description Parameters Default Value Domain Range Set up the SCAN SCAN F1 Function key action. NATIVE ASPECT BLUE ONLY Set up the MONO NATIVE F2 Function MARKER key action. H/V DELAY AUDIO METER FAST MODE Set up the F3 Function...
- Page 26 Table 2-15: GPI Menu Structure Description Parameters Default Value Domain Range Set up the TALLY GPI1 action of AREA MARKER GREEN GPI1. CENTER MARKER SAFETY MARKER Set up the ASPECT GPI2 TALLY RED action of NATIVE GPI2. OVER SCAN UNDER SCAN Set up the BLUE ONLY GPI3...
- Page 27 Table 2-16: IMD Menu Structure IMD Menu Parameters Default Value Domain Range Description Set whether to IMD DISPLAY ON or OFF enable the IMD. Set the color of RED, GREEN, YELLOW, IMD COLOR the IMD WHITE characters. (Up to 16 characters of Set the IMD IMD CHARACTER HDM-215-3G text for static LOCAL...
- Page 28 Table 2-17: Key Inhibit Menu Structure Key Inhibit Parameters Default Value Domain Range Description KEY INHIBIT OFF, ON Page...
-
Page 29: Chapter 3: Technical Info
CHAPTER 3: Technical Info Table 3–1: Specifications Specification Values/Domains Power requirements 100 V to 240 VAC ± 10%, 50/60Hz Power consumption 60 Watts HDM-215-3G 14.5” H x 20.5” W x 6.3” D with tabletop stand 370 mm H x 520 mm W x 160 mm D Weight with stand 13 lbs. - Page 30 Figure 3–1: HDM-215-3G Series Block Diagram Page...
-
Page 31: Supported Video Formats
Supported Video Formats The HDM-215-3G monitors will display the video formats listed in Table 3-2. Table 3-2: Video Formats Video, Format YPbPr HDMI DVI-D NTSC 480i60/59.94 576i50 480p60/59.94 576p50 720p24/23.97 720p25 720p30/29.97 720p50 720p60/59.94 1080sf24.23.97 1035i60/59.94 1080i50 1080i60/59.94 1080p24/23.97 1080p25 1080p30/29.97 1080p50 1080p60/59.94... -
Page 32: Chapter 4: Using Network Control
CHAPTER 4: Using Network Control The HDM-215-3G Web GUI allows you to customize the monitor configuration to perfectly suit your needs. The following setup steps are not necessary if you intend to use the HDM-215-3G in its default configuration or if you only make configuration changes using the OSD menus. -
Page 33: Status Page
Figure 4–1: Host IP Settings After making an IP address change such as this, close the control panel and reboot the host computer to be sure the change takes effect. Make the final address, mask and gateway changes in the HDM-215-3G System setup page. - Page 34 Figure 4–2: Status Page IP Address Input Source Selection Bar HDM-215-3G XXXXXXXXXXXX Page...
-
Page 35: Adjust Page
Adjust Page icon following some of the items in this menu indicates that this parameter is individually saved according to the choice made in the Input Source Selection Bar, as shown in Figure 4-2. Certain settings include a SET button. To change these parameters, first make the change and then click the SET button to put the change into effect. -
Page 36: Input Setup Page
Input Setup Page This menu is not used to select input sources, but instead is used to determine which input sources appear as choices in the Input button menu on screen. If an input is not connected, it makes sense to not have it appear in the Input button menu. -
Page 37: Marker Page
Marker Page The MARKER OFF/ON setting enables or disables the visibility of all markers on the screen. The settings of each marker are retained as the last change made from either the OSD Menu or this Network Control Page. Figure 4–6: Marker Page Page... -
Page 38: Audio Page
Audio Page First select the AUDIO SOURCE. Then select SPEAK(er) OUT selections for LEFT and RIGHT channels. These selections also apply to the AUDIO OUT and HEADPHONE outputs. METER SELECT controls which and how many channels are metered, independently of the SPEAK(er) OUT selections. icon following some of the items in this menu indicates that this parameter is individually saved according to the choice made in the Input Source Selection Bar, as shown in Figure 4-2. -
Page 39: Display Page
Display Page Figure 4–8: Display Page Close Caption Page Figure 4–9: Close Caption Page Page... -
Page 40: Config Page
Config Page icon following some of the items in this menu indicates that this parameter is individually saved according to the choice made in the Input Source Selection Bar, as shown in Figure 4-2. Certain settings include a SET button. To change these parameters, first make the change and then click the SET button to put the change into effect. -
Page 41: Color Temperature Page
Color Temperature Page Figure 4–11: Color Temperature Page Function Key Page The effect that each of the five function keys has can be set in this page. The available functions are: SCAN NATIVE ASPECT BLUE ONLY MONO MARKER H/V DELAY AUDIO METER FAST MODE MUTE... -
Page 42: Imd Page
IMD Page There are two ways to enter static IMD character strings, via the network with this page, or with the OSD IMD Menu. Both are retained in the monitor’s memory, and IMD PROTOCOL settings of LOCAL vs. NETWORK decides which one is displayed. Figure 4–13: IMD Page Page... -
Page 43: Gpi Page
GPI Page The effect that the six GPI contact closure inputs have can be specified in this menu page. The available choices are: AREA MARKER CENTER MARKER SAFETY MARKER ASPECT NATIVE OVER SCAN UNDER SCAN BLUE ONLY MONO H DELAY V DELAY H/V DELAY SDI1... -
Page 44: System Page
IP ADDRESS, and the last number is usually 1. The LOCK NUMBER is only needed in certain software installation situations. Do not change it unless instructed by Wohler Customer Service. Version numbers are additional information that may be useful when consulting with Wohler Customer Service.
Need help?
Do you have a question about the HDM-215-3G-TT and is the answer not in the manual?
Questions and answers