Table of Contents
Advertisement
Quick Links
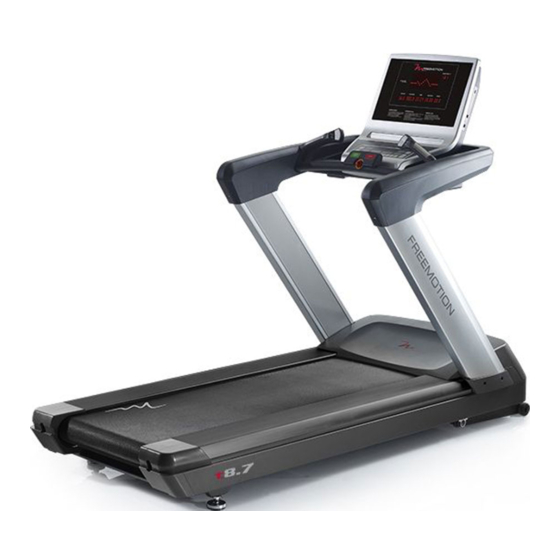
Model No. VMTL29814-INT.0
Serial No.
Write the serial number in the space
above for reference.
Serial Number Decal
QUESTIONS?
If you have questions, or if parts
are damaged or missing,
please see HOW TO CONTACT
CUSTOMER CARE on the back
cover of this manual.
CAUTION
Read all precautions and instruc-
tions in this manual before using
this equipment. Save this manual
for future reference.
USER'S MANUAL
www.freemotionfitness.com
Advertisement
Table of Contents

Subscribe to Our Youtube Channel
Related Manuals for Freemotion t8.7


Summary of Contents for Freemotion t8.7
- Page 1 USER’S MANUAL Model No. VMTL29814-INT.0 Serial No. Write the serial number in the space above for reference. Serial Number Decal QUESTIONS? If you have questions, or if parts are damaged or missing, please see HOW TO CONTACT CUSTOMER CARE on the back cover of this manual.
-
Page 2: Table Of Contents
LIMITED WARRANTY............. . . Back Cover FREEMOTION is a registered trademark of ICON Health & Fitness, Inc. -
Page 3: Important Precautions
To reduce the risk of burns, fire, electric shock, or injury to persons, read all important precautions and instructions in this manual and all warnings on your treadmill before using your treadmill. FreeMotion Fitness assumes no responsibility for personal injury or property damage sustained by or through the use of this product. - Page 4 20. Never leave the treadmill unattended while 24. Never insert or drop any object into any it is running. Always remove the key, press opening on the treadmill. the power switch into the off position (see DANGER: the drawing on page 5 for the location of the Always unplug the power power switch), and unplug the power cord cord immediately after use, before clean-...
-
Page 5: Before You Begin
BEFORE YOU BEGIN Thank you for selecting the revolutionary manual. To help us assist you, note the product model FREEMOTION T8.7 treadmill. The T8.7 treadmill number and serial number before contacting us. The ® offers an impressive selection of features designed to model number and the location of the serial number make your workouts more effective and enjoyable. -
Page 6: Part Identification Chart
PART IDENTIFICATION CHART Use the drawings below to identify small parts used for assembly. The number in parentheses below each draw- ing is the key number of the part, from the PART LIST near the end of this manual. The number following the key number is the quantity used for assembly. -
Page 7: Assembly
ASSEMBLY • Assembly requires two persons. • Assembly requires the following tools: the included hex keys • Place all parts in a cleared area and remove the packing materials. Do not dispose of the packing one Phillips screwdriver materials until you finish all assembly steps. To avoid damaging parts, do not use power tools. - Page 8 3. Slide the Right Upright (83) in the direction shown by the arrow. Attach the Right Upright (83) with four M10 x 25mm Screws (155); do not tighten the Screws yet. Attach the Left Upright (not shown) as described above. 4.
- Page 9 5. With the help of a second person, hold the handrail assembly (E) near the Left and Right Uprights (82, 83). Insert the wires (D) from the Right Upright up through the indicated hole in the handrail assembly. Then, set the handrail assembly (E) on the Uprights (82, 83).
- Page 10 7. Set the Motor Hood (167) onto the Frame (107). Tip: You may need to tip the Motor Hood sideways to center it between the Left and Right Uprights (82, 83). With one hand, push on the Motor Hood (167) in the direction shown by the upper arrow.
- Page 11 9. Identify the Left Small Handrail Cover (98). Attach the Left Small Handrail Cover with an M5 x 20mm Screw (100). Attach the Right Small Handrail Cover (99) in the same way. Next, attach the Left Handrail Cover (97) with five M5 x 15mm Screws (141);...
- Page 12 11. Plug the Power Cord (171) into the treadmill. Next, slide the Power Cord Cover (176) onto the Power Cord (171), and attach the Power Cord Cover to the treadmill with two M4 x 10mm Machine Screws (105) and two M4 Lock Washers (106).
-
Page 13: How To Connect The Treadmill
HOW TO CONNECT THE TREADMILL HOW TO PLUG IN THE POWER CORD 2. Plug the power cord into an appropriate outlet that is properly installed and earthed in accordance with This product must be earthed. If it should malfunc- all local codes and ordinances. tion or break down, earthing provides a path of least resistance for electric current to reduce the risk of Australia... -
Page 14: How To Upgrade The Console
HOW TO UPGRADE THE CONSOLE The treadmill’s console has been preconfigured to operate with an optional 19" Digital TV (see the drawings below).To learn about the features of the basic console, see page 15. To learn about the features of the digital TV, see the user’s manual included with the digital TV. -
Page 15: How To Use The Console
HOW TO USE THE CONSOLE FEATURES OF THE CONSOLE see page 17. To use a set-a-goal workout, see page 18. To use a training workout, see page 19. To use a The treadmill console offers an impressive array of heart rate workout, see page 20. To use the fitness test, see page 21. - Page 16 HOW TO TURN ON THE POWER HOW TO USE THE MANUAL MODE 1. Plug in the power cord. 1. Insert the key into the console. See HOW TO CONNECT THE POWER CORD on See HOW TO TURN ON THE POWER at the left. page 13.
- Page 17 5. Monitor your progress. To measure your heart rate, stand on the foot rails and hold the contacts with your palms for As you walk or run on the treadmill, the displays approximately ten seconds; avoid moving your hands. When your pulse is detected, your heart will show the following workout information: rate will be shown.
- Page 18 3. Start the workout. 5. Measure your heart rate if desired. Press the Quick Start button to start the workout. A See step 6 on page 17. moment after you press the button, the console will 6. When you are finished exercising, remove the count down, and then the walking belt will begin to move.
- Page 19 The workout will continue until you reach the goal The displays may prompt you to enter your age, that you set. The console will then automatically weight, gender, or other settings before the walk- begin counting down a cool down period. When the ing belt will move.
- Page 20 HOW TO USE A HEART RATE WORKOUT 4. Start the workout. Heart rate workouts automatically control the speed Touch the Quick Start button to start the workout. A and incline of the treadmill to keep your heart rate near moment after you touch the button, the console will a target level while you exercise.
- Page 21 HOW TO USE THE FITNESS TEST During the fitness test, the console will automati- cally adjust the speed and incline of the treadmill. 1. Insert the key into the console. IMPORTANT: You cannot adjust the incline and speed settings manually during the fitness test. See HOW TO TURN ON THE POWER on page If you are uncomfortable, press the Stop button or remove the key to stop the fitness test.
- Page 22 FITNESS TEST RESULTS CHARTS Female Test Very Poor Poor Fair Good Excellent Superior 13–19 <25.0 25.0–30.9 31.0–34.9 35.0–38.9 39.0–41.9 >41.9 20–29 <23.6 23.6–28.9 29.0–32.9 33.0–36.9 37.0–41.0 >41.0 30–39 <22.8 22.8–26.9 27.0–31.4 31.5–35.6 35.7–40.0 >40.0 40–49 <21.0 21.0–24.4 24.5–28.9 29.0–32.8 32.9–36.9 >36.9 50–59 <20.2...
- Page 23 HOW TO USE A PHYSICAL TEST THE SETTINGS MODE 1. Insert the key into the console. The console features a settings mode that keeps track of treadmill information and allows you to personalize See HOW TO TURN ON THE POWER on page console settings.
-
Page 24: How To Move The Treadmill
HOW TO MOVE THE TREADMILL Due to the size and weight of the treadmill, moving 2. After the treadmill is placed in the location where it requires two or three persons. it will be used, make sure that the leveling feet rest firmly on the floor. -
Page 25: Preventive Maintenance
PREVENTIVE MAINTENANCE Regular maintenance is necessary for optimal perfor- 2. Using a handheld vacuum, clean the area under the Motor Hood (not shown). Be careful to avoid mance and long life of the treadmill. Please read and follow all instructions below. If the treadmill is not touching any components. - Page 26 REPLACING THE WALKING PLATFORM AND THE 3. Remove the eight M8 x 115mm Screws (134), M8 WALKING BELT Lock Washers (13), and M8 Washers (135) (not all hardware is shown). Then, slide off the Left and Inspect the walking platform periodically for wear. If Right Foot Rails (130, 131).
- Page 27 5. Remove the Idler Roller (170), Drive Roller (168), Walking Platform (161), and Walking Belt (166). Arrow Arrow 36 in. (91.4 cm) Move the Walking Belt (166), if necessary, until the seam across the Walking Belt is underneath the Walking Platform (161). If you are replacing the Walking Platform (161), slide out the old Walking Platform and slide in Put two marks on each side of the Walking Belt...
- Page 28 LUBRICATING THE WALKING BELT 2. Insert the end of the tubing (A) under the center of the Walking Belt (166). Next, squeeze the silicone When the treadmill is used regularly, lubricate the bottle (B) while pulling the tubing out from under the walking belt approximately every 200 hours.
-
Page 29: Six-Month Preventive Maintenance Record
SIX-MONTH PREVENTIVE MAINTENANCE RECORD Photocopy this form and use it to record the preventive maintenance performed on the treadmill. Each copy of the form can be used for six months (26 weeks). When maintenance is performed, write the date in the appropriate spaces. -
Page 30: Troubleshooting
TROUBLESHOOTING Most treadmill problems can be solved by following SYMPTOM: The walking belt is off-center or slips the simple steps below. Find the symptom that when walked on applies, and follow the steps listed. If further assis- tance is needed, see the back cover of this manual. a. -
Page 31: Exercise Guidelines
EXERCISE GUIDELINES Burning Fat—To burn fat effectively, you must exer- WARNING: cise at a low intensity level for a sustained period of Before beginning this time. During the first few minutes of exercise, your or any exercise program, consult your physi- body uses carbohydrate calories for energy. - Page 32 SUGGESTED STRETCHES The correct form for several basic stretches is shown at the right. Move slowly as you stretch —never bounce. 1. Toe Touch Stretch Stand with your knees bent slightly and slowly bend forward from your hips. Allow your back and shoulders to relax as you reach down toward your toes as far as possible.
- Page 33 NOTES...
-
Page 34: Part List
PART LIST Model No. VMTL29814-INT.0 R0315A Key No. Qty. Description Key No. Qty. Description Console Assembly Left Fast Key Console Frame Right Fast Key Console Top Housing Compression Spring M4 x 16mm Screw Left Handrail Switch Tablet Holder Right Handrail Switch M4 x 10mm Screw M4 x 10mm Round Head Screw LED Display Shelf... - Page 35 Key No. Qty. Description Key No. Qty. Description Lower Left Upright Cover 300mm White Extension Wire Lower Right Upright Cover Inverter Lower TV Power Cord Incline Motor M5 x 20mm Rear Cap Screw Incline Motor Bearing M4 x 10mm Machine Screw Drive Motor M4 Lock Washer Wire Holder...
-
Page 36: Exploded Drawing
EXPLODED DRAWING A Model No. VMTL29814-INT.0 R0315A... - Page 37 EXPLODED DRAWING B Model No. VMTL29814-INT.0 R0315A...
- Page 38 EXPLODED DRAWING C Model No. VMTL29814-INT.0 R0315A...
- Page 39 EXPLODED DRAWING D Model No. VMTL29814-INT.0 R0315A...
-
Page 40: How To Contact Customer Care
WARRANTY PERIODS AND COVERAGE contacting the authorized dealer from which you purchased FreeMotion Fitness warrants this product to be free from this product. Make sure to retain your original invoice and defects in workmanship and material under normal use and serial number information.
Need help?
Do you have a question about the t8.7 and is the answer not in the manual?
Questions and answers