Advertisement
Quick Links
AU: 1800 029 701
N Z: 0800 466 444
For construction in non-cyclonic areas
Wind rating: N2 as per AS4055-2021.
If you require a higher wind rating please contact
us: admin@absco.com.au or 1800 029 701
NOTE: This shed can be upgraded to wind
rating: C1 as per AS4055-2021 with the additional
purchase of a Cyclone Kit.
DOWNLOAD
OUR APP FOR
ASSEMBLY
VIDEOS
Absco Industries
Assembly Instruction Manual
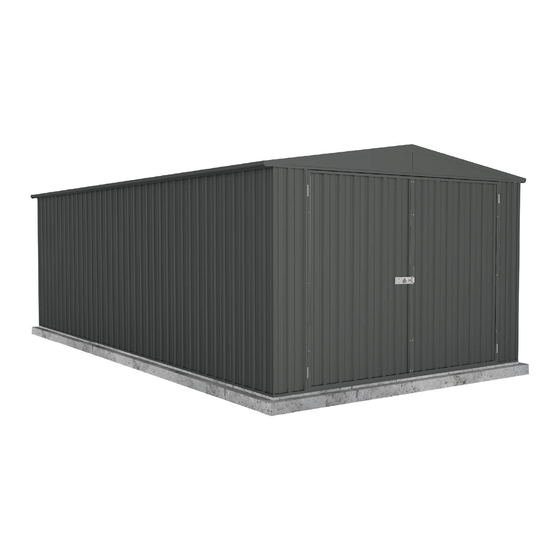
ABSCO UTILITY SHED
MODEL: 3060UTK
3.00mW x 5.96mD x 2.10mH
admin@absco.com.au
www.abscosheds.com.au
WHEN LAYING YOUR CONCRETE
SLAB, ENSURE THERE IS A
REBATED EDGE 25mm DEEP
AROUND THE PERIMETER
THIS WILL HELP WATER EGRESS
FROM THE BASE OF THE SHED
We thank you for choosing an Australian made
shed. For further assistance please visit our detailed
instructional video library at
Http://www.abscosheds.com.au/watch-videos
At ABSCO Industries we are always looking to be
number ONE, so please let us know what you think
of our instructions. Feedback makes us better.
feedback@absco.com.au
ABSCO INDUSTRIES
ASSEMBLY INSTRUCTION MANUAL
Absco Industries
Premier Shed Model: 23151GK
When laying concrete slab, ensure there
is a rebated edge 25mm deep around
the perimeter. This will help water egress
from the base of the shed.
PLEASE LEAVE A REVIEW
SHED MODEL: 23151GK
Tell us about your experience!
Visit www.abscosheds.com.au/review
Model: 3060UTK
29/11/2021
FRONT: 2.26m
SIDE:
1.52m
HEIGHT: 1.95m
BOTTOM CHANNEL
REBATED EDGE
75mm WIDE REBATE
CONCRETE SLAB
21-11-2017
PAGE 01
1.3
1
Advertisement

Related Manuals for ABSCO SHEDS MN3060UTK


Summary of Contents for ABSCO SHEDS MN3060UTK
- Page 1 ABSCO UTILITY SHED MODEL: 3060UTK 3.00mW x 5.96mD x 2.10mH AU: 1800 029 701 admin@absco.com.au N Z: 0800 466 444 www.abscosheds.com.au Absco Industries Premier Shed Model: 23151GK FRONT: 2.26m SIDE: 1.52m HEIGHT: 1.95m WHEN LAYING YOUR CONCRETE SLAB, ENSURE THERE IS A REBATED EDGE 25mm DEEP AROUND THE PERIMETER BOTTOM CHANNEL...
- Page 2 ABSCO UTILITY SHED MODEL: 3060UTK 3.00mW x 5.96mD x 2.10mH GENERAL INSTRUCTIONS • Before commencing any assembly, read through these instructions in detail to gain a thorough understanding of assembly methods and associated details. • Unpack the carton and carefully identify and check off all the parts against the parts described and illustrated on "COMPONENTS PACKING LIST"...
- Page 3 ABSCO UTILITY SHED MODEL: 3060UTK 3.00mW x 5.96mD x 2.10mH COMPONENT PACKING LIST Check off all components. MAIN PACK CARTON (PACK 1 OF 3) COMPONENT PART PART COMPONENT CHECK CHECK DESCRIPTION DESCRIPTION STEEL SHEET STEEL SHEET 1915mm X 773mm 1725mm X 711mm STEEL SHEET STEEL SHEET 2045mm X 773mm...
- Page 4 ABSCO UTILITY SHED MODEL: 3060UTK 3.00mW x 5.96mD x 2.10mH COMPONENT PACKING LIST FITTINGS & ACCESSORIES PACKET CONTENTS COMPONENT PART COMPONENT PART CHECK CHECK DESCRIPTION DESCRIPTION DOOR STRAP CHANNEL JOINER L: 165mm L= 200mm (7.9") RIDGE CAP GABLE PLATES L: 170mm RIDGE CAP JOINER JAMB L= 75mm...
- Page 5 ABSCO UTILITY SHED MODEL: 3060UTK 3.00mW x 5.96mD x 2.10mH COMPONENT PACKING LIST MAIN PACK CARTON (PACK 2 OF 3) COMPONENT PART PART COMPONENT CHECK CHECK DESCRIPTION DESCRIPTION STEEL SHEET STEEL SHEET 1785mm X 773mm 1915mm X 773mm PORTAL PACK STEEL SHEET (SEE BELOW) 2045mm X 773mm...
- Page 6 ABSCO UTILITY SHED MODEL: 3060UTK 3.00mW x 5.96mD x 2.10mH COMPONENT PACKING LIST MAIN PACK (PACK 2 OF 3) CHANNEL SET COMPONENT PART PART COMPONENT CHECK CHECK DESCRIPTION DESCRIPTION 55BL 55BR CHANNEL CHANNEL L = 1496.5mm L = 1496.5mm 56AL 56AR CHANNEL CHANNEL...
- Page 7 ABSCO UTILITY SHED MODEL: 3060UTK 3.00mW x 5.96mD x 2.10mH COMPONENT PACKING LIST MAIN PACK (PACK 2 OF 3) CHANNEL SET (CONT.) COMPONENT PART PART COMPONENT CHECK CHECK DESCRIPTION DESCRIPTION CHANNEL WITH HINGES JAMB L= 1785mm L = 1725mm CHANNEL JAMB L= 1785mm L = 1725mm CHANNEL...
- Page 8 ABSCO UTILITY SHED MODEL: 3060UTK 3.00mW x 5.96mD x 2.10mH COMPONENT PACKING LIST FRONT FRAME PACK (PACK 3 OF 3) COMPONENT PART COMPONENT PART CHECK CHECK DESCRIPTION DESCRIPTION C2300 K0285 CHANNEL L = 2300mm CHANNEL L = 285mm N1820 C0240 CHANNEL L = 1820mm CHANNEL L = 240mm C1785...
- Page 9 ABSCO UTILITY SHED MODEL: 3060UTK 3.00mW x 5.96mD x 2.10mH Guide on Splitting Sheets • This product comes with a perforated sheet that is designed to be split into two smaller sheets. • These sheets have sharp edges. Once separated please use appropriate foot and hand protection when handling.
- Page 10 ABSCO UTILITY SHED MODEL: 3060UTK 3.00mW x 5.96mD x 2.10mH SNAPTiTE ASSEMBLY GUIDE The Snaptite Assembly System locks end channels to all roof and wall sheets without the need for tools and fasteners. To assemble each panel, the perimeter channels are secured to the top and bottom of each panel. Gently tap the channel over the SNAPTiTE lugs on the sheet, working along the sheet.
- Page 11 ABSCO UTILITY SHED MODEL: 3060UTK 3.00mW x 5.96mD x 2.10mH Guide on Joining Spliced Channels The text marked on all parts must be shown on the same side as each other JOIN>> JOIN>> <<JOIN JOIN>> Step 1. Step 2. Position the channels and the Join the fi rst channel to the CSJ Push down one side of the CSJ CSJ joiner so the centre of...
- Page 12 ABSCO UTILITY SHED MODEL: 3060UTK 3.00mW x 5.96mD x 2.10mH PRE-ASSEMBLY OF SPLICED CHANNELS Join together 36 x channel sections using 18 x channel joiners (Part CSJ) NOTE: Some channels may have holes in them - You will need to redrill holes where CSJ joining channel covers 5 x 81A them.
- Page 13 ABSCO UTILITY SHED MODEL: 3060UTK 3.00mW x 5.96mD x 2.10mH Guide on Joining a Spliced Ridge Beam Follow these three steps to assemble a ridge beam. ZARSP 225mm 50mm Step 1. NOTE. Step 2. Place two ridge beams as There is a 50mm overlap of the Use the ZARSP to connect at shown and push them together.
- Page 14 ABSCO UTILITY SHED MODEL: 3060UTK 3.00mW x 5.96mD x 2.10mH PRE-ASSEMBLY OF SPLICED RIDGE BEAM ZARSP = 2x 97A 2x 97AL 2x 97AR Absco Industries Assembly Instruction Manual Model: 3060UTK 29/11/2021...
- Page 15 ABSCO UTILITY SHED MODEL: 3060UTK 3.00mW x 5.96mD x 2.10mH JOINING RIDGE BEAMS To make the total span we must now join the two ridge beams Cut away these two only. Using a hacksaw, remove one protruding section of each ridge beam, this will allow the sections to butt up neatly to each other.
- Page 16 ABSCO UTILITY SHED MODEL: 3060UTK 3.00mW x 5.96mD x 2.10mH OVERVIEW OF ROOF COMPONENTS Absco Industries Assembly Instruction Manual Model: 3060UTK 29/11/2021...
- Page 17 ABSCO UTILITY SHED MODEL: 3060UTK 3.00mW x 5.96mD x 2.10mH OVERVIEW OF WALL COMPONENTS Absco Industries Assembly Instruction Manual Model: 3060UTK 29/11/2021...
- Page 18 ABSCO UTILITY SHED MODEL: 3060UTK 3.00mW x 5.96mD x 2.10mH ROOF PANEL ASSEMBLY 4 required. When completed there will be four sections with 87A lip at one end only. Two panels will have part 87A fitted to this end only. Fit 81A to edge of sheet with pre- punched holes.
-
Page 19: Side Panel Assembly
ABSCO UTILITY SHED MODEL: 3060UTK 3.00mW x 5.96mD x 2.10mH SIDE PANEL ASSEMBLY 3 required. One panel requries. Sheet 30A this end. Two panels require. Sheet 30A this end. 30A is a corner sheet and must be orientated towards the shed corners when panels finally joined. - Page 20 ABSCO UTILITY SHED MODEL: 3060UTK 3.00mW x 5.96mD x 2.10mH SIDE PANEL ASSEMBLY SINGLE DOOR PANEL 1 required. Absco Industries Assembly Instruction Manual Model: 3060UTK 29/11/2021...
- Page 21 ABSCO UTILITY SHED MODEL: 3060UTK 3.00mW x 5.96mD x 2.10mH JOINING WALL AND ROOF PANELS To make the total span we must now join sections of sheeting together for the roof and wall. Trim the channels by 16.5mm to 16.5 16.5 allow the sheets to be overlapped.
- Page 22 ABSCO UTILITY SHED MODEL: 3060UTK 3.00mW x 5.96mD x 2.10mH DOOR PANEL ASSEMBLY SINGLE DOOR 1 required. Vertical door channels are installed in the opposite orientation compared to the horizontal door channels. Long Short fl ange fl ange of of channel channel Absco Industries Assembly Instruction Manual...
-
Page 23: Door Panel Assembly
ABSCO UTILITY SHED MODEL: 3060UTK 3.00mW x 5.96mD x 2.10mH DOOR PANEL ASSEMBLY SINGLE DOOR PANEL NOTE: Nuts and bolts are also supplied and may be used instead of rivets. Use a 4mm drill bit to enlarge these holes in the jamb NOTE: The holes to fasten the padbolt hasp are not pre-punched to allow for proper alignment. -
Page 24: End Panel Assembly
ABSCO UTILITY SHED MODEL: 3060UTK 3.00mW x 5.96mD x 2.10mH END PANEL ASSEMBLY 1 required. TRIM THE TIP OF EACH SHEET OR BEND OUT OF THE WAY TO ALLOW CHANNELS TO FIT HARD UP TO THE EDGE OF THE SHEET Absco Industries Assembly Instruction Manual Model: 3060UTK... - Page 25 ABSCO UTILITY SHED MODEL: 3060UTK 3.00mW x 5.96mD x 2.10mH DOOR PANEL ASSEMBLY Locate the narrow DOUBLE DOOR pan at this end. Note: These sheets have not been pre-punched. Pre-drill door sheets with a 3mm drill bit using the pre-punched components shown as templates Vertical door channels are installed in the opposite...
- Page 26 ABSCO UTILITY SHED MODEL: 3060UTK 3.00mW x 5.96mD x 2.10mH CENTRE PORTAL FRAME DETAILS 2 required. PART C1482 PART C1704 80mm TIP: An easy way to make sure that the angle at the top of the portal frame is correct is to use the gable wall panel as a template to lay the sections out.
- Page 27 ABSCO UTILITY SHED MODEL: 3060UTK 3.00mW x 5.96mD x 2.10mH CENTRE PORTAL FRAME DETAILS STEP 1. x 19 STEP 2. Secure ridge plates x 30 to apex plates STEP 3. M10 Dynabolt STEP 4. Portal to panel connection, see section PANEL CONSTRUCTION for further infomation.
- Page 28 ABSCO UTILITY SHED MODEL: 3060UTK 3.00mW x 5.96mD x 2.10mH CENTRE PORTAL ASSEMBLY SUPPORT PHOTOS STEP 1. Draw pattern on the concrete in accordance with the dimensions detailed in the assembly instructions. Absco Industries Assembly Instruction Manual Model: 3060UTK 29/11/2021...
- Page 29 ABSCO UTILITY SHED MODEL: 3060UTK 3.00mW x 5.96mD x 2.10mH CENTRE PORTAL ASSEMBLY SUPPORT PHOTOS STEP 2. Understand where components are to be positioned Step 2c Absco Industries Assembly Instruction Manual Model: 3060UTK 29/11/2021...
- Page 30 ABSCO UTILITY SHED MODEL: 3060UTK 3.00mW x 5.96mD x 2.10mH CENTRE PORTAL ASSEMBLY SUPPORT PHOTOS STEP 3. Join rafter to column with knee plate Absco Industries Assembly Instruction Manual Model: 3060UTK 29/11/2021...
- Page 31 ABSCO UTILITY SHED MODEL: 3060UTK 3.00mW x 5.96mD x 2.10mH CENTRE PORTAL ASSEMBLY SUPPORT PHOTOS STEP 4. Join both rafters using the apex plate Absco Industries Assembly Instruction Manual Model: 3060UTK 29/11/2021...
- Page 32 ABSCO UTILITY SHED MODEL: 3060UTK 3.00mW x 5.96mD x 2.10mH CENTRE PORTAL ASSEMBLY SUPPORT PHOTOS STEP 5. Secure ridge plate (RBP) Absco Industries Assembly Instruction Manual Model: 3060UTK 29/11/2021...
- Page 33 ABSCO UTILITY SHED MODEL: 3060UTK 3.00mW x 5.96mD x 2.10mH CENTRE PORTAL ASSEMBLY SUPPORT PHOTOS STEP 6. Secure multi purpose brackets Absco Industries Assembly Instruction Manual Model: 3060UTK 29/11/2021...
- Page 34 ABSCO UTILITY SHED MODEL: 3060UTK 3.00mW x 5.96mD x 2.10mH CENTRE PORTAL ASSEMBLY SUPPORT PHOTOS STEP 7. Turn frame over and repeat steps 4 and 5. Absco Industries Assembly Instruction Manual Model: 3060UTK 29/11/2021...
-
Page 35: Front Frame Assembly
ABSCO UTILITY SHED MODEL: 3060UTK 3.00mW x 5.96mD x 2.10mH FRONT FRAME ASSEMBLY STEP 1 of 2 16mm SELF DRILLING TEK SCREWS USE FIT THE CHANNELS WHICH FORM THE BOXED SECTIONS JOIN PART NUMBERS TOGETHER WITH THE SMALLER C2300 C0240 EDGE NEATLY INSIDE THE ONLY LARGER EDGE. - Page 36 ABSCO UTILITY SHED MODEL: 3060UTK 3.00mW x 5.96mD x 2.10mH FRONT FRAME ASSEMBLY STEP 2 of 2. FIT ONE 100mm CHANNEL SECTION (C0100) TO BOX THE BASE OF EACH OUTSIDE LEG AS SHOWN. THESE WILL LATER BE USED FOR SECURING THE FRAME TO THE CONCRETE SLAB. SECURE THE RIDGE SECURE THE SMALL PLATE TO THE...
- Page 37 ABSCO UTILITY SHED MODEL: 3060UTK 3.00mW x 5.96mD x 2.10mH FRONT FRAME ASSEMBLY SUPPORT PHOTOS STEP 1. Draw pattern on the concrete in accordance with the dimensions detailed in the assembly instructions. Absco Industries Assembly Instruction Manual Model: 3060UTK 29/11/2021...
- Page 38 ABSCO UTILITY SHED MODEL: 3060UTK 3.00mW x 5.96mD x 2.10mH FRONT FRAME ASSEMBLY SUPPORT PHOTOS STEP 2. Understand where components are to be positioned. Absco Industries Assembly Instruction Manual Model: 3060UTK 29/11/2021...
- Page 39 ABSCO UTILITY SHED MODEL: 3060UTK 3.00mW x 5.96mD x 2.10mH FRONT FRAME ASSEMBLY SUPPORT PHOTOS STEP 3. Join C0100 to the bottom of the columns (C1785) Absco Industries Assembly Instruction Manual Model: 3060UTK 29/11/2021...
- Page 40 ABSCO UTILITY SHED MODEL: 3060UTK 3.00mW x 5.96mD x 2.10mH FRONT FRAME ASSEMBLY SUPPORT PHOTOS STEP 4. Join rafter (M1484) to column (C1785) Absco Industries Assembly Instruction Manual Model: 3060UTK 29/11/2021...
- Page 41 ABSCO UTILITY SHED MODEL: 3060UTK 3.00mW x 5.96mD x 2.10mH FRONT FRAME ASSEMBLY SUPPORT PHOTOS STEP 5. Join K0285 to C1785 & N1820. Absco Industries Assembly Instruction Manual Model: 3060UTK 29/11/2021...
- Page 42 ABSCO UTILITY SHED MODEL: 3060UTK 3.00mW x 5.96mD x 2.10mH FRONT FRAME ASSEMBLY SUPPORT PHOTOS STEP 6. Fit mulitpurpose brackets. Absco Industries Assembly Instruction Manual Model: 3060UTK 29/11/2021...
- Page 43 ABSCO UTILITY SHED MODEL: 3060UTK 3.00mW x 5.96mD x 2.10mH FRONT FRAME ASSEMBLY SUPPORT PHOTOS STEP 7. Assemble the C0240 & C2300 sections. Absco Industries Assembly Instruction Manual Model: 3060UTK 29/11/2021...
- Page 44 ABSCO UTILITY SHED MODEL: 3060UTK 3.00mW x 5.96mD x 2.10mH FRONT FRAME ASSEMBLY SUPPORT PHOTOS STEP 8. Join all sections together. Absco Industries Assembly Instruction Manual Model: 3060UTK 29/11/2021...
- Page 45 ABSCO UTILITY SHED MODEL: 3060UTK 3.00mW x 5.96mD x 2.10mH FRONT FRAME ASSEMBLY SUPPORT PHOTOS STEP 9. Turn over frame and repeat steps 4 to 8. Absco Industries Assembly Instruction Manual Model: 3060UTK 29/11/2021...
- Page 46 ABSCO UTILITY SHED MODEL: 3060UTK 3.00mW x 5.96mD x 2.10mH FRONT FRAME ASSEMBLY SUPPORT PHOTOS STEP 10. Fully assembled front frame. Absco Industries Assembly Instruction Manual Model: 3060UTK 29/11/2021...
-
Page 47: Front Panel Assembly
ABSCO UTILITY SHED MODEL: 3060UTK 3.00mW x 5.96mD x 2.10mH FRONT PANEL ASSEMBLY 1 required. PRE-PUNCHED HOLES TO OUTSIDE EDGE NOTE: WHEN THIS FRONT PANEL IS FASTENED TO THE FRONT FRAME, ALL THREE JAMBS SHOULD FINISH FLUSH WITH THE EDGE OF THE FRONT FRAME, THUS FORMING A WEATHERPROOF REBATE FOR THE DOORS. - Page 48 ABSCO UTILITY SHED MODEL: 3060UTK 3.00mW x 5.96mD x 2.10mH PORTAL FRAME DETAILS Recommended slab dimensions - 6060mm x 3100mm External wall dimensions - 5960mm x 3000mm Internal wall dimensions - 5920mm x 2960mm FIG 8A 2050 1960 1900 Concrete slab Centre of 6060mm x 3100mm portal frames...
- Page 49 ABSCO UTILITY SHED MODEL: 3060UTK 3.00mW x 5.96mD x 2.10mH PANEL CONSTRUCTION NOTE: Take care to ensure that all wall panels are not upside down. The top channels of each panel are pre-punched for attaching roof sheeting. The base channels are not. With a concrete slab drill a 10mm hole instead of using the supplied hasp.
- Page 50 ABSCO UTILITY SHED MODEL: 3060UTK 3.00mW x 5.96mD x 2.10mH ROOF CONSTRUCTION STEP 1. STEP 3. Secure peak brace to ridge beam and Secure both roof panels to the walls with roof panel with one screw at each end, one screw in each corner first, followed see A below.
- Page 51 ABSCO UTILITY SHED MODEL: 3060UTK 3.00mW x 5.96mD x 2.10mH FINAL CONSTRUCTION ANCHORING OF SHED STEP 1. Secure the roof panels to the wall panels Location of 24 concrete anchors. as shown. Refer to section PORTAL FRAME for portal anchor locations. STEP 2.
-
Page 52: Door Installation
ABSCO UTILITY SHED MODEL: 3060UTK 3.00mW x 5.96mD x 2.10mH DOOR INSTALLATION Secure front doors to the front panel in the same manner as the side door was fitted. FASTEN TO SLAB DRILL 12mm HOLE CENTRALLY TO PICK UP PADBOLT Fit door braces (99B) to USE THE 75mm JAMB SECTIONS (93B) each door as shown by... - Page 53 ABSCO UTILITY SHED MODEL: 3060UTK 3.00mW x 5.96mD x 2.10mH Absco Large Gable Roof Shed Notes General • 1.G This instruction manual shall be read in conjunction with other consultants drawings, specifi cations and written instructions provided by Absco and/or their representatives. •...
- Page 54 ABSCO UTILITY SHED MODEL: 3060UTK 3.00mW x 5.96mD x 2.10mH Absco Large Gable Roof Shed Notes Steelwork • 1.S All structural steelwork shall have a corrosion protection system applied consistent with AS/NZS 2312- 2002. • 2.S All structural steelwork detailed within this installation manual shall be minimum Grade 550 for roll formed sections (including roof and wall sheeting and portal frame members) and Grade 250 for angle sections.
- Page 55 ABSCO UTILITY SHED MODEL: 3060UTK 3.00mW x 5.96mD x 2.10mH Absco Large Gable Roof Shed Notes Supporting Slab and Foundations • 1.F The supporting slab foundation for the garden shed shall be of a minimum size indicated on the installation manual.
- Page 56 Absco Sheds Storage Guidelines • Absco Sheds are designed to be weatherproof for normal weather conditions. In the event of extreme weather conditions such as heavy rain, combined with high wind gusts, the ridge capping, sheeting joins, screw fi xings etc., may exhibit minor deformations which may allow some water entry. These areas should be checked regularly to ensure that maximum strength and protection is maintained.
- Page 57 Lifetime Warranty Statement This warranty against defects is given by: Absco Industries (ABN: 77 869 708 678) Address: PO Box 119 Acacia Ridge QLD 4110 Ph: 1800 029 701 Fax: 07 3344 1191 Email: admin@absco.com.au Date of issue: 19 December 2018 Details of Manufacturer’s Warranty This product comes with a Lifetime structural warranty from the date of purchase.
- Page 58 IMPORTANT 1. Manufacturer’s Disclosure This warranty against defects shall not apply in the following situations: A) Where the product is not assembled in accordance with the instructions provided in the product kit; B) Where the product is used to store corrosive materials such as fertilizer, chlorine etc; C) The warranty does NOT cover damage caused by storms, wind, rain, snow or poor foundations;...
Need help?
Do you have a question about the MN3060UTK and is the answer not in the manual?
Questions and answers