Advertisement
Quick Links
Advertisement

Related Manuals for Mercia Garden Products 03DTSHPN0408DSHPB-V1


Summary of Contents for Mercia Garden Products 03DTSHPN0408DSHPB-V1
- Page 1 2mm Drill bit...
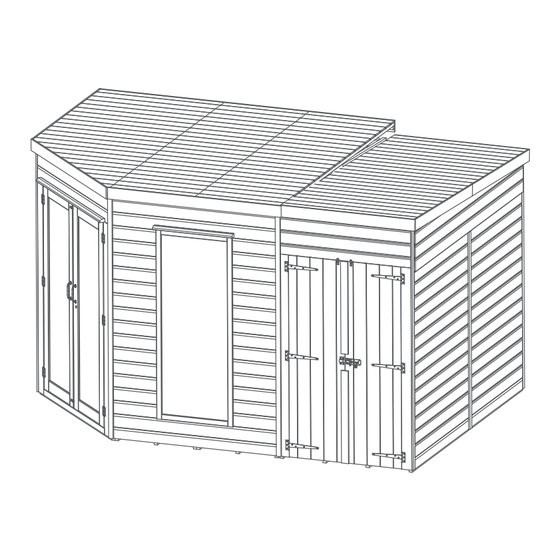
- Page 3 Before assembly Back Cover Trim - 12x40x1909mm QTY 1 please make sure you have a S1240-1909mm suitable base ready to erect your building Front Cover Trim - 12x40x2055mm QTY 2 S1240-2055mm Fascia Trim - 12x95x1143mm QTY 2 S1295-1143mm MADE IN GREAT BRITAIN Door Cover Trim - 12x60x770mm QTY 2 Overall Dimensions: Base Dimensions:...
-
Page 4: Pre-Assembly
Pre Assembly Step 1 IMPORTANT: Pre-drill before xing screws. Parts Needed - No.1 QTY 1 Before assembling remove the transportation - No.6 QTY 2 - No.11 QTY 2 blocks from the bottom of each panel. - No.15 QTY 6 Take care removing the blocks as to not damage the panels. - Page 5 Step 3 IMPORTANT: Pre-drill before xing screws. Step 5 IMPORTANT: Pre-drill before xing screws. Parts Needed - No.1 QTY 1 Parts Needed- No. 3 QTY 2 Fix the side of the Door Panel (No. 1) Fix the two Side panels (No.3) together against the side of the 8x8 Corner using 3x50mm screws.
- Page 6 Step 7 Step 9 IMPORTANT: Pre-drill before xing screws. IMPORTANT: Pre-drill before xing screws. Parts Needed- No.13 QTY 1 Parts Needed- No. 5 QTY 1 Place the the Gable frame (No. 13) Place the Roof Panel (No.5) on top to the top of the gable as shown of the building, ensure the Roof and x with 3x50mm screws.
- Page 7 Step 12 Step 11 IMPORTANT: Pre-drill before xing screws. Parts Needed- No.18 QTY 1 - No. 30 QTY 1 (8x8 Corner Summer House) Once the Roof is in position the extension can be xed in position. Cut four strips from the roll of felt (No.18 and No.30): 1 x 2120mm (L) x 1000mm (W) - Sheet 5 Fix the building in place by using 1 x 3820mm (L) x 1000mm (W) - Sheet 4...
- Page 8 Step 13 IMPORTANT: Pre-drill before xing screws. Step 15 IMPORTANT: Pre-drill before xing screws. Parts Needed - No.8 QTY 1 Parts Needed- No.14 QTY 2 - No.9 QTY 2 - No. 17 QTY 1 Fix the Cover Trims (No.8 and Fix two Door blocks (No.14) to No.9) plus the remaining cover the back of the Doors (internal-...
-
Page 9: After Treatment
Step 17 IMPORTANT: Pre-drill before xing screws. Parts needed - No. 16 QTY 2 Fix the Turn Buttons (No.16) above each of the Doors using 1x30mm screw per turn button. 2x30mm Screws It is ESSENTIAL that you apply wood *These turn buttons help to keep treatment immediately after the building your doors straight during high &...
Need help?
Do you have a question about the 03DTSHPN0408DSHPB-V1 and is the answer not in the manual?
Questions and answers