
Related Manuals for Redexim BLECAVATOR 145


Summary of Contents for Redexim BLECAVATOR 145
- Page 1 User Manual BLECAVATOR 145-210 Translation of the original User Manual 2201 English 952.120.022 EN Kwekerijweg 8 | 3709JA | Zeist | The Netherlands | T: +31 (0)306 933 227 redexim@redexim.com www.redexim.com...
-
Page 2: Eu - Declaration Of Conformity
EU – DECLARATION OF CONFORMITY Redexim Handel- en Exploitatie Maatschappij B.V. Kwekerijweg 8 3709 JA Zeist, The Netherlands declare that this “EU - DECLARATION OF CONFORMITY” is issued under our sole responsibility and belongs to the following product: BLECAVATOR WITH MACHINE NUMBER AS INDICATED ON THE MACHINE AND IN THIS... -
Page 3: Declaration Of Conformity
UK – DECLARATION OF CONFORMITY Redexim Handel- en Exploitatie Maatschappij B.V. Kwekerijweg 8 3709 JA Zeist, The Netherlands declare that this “UK - DECLARATION OF CONFORMITY” is issued under our sole responsibility and belongs to the following product: BLECAVATOR WITH MACHINE NUMBER AS INDICATED ON THE MACHINE AND IN THIS... -
Page 4: Foreword
FOREWORD Congratulations on your Blecavator 145 / 210 purchase. For safe and long-lasting operation of this machine, it is necessary to read and to understand this user manual. It is impossible to work safely with this machine without complete knowledge of the content of the user manual. -
Page 5: Table Of Contents
TABLE OF CONTENTS EU – DECLARATION OF CONFORMITY ................2 UK – DECLARATION OF CONFORMITY ................3 FOREWORD ..........................4 WARRANTY CONDITIONS ..................... 4 REGISTRATION CARD ......................4 SAFETY INSTRUCTIONS ................... 6 1.1. Obligations of the user ..................... 6 1.2. Maintenance, repairs and adjustments ................ -
Page 6: Safety Instructions
SAFETY INSTRUCTIONS This machine is designed for safe use. This can only be achieved if you completely follow the safety instructions described in this manual. Read and understand the manual before you start using this machine. If the machine is not used as described in this manual, this can result in injuries and/or damage to the machine. -
Page 7: Maintenance, Repairs And Adjustments
When unskilled people use, maintain or repair the machine, this could result in injuries to the user and to third parties. This should be avoided! Use only original Redexim parts for maintenance or repairs because of the safety of the machine and of the user. -
Page 8: Technical Data
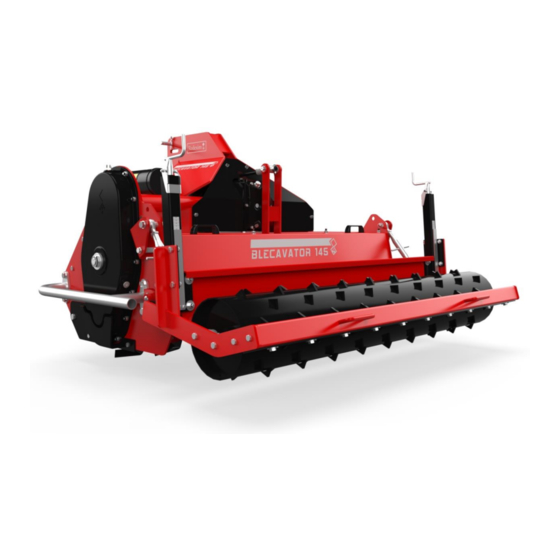
The Blecavator 145 / 210 is a cultivating machine for preparing the subsoil (e.g., seeding a lawn). The Blecavator 145 / 210 is a 3-point machine. You will need a tractor in order to use the Blecavator 145 / 210. -
Page 9: Safety Stickers
SAFETY STICKERS Safety stickers are attached to both sides of the machine. These safety stickers must always be clearly visible and legible and must be replaced if they have become damaged (see Fig. 1). Fig. 1 In case of maintenance, adjustments and repair, always switch OFF the engine of the towing vehicle and the PTO. -
Page 10: First Installation
FIRST INSTALLATION The machine should be prepared for use as follows (see Fig. 2): Make sure that the cable/crane/lift can hoist minimum twice the weight of the machine. (See Chapter 2: Technical Data for the weight.) 1. Attach a cable to the two hoisting points (1) and one around the rear roller (2). Keep a safe distance. - Page 11 Fig. 3...
-
Page 12: The Pto Axle
The PTO AXLE The PTO is a very important component that takes care of the drive from the tractor to the machine. The PTO axle ensures safe use of the machine on condition that it is properly installed and maintained. The PTO has its own CE certification and manual. This manual is located near the PTO axle. -
Page 13: Using The Pto Axle
Measure the distance ‘B’ of the PTO axle in its shortest position from the locking pin to the locking bolt. Divide the PTO axle in two parts and remove the protection cap at both ends. The ends of the cylinders and the protection caps should be shortened: (B-A) + 125 mm (4.9”). Smooth off all components and then assemble all components. -
Page 14: Attaching And Detaching The Machine
ATTACHING AND DETACHING THE MACHINE Attaching and detaching the machine has to be done carefully. Follow the instructions below: Fig. 5 7.1. Attaching the machine Prior to attaching the machine, check the following points: Check whether the machine is undamaged and whether it is safe to attach and use the machine. -
Page 15: Detaching The Machine
Set the stabilizer of the lifting arms (2) to 100 mm lateral stroke. Mount the top rod (3) on the tractor and attach it to the machine. Set the top rod (3) in such a manner that in working position the machine is parallel to the underground. -
Page 16: Transport
TRANSPORT The user is responsible for transporting the machine on public roads. Verify the national legislation regarding the regulations. In view of the machine’s weight, it is not advised to drive faster than 20 km/h (12.4 mph) with a raised machine. Higher speeds can lead to hazardous situations and result in damage to the machine and tractor. -
Page 17: Putting The Machine Into Operation
PUTTING THE MACHINE INTO OPERATION 9.1. Safety Before using the machine, you should check the following: Are there loose objects in the field? First remove these objects. Are there slopes? The maximum slope is 20 degrees for this machine. Always work from bottom to top. -
Page 18: Technical Information
10. TECHNICAL INFORMATION Generally speaking, the Blecavator 145 / 210 is not a complicated machine. A number of technical issues will be explained. If you still have questions, please contact your dealer who is always ready to assist you. 10.1. Adjusting the working depth The working depth can be adjusted by adjusting the rear roller as follows (see Fig. -
Page 19: Putting The Rear Roller Off Centre
10.2. Putting the rear roller off centre If required, the rear roller can be put off centre. You can slide the roller to the left or to the right so that you overlap the part that is already treated. Adjusting is done as follows (see Fig. 8): Fig. - Page 20 Adjusting is done as follows (see Fig. 9): Fig. 9 !! Switch off the tractor’s engine and PTO before descending !! !! Make sure that the tractor and the machine cannot move uncontrolled !! 1. Turn the spindles (1) on both sides of the machine until the correct position has been reached. Attention: Both sides of the machine should be positioned at the same depth.
-
Page 21: Pin Rack
10.4. Pin rack A pin rack is mounted behind the rotor. This pin rack catches large irregularities such as stones. It filters the soil, creating a nice-looking underground that is ready to be sown. Depending on the ground conditions and the desired result, the filtering can be set to coarser of finer by changing the position and the number of pins. -
Page 22: Options
!! Switch off the tractor’s engine and PTO before descending !! !! Make sure that the tractor and the machine cannot move uncontrolled !! Loosen the nuts (1) of the protective covers (2) and remove them. Move the pins to the required configuration. Store the removed pins very securely. -
Page 23: Maintenance
12. MAINTENANCE 12.1. Maintenance schedule Time schedule Check point Work activities Before any use Check for loose components. Tighten the loose components in the correct manner. General check Attach the machine to the tractor and let it run for 5 minutes. Listen and observe any strange movements/sounds. -
Page 24: Cleaning
12.2. Cleaning If a high-pressure cleaner is used to clean the machine, then observe the following rules: • Do not use aggressive cleaning agents that can affect the machine. • Maximum water pressure: 70 Bar (1015 PSI) • Maximum water temperature: 50°C (122°F) •... -
Page 25: Changing The Oil In The Drive
12.4. Changing the oil in the drive The oil in the side-drive and gearbox should be changed periodically. Changing the oil is done as follows: Fig. 13 Side-drive (see Fig. 13): Remove the protective cover (1) under the side-drive. For a few minutes, let the machine run above the ground so that the oil becomes warm. Stop the machine and lower it onto the underground so that it is parallel to the underground. - Page 26 7. Mount the plug (2) and the protective cover (1) onto the machine. Remove the de-aerator (4). Fill the side-drive using approx. 2.0 ltr. (0.53 gal.) of SAE 140 EP oil through the opening of the de-aerator (4). 10. Check the oil level by removing the plug (3). The oil level should be level with the opening of the plug (3).
-
Page 27: Checking The Grease Level In The Rotor's Bearing House
Fill the gearbox using approx. 3.4 ltr. (0.90 gal.) of GL-5 80W90 oil for the Blecavator 145 and approx. 3.55 ltr. (0.94 gal.) of GL-5 80W90 oil for the Blecavator 210 through the opening of the de-aerator (1). Mount the de-aerator (1). -
Page 28: Replacing The Knives
12.6. Replacing the knives. Take the following steps to replace the knives by new or different ones (see Fig. 16): Fig. 16 Attach the machine to the tractor as described in Section 7.2. Lift the machine at the front side and support the machine. !! Make sure that the tractor and the machine cannot move uncontrolled !! !! Never crawl under the machine !! Remove the bolts/nuts (1) and the knives that should be replaced. -
Page 29: Trouble Shooting (Problem Analysis)
13. TROUBLE SHOOTING (PROBLEM ANALYSIS) Problem Possible cause Solution Machine vibrates. Obstacle(s) between the knives Remove the obstacle(s). Angles cross the PTO differently. Rotate the top rod to an acceptable angle. Knives are not mounted in a spiral Mount the knives in a spiral pattern. pattern.
Need help?
Do you have a question about the BLECAVATOR 145 and is the answer not in the manual?
Questions and answers