Table of Contents
Advertisement
Quick Links
User Manual and
Parts Book
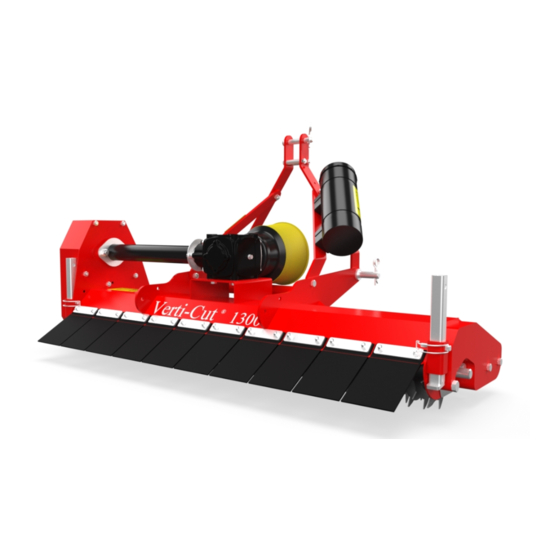
Verti-Cut 1300
Serial number:
Translation of the original operating
instructions
ATTENTION:
IT IS OF THE UTMOST IMPORTANCE TO READ THIS USER MANUAL CAREFULLY
PRIOR TO USING THE VERTI-CUT IN ORDER TO USE THE MACHINE SAFELY
AND TO OBTAIN THE BEST RESULTS.
1216 English 944.140.400
Advertisement
Table of Contents

Subscribe to Our Youtube Channel
Related Manuals for Redexim Verti-Cut 1300


Summary of Contents for Redexim Verti-Cut 1300
- Page 1 User Manual and Parts Book Verti-Cut 1300 Serial number: Translation of the original operating instructions ATTENTION: IT IS OF THE UTMOST IMPORTANCE TO READ THIS USER MANUAL CAREFULLY PRIOR TO USING THE VERTI-CUT IN ORDER TO USE THE MACHINE SAFELY AND TO OBTAIN THE BEST RESULTS.
-
Page 2: Foreword
FOREWORD Congratulations on your Verti-Cut purchase! For safe and long-lasting operation of this Verti-Cut, it is necessary to read and to understand this user manual. It is impossible to work safely with this machine without complete knowledge of its content. The Verti-Cut is not a machine that works independently. -
Page 3: Safety Instructions
! SAFETY INSTRUCTIONS ! The Verti-Cut is designed for safe use. This can only be achieved if you completely follow the safety instructions described in this manual. Read and understand the manual before (Figure 1) you start using the Verti-Cut. If the machine is not used as described in this manual, this can result in injuries and/or damage Figure 1... - Page 4 If present, check the hydraulic pipelines regularly and replace these when the hydraulic pipelines are damaged or appear old. The pipelines that are replaced should comply with the technical requirements of the manufacturer. If a hydraulic installation is present, you should always make it pressure-free before working on this installation.
- Page 5 Safety stickers with an identical meaning are attached to both sides (Figure 2, 3 and 4) (Figure 5) of the Verti-Cut. These safety stickers must always be clearly visible and legible and must be replaced if they have become damaged. During operation, NO persons are allowed within the danger zone of the Verti-Cut, because there is danger of physical injuries caused by moving components.
-
Page 6: Eu Declaration
EU DECLARATION Redexim BV Utrechtseweg 127 3702 AC Zeist, Holland declare entirely under our own responsibility that the product VERTI-CUT WITH A MACHINE NUMBER AS INDICATED ON THE MACHINE AND INDICATED IN THIS MANUAL to which this declaration refers, complies with stipulation of the 2006/42/EC machine directive. -
Page 7: Table Of Contents
TABLE OF CONTENTS FOREWORD ..................2 WARRANTY CONDITIONS ..............2 REGISTRATION CARD ................ 2 ! SAFETY INSTRUCTIONS ! ............... 3 EU DECLARATION ................6 1.1 Model .................... 8 2.0 GENERAL DESCRIPTION ............8 3.0 FIRST INSTALLATION OF THE VERTI-CUT ......9 4.0 ... -
Page 8: Model
TECHNICAL DATA Model Verti-Cut 1300 Working width 1300mm (51,2”) Working depth 0mm - 40mm (0” - 1.57”) (In case of a non- worn knives) Distance between the knives 30mm Working speed Depending on the conditions Recommended tractor 18 HP with minimum lifting capacity of 185 kg... -
Page 9: First Installation Of The Verti-Cut
Verti-Cut Figure 6 FIRST INSTALLATION OF THE VERTI-CUT The machine is placed in the transport position on the pallet. To remove the pallet and to place the machine horizontally on the ground, you take the following steps (see Figure 6) NEVER crawl under the machine! 1. -
Page 10: Attaching / Detaching The Verti-Cut
ATTACHING / DETACHING THE VERTI-CUT Checking procedure before starting to attach the Verti-Cut: Check the Verti-Cut for visually discernable damage and repair this if safe operation of the machine is no longer guaranteed. Check whether all the nuts and bolts are tight. ... -
Page 11: The Power Take-Off (Pto)
THE POWER TAKE-OFF (PTO) The PTO is a very important component. It also takes care of safe use of the machine, provided it is installed and maintained in the correct manner. The PTO has its own CE certification. Read the PTO manual. -
Page 12: Using The Pto
USING THE PTO The following items must be checked for correct use of the PTO: 1. While working the angle of the pivot pins may not exceed 30 degrees. 2. The pivot pins must always be aligned. 3. The overlap of the cylinders must always be minimum 150 mm. 4. -
Page 13: Using The Verti-Cut
USING THE VERTI-CUT Before using the Verti-Cut in a location, you should check the following items: Are there loose objects in the field? First remove these objects. Are there slopes? The maximum slope is 20 degrees for this machine. Always go from top to bottom. Is there danger of flying objects (e.g., balls) that distract the attention of the driver? If so, the Verti-Cut CANNOT be used. -
Page 14: Trouble Shooting (Problem Analysis)
11.0 TROUBLE SHOOTING (PROBLEM ANALYSIS) Problem Possible cause Solution Knife rotor does not rotate. Machine is adjusted Adjust the machine to less too deep. depth. V-belts are slipping. Adjust the V-belts. Squeaking noises during the Bearings are worn out Replace the faulty machine’s operation bearings. - Page 15 Time schedule Check/Grease point Method After every 100 working Check the roller Use EP2 lubrication. If hours or annually bearings and the required, replace these driveline. parts. Tighten loose bolts/nuts. Check for loose Adjust the tension of the bolts/nuts. V-belts or – if required – Check the tension of the replace the V-belts.
-
Page 16: Tightening The V-Belts Of The Verti-Cut
13.0 TIGHTENING THE V-BELTS OF THE VERTI-CUT Figure 10 The Verti-Cut is standard equipped with adjustable tension pulleys that keep the V-belts taut. Depending on the intensity of using the machine, wear and tear can occur to the driveline resulting in slipping of the V-belts. These V-belts should then be tightened. Adjusting the tension pulley is done as follows (see Figure 10) Make sure that the Verti-Cut is blocked well and cannot move on its own... - Page 17 Welded side housing center bearing facing nut 10! Figure 11...
-
Page 18: Changing / Replacing The Knives
13.1 CHANGING / REPLACING THE KNIVES If the knives are worn out or another knife thickness is required, the knives should be changed. This is done as follows (see Figure 11) Make sure that the Verti-Cut is blocked well and cannot move on its own accord! Make sure that the PTO is detached from the Verti-Cut! 1.
Need help?
Do you have a question about the Verti-Cut 1300 and is the answer not in the manual?
Questions and answers