Table of Contents
Advertisement
User manual and parts
handbook
Overseeder
Model 1275/1575/2075
Serial number:
Translation of the original operating instructions
ATTENTION:
TO ENSURE SAFE USE OF THIS MACHINE AND TO BE ABLE TO ACHIEVE THE
BEST RESULTS, IT IS OF MAJOR IMPORTANCE TO READ THIS USER
MANUAL THOROUGHLY BEFORE USING THE OVERSEEDER.
1706 English 922.120.202
Advertisement
Table of Contents

Related Manuals for Redexim 1275


Summary of Contents for Redexim 1275
- Page 1 User manual and parts handbook Overseeder Model 1275/1575/2075 Serial number: Translation of the original operating instructions ATTENTION: TO ENSURE SAFE USE OF THIS MACHINE AND TO BE ABLE TO ACHIEVE THE BEST RESULTS, IT IS OF MAJOR IMPORTANCE TO READ THIS USER MANUAL THOROUGHLY BEFORE USING THE OVERSEEDER.
-
Page 2: Foreword
FOREWORD Congratulations with the purchase of your Overseeder. To ensure long and safe use of this Overseeder, it is of major importance to all users to read and understand this user manual. Operation of this machine is not safe without full knowledge of the content of the manual. The Overseeder is not an independently operating machine. -
Page 3: Safety Instructions
SAFETY INSTRUCTIONS The design of the Overseeder allows for safe use. However, this is only possible if the user fully observes the safety instructions given in this manual. Read and understand the manual before (Fig. 1) starting to use the Overseeder. Not using the machine as described in the manual Fig. - Page 4 Inspect the Overseeder for loose bolts/nuts/parts before each use. If present, inspect the hydraulic hoses regularly and replace them if they are damaged or show signs of wear. The replacement hoses must meet the manufacturer’s technical specifications. Always relieve the pressure from the hydraulic installation, if present, before carrying out any work on it.
- Page 5 Before starting to work, all persons operating the Overseeder must be familiar with all its functions and controls. Connect the Overseeder to the vehicle that will pull it exactly according to the instructions (Danger of injury!) Before driving off, make sure you have a clear view both nearby and far away. On both sides of the Overseeder, safety stickers (Fig.
-
Page 6: Table Of Contents
CONTENTS Section Description Page Foreword Guarantee conditions Registration card Safety instructions Technical data First installation, removing the machine from the pallet General parts list Adjusting the working depth Setting the seed quantity. Transporting the Overseeder Driving speed General remarks on the use of the Overseeder Operating the Overseeder 10.0 Start/stop procedure... -
Page 7: Technical Data
1.0 TECHNICAL DATA Model 1275 1575 / 1575LV 2075 Working width 1.20 m (47.2”) 1.58 m (62.2”) 2.08 m (81.9”) Working depth 5 mm - 20 mm (0.19” - 0.78”) Seeding speed Up to 12 km/h (7.5 mph) Weight 665kg (1315 lbs) -
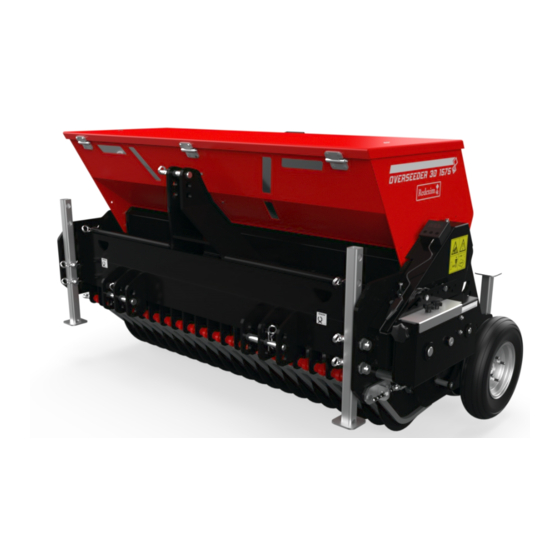
Page 8: First Installation, Removing The Machine From The Pallet
1. Turn the adjustable legs (1) downwards and lock them using the locking pins included. 2. Fasten a cable to the lifting point (2). * Make sure that the cable/crane/lift can lift at least OS 1275: 800 kg (1764 lbs) OS 1575: 1200 kg (2645 lbs) -
Page 9: General Parts List
GENERAL PARTS LIST Figure 7 shows some important parts: Fig. 7 Safety sticker RA, read user manual before use/toolbox. Safety sticker 911.280.402, keep a distance of at least 4 metres from the machine. Stop the engine before carrying out repairs or adjustments. Make sure all stickers are clearly visible on the machine and are understood. -
Page 10: Adjusting The Working Depth
ADJUSTING THE WORKING DEPTH The working depth can be adjusted by turning the top rod. When the top rod is turned and, consequently, shortened the machine will incline forwards, setting the seeding depth lower. This works when the ground to be tilled is soft enough to be cut to obtain the correct seeding depth. -
Page 11: Transporting The Overseeder
TRANSPORTING THE OVERSEEDER The user is responsible for the transport of the Overseeder behind the tractor when travelling on public roads. Check the national traffic rules. In view of the weight of the Overseeder, a maximum speed of 20 km/h (12.4 mph) should be observed while driving in open fields with the machine raised. -
Page 12: Start/Stop Procedure
10.0 STARTING/STOPPING PROCEDURE Before starting the seeding, check the machine for the following points: * While checking the machine/tractor combination must be fully locked to prevent it from driving/sliding/sinking away. The tractor engine must be switched off. Check the seeding elements for damage and repair if necessary. ... -
Page 13: Disconnecting The Overseeder
11.0 DISCONNECTING THE OVERSEEDER The machine can be disconnected from the tractor as follows: Turn the adjustable legs (see fig. 6 pos. 1) downwards and lock them using the locking pins included. 2. Slowly lower the machine until it stands on the ground. 3. -
Page 14: Eu Certificate
Chain drive is rigid. Lubricate. 13.0 EU CERTIFICATE We, Redexim BV, Utrechtseweg 127, 3702 AC Zeist, The Netherlands, declare entirely on our own responsibility that the product OVERSEEDER MODEL 1575/2075 WITH MACHINE NUMBER AS INDICATED ON THE MACHINE AND IN THIS MANUAL,... -
Page 15: Maintenance
14.0 MAINTENANCE Time schedule Check point/lubricating Method point Before each use Check for loose bolts/nuts. Tighten the loose bolts/nuts with the correct torque. Presence and legibility of safety Replace if damaged or stickers missing. (Fig. 5). After first 20 operating hours Grease the roller bearings of the Use EP 2 lubricating (new or repaired) -
Page 16: Adjusting The Seeding Slit Opening
15.0 ADJUSTING THE SEEDING SLIT OPENING Fig. 9 If the seed production does not correspond with the table, the seeding slit may need adjustment. This is done as follows: (see fig. 9) 1. Loosen all lock nuts 3. 2. Adjust bolt 4 such that a feeler gauge of 0.3 mm (0.012”) can be slit just between the roller 1 and the adjustment plate. -
Page 17: Spreading Test
7. Slide the spreading tray underneath below the seed tray (4). 8. Turn the wheel (5) 13 full rotations counterclockwise. 9. Weigh the seed that is collected and multiply this by 5.37 (1275) Weigh the seed that is collected and multiply this by 4.08 (1575) Weigh the seed that is collected and multiply this by 3.06 (2075).
Need help?
Do you have a question about the 1275 and is the answer not in the manual?
Questions and answers