Table of Contents
Advertisement
User manual and Parts book
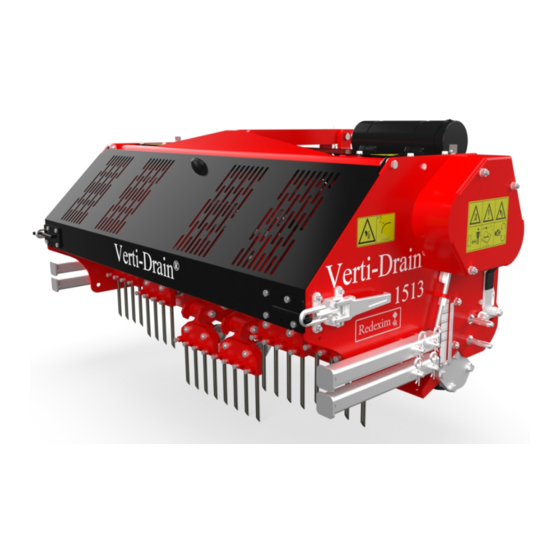
Verti-Drain
Model 1513 / 1517
Serial number:
Translation of the original user manual
ATTENTION:
FOR A SAFE OPERATION OF THE MACHINE AND FOR THE
BEST RESULTS, IT IS OF THE UTMOST IMPORTANCE THAT
THIS USER MANUAL IS CAREFULLY READ BEFORE USING
THE VERTI-DRAIN
®
®
.
1848 English 911.120.204
Kwekerijweg 8
3709JA Zeist
The Netherlands
T: (31)306933227
F: (31)306933228
E:
verti-drain@redexim.com
www.redexim.com
Advertisement
Table of Contents

Related Manuals for Redexim Verti-Drain 1513


Summary of Contents for Redexim Verti-Drain 1513
- Page 1 Kwekerijweg 8 3709JA Zeist The Netherlands T: (31)306933227 Serial number: F: (31)306933228 verti-drain@redexim.com www.redexim.com Translation of the original user manual ATTENTION: FOR A SAFE OPERATION OF THE MACHINE AND FOR THE BEST RESULTS, IT IS OF THE UTMOST IMPORTANCE THAT THIS USER MANUAL IS CAREFULLY READ BEFORE USING ®...
-
Page 2: Guarantee Conditions
PREFACE ® Congratulations on the purchase of your Verti-Drain . For a safe and durable operation of ® this Verti-Drain it is necessary to read or have this manual read to you and understand it. Without complete knowledge of the contents it is not possible to operate this machine safely. ®... -
Page 3: Safety Guidelines
SAFETY GUIDELINES ® The Verti-Drain is designed for safe use. This is only possible when the safety guidelines described in this user manual are followed to the letter. Read and comprehend the manual before (Fig. 1) ® you start using the Verti-Drain Fig. - Page 4 ® Before every instance of use, check the Verti-Drain for loose bolts/nuts/components. If applicable, regularly check the hydraulic tubes and replace them if damaged or when showing signs of wear and tear. The replacement tubes must comply with the technical requirements of the manufacturer. If applicable, pressure in the hydraulic installation should always be released before any work is carried out on it.
- Page 5 ® (6) Before the start of activities, all persons who will operate the Verti-Drain must be familiar with all its functions and operating features. ® Couple the Verti-Drain to the pulling vehicle according to the guidelines (Danger of injury!) Before you leave, check whether you have adequate visibility, both close-up and at a distance.
- Page 6 (7) Location of safety stickers. (Fig. 7) 900.280.404 911.280.404 900.280.402 911.280.402 Fig. 7 Used oil/grease is harmful to the environment; dispose of it according to the local applicable regulations.
-
Page 7: Eu Declaration
EU DECLARATION Redexim BV Utrechtseweg 127 3702 AC Zeist, The Netherlands declare completely under our own responsibility that the product: VERTI-DRAIN® WITH MACHINE NUMBER AS INDICATED ON THE MACHINE AND IN THIS MANUAL, to which this declaration refers, complies with stipulation of the 2006/42/EC machine directive... -
Page 8: Table Of Contents
CONTENTS GUARANTEE CONDITIONS ..................2 REGISTRATION CARD ....................2 SAFETY GUIDELINES ! ................3 EU DECLARATION ....................7 TECHNICAL DATA ..................9 GENERAL DESCRIPTION ................10 FIRST INSTALLATION, REMOVING THE MACHINE FROM THE PALLET ........................10 THE PTO ......................11 LENGTH OF THE PTO .................. -
Page 9: Technical Data
TECHNICAL DATA Model 1513 1517 Working width: 1.32 m (52”) 1.76 m (69”) Working depth: Up to 150 mm (6”) Up to 150 mm (6”) Tractor speed measured at 540 rpm on PTO: Pitch 55 mm (2.6”) Up to 1.8 km/h (1.1 mph) Up to 1.8 km/h (1.1 mph) Pitch 90 mm (3-1/2”) Up to 2.9 km/h (1.8 mph) -
Page 10: General Description
GENERAL DESCRIPTION ® The Verti-Drain is a machine for aerating fields of grass and sports fields. ® The Verti-Drain is a three-point machine which requires a tractor or Verti-Power in order to ® utilize the Verti-Drain FIRST INSTALLATION, REMOVING THE MACHINE FROM THE PALLET Fig. -
Page 11: The Pto
Do not crawl underneath the machine!! 5. Remove the pallet (3). 6. Slowly lower the machine until the support legs (1) touch the ground. 7. Slowly continue to lower the machine so it is positioned on all four support legs. 8. -
Page 12: Using The Pto
To bring the PTO to the correct length, whenever a new one is acquired or when using a different tractor, work as follows: (see Fig.9) 1. Measure the distance between the PTO connection of the tractor and that of the Verti- ®... -
Page 13: Working Depth Adjustment
Fig. 10 WORKING DEPTH ADJUSTMENT The working depth can be adjusted if the machine is raised (before start of operation) or during processing of the ground when the machine is operating. To adjust working depth (see fig. 10): 1. First turn the nuts (1) of the front roll loose one turn. 2. -
Page 14: Driving Speed
DRIVING SPEED The pitch in the driving direction depends on the driving speed. When a small pitch is desired, the driving speed must be sufficiently low, which depends on the tractor or the Verti- Power. The rpm input of the PTO may not exceed 540 rpm. If hard objects are expected, this speed must be lowered. -
Page 15: Start/Stop Procedure
START/STOP PROCEDURE Fig. 11 The start procedure is VERY important. If this procedure is not executed as described below, serious damage to the machine can result. The start procedure is as follows, see fig. 11. 1. Drive to the location where operations will take place. 2. -
Page 16: Using The Verti-Drain
® USING THE VERTI-DRAIN ® Before the Verti-Drain is used at a location, the following needs to be checked: 1. Are there any loose objects present in the field? Remove them first. 2. Are there slopes? The maximum inclination allowed to work on with this machine is 20 degrees. -
Page 17: Uncoupling The Verti-Drain
® 11.0 UNCOUPLING THE VERTI-DRAIN Fig. 12 ® To uncouple the Verti-Drain from the tractor, use the following procedure: 1. Open the rear cover. 2. Turn the crankshaft until all tine holders are in the highest position possible. ® 3. Assemble legs so the Verti-Drain will rest on the legs when the machine is lowered further (see fig. -
Page 18: Problem Analysis
12.0 PROBLEM ANALYSIS Problem Probable Cause Solution Machine vibrates. Crankshaft turns irregularly. Machine not at 90 degrees. Angles pivot points PTO differ. Difficult circumstances. Pivot points PTO not in line. Adjust working depth. Use thinner/shorter tines. In case of draught, irrigate first. Solid/ hollow tines Wrong tine. -
Page 19: Maintenance
13.0 MAINTENANCE Time line Check point / Method Lubrication point Before every use Check for loose bolts / nuts. Tighten the loose bolts/nuts with the correct torque. Couple the machine to a tractor Look and listen for strange and let the machine run for 5 movements/noises. -
Page 20: Technical Information
14.0 TECHNICAL INFORMATION ® Generally speaking, the Verti-Drain is not a complicated machine. A few technical items will be explained. If you still have additional questions, please get in touch with your dealer, who will be pleased to help you. Fig. -
Page 21: Replacing A Crank/Crank Bearing
14.2 REPLACING A CRANK/CRANK BEARING Replacing a crank bearing is necessary when it is fractured or when the nuts of the big-end regularly become loose. The crank bearings, the crank bearing fittings or the big-end pin holes in the crank are damaged. Replace the crank / the bearing as soon as possible in order to avoid any further damage to other parts, as follows (see fig 13): 1. -
Page 22: Timing And Tightening Torque
14.4 TIMING AND TIGHTENING TORQUE Fig. 14 In fig. 14, the tightening torque of the most important bolts/nuts are displayed. Assure yourself that the bolts and nuts, for which these settings are not displayed, are tightened exactly the same as similar bolts and nuts. When bolts and nuts become loose, you may use Loctite to tighten them again. -
Page 23: Tension The V-Belts
14.5 TENSION THE V-BELTS Fig. 14-2 !! Make sure that the Verti-Drain is properly blocked and can not move of its own accord !! !! Make sure that the PTO shaft is disconnected from the Verti-Drain !! To tension the V-belts on both sides of the machine, proceed as follows, see fig 14-2. -
Page 24: Options, Turf Hold Down Kit
15.0 OPTIONS, TURF HOLD DOWN KIT Fig. 15 You can use a turf hold down kit whenever the turf is loosened. There is 1 turf hold Down Kit available: • For the 12mm (1/2”) tines under number : VD1513: 211.215.000 VD1517: 211.215.012 By default, the Verti-Drain®... -
Page 25: Options, Tines
16.0 OPTIONS, TINES Tines are essential for the correct functioning of the machine. There are several different tines available for this machine, see the parts pages for a complete overview. Generally speaking, the tines can be divided into two categories: solid and hollow tines. We advise to only use original tines, because they are completely adapted to the machine. -
Page 26: Hollow Tines
Always use tines with similar diameter and length. Replace a bent tine immediately. If this doesn’t happen, the machine can become unstable. Do not use thicker and/or longer tines than supplied by us. Shorter (worn down) tines can be used when superficial poking is desired. Make sure that the working depth indicated on the sticker is only correct when the maximum length of the tine is used.
Need help?
Do you have a question about the Verti-Drain 1513 and is the answer not in the manual?
Questions and answers