Table of Contents
Advertisement
Advertisement
Table of Contents

Related Manuals for Redexim OVERSEEDER 3D Series


Summary of Contents for Redexim OVERSEEDER 3D Series
- Page 1 User Manual and Parts book OVERSEEDER 3D 1275-1575-2075 2010 English 922.120.204 Translation of the original User Manual REDEXIM Kwekerijweg 8 3709JA – Zeist – The Netherlands Tel.: +31 (0)306 933 227 E-mail: redexim@redexim.com Internet: www.redexim.com...
- Page 2 EU DECLARATION We – Redexim BV, Utrechtseweg 127, 3702 AC Zeist, Holland – declare entirely under our own responsibility that the product: OVERSEEDER 3D WITH A MACHINE NUMBER AS INDICATED ON THE MACHINE AND INDICATED IN THIS MANUAL to which this declaration refers, complies with stipulation of the 2006/42/EC machine directive and with the norms NEN-EN-ISO 12100:2010, NEN-EN-ISO 13857:2008, ISO 4254-1:2013, ISO 4254-9:2018.
- Page 3 THIS WARRANTY IS VALID FOR A PERIOD OF 12 MONTHS FROM THE PURCHASE DATE. REDEXIM WARRANTIES ARE SUBJECT TO THE ‘GENERAL CONDITIONS FOR SUPPLY OF PLANT AND MACHINERY FOR EXPORT, NUMBER 188’ THAT ARE PUBLISHED UNDER THE AUSPICES OF THE UNITED NATIONS ECONOMIC COMMISSION FOR EUROPE.
-
Page 4: Table Of Contents
TABLE OF CONTENTS SAFETY INSTRUCTIONS......................5 Obligations of the user ....................5 Maintenance, repairs and adjustments ................6 Using the machine ......................6 TECHNICAL DATA ........................7 GENERAL DESCRIPTION......................8 SAFETY STICKERS ........................8 FIRST INSTALLATION ......................9 ATTACHING AND DETACHING THE MACHINE ..............10 Attaching the machine .................... -
Page 5: Safety Instructions
1. SAFETY INSTRUCTIONS This machine is designed for safe use. This can only be achieved if you completely follow the safety instructions described in this manual. Read and understand the manual before you start using this machine. If the machine is not used as described in this manual, this can result in injuries and/or damage to the machine. -
Page 6: Maintenance, Repairs And Adjustments
When unskilled people use, maintain or repair the machine, this could result in injuries to the user and to third parties. This should be avoided! Use only original Redexim parts for maintenance or repairs because of the safety of the machine and of the user. -
Page 7: Technical Data
TECHNICAL DATA Model 1275 1575 / 1575LV 2075 1.20 m (47.2”) 1.58 m (62.2”) 2.08 m (81.9”) Working width 5mm-20mm (0.19”-0.78”) Working depth Sowing speed Max. 12 km/h (7.5 mph) Weight 698 kg (1539 lbs) 1184 kg (2610 lbs) 1518 kg (3347 lbs) 832 kg (1834 lbs) 75 mm (2.9”) Driving distance when... -
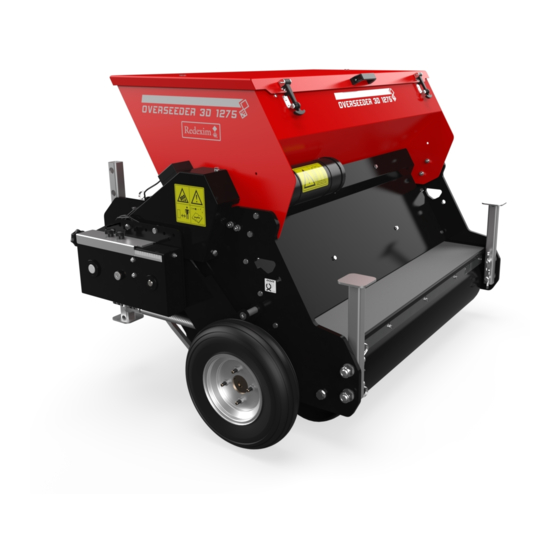
Page 8: General Description
GENERAL DESCRIPTION The Overseeder 3D is a machine for sowing grass areas. SAFETY STICKERS Safety stickers are located on both sides of the machine (see Figure 1). These safety stickers must always be clearly visible and legible and must be replaced if they have become damaged. Figure 1 In case of maintenance, adjustments and repair, always switch OFF the engine of the towing vehicle. -
Page 9: First Installation
FIRST INSTALLATION The machine should be prepared for use as follows (see Figure 2): 1. Attach cables to the hoisting points (1). Make sure that the crane and hoisting cable can handle at least the following weights: Overseeder 3D 1275 1,050 kg (2315 lbs) Overseeder 3D 1575 1,800 kg (3968 lbs) -
Page 10: Attaching And Detaching The Machine
ATTACHING AND DETACHING THE MACHINE Attaching and detaching the machine has to be done carefully. Follow the instructions below: Figure 3 Attaching the machine Prior to attaching the machine, check the following points: Check whether the machine is undamaged and whether it is safe to attach and use the machine. -
Page 11: Detaching The Machine
5. Mount the top rod (4) onto the tractor and attach it to the machine using the 3-point pin (1). Lock the pin using the R-clip. 6. Start the tractor and lift the machine off the ground. !! Make sure that the 3-point pins are locked using the R-clips !! 7. -
Page 12: Machine Settings
MACHINE SETTINGS The Overseeder 3D has several options for setting the machine optimally. Adjusting the working depth The working depth can be adjusted by turning the top rod. If the top rod is turned, causing it to be shortened, the machine will rotate forward and the result is that the sowing depth is set deeper. -
Page 13: Dispensing Test
1. Loosen the stellar knobs (1) (see Figure 5). 2. Rotate the stellar knob (2) to change the settings. You can see the settings on the sticker (3). 3. Retighten the stellar knobs (1). Figure 5 Dispensing test The quantity of seeds should be adjusted for the correct operation of the Overseeder 3D. See the Tables 1, 2 and 3 for an indication of the required quantity. - Page 14 Figure 6...
- Page 15 Sowing table Gearbox setting Gate opening Rye grass Kg/ha Pound/Acre 26.6 23.8 45.3 40.4 67.1 59.9 87.8 78.4 112.3 100.2 140.1 125.0 172.5 153.9 211.4 188.6 252.2 225.0 319.3 284.9 Table 1 Sowing table Gearbox setting Gate opening Bluegrass Kg/ha Pound/Acre 12.5 11.2...
-
Page 16: Setting The Digital Surface Meter
Setting the digital surface meter A digital surface meter (1) is mounted onto the machine (see Figure 7). This meter can be used to show various data (treated surfaces, distances, hours that you worked, etc.). A separate manual is added to the Overseeder 3D toolbox. This describes the operation & setting instructions of the surface meter. -
Page 17: Transport
TRANSPORT The user is responsible for transporting the machine on public roads. Verify the national legislation regarding the regulations. Related to the weight of the machine, it is recommended not to drive faster than 20 km/h (12.4 mph) with a lifted machine. A higher speed can be dangerous for the driver and/or the public and can even damage the machine. -
Page 18: Putting The Machine Into Operation
PUTTING THE MACHINE INTO OPERATION Safety Before using the Overseeder 3D, you should check the following: 1. Are there loose objects in the field? First remove these objects. 2. Are there slopes? The maximum slope is 20 degrees for this machine. Always go from top to bottom. - Page 19 STARTING TO SOW The start procedure is VERY important. If this procedure is not executed as described below, it might result in serious damage to the machine. The procedure is as follows: 1. Put seeds in the seed container. 2. Set the required dose of seeds by adjusting the gearbox (see Section 7.3). 3.
-
Page 20: 10. Maintenance
10. MAINTENANCE Schedule Check point Method Before every use Check for loose bolts / nuts. Tighten loose bolts / nuts with the correct tightening moment. Presence and readability of the safety Replace these if not present or stickers damaged. Check the knives. Replace or repair them if damaged. -
Page 21: Trouble Shooting (Problem Analysis)
11. TROUBLE SHOOTING (PROBLEM ANALYSIS) Problem Possible cause Solution No seeds come out of the The seeds are damp and stick to Use dry seeds. machine. each other. The gearbox is set incorrectly. Set the gearbox to the correct setting. The seed flap is set incorrectly. -
Page 22: 12. Options
12. OPTIONS 12.1 Weight kit Standard, the Overseeder 3D is equipped with a front bar to which the weights (1) can be attached (see Figure 9). Depending on your requirements, a certain number of weights (@ 25 kg/item [55 lbs/item]) can be attached. -
Page 23: Bogy Kit
12.2 Bogy kit As an alternative for lifting the machine, it can be equipped with a Bogy kit / wheel set (see Figure 10). The following Bogy kits per machine are available: • Overseeder 3D 1275: 222.127.502 • Overseeder 3D 1575/1575LV: 222.157.502 •...
Need help?
Do you have a question about the OVERSEEDER 3D Series and is the answer not in the manual?
Questions and answers