Table of Contents
Advertisement
Advertisement
Table of Contents

Subscribe to Our Youtube Channel
Related Manuals for Phcbi MPR-N450FSH Series


Summary of Contents for Phcbi MPR-N450FSH Series
- Page 1 Operating Instructions Pharmaceutical Refrigerator MPR-N450FSH MPR-N450FH Series MPR-N450FH Please read the operating instructions carefully before using this product, and keep the operating instructions for future use. See page 67 for all model numbers.
-
Page 2: Table Of Contents
CONTENTS INTRODUCTION ꞏꞏꞏꞏꞏꞏꞏꞏꞏꞏꞏꞏꞏꞏꞏꞏꞏꞏꞏꞏꞏꞏꞏꞏꞏꞏꞏꞏꞏꞏꞏꞏꞏꞏꞏꞏꞏꞏꞏꞏꞏꞏꞏꞏꞏꞏꞏꞏꞏꞏꞏꞏꞏꞏꞏꞏꞏꞏꞏꞏꞏꞏꞏꞏꞏꞏꞏꞏꞏꞏꞏꞏꞏ 4 PRECAUTIONS FOR SAFE OPERATION ꞏꞏꞏꞏꞏꞏꞏꞏꞏꞏꞏꞏꞏꞏꞏꞏꞏꞏꞏꞏꞏꞏꞏꞏꞏꞏꞏꞏꞏꞏꞏꞏꞏꞏꞏꞏꞏꞏꞏꞏꞏ 5 ENVIRONMENTAL CONDITIONS ꞏꞏꞏꞏꞏꞏꞏꞏꞏꞏꞏꞏꞏꞏꞏꞏꞏꞏꞏꞏꞏꞏꞏꞏꞏꞏꞏꞏꞏꞏꞏꞏꞏꞏꞏꞏꞏꞏꞏꞏꞏꞏꞏꞏꞏꞏꞏꞏꞏ 10 SYMBOLS ON UNIT ꞏꞏꞏꞏꞏꞏꞏꞏꞏꞏꞏꞏꞏꞏꞏꞏꞏꞏꞏꞏꞏꞏꞏꞏꞏꞏꞏꞏꞏꞏꞏꞏꞏꞏꞏꞏꞏꞏꞏꞏꞏꞏꞏꞏꞏꞏꞏꞏꞏꞏꞏꞏꞏꞏꞏꞏꞏꞏꞏꞏꞏꞏꞏꞏꞏꞏꞏ 11 REFRIGERATOR COMPONENTS Main body ꞏꞏꞏꞏꞏꞏꞏꞏꞏꞏꞏꞏꞏꞏꞏꞏꞏꞏꞏꞏꞏꞏꞏꞏꞏꞏꞏꞏꞏꞏꞏꞏꞏꞏꞏꞏꞏꞏꞏꞏꞏꞏꞏꞏꞏꞏꞏꞏꞏꞏꞏꞏꞏꞏꞏꞏꞏꞏꞏꞏꞏꞏꞏꞏꞏꞏꞏꞏꞏꞏꞏꞏꞏꞏꞏꞏ 12 Control panel ꞏꞏꞏꞏꞏꞏꞏꞏꞏꞏꞏꞏꞏꞏꞏꞏꞏꞏꞏꞏꞏꞏꞏꞏꞏꞏꞏꞏꞏꞏꞏꞏꞏꞏꞏꞏꞏꞏꞏꞏꞏꞏꞏꞏꞏꞏꞏꞏꞏꞏꞏꞏꞏꞏꞏꞏꞏꞏꞏꞏꞏꞏꞏꞏꞏꞏꞏꞏꞏꞏꞏꞏ 14 INSTALLATION SITE ꞏꞏꞏꞏꞏꞏꞏꞏꞏꞏꞏꞏꞏꞏꞏꞏꞏꞏꞏꞏꞏꞏꞏꞏꞏꞏꞏꞏꞏꞏꞏꞏꞏꞏꞏꞏꞏꞏꞏꞏꞏꞏꞏꞏꞏꞏꞏꞏꞏꞏꞏꞏꞏꞏꞏꞏꞏꞏꞏꞏꞏꞏꞏꞏꞏ 15 INSTALLATION ꞏꞏꞏꞏꞏꞏꞏꞏꞏꞏꞏꞏꞏꞏꞏꞏꞏꞏꞏꞏꞏꞏꞏꞏꞏꞏꞏꞏꞏꞏꞏꞏꞏꞏꞏꞏꞏꞏꞏꞏꞏꞏꞏꞏꞏꞏꞏꞏꞏꞏꞏꞏꞏꞏꞏꞏꞏꞏꞏꞏꞏꞏꞏꞏꞏꞏꞏꞏꞏꞏꞏꞏꞏ 16 START-UP PROCEDURE ꞏꞏꞏꞏꞏꞏꞏꞏꞏꞏꞏꞏꞏꞏꞏꞏꞏꞏꞏꞏꞏꞏꞏꞏꞏꞏꞏꞏꞏꞏꞏꞏꞏꞏꞏꞏꞏꞏꞏꞏꞏꞏꞏꞏꞏꞏꞏꞏꞏꞏꞏꞏꞏꞏꞏꞏꞏꞏꞏ 17 AFTER RECOVERY FROM POWER FAILURE ꞏꞏꞏꞏꞏꞏꞏꞏꞏꞏꞏꞏꞏꞏꞏꞏꞏꞏꞏꞏꞏꞏꞏꞏꞏꞏꞏꞏꞏꞏꞏꞏ... - Page 3 CONTENTS Setting the speed for data acquisition ꞏꞏꞏꞏꞏꞏꞏꞏꞏꞏꞏꞏꞏꞏꞏꞏꞏꞏꞏꞏꞏꞏꞏꞏꞏꞏꞏꞏꞏꞏꞏꞏꞏꞏꞏꞏꞏꞏꞏꞏꞏ 49 Setting the remote controlꞏꞏꞏꞏꞏꞏꞏꞏꞏꞏꞏꞏꞏꞏꞏꞏꞏꞏꞏꞏꞏꞏꞏꞏꞏꞏꞏꞏꞏꞏꞏꞏꞏꞏꞏꞏꞏꞏꞏꞏꞏꞏꞏꞏꞏꞏꞏꞏꞏꞏꞏꞏꞏꞏꞏꞏ 50 Setting the date display (format) ꞏꞏꞏꞏꞏꞏꞏꞏꞏꞏꞏꞏꞏꞏꞏꞏꞏꞏꞏꞏꞏꞏꞏꞏꞏꞏꞏꞏꞏꞏꞏꞏꞏꞏꞏꞏꞏꞏꞏꞏꞏꞏꞏꞏꞏꞏꞏ 51 Setting the date ꞏꞏꞏꞏꞏꞏꞏꞏꞏꞏꞏꞏꞏꞏꞏꞏꞏꞏꞏꞏꞏꞏꞏꞏꞏꞏꞏꞏꞏꞏꞏꞏꞏꞏꞏꞏꞏꞏꞏꞏꞏꞏꞏꞏꞏꞏꞏꞏꞏꞏꞏꞏꞏꞏꞏꞏꞏꞏꞏꞏꞏꞏꞏꞏꞏꞏꞏꞏꞏ 52 Setting the time ꞏꞏꞏꞏꞏꞏꞏꞏꞏꞏꞏꞏꞏꞏꞏꞏꞏꞏꞏꞏꞏꞏꞏꞏꞏꞏꞏꞏꞏꞏꞏꞏꞏꞏꞏꞏꞏꞏꞏꞏꞏꞏꞏꞏꞏꞏꞏꞏꞏꞏꞏꞏꞏꞏꞏꞏꞏꞏꞏꞏꞏꞏꞏꞏꞏꞏꞏꞏꞏ 53 REMOTE ALARM TERMINAL ꞏꞏꞏꞏꞏꞏꞏꞏꞏꞏꞏꞏꞏꞏꞏꞏꞏꞏꞏꞏꞏꞏꞏꞏꞏꞏꞏꞏꞏꞏꞏꞏꞏꞏꞏꞏꞏꞏꞏꞏꞏꞏꞏꞏꞏꞏꞏꞏꞏꞏꞏꞏꞏꞏ 54 ALARMS AND SELF-DIAGNOSIS ꞏꞏꞏꞏꞏꞏꞏꞏꞏꞏꞏꞏꞏꞏꞏꞏꞏꞏꞏꞏꞏꞏꞏꞏꞏꞏꞏꞏꞏꞏꞏꞏꞏꞏꞏꞏꞏꞏꞏꞏꞏꞏꞏꞏꞏꞏꞏꞏꞏ 55 ROUTINE MAINTENANCE Cleaning of exterior, interior, and accessories ꞏꞏꞏꞏꞏꞏꞏꞏꞏꞏꞏꞏꞏꞏꞏꞏꞏꞏꞏꞏꞏꞏꞏꞏꞏꞏꞏꞏꞏꞏ...
-
Page 4: Introduction
INTRODUCTION Read the operating instructions carefully before using the appliance and follow the instructions for safe operation. Handling of Operating Instructions PHC Corporation never guarantees any safety if the appliance is used for any objects other than intended use or used by any procedures other than those mentioned in the operating instructions. ... -
Page 5: Precautions For Safe Operation
PRECAUTIONS FOR SAFE OPERATION It is imperative that the user complies with the operating instructions as they contain important safety advice. Items and procedures are described so that you can use this unit correctly and safely. Following these precautions will prevent possible injury to the user and any other person. - Page 6 PRECAUTIONS FOR SAFE OPERATION WARNING Never damage the power supply cord or power supply plug (by breaking, adapting, placing near a source of heat, bending with force, twisting, pulling, adding weight, or binding). A damaged power supply cord or power supply plug may cause electric shock, short circuit, or fire. Remove dust from the power supply plug periodically.
- Page 7 PRECAUTIONS FOR SAFE OPERATION WARNING Never store volatile or flammable substances in this unit except in a sealed container. Such substances may cause explosion or fire if they leak. Never insert metal objects such as pins and wires into any vent, gap, or outlet on the unit. This may cause electric shock or injury by accidental contact with moving parts.
- Page 8 PRECAUTIONS FOR SAFE OPERATION WARNING Ask a qualified contractor to carry out disassembly and disposal of the unit. Leaving the unit in a location that can be accessed by third parties may result in unexpected accidents (e.g. the unit may be used for unintended purposes).
- Page 9 PRECAUTIONS FOR SAFE OPERATION CAUTION Do not climb on top of the unit or put any objects on the unit. Falling from the unit may cause injury; falling objects may cause damage to the unit. Never install the unit in a location where corrosive materials such as sulphur compounds are likely to be generated (e.g.
-
Page 10: Environmental Conditions
ENVIRONMENTAL CONDITIONS This equipment is designed to be safe at least under the following conditions (based on the IEC 61010-1): Indoor use; Altitude up to 2000 m; Temperature 5 C to 40 Maximum relative humidity 80 % for temperature up to 31 C decreasing linearly to 50 % relative humidity at 40 ... -
Page 11: Symbols On Unit
SYMBOLS ON UNIT The following symbols are attached to the unit. The table describes the meaning of the symbols. This symbol is attached to covers that access high-voltage electrical components to prevent electric shock. Only a qualified engineer or service personnel should be allowed to open these covers. -
Page 12: Refrigerator Components
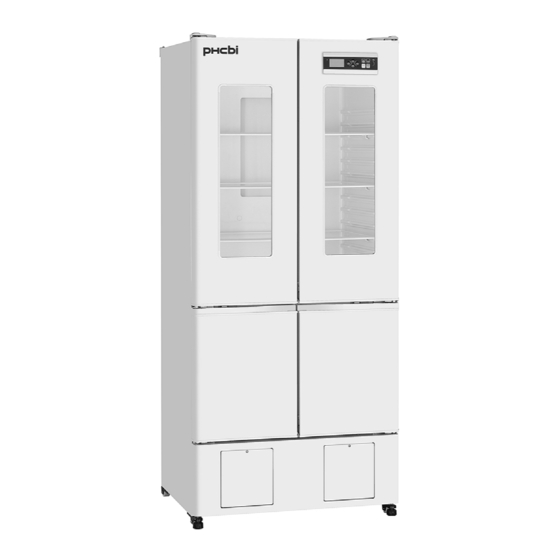
REFRIGERATOR COMPONENTS Main body Load line (outside) ② ① Refrigerator door Interior light Magnetic gasket ⑫ ⑪ ③ Key hole (outside) Freezer door ③ ④ ⑩ Key hole (outside) (right side) ⑤ ⑨ (inside) ⑥ ⑧ ⑦ MPR-N450FH ⑬ ... - Page 13 REFRIGERATOR COMPONENTS ① Air intake vent: This is an air intake vent for circulating the air in the chamber. Do not block this vent. Blocking this vent may cause unstable chamber temperature. ② Control panel: The chamber temperature and other alarms/functions can be set using the keys on the control panel.
-
Page 14: Control Panel
REFRIGERATOR COMPONENTS Control panel ① ② ③ ④ ⑤ ⑧ ⑦ ⑥ ① LED indicator: In normal operation, the green LED lamp lights up, and during alarm condition, the red LED lamp blinks to indicate alarm. ② Temperature display: The present chamber temperature, log chart, or input screen, etc. are displayed. -
Page 15: Installation Site
INSTALLATION SITE This unit must be installed in a location which meets all the conditions described below. If the unit is installed in a location which does not meet the conditions, its specified performance may not be achieved or malfunctions and accidents may occur. ■... -
Page 16: Installation
INSTALLATION 1. Preparations after unpacking Remove all the tape used to secure the doors and interior parts, and leave the doors open for a short while for ventilation. If any surfaces of the outer cabinet are dirty, wipe the surface using a cloth moistened with a diluted neutral dish-washing detergent. -
Page 17: Start-Up Procedure
START-UP PROCEDURE Follow this procedure for the initial operation of the unit and for consequent operations (after temporary stoppage for cleaning, maintenance or moving) . After a power failure, the unit will restart operation automatically with the same settings as before the power failure. -
Page 18: Home Screen (Temperature Display Screen)
HOME SCREEN (Temperature display screen) When the power is switched on, the following home screen (temperature display screen) is displayed. Following shows the integer display mode. ① Message column Normally, the time (24-hour notation) is displayed. ① At the error, the error code and message are 12:00 ... -
Page 19: Menu Screen
MENU SCREEN The menu screen is displayed by pressing the menu key (MENU/HOME) while the home screen (temperature display screen) is displayed. Following shows the menu screen. ① M e n u R e f . S e t T e m p . ... - Page 20 MENU SCREEN Following shows the screen display and function at each screen under Menu level. Note: The unit will return from setting mode to the home screen automatically after 90 seconds if no key is operated (auto-return function). In this case, the setting is not changed. Reference Screen Function...
-
Page 21: Setting The Chamber Temperature
SETTING THE CHAMBER TEMPERATURE Set the chamber temperature as required to keep the stored material at an appropriate temperature for a long period of time. Menu <Setting the refrigerator temperature> Ref. Set Temp. 5 C ... -
Page 22: Setting The Keypad Lock
SETTING THE KEYPAD LOCK The setting can be locked to avoid accidental changes. When the keypad lock is ON, a change of setting is not accepted even if the key on the control panel is operated. 1. On the home screen, press the menu key (MENU/HOME). Menu ... -
Page 23: Releasing The Keypad Lock
RELEASING THE KEYPAD LOCK When the keypad lock is OFF, a change of setting is acceptable. 1. On the home screen, press the menu key (MENU/HOME). Menu LOCK ►The Menu screen is displayed. -
Page 24: Display Of Max/Min Temperature
DISPLAY OF MAX/MIN TEMPERATURE On the temperature display, the maximum and minimum chamber temperature for every 24 or 12 hours can be checked. Initial setting (factory setting): 24 hours 1. On the home screen, press the menu key (MENU/HOME). Menu ... -
Page 25: Reset Of Max/Min Temperature
RESET OF MAX/MIN TEMPERATURE The maximum and minimum chamber temperature can be reset. 1. On the home screen, press the menu key (MENU/HOME). Menu ►The Menu screen is displayed. Ref. Set Temp. 5 C Fzr. Set Temp. -30 C ... -
Page 26: Setting The Period For Max/Min Temperature
SETTING THE PERIOD FOR MAX/MIN TEMPERATURE The period for monitoring the maximum and minimum chamber temperature is selectable. The monitor period is 24 hours or 12 hours. The maximum and minimum chamber temperature for 24 hours are displayed when 24 hours is selected. The maximum and minimum chamber temperature for 12 hours are displayed when 12 hours is selected. -
Page 27: Display And Export Of Data Log
DISPLAY AND EXPORT OF DATA LOG Display & export of temp. and door operation logs The log of chamber temperature (refrigerator and freezer) and door operation (refrigerator and freezer) can be displayed by chart on the screen. Also, those logs can be exported to a USB memory device. 1. - Page 28 DISPLAY AND EXPORT OF DATA LOG 8. By pressing the up or down key, select the date of which data is Date Select displayed. The date is advanced or got back by one day when the up or down 17/12/31 ...
-
Page 29: Export Of Temperature And Door Operation Logs
DISPLAY AND EXPORT OF DATA LOG Export of temperature and door operation logs All temperature logs (refrigerator and freezer) and door operation logs saved in a memory or log for a selected date (24 hours) can be exported to a USB memory device. 1. -
Page 30: Setting The Log Interval
DISPLAY AND EXPORT OF DATA LOG Setting the log interval The log interval for the chamber temperature (refrigerator and freezer) can be set. Setting range of log interval: between 1 minute and 15 minutes Initial setting (factory setting): 1 minute (log for approximately 3 months can be stored) 1. -
Page 31: Setting The Device Id
DISPLAY AND EXPORT OF DATA LOG Setting the device ID The unique device ID indicated on the file exported to a USB memory device (CSV file) can be set. Setting range of device ID: 6-digit number and alphabet (capital letter only) ... -
Page 32: Display Of Alarm Log
DISPLAY OF ALARM LOG The alarm log can be displayed on the screen. Following shows the format of the indication. A l a r m ② 1 8 / 0 3 / 0 5 1 2 : 0 0 W 0 1 R e f . -
Page 33: Export Of Alarm Log
EXPORT OF ALARM LOG The alarm log for the selected date or all alarm logs saved in the memory can be exported to a USB memory device in CSV file. 1. Insert a USB memory device to the USB port. Menu ... -
Page 34: Setting The Selectable Parameters
SETTING THE SELECTABLE PARAMETERS Selectable parameters The setting of some parameters (including the alarm setting) can be changed. Following shows the selectable parameters. Refer to the following pages for the details. A l a r m s & C o n t r o l s A l a r m s ... -
Page 35: Setting The Temperature Display
SETTING THE SELECTABLE PARAMETERS Setting the temperature display 1. On the home screen, press the menu key (MENU/HOME). Menu ►The Menu screen is displayed. Ref. Set Temp. 5 C Fzr. Set Temp. -30 C Keypad Lock 2. -
Page 36: Setting The Freezer Defrosting
SETTING THE SELECTABLE PARAMETERS Setting the freezer defrosting Stop the freezer operation according to the procedure below when removing the frost in the freezer chamber. Refer to page 57 for the freezer defrosting. 1. On the home screen, press the menu key (MENU/HOME). Menu ... -
Page 37: Setting The Freezer Alarm Buzzer
SETTING THE SELECTABLE PARAMETERS Setting the freezer alarm buzzer The high-temperature alarm will be kept for long period when freezing the ice packs. In this case, silence the buzzer by the following procedure. 1. On the home screen, press the menu key (MENU/HOME). Menu ... -
Page 38: Setting The High-Temp. Alarm Of Refrigerator
SETTING THE SELECTABLE PARAMETERS Setting the high-temp. alarm of refrigerator An abnormality (chamber temperature rise) is indicated by the blinking of red LED lamp and the chamber temperature display and the buzzer sounding (15 minutes after blinking) if the chamber temperature exceeds the set value of the high-temperature alarm. -
Page 39: Setting The Low-Temp. Alarm Of Refrigerator
SETTING THE SELECTABLE PARAMETERS Setting the low-temp. alarm of refrigerator An abnormality (chamber temperature drop) is indicated by the blinking of red LED lamp and the chamber temperature display and the buzzer sounding (15 minutes after blinking) if the chamber temperature falls below the set value of low-temperature alarm. -
Page 40: Setting The High-Temp. Alarm Of Freezer
SETTING THE SELECTABLE PARAMETERS Setting the high-temp. alarm of freezer An abnormality (chamber temperature rise) is indicated by the blinking of red LED lamp and the chamber temperature display and the buzzer sounding (15 minutes after blinking) if the chamber temperature exceeds the set value of the high-temperature alarm. -
Page 41: Setting The Low-Temp. Alarm Of Freezer
SETTING THE SELECTABLE PARAMETERS Setting the low-temp. alarm of freezer An abnormality (chamber temperature drop) is indicated by the blinking of red LED lamp and the chamber temperature display and the buzzer sounding (15 minutes after blinking) if the chamber temperature falls below the set value of low-temperature alarm. -
Page 42: Setting The Door Buzzer Delay
SETTING THE SELECTABLE PARAMETERS Setting the door buzzer delay The red LED lamp blinks when the door is opened, and the buzzer sounds (after a delay) to indicate that the door is open. The delay time (between the blinking of the red LED lamp and the activation of the buzzer) can be changed. -
Page 43: Setting The Buzzer Suspended Period
SETTING THE SELECTABLE PARAMETERS Setting the buzzer suspended period An abnormality is indicated again by the buzzer sounding after a certain period has elapsed (the buzzer recovery time) if the alarm mode continues even after the buzzer has already been silenced by pressing the buzzer stop key (BUZZER STOP). -
Page 44: Setting The Buzzer Volume
SETTING THE SELECTABLE PARAMETERS Setting the buzzer volume The buzzer volume is selectable. Select the appropriate volume taking into consideration of the environment of installation site. Setting range of buzzer volume: Low (small = standard), High (loud) Initial setting (factory setting): Low (small = standard) 1. -
Page 45: Setting The Remote Alarm
SETTING THE SELECTABLE PARAMETERS Setting the remote alarm The alarm of this unit can be informed at a remote location from this unit by connecting the external alarm device (commercial goods) to the remote alarm terminals. It is selectable that the operation of the external alarm device is linked with the buzzer or not. -
Page 46: Setting The Interior Light
SETTING THE SELECTABLE PARAMETERS Setting the interior light The lighting condition of the interior light can be selectable among three; link with door operation, always ON, always OFF. Setting range of interior light: link with door operation (AUTO), always ON (ON), always OFF (OFF) ... -
Page 47: Setting The Compressor Delay
SETTING THE SELECTABLE PARAMETERS Setting the compressor delay The delay time before the compressor starts can be changed to reduce the load on the power line and to facilitate the start-up (reset) of the refrigerator during recovery after power failure. <Important>... -
Page 48: Setting The Device Id For Data Acquisition
SETTING THE SELECTABLE PARAMETERS Setting the device ID for data acquisition Set a device ID for data acquisition when using the optional data acquisition system (MTR-5000). Setting range of device ID: between 0 and 255 Initial setting (factory setting): 000 1. -
Page 49: Setting The Speed For Data Acquisition
SETTING THE SELECTABLE PARAMETERS Setting the speed for data acquisition Set a communicating speed for data acquisition when using the optional data acquisition system (MTR-5000). Setting range of communicating speed: 2400 bps, 4800 bps, 9600 bps Initial setting (factory setting): 2400 bps 1. -
Page 50: Setting The Remote Control
SETTING THE SELECTABLE PARAMETERS Setting the remote control By the remote control, the setting of chamber temperature can be changed through the software of the optional data acquisition system (MTR-5000). Setting range of remote control: LOCAL (change of the chamber set temperature remotely is unable) or, REMOTE (change of the chamber set temperature remotely is enable) ... -
Page 51: Setting The Date Display (Format)
SETTING THE SELECTABLE PARAMETERS Setting the date display (format) The format of date display is selectable between two types. Setting range: year / month / day (YY/MM/DD), or day / month / year (DD/MM/YY) Initial setting (factory setting): year / month / day (YY/MM/DD) 1. -
Page 52: Setting The Date
SETTING THE SELECTABLE PARAMETERS Setting the date 1. On the home screen, press the menu key (MENU/HOME). Menu ►The Menu screen is displayed. Ref. Set Temp. 5 C Fzr. Set Temp. ... -
Page 53: Setting The Time
SETTING THE SELECTABLE PARAMETERS Setting the time It is recommended to adjust the time periodically since the deviation of about one minutes per a month may be occurred. 1. On the home screen, press the menu key (MENU/HOME). Menu ►The Menu screen is displayed. ... -
Page 54: Remote Alarm Terminal
REMOTE ALARM TERMINAL The alarm is relayed to a remote location when a remote alarm device (commercially available) is connected to the remote alarm terminal. Installation of a remote alarm device is recommended when the unit is installed in an unattended location so that the operator of the unit is notified of the alarm. Contact our representative or agent to arrange the installation of a remote alarm device. -
Page 55: Alarms And Self-Diagnosis
ALARMS AND SELF-DIAGNOSIS This unit has the alarm functions and self-diagnosis functions listed below. An error code and error message are displayed on the temperature display when an alarm or self-diagnosis goes off. Contact our sales representative or agent if the alarm mode continues, since the failure of the unit is supposed. -
Page 56: Routine Maintenance
ROUTINE MAINTENANCE Cleaning of exterior, interior, and accessories Use a dry cloth to wipe off small amounts of dirt on the outside and inside of the unit and all accessories. If the outside panels are dirty, clean them with a diluted neutral dishwashing detergent. Wipe off the condensation on the glass (MPR-N45FH) or exterior of the cabinet with a dry soft cloth. -
Page 57: Defrosting
DEFROSTING Defrosting the refrigerator The following 2 types of defrosting methods is provided for the refrigerator. Both of them are controlled automatically. Cycle defrosting The refrigerator temperature is kept stable by ON/OFF operation of the compressor. When the compressor is OFF (stopped), the frost on the evaporator is melted by the heater. This defrosting never influences to the refrigerator temperature. -
Page 58: Troubleshooting
TROUBLESHOOTING If the unit malfunctions, check out the following before calling for service. <Attention> If the malfunction is not resolved after checking the following items or if the malfunction is not shown in the table below, contact our sales representative or agent. Malfunction Check/Remedy If nothing operates even... -
Page 59: Disposal Of Unit
DISPOSAL OF UNIT WARNING If the unit is to be stored unused in an unsupervised area for an extended period ensure that children do not have access and doors cannot be closed completely. The disposal of the unit should be accomplished by appropriate personnel. Always remove doors to prevent accidents such as suffocation. - Page 60 DISPOSAL OF UNIT Disposal of Old Equipment and Batteries Likvidácia opotrebovaných zariadení a batérií Only for European Union and countries with recycling systems Len pre Európsku úniu a krajiny so systémom recyklácie These symbols on the products, packaging, and/or Tieto symboly uvádzané na výrobkoch, balení a/alebo accompanying documents mean that used electrical and v sprievodnej dokumentácii informujú...
- Page 61 DISPOSAL OF UNIT Likvidace použitých zařízení a baterií Vanhojen laitteiden ja paristojen hävittäminen Jen pro státy Evropské unie a země s fungujícím systémem recyklace a Vain EU-jäsenmaille ja kierrätysjärjestelmää käyttäville maille zpracování odpadu. Tämä symboli tuotteissa, pakkauksessa ja/tai Tyto symboly na výrobcích, jejich obalech a v doprovodné asiakirjoissa tarkoittaa, että...
- Page 62 DISPOSAL OF UNIT Smaltimento di vecchie apparecchiature e batterie usate Eliminação de Equipamentos Usados e Baterias Solo per Unione Europea e Nazioni con sistemi di raccolta e Apenas para a União Europeia e países com sistemas de smaltimento reciclagem Questi simboli sui prodotti, sull’imballaggio e/o sulle Estes símbolos nos produtos, embalagens, e/ou documentazioni o manuali accompagnanti i prodotti indicano documentos que os acompanham indicam que os...
- Page 63 DISPOSAL OF UNIT Avfallshantering av produkter och batterier Brukerinformasjon om innsamling av gammelt utstyr og brukte Endast för Europeiska Unionen och länder med återvinningssystem batterier Dessa symboler på produkter, förpackningar och/eller Bare for EU og land med retursystemer medföljande dokument betyder att förbrukade elektriska och Slike symboler på...
-
Page 64: Temperature Recorder (Option)
TEMPERATURE RECORDER (OPTION) The chamber temperature can be recorded and checked by installing an optional temperature recorder (MTR-G3504, MTR-0621LH, or MTR-4015LH). Contact our sales representative or agent for the purchase of temperature recorder. Main specifications of temperature recorder MTR-G3504 MTR-0621LH MTR-4015LH Application Refrigerator &... -
Page 65: Additional Shelf Kit For Freezer (Option)
ADDITIONAL SHELF KIT FOR FREEZER (OPTION) The additional shelf kit (MPR-450ST) for freezer is available to freeze the ice packs efficiently. The shelves can be installed in the right and left freezer. Contact our sales representative or agent for the purchase of additional shelf kit for freezer. LIGHT SHIELDING PLATE (OPTION) It is recommended to install the light shielding plate (MPR-45BP) when storing the photosensitive product... -
Page 66: Specifications
SPECIFICATIONS Product name Pharmaceutical refrigerator MPR-N450FSH MPR-N450FH External dimensions W800 mm x D640 mm x H1810 mm Internal dimensions W720 mm x D516 mm x H913 mm (refrigerator) W680 mm x D470 mm x H415 mm (freezer) Effective capacity 326 L (refrigerator), 136 L (freezer) Exterior Colored steel Interior... -
Page 67: Performance
PERFORMANCE Product name Pharmaceutical Refrigerator MPR-N450FSH Model number MPR-N450FSH-PE Temperature control range Refrigerator; 2 C to 14 C (ambient temperature; -5 C to 35 C, no load) Freezer; -30 C to -20 C (ambient temperature; -5 C to 35 C, no load) Rated voltage AC 220 V AC 230 V... -
Page 68: Safety Check Sheet
CAUTION Please fill in this form before servicing. Hand over this form to the service engineer to keep for his and your safety. Safety check sheet 1. Unit contents: □ □ Risk of infection: □ □ Risk of toxicity: □ □... - Page 69 1-1-1 Sakada, Oizumi-machi, Ora-gun, Gunma 370-0596, Japan Printed in Taiwan LDCL050200-3 © PHC Corporation 2018 S0918-30119 (Jan. 11, 2019)
Need help?
Do you have a question about the MPR-N450FSH Series and is the answer not in the manual?
Questions and answers