
Related Manuals for Klarstein FUTURELIGHT SMART


Summary of Contents for Klarstein FUTURELIGHT SMART
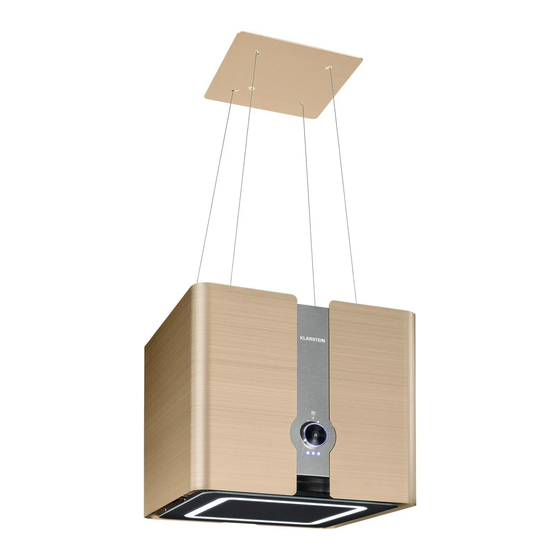
- Page 1 FUTURELIGHT SMART Dunstabzugshaube Range Hood Campana extractora Hotte aspirante Cappa aspirante 10038708 10038709 10038710 www.klarstein.com...
-
Page 3: Table Of Contents
Sehr geehrter Kunde, wir gratulieren Ihnen zum Erwerb Ihres Gerätes. Lesen Sie die folgenden Hinweise sorgfältig durch und befolgen Sie diese, um möglichen Schäden vorzubeugen. Für Schäden, die durch Missachtung der Hinweise und unsachgemäßen Gebrauch entstehen, übernehmen wir keine Haftung. Scannen Sie den folgenden QR-Code, um Zugriff auf die aktuellste Bedienungsanleitung und weitere Informationen rund um das Produkt zu erhalten. -
Page 4: Produktdatenblatt
PRODUKTDATENBLATT Angaben nach Verordnung (EU) Nr. 65/2014 Mess- und Berechnungsmethoden nach EN 61591:1997+A1:2006+A2:2011+A11:20 14+A12:2015 Artikelnummer 10038708, 10038709, 10038710 Bezeichnung Symbol Wert Einheit Jährlicher Energieverbrauch AEC hood 60,6 kWh/Jahr Energieeffizienzklasse Fluiddynamische Effizienz FDE hood 16,1 Klasse für die fluiddynamische Effizienz Beleuchtungseffizienz LE hood Lux/W Beleuchtungseffizienzklasse... - Page 5 Angaben nach Verordnung (EU) Nr. 66/2014 Mess- und Berechnungsmethoden nach EN 61591:1997+A1:2006+A2:2011+A11:20 14+A12:2015 Artikelnummer 10038708, 10038709, 10038710 Bezeichnung Symbol Wert Einheit Jährlicher Energieverbrauch AEC hood 60,6 kWh/Jahr Zeitverlängerungsfaktor Fluiddynamische Effizienz FDE hood 16,1 Energieeffizienzindex EEI hood 78,0 Gemessener Luftvolumenstrom Q BEP 205,8 m³/h im Bestpunkt...
-
Page 6: Sicherheitshinweise
SICHERHEITSHINWEISE • Lesen Sie sich alle Hinweise vor der Benutzung sorgfältig durch und bewahren Sie die Bedienungsanleitung zum späteren Nachschlagen gut auf. • Die Montagearbeiten dürfen nur von einer Elektrofachkraft oder einer qualifizierten Person durchgeführt werden. Bevor Sie die Dunstabzugshaube verwenden, stellen Sie sicher, dass die Spannung (V) und die auf der Dunstabzugshaube angegebene Frequenz (Hz) der Spannung und Frequenz der Stromversorgung in Ihrem Haushalt entsprechen. - Page 7 Wichtige Hinweise zum Abluftbetrieb WARNUNG Vergiftungsgefahr durch zurückgesaugte Abgase! Betreiben Sie das Gerät nicht im Abluftbetrieb, wenn es zusammen mit einer raumluftabhängigen Feuerstätte betrieben wird und keine ausreichende Luftzirkulation garantiert wird. Raumluftabhängige Feuerstätten wie Gas-, Öl-, Holz- oder Kohleheizungen, Boiler oder Durchlauferhitzer beziehen die Luft aus dem Raum und führen sie durch ein Abluftrohr oder einen Kamin ins Freie.
-
Page 8: Geräteübersicht Und Einzelteile
GERÄTEÜBERSICHT UND EINZELTEILE Dübel (x4) Schrauben ST4.8x40 (x4) Schrauben M4x8 (x6) Seilhalterung (x4) Seilsicherung (x4) Schrauben M4x6 (x4) Schrauben M4x10 (x2) Drahtklemme (x4) Magnet (x2) Deckenhalterung Verkabelungsplatte Dekorplatte Drahtseile Gehäuse Aktivkohlefilter Fettfilter Für die Installation benötigten Sie zusätzlich: • Befestigungen zur Fixierung des Geräte gehäuses und Anti-Kipp-Halterungen •... -
Page 9: Installation
INSTALLATION Vor der Installation • Entfernen Sie die gesamte Schutzfolie und nehmen Sie die Filter heraus, bevor Sie die Dunstabzugshaube installieren. Standort • Die Dunstabzugshaube muss an der Decke angebracht werden. Halten Sie zu elektrischen Herdplatten einen Mindestabstand von 60 cm und zu Gasbrennern einen Mindestabstand von 65 cm ein. - Page 10 Mindestabstände (zwischen Dunstabzugshaube und Oberseite des Herdes) Herdart Mindestabstand Maximalabstand 650 mm 800 mm Elektro 600 mm 800 mm Hinweis: Falls in der Bedienungsanleitung des Herdes ein größerer Mindestabstand für Dunstabzugshauben vorgegeben wird, muss dieser Mindestabstand und nicht der oben genannte eingehalten werden. Installation an der Decke Befolgen Sie die in Abbildung 6 angezeigte Richtung, um die Montagewinkel an die Decke zu halten.
- Page 11 Bohren Sie ein 4 Löcher mit dem Durchmesser von 10 mm in die Decke und stecken Sie anschließend die Dübel in die Löcher hinein. Schrauben Stellen Sie die 4 Schrauben an der Halterung so ein, dass Sie 2 mm herausragen. Ziehen Sie das Stromkabel durch das Loch in der Halterung und befestigen...
- Page 12 Messen Sie die Länge der Drahtseile (L) und beziehen Sie sich auf das unter „Abmessungen“ angegebene Maß: L = X-Y-26 (mm). Markieren Sie eine Linie auf den Drahtseilen. Hinweis: Die Abzugshaube sollte in einer Höhe von 65-80 cm (Gas) bzw. 60-80 cm (Elektroherd) über dem Startpunkt Kochfeld angebracht werden.
- Page 13 Magnete Führen Sie die 4 Drahtseile durch die Löcher in der Dekorplatte und befestigen Sie sie mit 2 Magneten an der Montagehalterung. Dekorplatte Hinweis: Die Öffnung für das Stromkabel in der Dekorplatte muss wie in Öffnung der Abbildung positioniert für das werden.
- Page 14 M4 8 Befestigungsklammern für die Dahtseile Befestigen Sie die Drahtseile mit Schrauben an den 4 kleinen Befestigungs- klammern.
- Page 15 lösen festziehen Falls die Abzugshaube nicht gerade hängt, justieren Sie sie durch leichtes Verstellen der 4 Schrauben, wie in der Abbildung dargestellt Verdrahten Sie die Kabel gemäß der Markierung der Drähte (L, N & Erdung). Hinweis: Dieser Installationsschritt MUSS von einer qualifi zierten Elektrofachkraft durchgeführt werden! WARNUNG...
- Page 16 Magnete Verstauen Sie die gesamte Verkabelung in der Montagehalterung. Befestigen Sie dann die anderen beiden Magnete an der Halterung. Für eine sichere Befestigung der Dekorplatte sind insgesamt 4 Magnete erforderlich. Schieben Sie zum Schluss die Dekorplatte hoch bis zur Montagehalterung.
-
Page 17: Bedienung
BEDIENUNG • Die besten Ergebnisse können erzielt werden, wenn Sie das Gerät bei normalen Bedingungen auf niedriger Stufe und bei konzentrierten Gerüchen auf hoher Stufe nutzen. • Schalten Sie die Dunstabzugshaube einige Minuten vor Beginn des Kochvorgangs ein. • Die Dunstabzugshaube sollte nach dem Kochen mindestens 5 Minuten lang eingeschaltet bleiben, bis sich alle Gerüche verflüchtigt haben. -
Page 18: Gerätesteuerung Per Smartphone
GERÄTESTEUERUNG PER SMARTPHONE Wenn Sie Ihr Klarstein-Gerät in Ihr heimisches WLAN einbinden, können Sie es ganz bequem über die dazugehörige Klarstein-App bedienen. Die App ermöglicht es Ihnen, nicht nur das Gerät über Ihr Smartphone fernzusteuern, sondern bietet Ihnen zudem Zugang zu Rezepten und weiterführenden Informationen. -
Page 19: Reinigung Und Wartung
Fehlerbehebung bei Verbindungsproblemen Wenn Ihr Klarstein-Gerät im WLAN nicht gefunden werden kann, überprüfen Sie Folgendes: • Ist das Gerät eingesteckt? • Ist die WLAN-Funktion des Smartphones aktiviert? • Ist die WLAN-Funktion des Klarstein-Gerätes aktiviert? (Befolgen Sie die Anweisungen in der App.) •... - Page 20 Entfernen des Fettfilters Öffnen Sie die Leuchtplatte, drücken Sie den Fettfilter nach oben und ziehen Sie diesen anschließend nach unten heraus. Reinigung der Fettfilter Hinweis: Die Metall-Fettfilter müssen mindestens alle 4 Wochen entfernt und gereinigt werden, entweder von Hand oder in der Geschirrspülmaschine. •...
- Page 21 Reinigung des Innengehäuses WARNUNG Stromschlaggefahr! Schalten sie das Gerät vor der Reinigung des Innengehäuses aus. • Reinigen Sie das Innengehäuse mit warmem Wasser und einem Fettreiniger (nutzen Sie niemals aggressive Reinigungsmittel, Scheuerpulver oder Stahlbürsten). Auswechseln der LED-Beleuchtung • Wenn eines der Lichter defekt ist, muss die gesamte Beleuchtung ausgetauscht werden.
- Page 22 Lösen Sie die 8 Schrauben. Setzen Sie die neue LED-Beleuchtung ein. Auswechseln des Aktivkohlefilters • Der Aktivkohlefilter sollte nur dann verwendet werden, wenn Sie das Gerät im Umluftmodus nutzen möchten. • Der Aktivkohlefilter kann nicht gereinigt oder aufbereitet werden, und sollte im Allgemeinen alle 4 Monate gewechselt werden.
-
Page 23: Fehlersuche Und Fehlerbehebung
FEHLERSUCHE UND FEHLERBEHEBUNG Problem Lösung Das Gerät startet nicht. Stellen Sie sicher, dass der Stecker der Dunstabzugshaube in der Steckdose steckt. Überprüfen Sie, ob eine Lüfter- geschwindigkeit ausgewählt wurde. Schlechte Absaugung. Stellen Sie sicher, dass die Lüftergeschwindigkeit den Anforderungen entsprechend eingestellt wurde. -
Page 24: Spezielle Entsorgungshinweise Für Verbraucher In Deutschland
SPEZIELLE ENTSORGUNGSHINWEISE FÜR VERBRAUCHER IN DEUTSCHLAND Entsorgen Sie Ihre Altgeräte fachgerecht. Dadurch wird gewährleistet, dass die Altgeräte umweltgerecht verwertet und negative Auswirkungen auf die Umwelt und menschliche Gesundheit vermieden werden. Bei der Entsorgung sind folgende Regeln zu beachten: • Jeder Verbraucher ist gesetzlich verpflichtet, Elektro- und Elek- tronikaltgeräte (Altgeräte) sowie Batterien und Akkus getrennt vom Hausmüll zu entsorgen. - Page 25 • Bei einem Vertrieb unter Verwendung von Fernkommunikationsmitteln ist die unentgeltliche Abholung am Ort der Abgabe auf Elektro- und Elektronikgeräte der Kategorien 1, 2 und 4 gemäß § 2 Abs. 1 ElektroG, nämlich „Wärmeüberträger“, „Bildschirmgeräte“ (Oberfläche von mehr als 100 cm²) oder „Großgeräte“...
-
Page 26: Hinweise Zur Entsorgung
Importeur für Großbritannien: Berlin Brands Group UK Ltd PO Box 1145 Oxford, OX1 9UW United Kingdom Hiermit erklärt Chal-Tec GmbH, dass der Funkanlagentyp Futurelight Smart der Richtlinie 2014/53/EU entspricht. Der vollständige Text der EU-Konformitätserklärung ist unter der folgenden Internetadresse verfügbar: use.berlin/10038708... - Page 27 Dear customer, Congratulations on purchasing this device. Please read the following instructions carefully and follow them to prevent possible damages. We assume no liability for damage caused by disregard of the instructions and improper use. Scan the QR code to get access to the latest user manual and more product information.
-
Page 28: Product Data Sheet
PRODUCT DATA SHEET Information according to Regulation (EU) No. 65/2014 Measurement and calculation methods according to EN 61591:1997+A1:2006+A2:2 011+A11:2014+A12:2015 Item number 10038708, 10038709, 10038710 Description Symbol Value Unit Annual Energy Consumption AEC hood 60.6 kWh/Year Energy Efficiency class Fluid Dynamic Efficiency FDE hood 16.1 Fluid Dynamic Efficiency class... - Page 29 Information according to Regulation (EU) No. 66/2014 Measurement and calculation methods according to EN 61591:1997+A1:2006+A2:2 011+A11:2014+A12:2015 Item number 10038708, 10038709, 10038710 Description Symbol Value Unit Annual Energy Consumption AEC hood 60.6 kWh/Year Time increase factor Fluid Dynamic Efficiency FDE hood 16.1 Energy Efficiency Index EEI hood...
-
Page 30: Safety Instructions
SAFETY INSTRUCTIONS • Read all instructions carefully before use and keep the user manual in a safe place for future reference. • The installation work may only be carried out by an electrician or a qualified person. Before using the cooker hood, make sure that the voltage (V) and frequency (Hz) indicated on the cooker hood correspond to the voltage and frequency of the power supply in your household. - Page 31 Important notes on exhaust air operation WARNING Danger of poisoning from recirculated exhaust gases! Do not operate the appliance in extract air mode if it is operated together with a room air-dependent fi replace and suffi cient air circulation is not guaranteed. Room air-dependent fi replaces such as gas, oil, wood or coal heaters, boilers or instantaneous water heaters draw the air from the room and lead it outdoors through an exhaust pipe or chimney.
-
Page 32: Device Overview And Individual Parts
DEVICE OVERVIEW AND INDIVIDUAL PARTS Dowel (x4) Screws ST4.8x40 (x4) Screws M4x8 (x6) Rope holder (x4) Rope protection (x4) Screws M4x6 (x4) M4x10 screws (x2) Wire clamp (x4) Magnet (x2) Ceiling mount Wiring plate Decorative panel Wire ropes Housing Activated carbon filter Grease filter For installation you will also need: •... -
Page 33: Installation
INSTALLATION Before installation • Remove all the protective film and take out the filters before installing the cooker hood. Location • The extractor hood must be fitted to the ceiling. Keep a minimum distance of 60 cm from electric hobs and 65 cm from gas burners. Dimensions: Min 600mm Min 650mm... - Page 34 Minimum distances (between cooker hood and top of cooker) Cooker type Minimum distance Maximum distance 650 mm 800 mm Electric 600 mm 800 mm Note: If a larger minimum distance for cooker hoods is specified in the operating instructions of the cooker, this minimum distance and not the one mentioned above must be observed.
- Page 35 Drill 4 holes with a diameter of 10 mm into the ceiling and then insert the dowels into the holes. Screws Adjust the 4 screws on the bracket so that they protrude 2 mm. Pull the power cable through the hole in the bracket and fi x the bracket with four screws ST4.8.
- Page 36 Measure the length of the wire ropes (L) and refer to the dimension given under 'Dimensions': L = X-Y-26 (mm). Mark a line on the wire ropes. Note: The extractor hood should be installed at a height of 65-80 cm (gas) or 60-80 cm (electric cooker) above the starting point of the hob.
- Page 37 Magnets Guide the 4 wire ropes through the holes in the decorative panel and attach them to the mounting bracket with 2 magnets. Decorative panel Note: The opening for the power cable in the decorative panel must be Opening positioned as shown in the for the illustration.
- Page 38 M4 8 Fixing clamps for the wire ropes Fasten the wire ropes with screws to the 4 small fastening clips.
- Page 39 loosen tighten If the extractor hood does not hang straight, adjust it by slightly adjusting the 4 screws as shown in the illustration. Wire the cables according to the marking of the wires (L, N & earth). Note: This installation step MUST be carried out by a qualifi ed electrician! WARNING...
- Page 40 Magnets Stow all the wiring in the mounting bracket. Then attach the other two magnets to the bracket. A total of 4 magnets are required to securely fasten the decorative panel. Finally, slide the decorative panel up to the mounting bracket.
-
Page 41: Operation
OPERATION • The best results can be achieved if you use the appliance on a low setting in normal conditions and on a high setting for concentrated odours. • Switch on the cooker hood for a few minutes before you start cooking. •... -
Page 42: Device Control By Smartphone
Make sure your smartphone is connected to the same WiFi network that your Klarstein device is to be connected to. Open the Klarstein app. Sign in to your account. If you do not have an account, sign up in the Klarstein app. Follow the instructions from the app. -
Page 43: Cleaning And Maintenance
Troubleshooting connection problems If your Klarstein device cannot be found in the WLAN, check the following: • Is the device plugged in? • Is the WiFi feature of my phone enabled? • Is the WiFi function of the Klarstein device activated? (Follow the instructions in the app) •... - Page 44 Removing the grease filter Open the light panel, push the grease filter upwards and then pull it out downwards. Cleaning the grease filters Note: The metal grease filters must be removed and cleaned at least every 4 weeks, either by hand or in the dishwasher. •...
- Page 45 Cleaning the inner casing WARNING Electrocution hazard! Switch off the unit before cleaning the inner casing. • Clean the inner casing with warm water and a grease cleaner (never use aggressive cleaning agents, scouring powder or steel brushes). Replacing the LED lighting •...
- Page 46 Loosen the 8 screws. Insert the new LED lighting. Replacing the activated carbon filter • The activated carbon filter should only be used if you want to use the unit in recirculation mode. • The activated carbon filter cannot be cleaned or reprocessed and should generally be changed every 4 months.
-
Page 47: Troubleshooting
TROUBLESHOOTING Problem Solution The appliance does not work. Make sure that the plug of the cooker hood is inserted in the socket. Check whether a fan speed has been selected. Poor suction. Make sure that the fan speed has been set according to the requirements. -
Page 48: Disposal Considerations
Oxford, OX1 9UW United Kingdom Hereby, Chal-Tec GmbH declares that the radio equipment type Futurelight Smart is in compliance with Directive 2014/53/ EU. The full text of the EU declaration of conformity is available at the following internet address: use.berlin/10038708... - Page 49 Cher client, chère cliente, Toutes nos félicitations pour l’acquisition de ce nouvel appareil. Lisez attentivement les indications suivantes et suivez-les pour éviter d'éventuels dommages. Nous ne saurions être tenus pour responsables des dommages dus au non-respect des consignes et à la mauvaise utilisation de l’appareil.
-
Page 50: Consignes De Sécurité
CONSIGNES DE SÉCURITÉ • Lisez attentivement toutes les consignes avant d'utiliser l'appareil et conservez le mode d'emploi pour vous y référer ultérieurement. • Les travaux de montage ne doivent être effectués que par un électricien ou une personne qualifiée. Avant d'utiliser la hotte, assurez-vous que la tension (V) et la fréquence (Hz) indiquées sur la hotte correspondent à... - Page 51 Remarques importantes pour l'utilisation en extraction d'air MISE EN GARDE Risque d‘intoxication par ré-aspiration de gaz de combustion Ne jamais utiliser la fonction d’extraction de l’appareil en même temps qu’un foyer dépendant de l’air ambiant si un apport suffi sant en air frais n'est pas garanti. Les foyers dépendants de l’air ambiant tels que les systèmes de chauffage au gaz, au fuel, au bois ou au charbon, les chauffe-eaux électriques, les chaudières, extraient l’air de la pièce et le rejette à...
-
Page 52: Aperçu De L'appareil Et Pièces Détachées
APERÇU DE L'APPAREIL ET PIÈCES DÉTACHÉES Chevilles (x4) Vis ST4.8x40 (x4) Vis M4x8 (x6) Support de corde (x4) Corde de sécurité (x4) Vis M4x6 (x4) Vis M4x10 (x2) Serre-câble (x4) Aimant (x2) Support de plafond Platine de câblage Panneau décoratif Câbles métalliques Boîtier Filtre à... -
Page 53: Installation
INSTALLATION Avant l'installation • Retirez tous les films protecteurs et les filtres avant d'installer la hotte aspirante. Emplacement • La hotte aspirante doit être fixée au plafond. Maintenez une distance minimale de 60 cm des plaques électriques et de 65 cm des brûleurs à gaz. Dimensions Min 600mm Min 650mm... - Page 54 Dégagements minimaux (entre la hotte aspirante et le dessus de la cuisi- nière) Type de cuisinière Distance minimale Distance maximale 650 mm 800 mm Électrique 600 mm 800 mm Remarque : Si une distance minimale plus importante pour les hottes aspirantes est spécifiée dans la notice d'utilisation de la cuisinière, cette distance minimale doit être respectée, et non celle mentionnée ci-dessus.
- Page 55 Percez 4 trous d'un diamètre de 10 mm dans le plafond puis insérez les chevilles dans les trous. Ajustez les 4 vis du support de manière à ce qu'elles dépassent de 2 mm. Tirez le câble d'alimentation à travers le trou du support et fi xez le support avec quatre vis ST4.8.
- Page 56 Mesurer la longueur des câbles ( L) et se référer à la dimension donnée sous "Dimensions" : L = X-Y-26 (mm). Tracez une ligne sur les câbles métalliques. Remarque : La hotte aspirante doit être installée à une hauteur de 65-80 cm (gaz) ou 60-80 cm (cuisinière électrique) au-dessus du point de départ de la table de cuisson.
- Page 57 Aimants Guidez les 4 câbles métalliques à travers les trous du panneau décoratif et fixez- les au support de montage avec 2 aimants. Panneau Remarque : L'ouverture décoratif pour le câble d'alimentation dans le panneau décoratif doit Ouverture être positionnée comme pour le indiqué...
- Page 58 M4 8 Supports de montage pour les câbles métalliques Fixez les câbles métalliques aux 4 petits supports de montage avec des vis.
- Page 59 Desserrer Serrer Si la hotte aspirante n'est pas bien droite, redressez-la en ajustant légèrement les 4 vis comme indiqué sur l'illustration Câblez les câbles selon le marquage sur les fi ls (L, N & masse). Remarque : Cette étape d'installation DOIT être effectuée par un électricien qualifi é...
- Page 60 Aimants Rangez tout le câblage dans le support de montage. Fixez ensuite les deux autres aimants au support. Un total de 4 aimants est nécessaire pour une fixation sûre du panneau décoratif. Enfin, faites glisser le panneau décoratif jusqu'au support de montage.
-
Page 61: Fonctionnement
FONCTIONNEMENT • Pour de meilleurs résultats, utilisez l'appareil à un niveau bas dans des conditions normales et à un niveau élevé lorsqu'il y a des odeurs concentrées. • Allumez la hotte quelques minutes avant de commencer la cuisson. • La hotte aspirante doit rester allumée au moins 5 minutes après la cuisson, jusqu'à... -
Page 62: Contrôle De L'appareil Par Smartphone
CONTRÔLE DE L'APPAREIL PAR SMARTPHONE Si vous intégrez votre appareil Klarstein à votre Wi-Fi domestique, vous pouvez le contrôler confortablement à l'aide de l'application Klarstein associée. L'application vous permet non seulement de contrôler l'appareil à distance sur votre smartphone, mais vous donne également accès à des recettes et à d'autres informations. -
Page 63: Nettoyage Et Maintenance
• L'appareil est-il branché ? • Le Wifi est-il activé sur le smartphone ? • Le Wifi est-il activé sur l'appareil Klarstein ? (Suivez les instructions dans l'application.) • Avez-vous saisi correctement le mot de passe Wifi ? • Le routeur, l'appareil Klarstein et le smartphone se trouvent-ils à proximité... - Page 64 Démontage du filtre à graisse Ouvrez le panneau lumineux, poussez le filtre à graisse vers le haut puis tirez-le vers le bas. Nettoyage du filtre à graisse Remarque : Les filtres à graisse métalliques doivent être retirés et nettoyés au moins toutes les 4 semaines, soit à...
- Page 65 Nettoyage du boîtier intérieur MISE EN GARDE Risque d'électrocution ! Éteignez l'appareil avant de nettoyer le boîtier intérieur. • Nettoyez l'intérieur du boîtier avec de l'eau tiède et un dégraissant (n'utilisez jamais de produits de nettoyage agressifs, de poudre à récurer ou de brosses en acier).
- Page 66 Desserrez les 8 vis. Insérez le nouvel éclairage LED. Remplacement du filtre à charbon actif • Le filtre à charbon actif ne doit être utilisé que si vous souhaitez utiliser l'appareil en mode recirculation. • Le filtre à charbon actif ne se nettoie pas ni ne se retraite et doit généralement être changé...
-
Page 67: Identification Et Résolution Des Problèmes
IDENTIFICATION ET RÉSOLUTION DES PROBLÈMES Problème Solution L'appareil ne démarre pas. Vérifiez que la fiche de la hotte est bien branchée dans la prise. Vérifiez qu'une vitesse de ventilateur a été sélectionnée. Faible aspiration Assurez-vous que la vitesse du ventilateur est réglée conformément aux exigences. -
Page 68: Informations Sur Le Recyclage
Oxford, OX1 9UW United Kingdom Le soussigné, Chal-Tec GmbH, déclare que l’équipement radioélectrique du type Futurelight Smart est conforme à la directive 2014/53/UE. Le texte complet de la déclaration UE de conformité est disponible à l’adresse internet suivante : use.berlin/10038708... - Page 69 Estimado cliente: Le felicitamos por la adquisición de este producto. Lea atentamente el siguiente manual y siga cuidadosamente las instrucciones de uso con el fin de evitar posibles daños. La empresa no se responsabiliza de los daños ocasionados por un uso indebido del producto o por haber desatendido las indicaciones de seguridad.
-
Page 70: Indicaciones De Seguridad
INDICACIONES DE SEGURIDAD • Lea atentamente todas las indicaciones antes de utilizar el aparato y conserve este manual de instrucciones para consultas posteriores. • Los trabajos de instalación sólo pueden ser realizados por un electricista cualificado o una persona cualificada. Antes de utilizar la campana extractora, asegúrese de que la tensión (V) y la frecuencia (Hz) indicadas en la campana extractora se corresponden con la tensión y la frecuencia de la red eléctrica de su hogar. - Page 71 Indicaciones importantes sobre la función de extracción de aire ADVERTENCIA ¡Peligro de intoxicación por la recirculación de gases! No utilice el aparato en modo de extracción de aire si lo utiliza junto a chimenea que depende del aire ambiente ya que no se garantiza una circulación sufi ciente de aire.
-
Page 72: Vista General Y Piezas Individuales
VISTA GENERAL Y PIEZAS INDIVIDUALES Tacos (4) Tornillos ST4.8x40 (4) Tornillos M4x8 (6) Sujetacables (4) Seguro de cables (4) Tornillos M4x6 (4) Tornillos M4x10 (2) Ganchos de alambre (4) Imán (2) Soporte de techo Placa de conexiones Placa decorativa Cable de acero Carcasa Filtro de carbón activo Filtro de grasa... -
Page 73: Instalación
INSTALACIÓN Antes de la instalación • Retire la película protectora y saque los filtros antes de instalar la campana extractora. Ubicación • Instale la campana extractora en el techo. Conserve una distancia mínima de 60 cm de las placas eléctricas y de 65 cm de los quemadores de gas. Dimensiones Min 600mm Min 650mm... - Page 74 Distancias mínimas (entre la campana extractora y la parte superior de la cocina) Tipo de cocina Distancia mínima Distancia máxima 650 mm 800 mm Eléctrica 600 mm 800 mm Nota: si en el manual de instrucciones de la cocina se especifica una distancia mínima mayor para las campanas extractoras, deberá...
- Page 75 Perfore 4 orifi cios con un diámetro de 10 mm en el techo y luego inserte los tacos en los orifi cios. Tornillos Atornille los 4 tornillos del soporte de forma que sobresalgan 2 mm. Pase el cable de alimentación por el orifi cio del soporte y fi je el soporte con 4 tornillos ST4.8.
- Page 76 Mida la longitud de los cables de acero (L) y refiérase a la medida indicada en «Dimensiones»: L = X-Y-26 (mm). Marque una línea en los cables de acero. Nota: la ampana extractora debe instalarse a una altura de 65-80 cm (cocina de gas) o 60-80 cm (placa eléctrica) por encima del punto de partida de la placa...
- Page 77 Imán Pase los 4 cables de acero por los orificios de la placa decorativa y fíjelos al soporte de montaje con 2 imanes. Placa Nota: la abertura para el decorativa cable de alimentación en la placa decorativa debe colocarse como se muestra Abertura en la imagen.
- Page 78 M4 8 Clips de sujeción para los cables de acero Fije los cables de acero a los 4 pequeños clips de sujeción con la ayuda de los tornillos.
- Page 79 afl ojar apretar Si la campana no cuelga recta, adáptela ajustando ligeramente los 4 tornillos como se muestra en la imagen. Conecte los cables según la marca de los mismos (L, N y tierra). Nota: ¡solamente un electricista cualifi cado DEBE realizar este paso de la instalación! ADVERTENCIA ¡Riesgo de descarga eléctrica! Este aparato cuenta con el grado...
- Page 80 Imán Guarde todo el cableado en el soporte de montaje. A continuación, fije los otros dos imanes al soporte de montaje. Necesita un total de 4 imanes para montar de forma segura la placa decorativa. Por último, deslice la placa decorativa hasta el soporte de montaje.
-
Page 81: Puesta En Marcha
PUESTA EN MARCHA • Para disfrutar de una mayor eficacia, utilice el aparato en el nivel más bajo en condiciones normales y en el nivel más alto en caso de olores concentrados. • Encienda la campana extractora unos minutos antes de empezar a cocinar. •... -
Page 82: Control Del Aparato A Través Del Teléfono Inteligente
CONTROL DEL APARATO A TRAVÉS DEL TELÉFONO INTELIGENTE Si conecta su aparato Klarstein a la red wifi de su casa, podrá manejarlo cómodamente a través de la aplicación «Klarstein». La aplicación no solo permite controlar el aparato a distancia a través del teléfono inteligente, sino que también da acceso a recetas y a más información. -
Page 83: Limpieza Y Mantenimiento
Solución de problemas de conexión Si su aparato Klarstein no se conecta a la red wifi, compruebe lo siguiente: • ¿Está el aparato enchufado? • ¿Está activada la función wifi del teléfono inteligente? • ¿Está activada la función wifi del aparato? (Siga las instrucciones de la aplicación.) - Page 84 Desmontaje del filtro de grasa Abra el panel de la lámpara, empuje el filtro de grasa hacia arriba y luego tire de él hacia abajo. Limpieza del filtro de grasa Nota: retire y limpie el filtro de grasa metálico al menos cada 4 semanas, ya sea a mano o en el lavavajillas.
- Page 85 Limpieza de la carcasa interior ADVERTENCIA ¡Riesgo de descarga eléctrica! Apague el aparato antes de limpiar la carcasa interior. • Limpie la carcasa interior con agua tibia y un limpiador antigrasa (no utilice nunca productos de limpieza agresivos, polvos limpiadores o cepillos de acero).
- Page 86 Afloje los 8 tornillos. Inserte la nueva iluminación led. Cambio del filtro de carbón activo • Utilice el filtro de carbón activo únicamente si desea usar el aparato en modo de recirculación de aire. • El filtro de carbón activo no se puede limpiar ni reprocesar y, por lo general, debe cambiarse cada 4 meses.
-
Page 87: Detección Y Reparación De Anomalías
DETECCIÓN Y REPARACIÓN DE ANOMALÍAS Anomalía Solución El aparato no se enciende. Compruebe que el cable de alimentación de la campana está conectado correctamente a la toma de corriente. Compruebe que ha seleccionado una velocidad del ventilador. Extracción deficiente. Asegúrese de que ha ajustado la velocidad del ventilador de acuerdo con las necesidades. -
Page 88: Indicaciones Sobre La Retirada Del Aparato
Oxford, OX1 9UW United Kingdom Por la presente, Chal-Tec GmbH declara que el tipo de equipo radioeléctrico Futurelight Smart es conforme con la Directiva 2014/53/UE. El texto completo de la declaración UE de conformidad está disponible en la dirección Internet... - Page 89 Gentile cliente, la ringraziamo per l'acquisto del dispositivo. La preghiamo di leggere attentamente le seguenti istruzioni per l’uso e di seguirle per evitare possibili danni. Non ci assumiamo alcuna responsabilità per danni scaturiti da una mancata osservanza delle avvertenze di sicurezza e da un uso improprio del dispositivo.
-
Page 90: Avvertenze Di Sicurezza
AVVERTENZE DI SICUREZZA • Leggere attentamente tutte le istruzioni prima dell'uso e conservare il manuale per consultazioni future. • Il montaggio può essere eseguito solo da un tecnico qualificato. Prima di utilizzare la cappa aspirante, accertarsi che la tensione (V) e la frequenza (Hz) indicate corrispondano alla tensione (V) e alla frequenza (Hz) domestiche. - Page 91 Note importanti sulla modalità di scarico dell'aria AVVERTENZA pericolo di intossicazione da gas di scarico riaspirati! Non utilizzare il dispositivo in funzione di scarico mentre è attivo un impianto di riscaldamento che sfrutta l'aria dell'ambiente per il funzionamento e se non è presente una ventilazione suffi ciente. Gli impianti di riscaldamento che sfruttano l'aria dell'ambiente (ad es.
-
Page 92: Descrizione Del Dispositivo E Singoli Componenti
DESCRIZIONE DEL DISPOSITIVO E SINGOLI COMPONENTI Tasselli (x4) Viti ST4.8x40 (x4) Viti M4x8 (x6) Supporti per cavi (x4) Sicure per cavi (x4) Viti M4x6 (x4) Viti M4x10 (x2) Morsetti per cavi (x4) Magneti (x2) Supporto a soffitto Pannello di cablaggio Pannello decorativo Cavi di sospensione Alloggiamento... -
Page 93: Installazione
INSTALLAZIONE Prima dell'installazione • Rimuovere tutta la pellicola protettiva e togliere il filtro prima di installare la cappa. Luogo • La cappa deve essere montata al soffitto. Tenere una distanza minima di 60 cm da fornelli elettrici e di 65 cm da fornelli a gas. Dimensioni Min 600mm Min 650mm... - Page 94 Distanze minime (tra cappa e lato superiore del piano cottura). Tipo di fornello Distanza minima Distanza massima 650 mm 800 mm Elettrico 600 mm 800 mm Nota: se nel manuale d'uso del piano cottura è indicata una distanza minima maggiore per le cappe aspiranti, è necessario rispettare questa distanza minima e non quella citata in precedenza.
- Page 95 Realizzare 4 fori con un diametro di 10 mm sul soffi tto e inserirci i tasselli. Viti Mettere le 4 viti sul supporto, in modo che sporgano di 2 Far passare il cavo di alimentazione attraverso il foro sul supporto e fi ssare il supporto con quattro viti ST4.8.
- Page 96 Misurare la lunghezza dei cavi di sospensione (L) e fare riferimento alla misura indicata al punto "Dimensioni": L = X-Y-26 (mm). Segnare una linea sui cavi di sospensione. Nota: la cappa aspirante deve essere montata a un'altezza di 65-80 cm (gas) o 60-80 cm (elettrico) dal punto in cui inizia il piano di cottura.
- Page 97 Magneti Far passare i 4 cavi di sospensione tra i fori del pannello decorativo e fissarli al supporto di montaggio con 2 magneti. Pannello decorativo Nota: l'apertura per il cavo di alimentazione sul pannello decorativo deve Apertura essere posizionata come per il mostrato in immagine.
- Page 98 M4 8 Morsetti di fissaggio per i cavi di sospensione Fissare i cavi di sospensione ai 4 piccoli morsetti con le viti.
- Page 99 allentare stringere Se la cappa non è diritta, regolarla con le 4 viti, come mostrato in immagine. Collegare i cavi rispettando i relativi simboli (F, N & messa a terra) Nota: questo passaggio dell'installazione DEVE essere realizzato da un elettricista qualifi cato! AVVERTENZA Pericolo di scossa elettrica! Questo è...
- Page 100 Magneti Riporre l'intero cablaggio nel supporto di montaggio. Fissare poi gli altri due magneti al supporto. Per un fissaggio sicuro del pannello decorativo sono necessari in totale 4 magneti. Spingere poi il pannello decorativo verso l'alto, fino al supporto di montaggio.
-
Page 101: Utilizzo
UTILIZZO • Per ottenere i migliori risultati, utilizzare il dispositivo al livello di potenza minimo in condizioni normali e ai massimi regimi in caso di odori concentrati. • Accendere la cappa aspirante qualche minuto prima di iniziare a cucinare. • La cappa dovrebbe essere lasciata in funzione per 5 minuti al termine della cottura, fino a quando sono scomparsi tutti gli odori. -
Page 102: Controllo Del Dispositivo Con Smartphone
CONTROLLO DEL DISPOSITIVO CON SMARTPHONE Se si collega il dispositivo Klarstein con la rete Wi-Fi di casa, è possibile utilizzarlo comodamente con l’apposita app di Klarstein. La app non permette solo di controllare il dispositivo a distanza con lo smartphone, ma offre anche accesso a utili informazioni. -
Page 103: Pulizia E Manutenzione
Correzione degli errori in caso di problemi di connessione Se non è possibile trovare il dispositivo Klarstein nella rete Wi-Fi, controllare i seguenti punti: • La spina del dispositivo è collegata alla presa elettrica? • La funzione Wi-Fi dello smartphone è attiva? •... - Page 104 Rimuovere il filtro antigrasso Aprire il pannello dell'illuminazione, spingere il filtro verso l'alto e tirarlo fuori. Pulire i filtri antigrasso Nota: i filtri antigrasso di metallo devono essere rimossi e puliti ogni 4 settimane. Possono essere lavati a mano o in lavastoviglie. •...
- Page 105 Pulire l'alloggiamento interno AVVERTENZA Pericolo di scosse elettriche! Prima di pulire l'alloggiamento interno, spegnere il dispositivo. • Pulire l'alloggiamento interno con acqua calda e uno sgrassante (non usare mai detergenti aggressivi, polveri abrasive o spazzole di acciaio). Sostituire l'illuminazione LED •...
- Page 106 Svitare le 8 viti. Posizionare la nuova illuminazione LED. Sostituire il filtro a carboni attivi • Il filtro ai carboni attivi deve essere utilizzato solo quando il dispositivo è in funzione di ricircolo. • Il filtro ai carboni attivi non può essere pulito o riattivato e deve essere sostituito generalmente ogni 4 mesi.
-
Page 107: Ricerca E Correzione Degli Errori
RICERCA E CORREZIONE DEGLI ERRORI Problema Soluzione Il dispositivo non si avvia. Assicurarsi che la spina della cappa sia inserita nella presa elettrica. Controllare se è stata selezionata una velocità della ventola. Cattiva aspirazione. Assicurarsi che la velocità della ventola selezionata sia adatta alle necessità. -
Page 108: Avviso Di Smaltimento
PO Box 1145 Oxford, OX1 9UW United Kingdom Il fabbricante, Chal-Tec GmbH, dichiara che il tipo di apparecchiatura radio Futurelight Smart è conforme alla direttiva 2014/53/UE. Il testo completo della dichiarazione di conformità UE è disponibile al seguente indirizzo Internet: use.berlin/10038708...
Need help?
Do you have a question about the FUTURELIGHT SMART and is the answer not in the manual?
Questions and answers