
Subscribe to Our Youtube Channel
Related Manuals for Klarstein HEKTOR ECO


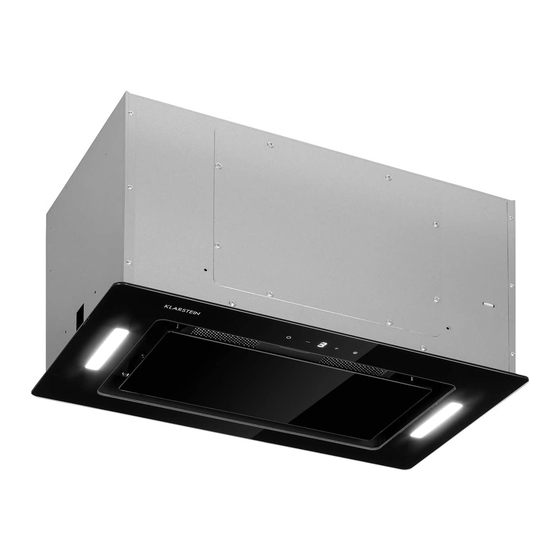
Summary of Contents for Klarstein HEKTOR ECO
- Page 1 HEKTOR ECO Dunstabzugshaube Range Hood Campana extractora Hotte aspirante Cappa aspirante 10034864 10034865 www.klarstein.com...
-
Page 3: Table Of Contents
Sehr geehrter Kunde, wir gratulieren Ihnen zum Erwerb Ihres Gerätes. Lesen Sie die folgenden Hinweise sorgfältig durch und befolgen Sie diese, um möglichen Schäden vorzubeugen. Für Schäden, die durch Missachtung der Hinweise und unsachgemäßen Gebrauch entstehen, übernehmen wir keine Haftung. Scannen Sie den folgenden QR-Code, um Zugriff auf die aktuellste Bedienungsanleitung und weitere Informationen rund um das Produkt zu erhalten. -
Page 4: Sicherheitshinweise
SICHERHEITSHINWEISE • Lesen Sie sich alle Hinweise vor der Benutzung sorgfältig durch und bewahren Sie die Bedienungsanleitung zum späteren Nachschlagen gut auf. • Die Montagearbeiten dürfen nur von einer Elektrofachkraft oder einer qualifizierten Person durchgeführt werden. Bevor Sie die Dunstabzugshaube verwenden, stellen Sie sicher, dass die Spannung (V) und die auf der Dunstabzugshaube angegebene Frequenz (Hz) der Spannung und Frequenz der Stromversorgung in Ihrem Haushalt entsprechen. - Page 5 Wichtige Hinweise zum Abluftbetrieb WARNUNG Vergiftungsgefahr durch zurückgesaugte Abgase! Betreiben Sie das Gerät nicht im Abluftbetrieb, wenn es zusammen mit einer raumluftabhängigen Feuerstätte betrieben wird und keine ausreichende Luftzirkulation garantiert wird. Raumluftabhängige Feuerstätten wie Gas-, Öl-, Holz- oder Kohleheizungen, Boiler oder Durchlauferhitzer beziehen die Luft aus dem Raum und führen sie durch ein Abluftrohr oder einen Kamin ins Freie.
-
Page 6: Installation
INSTALLATION Die Dunstabzugshaube sollte in einem Sägen Sie ein 500 (700)*275 mm Abstand von 65-75 cm (26-30 Zoll) großes Loch in die Unterseite des über der Kochfläche platziert werden, Hängeschranks. Achten Sie darauf, um eine optimale Wirkung zu erzielen. dass die Lochkante zum Schrankrand mindestens 35 mm Abstand hat. - Page 7 Schrauben im Uhrzeigersinn anziehen Setzen Sie die Haube in das Schrankgehäuse ein und ziehen Sie die Schrauben mit einem Schraubenzieher an. Vergewissern Sie sich, dass die Haube fest sitzt. Schließen Sie den Lichtdraht an und montieren Sie die äußere Glasrahmenplatte mit Schrauben.
-
Page 8: Aktivkohlefilter Einbauen (Optional)
AKTIVKOHLEFILTER EINBAUEN (OPTIONAL) Hinweis: Zu dieser Dunstabzugshaube können Sie unter der Artikelnummer 10032843 zusätzlich einen Aktivkohlefilter erwerben. Besuchen Sie dafür unsere Webseite: www.elektronik-star.de Mit einem Aktivkohlefilter lassen sich Um den Filter installieren zu können, bei innenentlüfteten Abzugshauben müssen sie zuerst den Fettfilter entfernen. unangenehme Essensgerüche aus der Drücken Sie auf den Verschluss und Luft filtern. -
Page 9: Bedienfeld Und Tastenfunktionen
BEDIENFELD UND TASTENFUNKTIONEN Drücken Sie auf die Taste, um die Dunstabzugshaube ein- oder auszuschalten. Drücken Sie im eingeschalteten Zustand auf die Taste, um die Motorgeschwindigkeit zu verringern. Drücken Sie im eingeschalteten Zustand auf die Taste, um die Motorgeschwindigkeit zu erhöhen. Drücken Sie während der Motor läuft oder aus ist 3 Sekunden lang auf die Taste. -
Page 10: Reinigung Und Wartung
REINIGUNG UND WARTUNG Schalten Sie die Dunstabzugshaube vor der Reinigung und Wartung aus und ziehen Sie den Stecker aus der Steckdose. Die Außenflächen sind anfällig für Kratzer und Flecken. Benutzen Sie daher zur Reinigung keine Scheuermittel und wischen Sie Rückstände von alkalischen oder saure Substanzen (Zitronensaft, Essig) nach der Reinigung umgehend weg. -
Page 11: Fehlerbehebung 1
FEHLERBEHEBUNG Fehler Mögliche Ursache Lösung Das Licht ist an, aber der Die Lüftung ist blockiert. Entfernen Sie die Motor läuft nicht. Blockade. Der Kondensator ist Lassen Sie den kaputt. Kondensator ersetzen. Der Motor ist kaputt. Lassen Sie den Motor ersetzen. Der Motor riecht Lassen Sie den Motor merkwürdig. -
Page 12: Produktdatenblatt
PRODUKTDATENBLATT Angaben nach Verordnung (EU) Nr. 65/2014 Mess- und Berechnungsmethoden nach EN 61591:1997+A1:2006+A2:201 1+A1 1:201 4+A12:2015 Artikelnummer 10034864, 10034865 Bezeichnung Symbol Wert Einheit Jährlicher Energieverbrauch 47,0 kWh/Jahr hood Energieeffizienzklasse fluiddynamische Effizienz 24,7 hood Klasse für die fluiddynamische Effizienz Beleuchtungseffizienz 32,3 Lux/W hood Beleuchtungseffizienzklasse... - Page 13 Angaben nach Verordnung (EU) Nr. 66/2014 Mess- und Berechnungsmethoden nach EN 61591:1997+A1:2006+A2:201 1+A1 1:201 4+A12:2015 Artikelnummer 10034864, 10034865 Bezeichnung Symbol Wert Einheit Jährlicher Energieverbrauch 47,0 kWh/Jahr hood Zeitverlängerungsfaktor Fluiddynamische Effizienz 24,7 hood Energieeffizienzindex 60,3 hood Gemessener Luftvolumenstrom im 268,5 m³/h Bestpunkt Gemessener Luftdruck im Bestpunkt Maximaler Luftstrom...
-
Page 14: Hinweise Zum Umweltschutz
HINWEISE ZUM UMWELTSCHUTZ • Achten Sie während des Kochens auf eine ausreichende Luftzufuhr, damit die Dunstabzugshaube effizient und mit einem geringen Betriebsgeräusch arbeiten kann. • Passen Sie die Gebläsedrehzahl an die beim Kochen entstehende Dampfmenge an. Verwenden Sie den Intensivmodus nur bei Bedarf. Je niedriger die Gebläsedrehzahl ist, desto weniger Energie wird verbraucht. - Page 15 Dear Customer, Congratulations on purchasing this device. Please read the following instructions carefully and follow them to prevent possible damages. We assume no liability for damage caused by disregard of the instructions and improper use. Scan the QR code to get access to the latest user manual and more product information.
-
Page 16: Safety Instructions
SAFETY INSTRUCTIONS • Thank you for purchasing this cooker hood. Please read the instruction manual carefully before you use the cooker hood, and keep it in a safe place. • The installation work must be carried out by a qualified electrician or competent person. - Page 17 Important notes about the extraction mode WARNING Risk of poisoning from exhaust gases sucked back. Never operate the device in extraction mode simultaneously with an open flue appliance when there is not adequate airflow guaranteed. Open fl ue combustion equipment (for example, gas, oil, wood or coal-fi red heaters, tankless water heaters, water heaters) pulls combustion air from the room and runs it through an exhaust pipe or chimney to the outside.
-
Page 18: Installation
INSTALLATION The cooker hood should be placed Saw a 500 (700)*275 mm hole in the 65-75 cm (26-30 inches) above the underside of the wall cabinet. Make sure cooking surface for optimum effect. that the edge of the hole is at least 35 mm from the edge of the cabinet. - Page 19 Tighten screws clockwise Insert the cover into the cabinet housing and tighten the screws with a screwdriver. Make sure the hood is firmly seated. Connect the light wire and mount the outer glass frame plate with screws. Light Replacement Use screw driver to undo 4 screws from the glass, disconnect the wire and take out the glass,undo the screw on lamp bracket and change lamp.
-
Page 20: Installing A Carbon Filter (Optional)
INSTALLING A CARBON FILTER (OPTIONAL) Note: You can also purchase an activated carbon filter for this cooker hood under item number 10032843. Please visit our website: www.hifi-tower.co.uk Activated carbon filter can be used to In order to install the activated carbon trap odours. -
Page 21: Control Panel And Key Functions
CONTROL PANEL AND KEY FUNCTIONS Press the button to turn the cooker hood on or off. When the cooker hood is switched on, press the button to reduce the motor speed. When the hood is on, press the button to increase the motor speed. While the motor is running or off, press the button for 3 seconds. -
Page 22: Cleaning And Maintenance
CLEANING AND MAINTENANCE Turn off the cooker hood before cleaning and maintenance and unplug the appliance from the wall outlet. The exterior surfaces are susceptible to scratches and stains. Therefore, do not use abrasive cleaners and wipe away any alkaline or acidic residue (lemon juice, vinegar) immediately after cleaning. -
Page 23: Troubleshooting
TROUBLESHOOTING Fault Possible Cause Solution Light on, but motor does The leaf blocked. Get rid of the blocking. not work. The capacitor damaged. Replace capacitor. The motor jammed Replace motor. bearing damaged. The internal with of motor Replace motor. off or a bad smell from the motor. -
Page 24: Product Data Sheet
PRODUCT DATA SHEET Information according to Regulation (EU) No. 65/2014 Measurement and calculation methods according to EN 61591:1997+A1:2006+A2:20 1 1+A1 1:2014+A12:2015 Item number 10034864, 10034865 Description Symbol Value Unit Annual Energy Consumption 47,0 kWh/Year hood Energy Efficiency class Fluid Dynamic Efficiency 24,7 hood Fluid Dynamic Efficiency class... - Page 25 Information according to Regulation (EU) No. 66/2014 Measurement and calculation methods according to EN 61591:1997+A1:2006+A2:20 1 1+A1 1:2014+A12:2015 Item number 10034864, 10034865 Description Symbol Value Unit Annual Energy Consumption 47,0 kWh/Year hood Time increase factor Fluid Dynamic Efficiency 24,7 hood Energy Efficiency Index 60,3 hood...
-
Page 26: Notes On Environmental Protection
NOTES ON ENVIRONMENTAL PROTECTION • During cooking, make sure that there is sufficient air supply so that the cooker hood can operate efficiently and with low operating noise. • Adjust the fan speed to the amount of steam produced during cooking. Use the intensive mode only when necessary. - Page 27 Estimado cliente, Le felicitamos por la adquisición de este producto. Lea atentamente las siguientes instrucciones y sígalas para evitar posibles daños. No asumimos ninguna responsabilidad por los daños causados por el incumplimiento de las instrucciones y el uso inadecuado. Escanee el siguiente código QR para obtener acceso a la última guía del usuario y más información sobre el producto.
-
Page 28: Indicaciones De Seguridad
INDICACIONES DE SEGURIDAD • Lea atentamente todas las indicaciones y conserve este manual para consultas posteriores. • Los trabajos de montaje deben ser realizados solamente por un electricista u otro profesional. Antes de utilizar la campana extractora, asegúrese de que la tensión (V) y la frecuencia indicada en la campana extractora (Hz) coinciden con la tensión (V) y frecuencia (Hz) de su suministro eléctrico. - Page 29 Notas importantes acerca del modo de extracción ADVERTENCIA Peligro de muerte, riesgo de intoxicación provocado por gases en combustión aspirados. Nunca ponga en funcionamiento la función de extracción simultáneamente con un dispositivo que genere calor en una estancia estanca si no se ha garantizado una ventilación sufi ciente.
-
Page 30: Instalación
INSTALACIÓN La campana extractora debe colocarse Hizo un agujero de 500 (700)*275 mm a una distancia de 65-75 cm (26-30 en el fondo del armario de la pared. pulgadas) sobre la superficie de Asegúrate de que el borde del agujero cocción para un efecto óptimo. - Page 31 Apriete los tornillos en el sentido de las agujas del reloj Inserte la capucha en el armario y apriete los tornillos con un destornillador. Asegúrate de que la capucha esté firmemente en su lugar. Conecta el cable de la luz y monta la placa exterior del marco de vidrio con tornillos.
-
Page 32: Instalación Del Filtro Carbón Activado
INSTALACIÓN DEL FILTRO CARBÓN ACTIVADO Nota: Para esta campana extractora puede adquirir un filtro de carbón activo con el número de artículo 10032843. Para ello, visite nuestra página web: www.elektronik-star.es Con un filtro de carbón activado Para poder instalar el filtro, primero instalado en las campanas con debe quitar el filtro de grasa. -
Page 33: Panel De Control Y Funciones De Seguridad
PANEL DE CONTROL Y FUNCIONES DE SEGURIDAD Presione el botón para encender o apagar la campana extractora. Presiona el botón cuando la campana está encendida para reducir la velocidad del motor. Presiona el botón mientras la campana está encendida para aumentar la velocidad del motor. -
Page 34: Limpieza Y Mantenimiento
LIMPIEZA Y MANTENIMIENTO Antes de limpiar y mantener la campana extractora, apáguela y desenchufe el aparato de la toma de corriente. Las superficies exteriores son susceptibles a arañazos y manchas. Por lo tanto, no utilice limpiadores abrasivos y limpie cualquier residuo alcalino o ácido (jugo de limón, vinagre) inmediatamente después de la limpieza. -
Page 35: Solución De Problemas
SOLUCIÓN DE PROBLEMAS Problema Posible causa Solución La luz está encendida La ventilación está Retire aquello que pero el motor no funciona. bloqueada. obstruye la ventilación. El condensador está Sustituya el condensador. averiado. El motor está averiado. Sustituya el motor. El motor genera un olor Sustituya el motor. -
Page 36: Ficha Técnica Del Producto
FICHA TÉCNICA DEL PRODUCTO Información según el Reglamento (UE) nº 65/2014 Métodos de medición y cálculo según EN 61591:1997+A1:2006+A2:201 1+A1 1:2014 +A12:2015 Número de artículo 10034864, 10034865 Descripción Símbolo Valor Unidad Consumo anual de energía 47,0 kWh/Año hood Clase de eficiencia energética eficiencia fluidodinámica 24,7 hood... - Page 37 Datos según el Reglamento (UE) nº 66/2014 Métodos de medición y cálculo según EN 61591:1997+A1:2006+A2:201 1+A1 1:2014 +A12:2015 Número de artículo 10034864, 10034865 Descripción Símbolo Valor Unidad Consumo anual de energía 47,0 kWh/Año hood Factor de extensión temporal eficiencia fluidodinámica 24,7 hood Índice de eficiencia energética...
-
Page 38: Notas Para Cuidar Del Medio Ambiente
NOTAS PARA CUIDAR DEL MEDIO AMBIENTE • Durante la cocción, asegúrese de que haya un flujo de aire suficiente para que la campana extractora funcione eficazmente y con poco ruido de funcionamiento. • Ajuste la velocidad del ventilador a la cantidad de vapor producida durante la cocción. - Page 39 Chère cliente, cher client, Toutes nos félicitations pour l’acquisition de ce nouvel appareil. Veuillez lire attentivement et respecter les instructions de ce mode d’emploi afin d’éviter d’éventuels dommages. Nous ne saurions être tenus pour responsables des dommages dus au non-respect des consignes et à...
-
Page 40: Consignes De Sécurité
CONSIGNES DE SÉCURITÉ • Lisez attentivement toutes les consignes avant d’utiliser l’appareil et conservez ce mode d’emploi pour vous y référer ultérieurement. • Les travaux de montage doivent être effectués uniquement par électricien professionnel ou un spécialiste. Avant d‘utiliser la hotte aspirante, assurez-vous que la tension (V) et la fréquence indiquée sur la hotte aspirante (Hz) correspondent à... - Page 41 Remarques importantes concernant le mode d‘extraction MISE EN GARDE Danger de mort, risques d‘intoxication ! Par la ré-aspiration de gaz de combustion. Ne jamais utiliser la fonction d’aspiration de l’appareil en même temps qu’un foyer dépendant de l’air ambiant si l’air frais est insuffi sant.
-
Page 42: Installation
INSTALLATION La hotte aspirante doit être placée à une Sciez un trou de 500 (700) x 275 mm distance de 65-75 cm (26-30 pouces) au bas de l'élément suspendu. Assurez- au-dessus de la surface de cuisson afin vous que le bord du trou est à au moins d'obtenir un effet optimal. - Page 43 Serrez les vis dans le sens des aiguilles d‘une montre Insérez la hotte dans l‘élément suspendu et serrez les vis avec un tournevis. Assurez- vous que la hotte est bien serrée. Connectez le câble d‘éclairage et montez la plaque de cadre en verre externe avec des vis. Remplacement des ampoules Utilisez le tournevis pour desserrer les 4 vis de la vitre, déconnectez le câble et retirez la vitre.
-
Page 44: Installation Du Filtre À Charbon Actif
INSTALLATION DU FILTRE À CHARBON ACTIF Remarque : Vous pouvez également acheter un filtre à charbon actif pour cette hotte aspirante sous le numéro d‘article 10032843. Pour cela, consultez notre site Web : www.elektronik-star.fr Le filtre à charbon actif permet à la Pour installer le filtre, vous devez hotte de filtrer et d'éliminer les odeurs d'abord démonter le filtre à... -
Page 45: Panneau De Commande Et Fonctions Des Touches
PANNEAU DE COMMANDE ET FONCTIONS DES TOUCHES Appuyez sur la touche pour allumer ou éteindre la hotte. L'appareil étant allumé, appuyez sur la touche pour réduire la vitesse du moteur L'appareil étant allumé, appuyez sur la touche pour augmenter la vitesse du moteur. -
Page 46: Nettoyage Et Maintenance
NETTOYAGE ET MAINTENANCE Éteignez la hotte avant le nettoyage et l’entretien, puis débranchez la fiche de la prise. Les surfaces extérieures sont sujettes aux rayures et aux taches. Par conséquent, n‘utilisez pas d‘abrasifs pour le nettoyage et essuyez immédiatement les restes de substances alcalines ou acides (jus de citron, vinaigre) après le nettoyage. -
Page 47: Résolution Des Problèmes
RÉSOLUTION DES PROBLÈMES Problème Cause possible Solution La lumière est allumée La bouche d’aération est Éliminer la source du mais le moteur ne bloquée. blocage. fonctionne pas. Le condensateur est cassé. Faire remplacer le condensateur. Le moteur est cassé. Faire remplacer le moteur. Le moteur dégage une Faire remplacer le moteur. -
Page 48: Fiche De Données Produit
FICHE DE DONNÉES PRODUIT Informations selon le règlement (UE) n ° 65/2014 Méthodes de mesure et de calcul selon EN 61591:1997+A1:2006+A2:201 1+A1 1:201 4+A12:2015 Numéro d‘article 10034864, 10034865 Description Symbole Valeur Unité Consommation annuelle d'énergie 47,0 kWh/Année hood Classe d'efficacité énergétique Efficacité... - Page 49 Informations selon le règlement (UE) n ° 66/2014 Méthodes de mesure et de calcul selon EN 61591:1997+A1:2006+A2:201 1+A1 1:201 4+A12:2015 Numéro d‘article 10034864, 10034865 Description Symbole Valeur Unité Consommation annuelle d'énergie 47,0 kWh/Année hood Facteur d'extension de temps Efficacité dynamique des fluides 24,7 hood Indice d'efficacité...
-
Page 50: Informations Sur La Protection De L'environnement
INFORMATIONS SUR LA PROTECTION DE L‘ENVIRONNEMENT • Assurez-vous qu‘il y a une ventilation suffisante pendant la cuisson pour que la hotte aspirante puisse fonctionner efficacement et avec un faible niveau sonore. • Ajustez la vitesse du ventilateur à la quantité de vapeur produite pendant la cuisson. - Page 51 Gentile cliente, La ringraziamo per aver acquistato il dispositivo. La preghiamo di leggere attentamente le seguenti istruzioni per l’uso e di seguirle per evitare possibili danni. Non ci assumiamo alcuna responsabilità per danni scaturiti da una mancata osservazione delle avvertenze di sicurezza e da un uso improprio del dispositivo.
-
Page 52: Avvertenze Di Sicurezza
AVVERTENZE DI SICUREZZA • Leggere attentamente tutte le istruzioni prima dell´uso e conservare il manuale per consultazioni future. • Il montaggio può essere eseguito solo da un tecnico qualificato. Prima di utilizzare la cappa aspirante, accertarsi che la tensione (V) e la frequenza (Hz) indicate corrispondano alla tensione (V) e alla frequenza (Hz) domestiche. - Page 53 Note importanti circa la modalità di estrazione AVVERTENZA Pericolo di morte, pericolo di intossicazione da gas di scarico! Non azionare l´apparecchio con funzione di scarico mentre è attivo un impianto di riscaldamento che utilizza l´aria ambiente, se l´areazione non è suffi ciente. Gli impianti di riscaldamento che sfruttano l´aria ambiente (ad es.
-
Page 54: Installazione
INSTALLAZIONE La cappa aspirante deve essere Segare un’apertura di 500 (700)*275 posizionata a una distanza di almeno mm nel lato inferiore del pensile. 65-75 cm (26-30 pollici) dal piano Assicurarsi che il bordo del foro sia cottura per garantire un’efficacia distante di almeno 35 mm dal bordo del ottimale. - Page 55 Stringere le viti in senso orario Posizionare la cappa nell’alloggiamento del mobile e stringere le viti con un cacciavite. Assicurarsi che la cappa sia ben fissata. Collegare il cavo della luce e montare il pannello esterno del telaio in vetro con le viti. Come sostituire le lampadine Con il cacciavite svitare le 4 viti dal vetro, scollegare il cavo e togliere il vetro.
-
Page 56: Inserire Il Filtro Ai Carboni Attivi
INSERIRE IL FILTRO AI CARBONI ATTIVI Nota: con questa cappa aspirante è possibile acquistare opzionalmente un filtro ai carboni attivi con il codice articolo 10032843. A tal proposito si prega di visitare il sito web: www.elektronik-star.it Con un filtro ai carboni attivi è possibile Per installare il filtro, è... -
Page 57: Pannello Di Controllo E Funzione Tasti
PANNELLO DI CONTROLLO E FUNZIONE TASTI Premere questo tasto per accendere o spegnere la cappa aspirante. Quando il dispositivo è acceso premere questo tasto per diminuire la velocità del motore. Quando il dispositivo è acceso premere questo tasto per aumentare la velocità... -
Page 58: Limpieza Y Mantenimiento
LIMPIEZA Y MANTENIMIENTO Antes de limpiar y mantener la campana extractora, apáguela y desenchufe el aparato de la toma de corriente. Las superficies exteriores son susceptibles a arañazos y manchas. Por lo tanto, no utilice limpiadores abrasivos y limpie cualquier residuo alcalino o ácido (jugo de limón, vinagre) inmediatamente después de la limpieza. -
Page 59: Solución De Problemas
SOLUCIÓN DE PROBLEMAS Problema Posible causa Solución La luz está encendida La ventilación está Retire aquello que pero el motor no funciona. bloqueada. obstruye la ventilación. El condensador está Sustituya el condensador. averiado. El motor está averiado. Sustituya el motor. El motor genera un olor Sustituya el motor. -
Page 60: Scheda Dati Del Prodotto
SCHEDA DATI DEL PRODOTTO Indicazioni conformi alla direttiva (UE) N° 65/2014 Metodi di misurazione e calcolo conformi a EN 61591:1997+A1:2006+A2:201 1+A1 1: 2014+A12:2015 Numero articolo 10034864, 10034865 Definizione Simbolo Valore Unità Consumo energetico annuale 47,0 kWh/Anno hood Classe di efficienza energetica Efficienza fluidodinamica 24,7 hood... - Page 61 Indicazioni conformi alla direttiva (UE) N° 66/2014 Metodi di misurazione e calcolo conformi a EN 61591:1997+A1:2006+A2:201 1+A1 1: 2014+A12:2015 Numero articolo 10034864, 10034865 Definizione Simbolo Valore Unità Consumo energetico annuale 47,0 kWh/Anno hood Fattore di incremento nel tempo Efficienza fluidodinamica 24,7 hood Indice di efficienza energetica...
-
Page 62: Indicazioni Per La Tutela Dell'ambiente
INDICAZIONI PER LA TUTELA DELL’ AMBIENTE • Mentre si cucina, assicurare un sufficiente flusso d’aria, in modo che la cappa aspirante possa funzionare in modo efficiente e con bassa rumorosità operativa. • Regolare la velocità della ventola in base alla quantità di vapore generato durante la cottura.
Need help?
Do you have a question about the HEKTOR ECO and is the answer not in the manual?
Questions and answers