Table of Contents
Advertisement
Quick Links
Advertisement
Table of Contents

Related Manuals for Valor Black Beauty Unigas II


Summary of Contents for Valor Black Beauty Unigas II
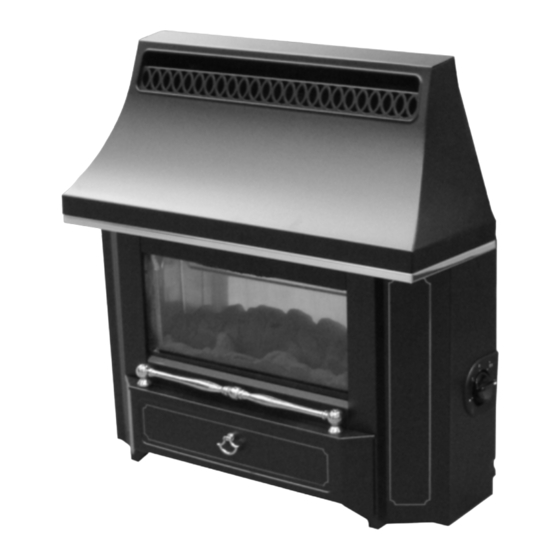
- Page 1 R a d i a n t / C o n v e c t o r G a s F i r e Black Beauty Unigas II Please keep in a safe place for future reference For latest prices and delivery to your door visit MyTub Ltd - www.mytub.co.uk - info@mytub.co.uk 0844 556 1818...
- Page 2 600A742/02 For latest prices and delivery to your door visit MyTub Ltd - www.mytub.co.uk - info@mytub.co.uk 0844 556 1818...
- Page 3 (GB) and the Republic of Ireland (IE) only. This Installer Guide gives sufficient details to enable the appliance to be installed and maintained. If further information is required, our Valor AdviceLine will be pleased to help. Please telephone 0345 626341 (In UK local call rates apply)
-
Page 4: Table Of Contents
Page Specification Installation Conditions Unpacking Preparing the Fire Preparing the Wall Preparing the Flue Unit Terminal Guard Fitting Ignition Spark Check Gas Supply Connection Fitting Coals Operation Check Reference Pressure Check Outer Case Fitting Final Checks & User Instruction Servicing •... -
Page 5: Specification
SPECIFICATION The overall dimensions are shown in figure 1. Fig. 1 Overall dimensions Gross Weight: Pressure Setting (Cold): 18.2 + 0.75mbar 26.2kg Main Burner: Simplex aerated Aeration Adjustment: None required. Flame Effect Burner: Simplex aerated. Control Tap: Variable position fitted with Gas Connection: RP 1/4 (1/4in. - Page 6 Fitting a terminal guard is recommended where contact with or damage to the terminal is possible even if regulations do not demand it. A suitable guard - Part No. 516539 - is available from Valor Heating, Wood Lane, Erdington, Birmingham B24 9QP. 2.14 No special ventilation bricks or vents into the room containing the appliance are required.
-
Page 7: Unpacking
Terminal Position Minimum Distance (mm) Directly below an openable window or other opening e.g. air brick Below gutters, soil pipes or drain pipes Below eaves Below balconies or car port roof From vertical drain pipes and soil pipes From internal or external corners Above ground, roof or balcony level Fig. - Page 8 Place the template against the wall. Make sure that the centre of the flue hole is not less than the minimum shown in figure Pierce the centre of the screw fixing holes and the flue hole and mark the positions on the wall. Remove the template.
-
Page 9: Preparing The Flue Unit
PREPARE FLUE UNIT (Figure 7) Measure the total wall thickness from the outside surface to the inside face. Add 80mm to this measurement to obtain the correct length of flue unit required. Mark off the flue length on the outer (air) tube measuring from the end of the terminal. -
Page 10: Terminal Guard Fitting
TERMINAL GUARD FITTING Place the guard centrally over the flue terminal with the fixing ears at each side - not at the top and bottom (see figure 9). Holding the guard in position and using it as a template, mark on the wall the positions of the four fixing holes. Remove the guard. -
Page 11: Fitting Coals
FIT COALS 10.1 Place the fuel bed (embossed 'A' underneath) in position. The front edge of the fuel bed locates under the flange of the locating strip at the base of the firebox - see figure 11. Fig. 11 Fuel Bed “A” Location 10.2 Place the front right coal (embossed 'B' underneath) in position. - Page 12 10.3 Place the front left coal (embossed 'C' underneath) in position at the side of the first coal. The flat bottom front face of the coal should rest on the metal ledge immediately behind the bottom front of the firebox opening. See figure 13.
-
Page 13: Operation Check
10.6 Place the rear left coal (embossed 'E' underneath) in position as shown in figure 15. 10.7 Replace the window unit and tighten the 12 wing nuts. Fig. 15 Rear Left Coal “E” Location CHECK APPLIANCE OPERATION 11.1 Turn on the gas supply and check all joints up to the appliance gas tap for gas soundness using a soap solution or leak detection fluid. -
Page 14: Reference Pressure Check
CHECK THE REFERENCE PRESSURE The burner aeration is non-adjustable. The appliance is preset to give the correct heat input on Natural Gas at 20 mbar (8in w.g) inlet pressure and no further adjustment is necessary. The burner pressure should be checked at the pressure test point located on the pipe connecting the gas tap to the main burner. -
Page 15: Servicing
SERVICING Turn off the gas and make sure that the appliance is cool before commencing any servicing. Always test for gas soundness after refitting the appliance. 15.1 To Remove Outer Case. 15.1.1 Remove the knurled screws at the case sides (see fig.1). 15.1.2 Pull the bottom of the case forwards and then lift the case clear. -
Page 16: Gas Tap Unit Removal
15.9 To Remove The Gas Tap And Piezo Unit 15.9.1 Remove the outer case as 15.1 above. 15.9.2 Remove the window unit as 15.2 above. 15.9.3 Remove the ceramic items as 15.3 above. 15.9.4 Remove the burner front cover by unscrewing 14 screws. 15.9.5 Remove the control knob by pulling clear of the gas tap spindle. -
Page 17: Short Spares List
SHORT LIST OF SPARES Description No. Off Part No. Pilot Injector SIT Ref 0.977.113 (Stamped ‘27’) 524949 Electrode Pin SIT Ref. 0.007.243 524979 Thermocouple SIT Ref. 0.290.198 524999 Main Burner Injector Bray Cat 960/240 551079 Decorative Burner Injector Bray Cat 960/130 525059 Gas Tap &... - Page 18 BS EN ISO 9001 quality system accepted by the British Standards Institute. The Highest Standards Valor is a member of the Society of British Gas Industries which works to ensure high standards of safety, quality and performance. Careful Installation Valor is a Corgi registered company.
Need help?
Do you have a question about the Black Beauty Unigas II and is the answer not in the manual?
Questions and answers