Table of Contents
Advertisement
600B607/05
INSTALLER GUIDE
COALFLAME
&
LIMOUSIN
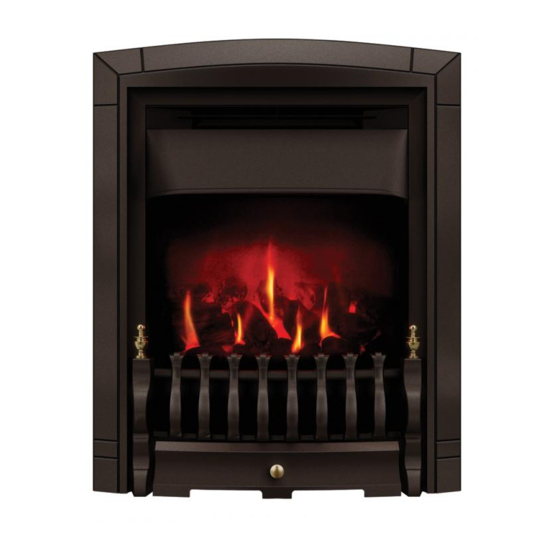
MODEL BR627
(GC No. 32-032-22)
INSET LIVE FUEL EFFECT
GAS FIRE
AS SUPPLIED, THIS APPLIANCE IS FOR USE WITH NATURAL GAS
(G20)
WHEN CONVERTED USING VALOR CONVERSION KIT NO.591159 THIS
APPLIANCE IS FOR USE WITH PROPANE GAS (G31)
THIS APPLIANCE IS FOR USE IN THE UNITED KINGDOM (GB) AND
THE REPUBLIC OF IRELAND (IE) ONLY.
We trust that this Installer Guide gives sufficient details to enable the appliance to be
installed and maintained satisfactorily. However, if further information is required, our
Valor AdviceLine will be pleased to help.
Please telephone 0345 626341 (Local call rates apply).
INSTALLER: Please leave this guide with the owner
© Valor Heating
Advertisement
Table of Contents

Related Manuals for Valor Coalflame BR627


Summary of Contents for Valor Coalflame BR627
- Page 1 GAS FIRE AS SUPPLIED, THIS APPLIANCE IS FOR USE WITH NATURAL GAS (G20) WHEN CONVERTED USING VALOR CONVERSION KIT NO.591159 THIS APPLIANCE IS FOR USE WITH PROPANE GAS (G31) THIS APPLIANCE IS FOR USE IN THE UNITED KINGDOM (GB) AND THE REPUBLIC OF IRELAND (IE) ONLY.
- Page 2 BS EN ISO 9001 quality system accepted by the British Standards Institute. The Highest Standards Valor is a member of the Society of British Gas Industries which works to ensure high standards of safety, quality and performance. Careful Installation Valor is a CORGI registered company.
-
Page 3: Table Of Contents
INSTALLER’S GUIDE CONTENTS 1 APPLIANCE DATA....................4 2 GENERAL INSTALLATION REQUIREMENTS..........5 3 PRELIMINARY CHECKS ...................8 3.1 Unpacking......................8 3.2 Check Ignition Spark...................8 3.3 Check The Fireplace....................8 3.4 Fireplace Flue Pull....................9 4 PREPARING APPLIANCE FOR INSTALLATION........9 4.1 Gas Supply Connection..................9 4.2 Appliance Preparation ..................9 5 INSTALLATION TO FIREPLACE ..............10 6 BURNER &... -
Page 4: Appliance Data
INSTALLER’S GUIDE 1 A P P L I A N C E D A T A This product uses fuel effect pieces containing Refractory Ceramic Fibres (RCF), which are man-made vitreous silicate fibres. Excessive exposure to these materials may cause temporary irritation to eyes, skin and respiratory tract. -
Page 5: General Installation Requirements
INSTALLER’S GUIDE 2 G E N E R A L I N S T A L L A T I O N R E Q U I R E M E N T S The installation must be in accordance with these instructions. For the user’s protection, in the United Kingdom it is the law that all gas appliances are installed by competent persons in accordance with the current edition of the Gas Safety (Installation and Use) Regulations. - Page 6 INSTALLER’S GUIDE Note that soft wall coverings (e.g. embossed vinyl, etc.) are easily affected by heat. They may scorch or become discoloured when close to a heating appliance. Please bear this in mind when installing. The minimum allowable distance to a corner wall or other combustible projection from the outside edge of the front surround at either side is 100mm.
- Page 7 INSTALLER’S GUIDE the top surface of the system firebox and must stand on a non-combustible base of 25mm thickness. 2.11 The appliance must be mounted behind a non-combustible hearth with minimum dimensions as figure 3. (n.b conglomerate marble hearths are considered as non-combustible).
-
Page 8: Preliminary Checks
INSTALLER’S GUIDE 3 P R E L I M I N A R Y C H E C K S 3.1 Unpacking Carefully remove the contents. Take special care in handling the ceramic coals. Take care not to bend or distort the slide control linkage when handling the burner and convection box unit. -
Page 9: Fireplace Flue Pull
INSTALLER’S GUIDE combustible cladding, the cladding must be removed from the area covered by the outer surround. We suggest that the actual surround is used as a template to mark the area for combustible cladding removal. 3.4 Fireplace Flue Pull After preparing the fireplace, carry out the flue flow test as detailed in BS5440: Part 1. -
Page 10: Installation To Fireplace
INSTALLER’S GUIDE 4.2.3 Detach the burner unit from the convection box by removing three screws. See figure 8. Lift the burner unit clear. 4.2.4 Fit the coal rear support to the burner by inserting the support through the slot in the burner tray from the underside. - Page 11 INSTALLER’S GUIDE Insert a fibre plug into each hole. Use the rawlplugs supplied with this appliance - Never use plastic plugs instead of the fibre plugs supplied. Screw the eyebolts into the plugs. Make sure that the bolts are secure. Place the convection box unit close to the fireplace but allow sufficient access into the fireplace opening so that the cables can be threaded through the eyebolts and returned through the back of the convection box.
-
Page 12: Burner & Fascia Installation
INSTALLER’S GUIDE 5.13 Using the floor sealing tape supplied, seal the bottom of the convection box to the fireplace and hearth floor (see figure 11). Make sure that the whole length of the front edge of the convection box is fully sealed. Fig. -
Page 13: Preliminary Burner Checks
INSTALLER’S GUIDE 6.1.4 Pressure check the installation pipework for gas soundness. In the United Kingdom check in accordance with the current edition of BS6891. In the Republic of Ireland check in accordance with the rules in force. 6.2 Preliminary burner checks Some burner operations can be checked at this stage. -
Page 14: Burner Trim Fitting
INSTALLER’S GUIDE 6.4 Burner Trim Fitting Position the burner trim over the front flanges of the burner tray and firmly push it down as far as it will go. See figure 13. 6.5 Fascia Fitting Coalflame: The fascia has four magnetic discs which hold it in place against the convection box front. -
Page 15: Ceramic Coals Installation
INSTALLER’S GUIDE 7 C E R A M I C C O A L S I N S T A L L A T I O N 7.1 Place the 7.4 Place front base coal in two coals the burner each side compartment so of the... -
Page 16: Full Operating Checks
INSTALLER’S GUIDE 8 F U L L O P E R A T I N G C H E C K S 8.1 Check the control The control position markings on the front fascia are shown in figure 22. When first turned on from cold, the flames will appear predominantly blue. -
Page 17: Check For Spillage
INSTALLER’S GUIDE 8.2 Check For Spillage A spillage check must be made before leaving the installed appliance with the customer. Make this check with the appliance fully installed with the ceramics and fascia casting in position. 8.2.1 Close all doors and windows in the room containing the appliance. -
Page 18: Final Review
INSTALLER’S GUIDE 9 F I N A L R E V I E W Place the fire front castings in position.. Visually inspect the appliance. Clean off any marks incurred during installation. Hand this guide to the customer. Advise the customer how to operate the appliance. Point out that lighting instruction details are on the metal plate attached at the bottom of the appliance (Leave the plate visible in front of the bottom front cover as a reminder. -
Page 19: Servicing & Parts Replacement
INSTALLER’S GUIDE S E R V I C I N G & P A R T S R E P L A C E M E N T • Always turn off the gas supply before commencing any servicing (The inlet elbow for this appliance incorporates an isolating valve). -
Page 20: To Remove The Ignition Microswitch
INSTALLER’S GUIDE 10.1 To remove the ignition microswitch See figures 24 & 25. The ignition microswitch is stamped V4NT9C4YC 10.1.1 Remove the “ash pan” casting and bottom front casting. 10.1.2 Detach the microswitch cover by removing one screw and pulling clear of the location lug (see figure 24). 10.1.3 Disconnect the leads from the ignition microswitch (The lower of the two microswitches - See figure 25). -
Page 21: To Remove The Burner Unit
INSTALLER’S GUIDE 10.4 To remove the burner unit 10.4.1 Remove the “ash pan” casting and bottom front casting. 10.4.2 Remove the loose coals, the front base coal, rear base coal and front burner trim. 10.4.3 Disconnect the control linkage by removing the knurled screw which connects the control linking bar to the control pivot unit (see figure 28). -
Page 22: To Remove The Thermocouple Interrupter Block
INSTALLER’S GUIDE 10.6 To remove the thermocouple interrupter block See figure 30. 10.6.1 Remove the “ash pan” casting and bottom front casting. 10.6.2 Detach the thermocouple from the interrupter block by unscrewing the thermocouple nut. 10.6.3 Detach the two microswitch leads Fig 30 Thermocouple interrupter block from the interrupter block. -
Page 23: To Remove The Shut-Off Tap
INSTALLER’S GUIDE 10.8 To remove the shut-off tap See figure 32. 10.8.1 Remove the burner unit – See section 10.4 10.8.2 Turn the burner unit upside down. Detach the thermocouple and interrupter block from the tap - See sections 10.6.2 to 10.6.4. -
Page 24: To Remove The Main Burner Injector
INSTALLER’S GUIDE 10.9.8 Remove the hexagonal nut securing the controller to the front mounting bracket and remove the flow rate controller. 10.9.9 Refit in the reverse order. When refitting the burner unit, make sure that the tab at the right side of the battery box is in front of the “L”... -
Page 25: To Replace Burner Plaques
INSTALLER’S GUIDE 10.11 To replace burner plaques See fig. 35. 10.11.1 Remove the loose coals, the front base coal, rear base coal and front burner trim. 10.11.2 Remove the plaque clamping strips by detaching 8 screws. 10.11.3 Remove the plaques and the combination gasket between and under the plaques. -
Page 26: Short List Of Spares
INSTALLER’S GUIDE S H O R T L I S T O F S P A R E S DESCRIPTION MAKER’S PART NO. Shut-off tap 540899 Gas flow rate controller 540919 Thermocouple interrupter block 522389 Ignition microswitch 540959 Gas shut-off microswitch 540969 Pilot unit - For Natural Gas Appliances 540979...
Need help?
Do you have a question about the Coalflame BR627 and is the answer not in the manual?
Questions and answers
What are the dimensions of valour coalflameBR627