Table of Contents
Advertisement
Quick Links
Advertisement
Table of Contents

Related Manuals for Accu-Scope EXI-300 Series


Summary of Contents for Accu-Scope EXI-300 Series
- Page 1 MANUAL EXI-300 INVERTED MICROSCOPE SERIES...
-
Page 2: Table Of Contents
ADJUSTABLE TENSION CONTROL ..................10 STAGE PLATES (OPTIONAL) ....................10 SELECTING THE LIGHT PATH ....................11 APERTURE DIAPHRAGM ADJUSTMENT ................12 PHASE CONTRAST (OPTIONAL) ..................12-14 MOUNTING A MICROSCOPY CAMERA (OPTIONAL) ............14 TROUBLESHOOTING ....................15-17 MAINTENANCE........................18 SERVICE ..........................18 WARRANTY ........................18 ® ACCU-SCOPE... -
Page 3: Safety Notes
4. Store the instrument in a cool, dry environment. Cover the microscope with the dust cover when not in use. ® 5. ACCU-SCOPE microscopes are precision instruments which require periodic preventative maintenance to maintain proper performance and to compensate for normal wear. An annual schedule of preventative maintenance by qualified personnel is highly recommended. -
Page 4: Introduction
Your microscope will ® last a lifetime if used and maintained properly. ACCU-SCOPE microscopes are carefully assembled, inspected and tested by our staff of trained technicians in our New York facility. Careful quality control procedures ensure each microscope is of the highest quality prior to shipment. -
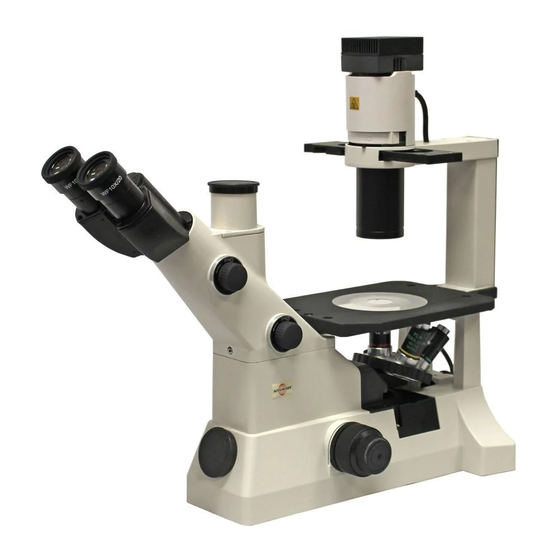
Page 5: Component Diagrams
(Optional) Stand Frame/Stand Binocular Condenser Viewing Head Stage Objective Light split control Nosepiece knobs Camera/Photo Port Coarse/Fine Focus Base Adjustment Knob Tension Adjustment Collar X-Y Attachable Mechanical Stage (Optional) Auxiliary Stage (Optional) On/Off Switch Light Intensity Control Knob ® ACCU-SCOPE... -
Page 6: Assembly Diagram
Be sure to keep these wrenches for changing out components or making adjustments. When assembling the microscope, make sure that all parts are free of dust and dirt, and avoid scratching any parts or touching glass surfaces. ② & ③ ⑤ ④ ① ⑥ ® ACCU-SCOPE... -
Page 7: Detailed Assembly
(i.e., it’s tilted in the holder ④), it may fall through the filter holder. More than one filter can be stacked in the Fig. 3 filter holder as long as the total thickness of all filters does not exceed 11mm. ® ACCU-SCOPE... - Page 8 Plug the power cord into a power supply receptacle. NOTE: Always use the power cord that came with your microscope. If your power cord becomes damaged or lost, please call your authorized ACCU-SCOPE dealer for a replacement. ® ACCU-SCOPE...
-
Page 9: Interpupillary Distance
Instead, rotate the right diopter collar until the sharpest image appears. Repeat several times ② ② to check. IMPORTANT: do not counter rotate the focusing knobs as this will Fig. 8 cause severe problems and damage to the focusing system. ® ACCU-SCOPE... -
Page 10: Operation Illumination
The appropriate stage is inserted into the slide holder and can be moved by turning the X③ and Y ④ stage movement controls. Fig. 10 ② ③ ④ ® ACCU-SCOPE... -
Page 11: Selecting The Light Path
“Closed” position 80% for binocular eyepieces The upper knob is set Observation of bright specimens, to“PHO”position photography, HDMI imaging 20% for top photo port The lower knob is set 100% for bottom photo port Photography, HDMI imaging to“PHO”position ® ACCU-SCOPE... -
Page 12: Aperture Diaphragm Adjustment
If the phase ring is not centered, you can adjust it by the centering the bolt with the 2mm hex wrench provided with the microscope – see instructions on page 13. Match the 10-20-40 light annulus with phase contrast objectives 10x, 20x or 40x (optional). ® ACCU-SCOPE... - Page 13 ③. Tighten and loosen the centering screws until the light annulus is superimposed on the phase annulus of the objective. Fig. 16 & 17 6. Repeat the steps above to adjust centering with other objectives and corresponding light annulus. ® ACCU-SCOPE...
-
Page 14: Mounting A Microscopy Camera (Optional)
1. Remove the dust cap on the top or bottom photo port (whichever one you prefer to use). 2. Attach the camera to a c-mount adapter. 3. Thread the c-mount adapter with camera in the top photo port or bottom port. Selecting the Light Path for Observation With a Camera Refer to page 11. ® ACCU-SCOPE... -
Page 15: Troubleshooting
Dirt/dust on the specimen Replace with a clean specimen Dirt or dust is visible in the field of view Dirt/dust on the eyepiece Clean the eyepieces The image glares The iris diaphragm is closed too much Open up the iris diaphragm ® ACCU-SCOPE... - Page 16 Place the specimen on the stage correctly. One side of the image is stage. blurred The optical performance of the culture vessel Use a vessel with a good profile irregularity bottom plate is poor (profile irregularity, etc.) characteristic. ® ACCU-SCOPE...
- Page 17 The lamp can’t light you should need to replace the LED bulb, please contact an authorized ACCU-SCOPE service center or call ACCU-SCOPE at 1-888-289-2228 for an authorized service center near you. Not use an designated lamp use an designated lamp...
-
Page 18: Maintenance
ACCU-SCOPE INC. This warranty expressly excludes any liability by ACCU-SCOPE INC. for consequential loss or damage on any grounds, such as (but not limited to) the non-availability to the End User of the product(s) under warranty or the need to repair work processes. Should any defect in material, workmanship or electronic component occur under this warranty contact your ACCU-SCOPE distributor or ACCU-SCOPE at (631) 864-1000.
Need help?
Do you have a question about the EXI-300 Series and is the answer not in the manual?
Questions and answers