PROAIM CINEMA Series Assembly Manual
Camera shock absorber arm 11-44lb
Hide thumbs
Also See for CINEMA Series:
- Instruction manual (18 pages) ,
- Assembly manual (14 pages) ,
- Instruction manual (11 pages)
Advertisement
1
Airwave V520 Camera Shock Absorber Arm (11-44lb)
(VI-ARWV-520)
A s s e m b l y M a n u a l
What's In The Box
Please inspect the contents of your shipped package to ensure you have received everything that is listed
below.
Airwave V520
Vibration Isolator
Airwave V520 Vibration Arm with Dampener Airwave V520 Vibration Arm Head
2 x Hex Nut
2 x Spanner: (13, 21)
1 x L-Type
Allen Key (Size:5mm)
Flight Case
All rights reserved.
No part of this document may be reproduced, stored in a retrieval system, or transmitted by any form or by any means,
electronic, mechanical, photo-copying, recording, or otherwise, except as may be expressly permitted by the applicable copyright
statutes or in writing by the Publisher.
Advertisement
Table of Contents

Related Manuals for PROAIM CINEMA Series


Summary of Contents for PROAIM CINEMA Series
- Page 1 Airwave V520 Camera Shock Absorber Arm (11-44lb) (VI-ARWV-520) A s s e m b l y M a n u a l What’s In The Box Please inspect the contents of your shipped package to ensure you have received everything that is listed below.
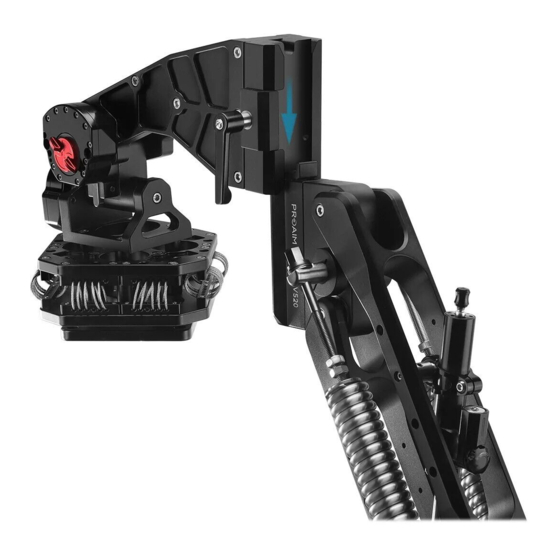
- Page 2 Airwave V520 Setup • Loosen the clamp of the Airwave V520 Vibration Arm to open it. • Align the Airwave Arm to the Scaffold pole with the help of the Quick-lock Scaff Mechanism and properly tighten the knobs to secure it. NOTE: Airwave V520 Arm can be securely attached to a Dia 38 to 42mm Scaffold Pole or Speed Rail with a quick-lock Scaff Mechanism.
- Page 3 • Airwave arm and the arm head have both been securely attached to the Scaffold pole. Airwave Vibration Isolator Setup • Remove the bolts of the Airwave Isolator with the help of a 5mm Allen Key. • After removing all the bolts of the isolator, flip it around.
- Page 4 • Properly tighten all the bolts of the Airwave Isolator with the help of an Allen key. NOTE: Dampeners have built-in damping adjustment knobs that smoothen all the sudden jerks, vibrations, and movement. • Panning movement can be facilitated by loosening the damping adjustment knob at the front of the Airwave Arm Head.
- Page 5 • After attaching the Gimbal (Not Included), push the lock lever of the quick release plate to securely lock it in. • Slide and mount the camera (Not Included) the Gimbal, as shown in the image. • After mounting the camera (Not Included) securely lock its position with the help of the lock lever.
- Page 6 YOUR PROAIM AIRWAVE V520 CAMERA SHOCK ABSORBER ARM ALL DRESSED UP AND READY TO GO! (SHOWN WITH OPTIONAL ACCESSORIES) Warranty: We offer one year warranty for our products from date of purchase. Within this period of time, we will repair it without charge for labor or parts. Warranty doesn’t cover transportation costs nor does it cover a product subjected to misuse or accidental damage.
Need help?
Do you have a question about the CINEMA Series and is the answer not in the manual?
Questions and answers