
Related Manuals for Triton Thermostatic Care


Summary of Contents for Triton Thermostatic Care
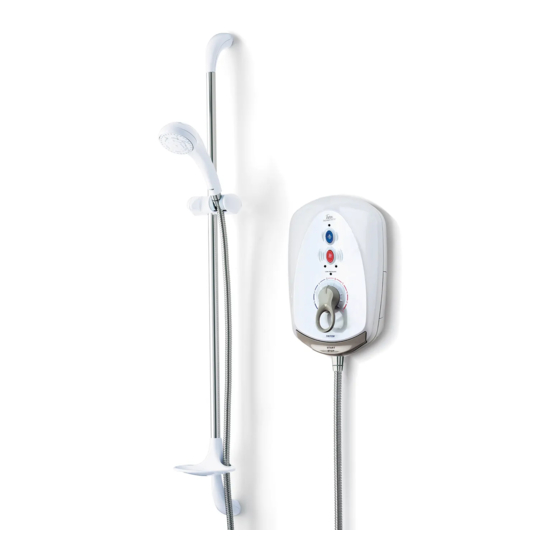
- Page 1 T100e Thermostatic Care and Care Plus electric shower Installation and operating instructions T00338 NSTALLERS PLEASE NOTE THESE INSTRUCTIONS ARE TO BE LEFT WITH THE USER 2180375J - November 2011...
-
Page 2: Table Of Contents
Spare parts ..................21 Fault finding ................22 - 23 Water/Cable entry points diagram ........24 Guarantee, service policy, etc...........rear cover To check the product suitability for commercial and multiple installations, please contact Triton’s specification advisory service before installation. Telephone: 0844 980 0730... -
Page 3: Important Safety Information
T1 0 0e ther m ostatic c ar e & ca re p l u s PLEASE READ THIS IMPORTANT SAFETY INFORMATION Products manufactured by Triton are safe and without risk provided they are installed, used and maintained in good working order in accordance with our instructions and recommendations. -
Page 4: Introduction
IMPORTANT: When first installed the unit and operating instructions for your Triton T100e will be empty. It is essential the unit should Thermostatic Care or Care Plus electric shower. contain water before the elements are Take time to read this book thoroughly and... -
Page 5: Main Components
T1 0 0e ther m ostatic c ar e & ca re p l u s MAIN COMPONENTS Main components Fig.1 Inside unit (fig.1) Top cable / pipe entry Bottom cable / pipe entry Wall screw fixings Power Printed Circuit Board Thermal cut-out Can and element assembly Ribbon cable connector... -
Page 6: Electrical Requirements
T1 0 0e ther m ostatic c ar e & ca re p l u s ELECTRICAL REQUIREMENTS Shepperton Park, Triton Road, Nuneaton, Warwickshire, CV11 4NR WARNING! W-006-A THIS APPLIANCE MUST BE EARTHED The installation, supply cable and circuit protection must conform with BS 7671 (IEE Fig.3... - Page 7 T1 0 0e ther m ostatic c ar e & ca re p l u s 9.2 In the majority of installations, the cable 5.1 A 30mA residual current device (RCD) must will unavoidably be placed in one or more be installed in all UK electric and pumped of the above conditions.
-
Page 8: Water Requirements
T1 0 0e ther m ostatic c ar e & ca re p l u s WATER REQUIREMENTS Water requirements Mains electric supply (via double pole switch) The installation must be in accordance with Water Regulations/Bylaws. To guarantee activating the heating elements, the shower must be connected to a mains water Double supply with a minimum running pressure of... -
Page 9: Siting Of The Shower
T1 0 0e ther m ostatic c ar e & ca re p l u s SITING OF THE SHOWER Siting of the shower WARNING! IMPORTANT: If installing onto a tiled wall The shower must not be positioned W-008-A always mount the unit on the surface of the where it will be subjected to freezing tiles. -
Page 10: Fitting The Shower To The Wall
T1 0 0e ther m ostatic c ar e & ca re p l u s FITTING THE SHOWER TO THE WALL Fitting the shower to the wall Fig.8 WARNING! Check there are no hidden cables or pipes before drilling holes for wall W-005-A plugs. - Page 11 T1 0 0e ther m ostatic c ar e & ca re p l u s Slide the compression nut and olive onto the Fig.13 unit inlet pipe. Make sure the inlet filter is in place before attempting to fit onto the elbow connector (fig.12).
-
Page 12: Plumbing Connections
T1 0 0e ther m ostatic c ar e & ca re p l u s PLUMBING CONNECTIONS Plumbing connections Fig.16 Plumbing to be carried out before wiring DO NOT use jointing compounds on any pipe Inlet filter fittings for the installation. DO NOT solder fittings near the shower unit as heat can transfer along the pipework and damage components. -
Page 13: Electrical Connections
T1 0 0e ther m ostatic c ar e & ca re p l u s ELECTRICAL CONNECTIONS Electrical connections Fig.17 Fig.17 shows a schematic wiring diagram. The cable entry points are top, bottom or back. Care Plus only Pressure The cable can be surface clipped, hidden or via Thermistor switch... -
Page 14: Commissioning
T1 0 0e ther m ostatic c ar e & ca re p l u s COMMISSIONING Commissioning Fig.18 WARNING! Before normal operation of the W-001-A shower, it is essential the following commissioning procedure is completed Valve correctly. spindle The first operation of the shower is intended to flush out any remaining system debris, to make sure that water is purged through the unit and that the heater unit contains water before the... - Page 15 T1 0 0e ther m ostatic c ar e & ca re p l u s It will take about thirty seconds for a smooth Fig.20 flow of water to be obtained while air and any debris is being flushed from the shower. When a smooth flow of water is obtained, disconnect the electricity supply to the shower at the isolating switch.
-
Page 16: Replacing The Cover
T1 0 0e ther m ostatic c ar e & ca re p l u s REPLACING THE COVER Replacing the cover IMPORTANT: Before finally fitting the Offer the cover to the unit. Carefully locate cover, the following steps must be taken: the cover tags into the guide pockets on the a. -
Page 17: Operating The Shower
T1 0 0e ther m ostatic c ar e & ca re p l u s OPERATING THE SHOWER Operating the shower WARNING! The shower controls are shown in fig.21. Before normal operation of the W-001-A Make sure the water supply is turned fully on. shower, it is essential the following Switch the electric supply back on at the commissioning procedure is completed... - Page 18 T1 0 0e ther m ostatic c ar e & ca re p l u s If the shower is on full power and the POWER Fig.22 button is pressed, one of the LED’s below the button goes out (the Care Plus will also emit a single ‘bleep’).
- Page 19 T1 0 0e ther m ostatic c ar e & ca re p l u s Setting the adjustable temperature stop Fig.24 This shower unit is fitted with a temperature stop. This is factory set to allow the full range of temperatures to be selected.
-
Page 20: Operating Functions
T1 0 0e ther m ostatic c ar e & ca re p l u s OPERATING FUNCTIONS Operating functions Fig.26 There will always be a time delay of a few seconds between selecting a temperature and the water reaching the stable selected temperature. -
Page 21: Instructions For Installers And Service Engineers Only
T1 0 0e ther m ostatic c ar e & ca re p l u s INSTRUCTIONS FOR INSTALLERS AND SERVICE ENGINEERS ONLY Instructions for installers and service engineers only CLEANING THE INLET FILTER Cleaning the inlet filter Fig.27 It is recommended that the filter is periodically cleaned in order to maintain the performance of the shower. -
Page 22: Cleaning The Scale Trap
T1 0 0e ther m ostatic c ar e & ca re p l u s INSTRUCTIONS FOR INSTALLERS AND SERVICE ENGINEERS ONLY CLEANING THE SCALE TRAP Cleaning the scale trap Fig.28 It is recommended in hard water areas, the scale trap is periodically cleaned to maintain the performance of the shower. -
Page 23: Spare Parts
T1 0 0e ther m ostatic c ar e & ca re p l u s SPARE PARTS Spare parts Ref. Description Part No. 1. Printed circuit board ....7073730 2. Copper bus bar ......7023005 3. Terminal block & wires ....S07710901 Terminal block ...... -
Page 24: Fault Finding
T1 0 0e ther m ostatic c ar e & ca re p l u s FAULT FINDING IMPORTANT: Switch off the electricity at the mains supply and remove the circuit fuse before attempting any fault finding inside the unit. Fault finding Problem/Symptom Cause... - Page 25 T1 0 0e ther m ostatic c ar e & ca re p l u s FAULT FINDING Problem/Symptom Cause Action/Cure 6 Low pressure indicator 6.4 Blocked connecting tube 6.4.1 Make sure the tube from solenoid flashing. to pressure switch. valve to pressure switch is not kinked or blocked.
-
Page 26: Water/Cable Entry Points Diagram
T1 0 0e ther m ostatic c ar e & ca re p l u s Entry Points Diagram Key: Water Entry Points Cable Entry Points... - Page 27 T1 0 0e ther m ostatic c ar e & ca re p l u s WEEE Directive – Policy Statement As a producer and a supplier of electric showers, Triton Showers is committed to the protection of the environment via our own environmental policy and the compliance with the WEEE directive.
- Page 28 Triton is a division of Norcros Group (Holdings) Limited E-mail: serviceenquiries@tritonshowers.co.uk Extended Warranty AVAILABLE NOW. Call 0844 980 0740 for more details. 8-8-2012 TRITON reserve the right to change product specification without prior notice. E&OE. © TRITON SHOWERS 2012...
Need help?
Do you have a question about the Thermostatic Care and is the answer not in the manual?
Questions and answers