Multitech FaxFinder FF200 Administrator User Manual
2-port v.34 fax server
Hide thumbs
Also See for FaxFinder FF200:
- Client operation primer (14 pages) ,
- Quick start manual (68 pages) ,
- Configuration manual (6 pages)

Related Manuals for Multitech FaxFinder FF200


Summary of Contents for Multitech FaxFinder FF200
- Page 1 ADMINISTRATOR USER GUIDE ™ FaxFinder FF200 2-Port V.34 Fax Server Administrator User Guide...
- Page 2 Furthermore, Multi-Tech Systems, Inc. reserves the right to revise this publication and to make changes from time to time in the content hereof without obligation of Multi-Tech Systems, Inc. to notify any person or organization of such revisions or changes.
-
Page 3: Table Of Contents
Current Status Screen ...42 Logout Option...44 Help Screen...44 Administration Screen ...45 Phone Book Screen ...49 Modem Configuration Screen – POTS Modem...51 Multi-Tech Systems, Inc. FF200 FaxFinder Fax Server Admin User Guide Table of Contents & C ...8 OMPATIBILITY ONFIGURATION ...10 SERS &... - Page 4 Opening the Device Manager Software...138 Device Manager Main Screen ...139 Device Manager “Edit” Menu ...141 Right-Click Menu for Selected FaxFinder Device...145 IRMWARE PDATING ROCESS Multi-Tech Systems, Inc. FF200 FaxFinder Fax Server Admin User Guide ...56 )...61 INDER ...63 PECIFIC INDER ’...
- Page 5 ...164 ELECOM 47 CFR P 15 R ...165 EGULATION ...165 RANDING TATEMENT ...166 ANADIAN IMITATIONS OTICE ...166 NDUSTRY ANADA WEEE S ...167 TATEMENT CHAPTER 11: WARRANTY, SERVICE, & REPAIR ...168 Multi-Tech Systems, Inc. FF200 FaxFinder Fax Server Admin User Guide...
-
Page 6: Chapter 1 - Product Description And Specifications
Multiple PBX extension numbers are dedicated to incoming fax traffic which is routed to the FF200. (Only one station port is needed. Faxes transmitted to any of the PBX’s fax-dedicated extension numbers all go to the station port serving the FF200.) The FF200 converts the incoming faxes into graphic files that are sent as email attachments to fax recipients on or beyond the ethernet network. -
Page 7: Product Features
Tone and pulse dialing • Connects to 10/100BaseT Ethernet • Flash memory for easy software updates • Small desktop-size external chassis • Two-year warranty Multi-Tech Systems, Inc. FF200 FaxFinder Fax Server Admin User Guide Chapter 1: Product Description and Specifications... -
Page 8: Prerequisite: Determining Pbx Compatibility & Configuration
If you are using the FF200 in conjunction with a PBX, be sure that the PBX has this multiple-extension-to- single-port functionality and that it is activated. PBXs lacking this functionality can still be used with the FaxFinder in POTS Mode. -
Page 9: Technical Specifications
UL, cUL, UL60950, CSA 950, EN60950, AS3260, CCIB (China) Telecom Approvals FCC Part 68, CS03 Related Manuals The FF200 FaxFinder unit comes with 5 manuals that serve different purposes: Title Administrator User Guide (this manual) Client User Guide Client Operation Primer... -
Page 10: Distributing Documents To Client Users
(CD, diskette, etc.). Client users will need this information to take advantage of the capabilities of the FaxFinder system. Multi-Tech Systems, Inc. FF200 FaxFinder Fax Server Admin User Guide... -
Page 11: Chapter 2 - System Overview
The FaxFinder system decentralizes fax functions throughout a network of PCs served by the FaxFinder unit and by an email server in a common Ethernet network. In this chapter, we will give you the big picture of how the FaxFinder FF200 Server unit and the FaxFinder Client software can deliver this convenient functionality. - Page 12 These illustrations explain how the FaxFinder system fits into your Ethernet network and what client users will encounter when they begin to use the FaxFinder Client software. Multi-Tech Systems, Inc. FF200 FaxFinder Fax Server Admin User Guide POTS Mode Outbound Faxing:...
-
Page 13: Server Setup For Sample Faxfinder System - Acme99, Inc
Admin receives fax log report as email attachment after every nth fax. Multi-Tech Systems, Inc. FF200 FaxFinder Fax Server Admin User Guide Administration: Time Configuration time.nist.gov Time Server Time Zone (GMT-06:00) Mountain Time (US & Canada) -
Page 14: Receiving A Fax, Server Perspective - Acme99 Gets A Fax
PBX Ext 3049 Pat -- Admin Email:pat @acme99 .com Multi-Tech Systems, Inc. FF200 FaxFinder Fax Server Admin User Guide FaxFinder Server fax log ( ) indicates successful fax reception. Time 07/27/2004 12:47:31 PM 07/27/2004 10:48:46 AM 07/27/2004 10:32:06 AM 07/27/2004 09:49:39 AM... -
Page 15: Receiving A Fax, Client Perspective - Joe Gets A Product Order
Chapter 2: System Overview Receiving a Fax, Client Perspective – Joe Gets a Product Order Multi-Tech Systems, Inc. FF200 FaxFinder Fax Server Admin User Guide... -
Page 16: Sending A Fax, Server Perspective - Acme99 Sends A Fax
PBX Ext 3033 PBX Ext 3049 Admin Email:pat @acme99 .com Multi-Tech Systems, Inc. FF200 FaxFinder Fax Server Admin User Guide FaxFinder Server fax log ( ) indicates successful fax transmission. Time 07/27/2004 10:23:36 AM 07/27/2004 09:56:46 AM 08/20/2003 09:53:23 AM... -
Page 17: Sample Client Setup - Joe, The Acme99 Order Processor
Chapter 2: System Overview Sample Client Setup – Joe, the Acme99 Order Processor Multi-Tech Systems, Inc. FF200 FaxFinder Fax Server Admin User Guide... -
Page 18: Sending A Fax, Client Perspective - Mary Sends Spec Sheet To Client
Chapter 2: System Overview Sending a Fax, Client Perspective – Mary Sends Spec Sheet to Client Multi-Tech Systems, Inc. FF200 FaxFinder Fax Server Admin User Guide... -
Page 19: Fax Message Components
Options screen FF Send Fax screen Cover Page From: Subject : Comment : Outgoing Fax Transmission Multi-Tech Systems, Inc. FF200 FaxFinder Fax Server Admin User Guide comes together. Main Body Subject, Fax Message Comment FROM FROM file of application program. -
Page 20: Chapter 3 - Server Installation
PBX users to have their own unique directory numbers for receiving faxes. If you are using the FF200 in conjunction with a PBX and in “PBX Routing Mode,” be sure that the PBX has this multiple-extension-to-single-port capacity and that this capacity is activated. -
Page 21: Part A: Cabling -- Connecting The Faxfinder To Power Outlet, Phone Lines, And Ethernet
FaxFinder is not a 192.168.2.x subnet. Because the FaxFinder’s factory default IP address is 192.168.2.1, connecting it to a network that has a different device at that same IP address would cause data interference. Multi-Tech Systems, Inc. FF200 FaxFinder Fax Server Admin User Guide POWER Ethernet Line 1... -
Page 22: Part B: Connecting To Telephony Service
FaxFinder’s IP address has been configured. Thereafter, connect the FaxFinder into the network. Part B: Connecting to Telephony Service The FF200’s fax modems can either be connected to a PBX (for use in PBX Routing Mode) or to a POTS line (for use in POTS Mode). Connection for... -
Page 23: Part C: Configuring The Faxfinder Server
“PBX Routing” = PBX Routing Mode) User Parameters (for Server Phonebook, Client Options, & Client Add FaxFinder screens) Name User ID/ Username Multi-Tech Systems, Inc. FF200 FaxFinder Fax Server Admin User Guide Chapter 3: Server Installation Values for this FaxFinder Email Address PBX Extension Password... -
Page 24: Setting Admin Pc To Startup Ip Address
In the Microsoft Internet Protocol (TCP/IP) Properties screen, record the existing IP address. Then reset the IP address to 192.168.2.2. Multi-Tech Systems, Inc. FF200 FaxFinder Fax Server Admin User Guide Windows 2000 a. From the Windows desktop, right- click on “My Network Places,” and select “Properties.”... -
Page 25: Logging In (I)
FaxFinder?” in Chapter 9: Troubleshooting. c. At the Login screen, enter admin (all lower case) in the Username field. d. Enter admin (all lower case) in the Password field. Multi-Tech Systems, Inc. FF200 FaxFinder Fax Server Admin User Guide Chapter 3: Server Installation... -
Page 26: Setting Faxfinder Ip Addresses
192.168.11.251 Name Server update b. Fill in the IP information that applies to your FF200 FaxFinder Server unit. The fields for “IP Address,” “Subnet Mask,” “Default Gateway” and “Name Server” are required. A “Secondary Name Server” may be considered optional. -
Page 27: Resetting Admin Pc To Its Regular Ip Address
(at this point, it should be admin). Multi-Tech Systems, Inc. Phone Book User ID E mail Address a dmin FF200 FaxFinder Fax Server Admin User Guide Chapter 3: Server Installation Function update update update delete... - Page 28 ‘fax attendant’ for the FaxFinder system. This is the person who forwards received faxes to their intended recipients, typically by forwarding the email to which the fax is attached. Multi-Tech Systems, Inc. FF200 FaxFinder Fax Server Admin User Guide Phone Book User ID Email Address p at-a dmin pa t@a cme 99.com...
- Page 29 Phone Book User ID E mail Address p at-a dmin pa t@a cme 99.com pa t@a cme99 .com pa tm patm@acme 99.com FF200 FaxFinder Fax Server Admin User Guide Chapter 3: Server Installation Function update update update delete update delete...
-
Page 30: Setting Up The Mail Server
In the Modem Configuration: POTS Modem 1, screen, enter the modem characteristics needed in your FaxFinder system. The default values have been designed to work well in many situations. Multi-Tech Systems, Inc. FF200 FaxFinder Fax Server Admin User Guide Chapter 3: Server Installation... - Page 31 Smart Dial. When Smart Dial mode is ON, the FaxFinder will look for a dial tone before dialing. If, under normal circumstances, no dial tone is presented to the FaxFinder, then set Smart Dial to OFF. Multi-Tech Systems, Inc. FF200 FaxFinder Fax Server Admin User Guide Chapter 3: Server Installation...
- Page 32 Call - for POTS Mode (where the Routing field is set to “Pots Line”). From a different POTS phone, dial the number of the phone line to which the FF200 FaxFinder is attached. l. In the Current Status: POTS Modem 1 screen, the "State" field should change to "Waiting for Connect."...
-
Page 33: Changing Admin's Server Password
Click on Update for this row. The Login screen will appear. Name Pat-Admin Pat Mu rphy Multi-Tech Systems, Inc. FF200 FaxFinder Fax Server Admin User Guide Passw ord Administration User ID P assword P assword p at-a dmin *** **... -
Page 34: Specifying Administrator's Client Password
11. Sending Test Fax from Fax Machine to FaxFinder a. Using a conventional fax machine, send a fax to the fax number established for the FaxFinder Administrator. Multi-Tech Systems, Inc. FF200 FaxFinder Fax Server Admin User Guide User ID P assword P assword *** **... - Page 35 Verify also that you can open the fax in a Tiff viewer program on your computer. The viewer program you use could be either the Multi-Tech Tiff Viewer or a graphic file viewer included with or installed in your PC. (The Multi-Tech Tiff viewer is included on the Product CD and installed with other client programs.
-
Page 36: Adding Client/Users To The Phone Book
U nassi gned N umbe r Pa t Murp hy Pe te Jo e Ma ry Multi-Tech Systems, Inc. FF200 FaxFinder Fax Server Admin User Guide Phone Book User ID E mail Address p at-a dmin pa t@a cme 99.com pa t@a cme 99.com p atm pa tm@acme 99.com... -
Page 37: Chapter 4 - Faxfinder Server Software Screens
Windows software. Examples of such self-evident functions include buttons like “OK,” “Cancel,” “Next,” etc.) Home Screen The FaxFinder Home screen offers access to all other FaxFinder software screens. Multi-Tech Systems, Inc. FF200 FaxFinder Fax Server Admin User Guide... -
Page 38: Login Screen
The FaxFinder has a default setting that allows use of “admin” as both the User Name and the Password at initial startup. After you have begun configuring your FaxFinder fax server system, you should change the password in the Password Administration screen described later in this chapter. Multi-Tech Systems, Inc. FF200 FaxFinder Fax Server Admin User Guide... -
Page 39: Fax Log Screen
Name Remote ID Result Send/Receive Pages Details (button) Multi-Tech Systems, Inc. FF200 FaxFinder Fax Server Admin User Guide Chapter 4: FaxFinder Server Software Screens Fax Log Screen Field Definitions Values Description mm/dd/yyyy Time that fax was sent or received. alphanumeric Client party sending or receiving fax. -
Page 40: Fax Details Screen
33600 bps Scan Line Time Remote ID Number of Pages Total Bytes Multi-Tech Systems, Inc. FF200 FaxFinder Fax Server Admin User Guide Chapter 4: FaxFinder Server Software Screens Fax Details Screen Field Definitions Values Description alphanumeric Name of local client participating in fax transmission (sending or receiving). - Page 41 Email Attachments Connect Time Height: Error Correction: init time Multi-Tech Systems, Inc. FF200 FaxFinder Fax Server Admin User Guide Chapter 4: FaxFinder Server Software Screens Fax Details Screen Field Definitions Values Description mm/dd/yyyy The time at which the modem went off-hook for hh:mm:ss the fax transmission.
-
Page 42: Current Status Screen
System fields group Current Time Pending Msgs Email To: Subject: Time Server Status Multi-Tech Systems, Inc. FF200 FaxFinder Fax Server Admin User Guide Chapter 4: FaxFinder Server Software Screens Values Description weekday, mo, dd The present time of day. hh:mm:ss yyyy... - Page 43 (phone number) or alphanumeric Initialize Modem (button) Make Busy (button) Multi-Tech Systems, Inc. FF200 FaxFinder Fax Server Admin User Guide Chapter 4: FaxFinder Server Software Screens Values Description x days yy hours: Operation time since last reboot. zz minutes No Errors, Indicates whether the FaxFinder’s email...
-
Page 44: Logout Option
When you click on Logout in the FaxFinder Home screen, you will be logged out of the FaxFinder Server software. The Login screen will appear to allow access to re-enter the program. Help Screen Online Help has not yet been implemented. Multi-Tech Systems, Inc. FF200 FaxFinder Fax Server Admin User Guide... -
Page 45: Administration Screen
Chapter 4: FaxFinder Server Software Screens Administration Screen Multi-Tech Systems, Inc. FF200 FaxFinder Fax Server Admin User Guide... - Page 46 Secondary Name Server for n = 0-255 Update (button) Multi-Tech Systems, Inc. FF200 FaxFinder Fax Server Admin User Guide Chapter 4: FaxFinder Server Software Screens Values Description The IP address of the fax server. This subnet mask is the subnet for the network to which the fax server is connected.
- Page 47 Time Zone mm/dd/yyyy Date Format dd/mm/yyyy yyyy/mm/dd Multi-Tech Systems, Inc. FF200 FaxFinder Fax Server Admin User Guide Chapter 4: FaxFinder Server Software Screens Values Description Domain name or IP address for mail server (SMTP must be supported on mail server).
- Page 48 Time Format Update (button) Reset Unit fields Reset button Multi-Tech Systems, Inc. FF200 FaxFinder Fax Server Admin User Guide Chapter 4: FaxFinder Server Software Screens Values Description Indicates whether time is presented in a 12-hour scheme with an am/pm designation or in a 24- hour scheme.
-
Page 49: Phone Book Screen
Ext # column Function column and Add functions Multi-Tech Systems, Inc. FF200 FaxFinder Fax Server Admin User Guide Chapter 4: FaxFinder Server Software Screens Phone Book User ID Email Address Ext# p at-a dmin pa t@a cme 99.com pa t@a cme 99.com... - Page 50 Field Name Delete button Admin row Unassigned Number row User Update button Multi-Tech Systems, Inc. FF200 FaxFinder Fax Server Admin User Guide Chapter 4: FaxFinder Server Software Screens Values Description Use to remove a client user from the Phone Book.
-
Page 51: Modem Configuration Screen - Pots Modem
Modem Configuration Screen – POTS Modem “Modem Configuration: POTS Modem” Screen Field Definitions Field Name Country Code Answer On Multi-Tech Systems, Inc. FF200 FaxFinder Fax Server Admin User Guide Chapter 4: FaxFinder Server Software Screens Values Description country names Sets modem telephony parameters as required for the listed country. - Page 52 Alcatel Mode Code, Avaya Mode Code Max Baud Rate 2400 – 33,600 bps Tone Dial Multi-Tech Systems, Inc. FF200 FaxFinder Fax Server Admin User Guide Chapter 4: FaxFinder Server Software Screens Values Description Pots Line, The value chosen for this field determines...
- Page 53 Update All Modems (button) Max DTMF Digits Fax ID Multi-Tech Systems, Inc. FF200 FaxFinder Fax Server Admin User Guide Chapter 4: FaxFinder Server Software Screens Values Description Numeric string, When the FaxFinder is used on a phone line in a...
- Page 54 “Modem Configuration: POTS Modem” Screen Field Definitions (cont’d) Field Name Error Correction Smart Dial Fax Direction Multi-Tech Systems, Inc. FF200 FaxFinder Fax Server Admin User Guide Chapter 4: FaxFinder Server Software Screens Values Description on, off By setting Error Correction to "on," you are...
-
Page 55: Password Administration Screen
Name User ID Password Confirm Password Function Multi-Tech Systems, Inc. FF200 FaxFinder Fax Server Admin User Guide Chapter 4: FaxFinder Server Software Screens Values Description alphanumeric Name of client user. This entry must match the “Name” entry in the Phone Book. -
Page 56: Multi-Tech Systems, Inc. Ff200 Faxfinder Fax Server Admin User Guide
1. Insert the FaxFinder Product CD into the CD-ROM drive of the client PC. Launch the installation program by clicking on the setup.exe file on the CD. Transient screens will appear. Multi-Tech Systems, Inc. FF200 FaxFinder Fax Server Admin User Guide... - Page 57 3. At the Choose Destination Location screen, designate the desired file location for the FaxFinder client software. In most cases, the default file location is recommended. Specify the desired file location and click Next. Multi-Tech Systems, Inc. FF200 FaxFinder Fax Server Admin User Guide...
- Page 58 Again, in most cases, the default is recommended unless you have other plans. Designate a folder and click Next. 5. A transient screen will appear while files are being copied. Multi-Tech Systems, Inc. FF200 FaxFinder Fax Server Admin User Guide...
- Page 59 Chapter 5: FaxFinder Client Software Configuration 6. You will be asked whether or not you want to associate TIF and CPG files with the Multi-Tech Tiff Viewer. Click Yes (unless you prefer to use a different viewer program). 7. If a Question screen appears asking "Warning - the extension TIF is already registered, Overwrite?,”...
- Page 60 Start menu icon or the tray icon. (If the Client Software is shut down, it can be re-opened from the Start menu or by double-clicking on the FF110.EXE file, which, following a typical, default installation, would be located at C:\Program Files \ Multi-Tech Systems\FaxFinder Client Software\.) Multi-Tech Systems, Inc.
-
Page 61: Associating Client With Specific Faxfinder Unit(S)
FaxFinder unit. If the client is to be associated with multiple FaxFinder units, a different Username and Password could be established for each. However, in most cases, it is advisable (for Multi-Tech Systems, Inc. FF200 FaxFinder Fax Server Admin User Guide Chapter 5: FaxFinder Client Software Configuration... - Page 62 The Username/Password combination may be wrong. Verify that the Username/Password combination in the client software screen matches the UserID/Password combination established in the FaxFinder Server software screen. Multi-Tech Systems, Inc. FF200 FaxFinder Fax Server Admin User Guide Chapter 5: FaxFinder Client Software Configuration...
-
Page 63: Dis-Associating The Client From A Specific Faxfinder Unit
Right-click on it and select delete. 2. Your FaxFinder Client Software will no longer be able to send faxes through this particular FaxFinder unit. Multi-Tech Systems, Inc. FF200 FaxFinder Fax Server Admin User Guide Chapter 5: FaxFinder Client Software Configuration... -
Page 64: Disabling And Re-Enabling A Client's Faxfinder Service
(preferably a local fax machine). To do so, follow the instructions for the “Sending a Fax” procedure in Chapter 6. Multi-Tech Systems, Inc. FF200 FaxFinder Fax Server Admin User Guide Chapter 5: FaxFinder Client Software Configuration disable. You will now be re-... -
Page 65: Faxfinder Fax Client Software Menu Command Definitions
Send Fax Pause Scheduler Options Exit Multi-Tech Systems, Inc. FF200 FaxFinder Fax Server Admin User Guide Chapter 5: FaxFinder Client Software Configuration Values Description Brings up the FaxFinder Send Fax screen, the first step in transmitting a fax message via the FaxFinder system. - Page 66 Add Contact Edit Cover Page Template Help menu commands Multi-Tech Systems, Inc. FF200 FaxFinder Fax Server Admin User Guide Chapter 5: FaxFinder Client Software Configuration Values Description Brings up the Add Device Address screen so that a FaxFinder or HylaFax server on the network can be associated with the client.
- Page 67 Multi-Tech Systems, Inc. FF200 FaxFinder Fax Server Admin User Guide Chapter 5: FaxFinder Client Software Configuration Values Description Shows FaxFinder or HylaFAX server units with which the client is associated. Also shows Print Capture function.
- Page 68 Delete Disable Abort Abort and Pause Properties Multi-Tech Systems, Inc. FF200 FaxFinder Fax Server Admin User Guide Chapter 5: FaxFinder Client Software Configuration Values Description Dis-associates the client from the selected FaxFinder or HylaFAX unit so that the client can no longer send faxes through that FaxFinder unit.
- Page 69 Delete Reschedule Properties Multi-Tech Systems, Inc. FF200 FaxFinder Fax Server Admin User Guide Chapter 5: FaxFinder Client Software Configuration Values Description Identifies recipient of each fax for which transmission is incomplete. Identifies time at which a pending fax is set to be transmitted.
- Page 70 <descriptor> Recipient (column) alphanumeric List All Fax Ports Multi-Tech Systems, Inc. FF200 FaxFinder Fax Server Admin User Guide Chapter 5: FaxFinder Client Software Configuration Values Description Shows FaxFinder units with which the client is associated. The fax modem (within) the FaxFinder server unit, the status of which is being tracked.
- Page 71 Multi-Tech Systems, Inc. FF200 FaxFinder Fax Server Admin User Guide Chapter 5: FaxFinder Client Software Configuration Values Description Identifies recipient of each outgoing fax. Indicates when each outgoing fax was sent.
- Page 72 Multi-Tech Systems, Inc. FF200 FaxFinder Fax Server Admin User Guide Chapter 5: FaxFinder Client Software Configuration Values Description Shows the name of the the selected Address Book entry. Shows the organizational affiliation of the the selected Address Book entry.
-
Page 73: Chapter 6: Faxfinder Client Software Operation
Cover Page Generator and Tiff Viewer for their special functions. When sending faxes, the FaxFinder Client Software calls up the Multi-Tech Cover Page generator if cover pages are requested. When previewing outgoing faxes or viewing received faxes, the PC’s operating system calls up the TIFF Viewer to display TIFF files. -
Page 74: Sending A Fax
FaxFinder program screen. If the program has been shut down, it can be restarted from the Windows Start menu.) Multi-Tech Systems, Inc. FF200 FaxFinder Fax Server Admin User Guide Chapter 6: FaxFinder Client Software Operation... - Page 75 Chapter 6: FaxFinder Client Software Operation However, you can send faxes through the FaxFinder without bringing up the FaxFinder Client Software screen. Multi-Tech Systems, Inc. FF200 FaxFinder Fax Server Admin User Guide...
- Page 76 Although such messages can sometimes safely be ignored (in the illustration below, simply by clicking “Yes” to proceed), you must confirm this with your own application programs. Multi-Tech Systems, Inc. FF200 FaxFinder Fax Server Admin User Guide Chapter 6: FaxFinder Client Software Operation...
- Page 77 To assign the FaxFinder as the default printer simultaneously for all application programs that print, use the Windows Printers dialog box. To adjust fax-specific parameters (like resolution and paper size), right-click on the Print dialog box within the application and select “Properties.” The MULTI-TECH FAXFINDER Properties screen will appear. Multi-Tech Systems, Inc.
- Page 78 “Options” menu of the FaxFinder Fax Client Software screen. For more information about addresses and the automated fields used in cover pages, see the section “Setting Up Your Address Book” later in this chapter. Multi-Tech Systems, Inc. FF200 FaxFinder Fax Server Admin User Guide Chapter 6: FaxFinder Client Software Operation...
- Page 79 In it, you can view both the cover page and the main fax page(s). (For more information on this, see the section “Using the Multi-Tech Tiff Viewer” later in this chapter.) When satisfied with your fax, close the Multi-Tech Tiff Viewer program and return to the FaxFinder Send Fax screen.
-
Page 80: Scheduling Fax Transmissions
5. Enter the date and time at which you want the fax to be sent. 6. Click OK in the Fax Scheduling screen and then click Send Fax in the FaxFinder Send Fax screen. Multi-Tech Systems, Inc. FF200 FaxFinder Fax Server Admin User Guide... -
Page 81: Re-Sending A Failed Fax
Locate the failed fax in the Fax Log tab of the FaxFinder Fax Client Software. Select the failed fax and right-click on it. In the menu that appears, select Resend. Multi-Tech Systems, Inc. FF200 FaxFinder Fax Server Admin User Guide... -
Page 82: Putting Pending Faxes On Hold And Rescinding The Hold
2. While the fax is being sent to the second party, the client user realizes that there is something wrong with the fax. She brings up the FaxFinder Fax Client Software screen, opens the File menu, and selects “Pause Scheduler.” Multi-Tech Systems, Inc. FF200 FaxFinder Fax Server Admin User Guide... - Page 83 She could click on “Pause Scheduler” again to cancel that command. In that case, the pending fax would become active and could not be stopped. She could select the fax in the Pending Faxes screen and right-click on it to bring up a menu. Multi-Tech Systems, Inc. FF200 FaxFinder Fax Server Admin User Guide...
- Page 84 Chapter 6: FaxFinder Client Software Operation She could view the details of the fax and, at her option, view the fax again. She could re-schedule the fax for a later time. Multi-Tech Systems, Inc. FF200 FaxFinder Fax Server Admin User Guide...
-
Page 85: Canceling A Fax
Pause Scheduler. Any pause applied to a pending fax is cancelled when the computer is rebooted. Any fax left pending with the FaxFinder Scheduler paused will be sent as soon as the FaxFinder client program opens when the PC is turned on again. Multi-Tech Systems, Inc. FF200 FaxFinder Fax Server Admin User Guide... -
Page 86: Setting Fax Retry Number And Interval
1. In the FaxFinder Fax Client Software screen, open the File menu and select “Options.” When the Options screen appears, click on the Fax Retry tab. 2. Set the number of retries and the interval between these repeated attempts and click OK. Multi-Tech Systems, Inc. FF200 FaxFinder Fax Server Admin User Guide... -
Page 87: Sending One Fax Containing Multiple Documents
2. In the “Documents” pane of the FaxFinder Send Fax screen, you can add a cover page, re-arrange the order of the files, or delete items from the list of files to be faxed. Multi-Tech Systems, Inc. FF200 FaxFinder Fax Server Admin User Guide Chapter 6: FaxFinder Client Software Operation... - Page 88 TIF file, and now want to forward to another party. 4. When all documents to be transmitted have been listed in the Documents list, click Send Fax. The documents will be sent in the order listed. Multi-Tech Systems, Inc. FF200 FaxFinder Fax Server Admin User Guide...
-
Page 89: Forwarding A Fax
2. In the Documents pane, click “Add.” Then browse to the TIF file to be sent as a fax. Click Open. 3. The selected file will appear in the “Documents” list in the FaxFinder Send Fax screen. Multi-Tech Systems, Inc. FF200 FaxFinder Fax Server Admin User Guide... - Page 90 “Add Recipient.” Then click Send Fax. The TIF file will be reconverted into a fax message that can be received by a fax machine. Multi-Tech Systems, Inc. FF200 FaxFinder Fax Server Admin User Guide Chapter 6: FaxFinder Client Software Operation...
-
Page 91: Receiving A Fax
The sender’s “Remote ID” and the client’s name appear in the “Subject” line of the email message. (The Remote ID comes from the sending fax machine and is typically the sender’s fax number or name.) Multi-Tech Systems, Inc. FF200 FaxFinder Fax Server Admin User Guide Chapter 6: FaxFinder Client Software Operation... - Page 92 Chapter 6: FaxFinder Client Software Operation Multi-Tech Systems, Inc. FF200 FaxFinder Fax Server Admin User Guide...
-
Page 93: Receiving Faxes In Pbx Routing Mode
The sender’s “Remote ID” and the recipient’s name appear in the “Subject” line of the email message. (The Remote ID comes from the sending fax machine and is typically the sender’s fax number or name.) Multi-Tech Systems, Inc. FF200 FaxFinder Fax Server Admin User Guide Chapter 6: FaxFinder Client Software Operation... - Page 94 As,’ renaming the TIFF file attachment with a meaningful name for subsequent viewing or forwarding. 7. The client views the fax message in the TIFF viewer program. Multi-Tech Systems, Inc. FF200 FaxFinder Fax Server Admin User Guide Chapter 6: FaxFinder Client Software Operation...
-
Page 95: Using The Multi-Tech Tiff Viewer
Chapter 6: FaxFinder Client Software Operation Using the Multi-Tech Tiff Viewer The Multi-Tech Tiff Viewer program has a variety of features that enhance the viewing of fax messages in graphic file form (thumbnails, zooming, spot magnification, scrolling, rotating, etc.). The program can also manipulate and permanently alter the graphic files. - Page 96 Chapter 6: FaxFinder Client Software Operation Multi-Tech Systems, Inc. FF200 FaxFinder Fax Server Admin User Guide...
- Page 97 Zoom to Selection. Click and drag with the mouse over the rectangular area you would like to view. The Multi-Tech Tiff Viewer zooms in sufficiently to fill the screen with the selected area. Multi-Tech Systems, Inc. FF200 FaxFinder Fax Server Admin User Guide...
- Page 98 Click over Area. A secondary window will appear that shows the ‘clicked-on’ area magnified. You can adjust the size of the secondary window by dragging on its borders. You can re-locate the secondary window by putting the cursor inside the window, clicking, holding, and dragging. Multi-Tech Systems, Inc. FF200 FaxFinder Fax Server Admin User Guide...
- Page 99 Scan the Graphic. If you click, hold, and drag, you can scan the image in a magnified view. Two magnifying windows will appear as in the “Click-and-Hold Over Area” description above. Multi-Tech Systems, Inc. FF200 FaxFinder Fax Server Admin User Guide...
-
Page 100: Importing Fax Images Into Other Application Programs
Importing Fax Images into Other Application Programs The Copy command in the Multi-Tech Tiff Viewer allows you to import the fax image into other application programs. In the illustration below, a fax has been Copied from the Multi-Tech Tiff Viewer and Pasted into a Microsoft Word document. -
Page 101: Setting Up Your Address Book Manually
4. After an entry has been made in the Address Book, you can view and revise it. In the Address Book list, right-click on the name of the contact about whom you wish to review address information and select Properties. Multi-Tech Systems, Inc. FF200 FaxFinder Fax Server Admin User Guide Chapter 6: FaxFinder Client Software Operation... - Page 102 8. To delete an entry from your Address Book, select the entry and right-click on it. In the menu that appears, select delete. Multi-Tech Systems, Inc. FF200 FaxFinder Fax Server Admin User Guide Chapter 6: FaxFinder Client Software Operation...
-
Page 103: Setting Up Your Address Book By Synchronizing With Outlook
2. In the FaxFinder Fax Client Software, go to Multi-Tech Systems, Inc. FF200 FaxFinder Fax Server Admin User Guide Chapter 6: FaxFinder Client Software Operation and click on “Enable Outlook Sync.” File | Options |Advanced... - Page 104 At the Options screen, click OK. 4. In the FaxFinder Fax Client Software, go to the Device Status tab and select Outlook Synchronizer in the “Device” list. Multi-Tech Systems, Inc. FF200 FaxFinder Fax Server Admin User Guide Chapter 6: FaxFinder Client Software Operation...
- Page 105 The Outlook Synchronizer feature has many options. For further details, see the Administrator User Guide. Multi-Tech Systems, Inc. FF200 FaxFinder Fax Server Admin User Guide Chapter 6: FaxFinder Client Software Operation...
-
Page 106: Using Stock Cover Pages
1. We will send the fax from the Windows Notepad program. (In this program, one sets the printer by going to File | Page Setup | Printer | Properties | Name and, in the drop-down list, set “Multi-Tech FaxFinder” as the target printer, and click OK). - Page 107 The “fax stamp” at the top of each sheet of the fax (which includes sender, recipient, and time info) is inserted automatically based on information from the FaxFinder server software and from the recipient fax machine. Multi-Tech Systems, Inc. FF200 FaxFinder Fax Server Admin User Guide...
- Page 108 Chapter 6: FaxFinder Client Software Operation 4. The FaxFinder Send Fax screen appears again but this time our recipient has been entered. Multi-Tech Systems, Inc. FF200 FaxFinder Fax Server Admin User Guide...
- Page 109 5. Since we intend to use a cover page, we click “Use Cover Page” and then select a stock cover page from the “Cover Page Style” drop-down list. We can then type a subject for the fax message and type a cover page note, each in the appropriate fields. Multi-Tech Systems, Inc. FF200 FaxFinder Fax Server Admin User Guide...
- Page 110 Suppose we choose the style called “BoldComplete.” We can view it by clicking “View/Edit” on the FaxFinder Send Fax screen. The requested file will appear in the Template Editor screen. Multi-Tech Systems, Inc. FF200 FaxFinder Fax Server Admin User Guide...
- Page 111 6. To see how the cover page appears after the sender and recipient information has been automatically inserted, click Preview Fax. This is how the fax cover page will be sent. 7. To send the fax, simply click Send Fax in the FaxFinder Send Fax screen. Multi-Tech Systems, Inc. FF200 FaxFinder Fax Server Admin User Guide...
-
Page 112: Creating Or Modifying Cover Page Styles
Creating or Modifying Cover Page Styles The Multi-Tech Cover Page Generator program allows you either to produce custom cover pages or to use existing style templates. In this section, we will describe both processes, making a new template and customizing an existing stock cover page style template. - Page 113 Chapter 6: FaxFinder Client Software Operation 2. The main Template Editor screen will appear. Open it to full-screen size. Multi-Tech Systems, Inc. FF200 FaxFinder Fax Server Admin User Guide...
- Page 114 FaxFinder Send Fax screen (for the subject of fax and the comment) and from the client PC (for the date of the fax). Multi-Tech Systems, Inc. FF200 FaxFinder Fax Server Admin User Guide Chapter 6: FaxFinder Client Software Operation...
- Page 115 (its darker shade represents its unselected state). You can also turn the Grid on and off in the Settings pull-down menu. Multi-Tech Systems, Inc. FF200 FaxFinder Fax Server Admin User Guide Chapter 6: FaxFinder Client Software Operation Edit Box or...
- Page 116 4-direction cursor appears. To expand or contract the box, click on it and drag an edge or a handle until the desired size/shape is achieved. Multi-Tech Systems, Inc. FF200 FaxFinder Fax Server Admin User Guide Chapter 6: FaxFinder Client Software Operation cursor.
- Page 117 To follow our example, you would select “T_DATE” to insert a date field next to the “Date” label you have previously placed on the page. Multi-Tech Systems, Inc. FF200 FaxFinder Fax Server Admin User Guide Chapter 6: FaxFinder Client Software Operation and drag to open the desired field.
- Page 118 To set the line width for lines, rectangles, and ellipses, use the drop-down box at the far-right of the Template Editor’s tool bar. (You need to have the screen open widely enough to see its entirety.) Multi-Tech Systems, Inc. FF200 FaxFinder Fax Server Admin User Guide Chapter 6: FaxFinder Client Software Operation C. Ellipse D.
- Page 119 If you used the default installation path for Windows XP, save to C:\Documents And Settings\<username>\Application Data\Fax Finder Client\Cover Pages. 10. We advise previewing and printing your custom cover page template using the Multi-Tech Tiff Viewer program rather than the Template Editor program.
-
Page 120: Modifying Existing Cover Page Templates
2. In the File menu, select “Open.” Browse to the directory into which the FaxFinder client software has been installed. Typically, this will be C:\Program Files \ Multi-Tech Systems \ FaxFinder Client Software \ Cover Pages. Select a cover page template from the list. - Page 121 Address Book (in “New Contact” screens launched from Edit | Add Contact in the FaxFinder Fax Client Software program). Multi-Tech Systems, Inc. FF200 FaxFinder Fax Server Admin User Guide Chapter 6: FaxFinder Client Software Operation...
- Page 122 Then click and drag to size the graphic. Click and drag on the cursor dots on the periphery of the image to resize it and set its vertical/horizontal aspect ratio. Multi-Tech Systems, Inc. FF200 FaxFinder Fax Server Admin User Guide Chapter 6: FaxFinder Client Software Operation...
- Page 123 For the purposes of our fictitious company, Rocky Mountain Construction, Inc., we will use the slogan “Building on New Horizons.” Select the “Static Text” cursor labeled and drag to open a text box at the bottom of the template page. Enter the slogan. Multi-Tech Systems, Inc. FF200 FaxFinder Fax Server Admin User Guide...
- Page 124 FaxFinder Send Fax screen. Then scroll through the “Cover Page Style” list to find the file name of the custom template you have created. In our example, it is rmc1. Multi-Tech Systems, Inc. FF200 FaxFinder Fax Server Admin User Guide Chapter 6: FaxFinder Client Software Operation...
- Page 125 Address Book (if the recipient is listed there). Click on “Preview Fax” in the FaxFinder Send Fax screen to examine the fax with cover page. Multi-Tech Systems, Inc. FF200 FaxFinder Fax Server Admin User Guide Chapter 6: FaxFinder Client Software Operation...
-
Page 126: Cover Page Generator Menu/Icon Command Descriptions
File Menu commands Open Save Save As Print Exit Multi-Tech Systems, Inc. FF200 FaxFinder Fax Server Admin User Guide Chapter 6: FaxFinder Client Software Operation Short- Icon Description Creates new cover page template file. Ctrl + N Opens an existing cover page template file for Ctrl + O viewing or editing. -
Page 127: Edit Menu
Command Name Insert menu commands Image Field Text Edit Box Multi-Tech Systems, Inc. FF200 FaxFinder Fax Server Admin User Guide Chapter 6: FaxFinder Client Software Operation Icon Description Use to insert a bmp or tif image into the cover page template. - Page 128 Filled Object deleting objects Line Size drop-down menu Multi-Tech Systems, Inc. FF200 FaxFinder Fax Server Admin User Guide Chapter 6: FaxFinder Client Software Operation Icon Description Use to insert text objects needed in the cover page template. These uses include labels for automated fields (TO, FROM, DATE, etc.) and plain text like a...
-
Page 129: View Menu
Zoom Out Fit to Width Fit in Window Toolbar Multi-Tech Systems, Inc. FF200 FaxFinder Fax Server Admin User Guide Chapter 6: FaxFinder Client Software Operation Icon Description Use to view a smaller area of the cover page template file in greater magnification. -
Page 130: Settings Menu
Command Name Settings Menu commands Font Grid Multi-Tech Systems, Inc. FF200 FaxFinder Fax Server Admin User Guide Chapter 6: FaxFinder Client Software Operation Icon Description Brings up Font dialog box in which font, font size, and font style can be set. -
Page 131: Reporting Failed Faxes To The Administrator
5. The client user should forward the modem log file to the FaxFinder administrator in an email message. The FaxFinder administrator’s email address should be viewable in any fax you have received via the FaxFinder. Multi-Tech Systems, Inc. FF200 FaxFinder Fax Server Admin User Guide... -
Page 132: Chapter 7 - Server Operation
The actual log is a text file attached to the email. The fax log gives you a summary of events going on in the system. Use it as a reference when considering modifications or expansions of your faxing system. A sample log file is shown below. Multi-Tech Systems, Inc. FF200 FaxFinder Fax Server Admin User Guide... -
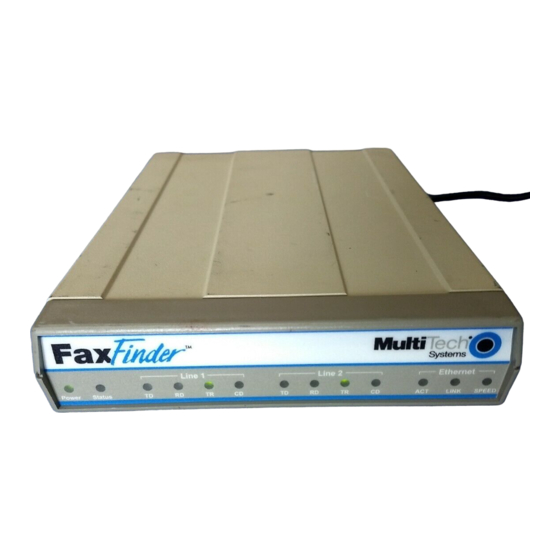
Page 133: Front Panel Leds
Data Link Activity Speed Speed Multi-Tech Systems, Inc. FF200 FaxFinder Fax Server Admin User Guide Description Solid (constant) green if unit is on. Flashing Green = unit is functioning properly Solid Green = unit is having its software updated. DO NOT TURN OFF if Status LED is solid green. -
Page 134: Dealing With Failed Fax Reports
Check Mult-Tech web site for newer server software for FaxFinder and, if any is available, upgrade the FaxFinder (see the section “Upgrading FaxFinder Server Software” in Chapter 8: FaxFinder Maintenance). • Call Mult-Tech Tech Support at 1-800-972-2439. Multi-Tech Systems, Inc. FF200 FaxFinder Fax Server Admin User Guide Chapter 7: Server Operation... -
Page 135: Chapter 8 - Device Manager Installation & Operation
Chapter 8: Device Manager Installation & Operation Chapter 8 - Device Manager Installation & Operation Installing Device Manager Software The process of installing the Device Manager software is explained in the illustration below. Multi-Tech Systems, Inc. FF200 FaxFinder Fax Server Admin User Guide... -
Page 136: Operation: Applicability Of Device Manager
Delete Device Save Configuration Right-Click on listed device Restore Configuration Multi-Tech Systems, Inc. FF200 FaxFinder Fax Server Admin User Guide Chapter 8: Device Manager Installation & Operation Summary For FaxFinder and CallFinder, this command copies entries of main (primary) phonebook into the phonebooks of other subordinate units in the system. - Page 137 Update [Firmware] Set Phonebook Sharing Right-Click on listed device [View] Properties Multi-Tech Systems, Inc. FF200 FaxFinder Fax Server Admin User Guide Chapter 8: Device Manager Installation & Operation Summary Updates “server” firmware and channel firmware of a device (FaxFinder, CallFinder, or Multi- Access unit).
-
Page 138: Opening The Device Manager Software
1. To launch the Device Manager program from the Windows desktop, go to Start | Programs | Device Manager | Device Manager. 2. The Device Manager main screen will appear. Multi-Tech Systems, Inc. FF200 FaxFinder Fax Server Admin User Guide... -
Page 139: Device Manager Main Screen
(designated as Independent) can also be part of the system. The Device Manager is in contact with all the FaxFinder units of its system through the Ethernet network (Internet or private IP network) to which all are connected. Multi-Tech Systems, Inc. FF200 FaxFinder Fax Server Admin User Guide... - Page 140 Help menu Device column Status column Version column Multi-Tech Systems, Inc. FF200 FaxFinder Fax Server Admin User Guide Chapter 8: Device Manager Installation & Operation Description Contains the Exit command which closes the Device Manager program. Allows you to add a device (FaxFinder, CallFinder, or Multi-Access unit) to the system.
-
Page 141: Device Manager "Edit" Menu
Edit Menu Command Synchronize Phonebooks Add Device Auto-Discover Devices Multi-Tech Systems, Inc. FF200 FaxFinder Fax Server Admin User Guide Chapter 8: Device Manager Installation & Operation Description Transfers phonebook data from a Primary FaxFinder unit to all FaxFinders designated as Copy units. The phonebook sharing... - Page 142 2. Designating all other FaxFinder units participating in phonebook sharing as Copy units. In the main Device Manager screen, right-click on each unit to share the master phonebook, and select Copy. Multi-Tech Systems, Inc. FF200 FaxFinder Fax Server Admin User Guide...
- Page 143 To see the newly synchronized phonebook list in each Copy FaxFinder unit, you must update the Phone Book screen by clicking on the Phone Book button (to the right of Administration) in the list at the top of the screen. Multi-Tech Systems, Inc. FF200 FaxFinder Fax Server Admin User Guide...
- Page 144 Open the Edit menu and select Add Device. When the Add Device screen appears, enter the IP address, Username, and Password for the unit you are adding to the system. Then click OK. Multi-Tech Systems, Inc. FF200 FaxFinder Fax Server Admin User Guide...
-
Page 145: Right-Click Menu For Selected Faxfinder Device
Restore Configuration Update [firmware] Set Phone Book Sharing Properties Multi-Tech Systems, Inc. FF200 FaxFinder Fax Server Admin User Guide Chapter 8: Device Manager Installation & Operation Description Dis-associates the selected device (FaxFinder, CallFinder, or Multi-Access unit) from the system of devices listed in the Device Manager software Device column. - Page 146 Once deleted, the device will no longer be under the management of the Device Manager software. Click Yes at the ‘confirmation’ screen to complete the deletion command. Multi-Tech Systems, Inc. FF200 FaxFinder Fax Server Admin User Guide...
- Page 147 To save the configuration for a particular devicet, select the unit in the main Device Manager screen, right-click on it, and select Save Configuration. Choose the location at which the configuration file will be stored and click OK. Then, at the ‘confirmation’ screen, click OK again. Multi-Tech Systems, Inc. FF200 FaxFinder Fax Server Admin User Guide...
- Page 148 Device Manager software, use the Restore Configuration command. Device Manager will browse, by default, to an automatically determined directory that contains a saved configuration. Multi-Tech Systems, Inc. FF200 FaxFinder Fax Server Admin User Guide...
- Page 149 Start Update button Get Versions button main pane of window Multi-Tech Systems, Inc. FF200 FaxFinder Fax Server Admin User Guide Chapter 8: Device Manager Installation & Operation Description Identifies the current condition of the device (FaxFinder, CallFinder, or MultiAccess unit) or the current process underway.
- Page 150 The Properties command brings up the FaxFinder/CallFinder – N.N.N.N screen on which you can view the IP Address and Username of the FaxFinder and determine the number of characters in its Password. Multi-Tech Systems, Inc. FF200 FaxFinder Fax Server Admin User Guide...
-
Page 151: Firmware Updating Process - Detailed
(You cannot update the FaxFinder while it is handling a call.) Select that FaxFinder unit and right-click on it. In the menu that appears, select Update. Multi-Tech Systems, Inc. FF200 FaxFinder Fax Server Admin User Guide Chapter 8: Device Manager Installation & Operation... - Page 152 2. The Update FaxFinder N.N.N.N screen will appear. The current firmware versions for the FaxFinder’s POTS Modems (1 modem for FF100 and FF110; 2 modems for FF200; 4 modems for FF420; 8 modems for FF820) will be listed in the main window.
-
Page 153: Multi-Tech Systems, Inc. Ff200 Faxfinder Fax Server Admin User Guide
Chapter 8: Device Manager Installation & Operation 3. Browse to the location of the most recent firmware file. 4. Click Start Update. 5. The FaxFinder – Confirm Update screen will appear. Click OK. Multi-Tech Systems, Inc. FF200 FaxFinder Fax Server Admin User Guide... - Page 154 POTS modems of all FaxFinder units in the system. 8. The updating process is now complete. Click the “X” in the upper-right corner to return to the main Device Manager screen. Multi-Tech Systems, Inc. FF200 FaxFinder Fax Server Admin User Guide...
-
Page 155: Faxfinder Server Firmware Update
2. The Update FaxFinder N.N.N.N screen will appear. The current firmware versions for the FaxFinder server, for POTS Modem 1, and for any of the unit’s additional POTS modems, will be listed in the main window. Multi-Tech Systems, Inc. FF200 FaxFinder Fax Server Admin User Guide Chapter 8: Device Manager Installation & Operation... - Page 156 In the FaxFinder Update Select field, select “FaxFinder firmware.” 3. Browse to the location of the most recent firmware file. 4. Click Start Update. 5. The FaxFinder – Confirm Update screen will appear. Click OK. Multi-Tech Systems, Inc. FF200 FaxFinder Fax Server Admin User Guide...
- Page 157 “Finished – The FaxFinder/CallFinder is ready.” 7. Close the Update FaxFinder N.N.N.N window. In the main FFCF Manager window, the updated version will be listed. Multi-Tech Systems, Inc. FF200 FaxFinder Fax Server Admin User Guide...
-
Page 158: Uninstalling Or Reinstalling The Device Manager Software
1. Go to Start | Settings | Control Panel | Add or Remove Programs. (The menu director location of the ‘Add/Remove Programs’ function varies for different types of Windows operating systems.) 2. Select the Device Manager program and click Remove. Multi-Tech Systems, Inc. FF200 FaxFinder Fax Server Admin User Guide Chapter 8: Device Manager Installation & Operation... - Page 159 4. At the ‘Welcome’ screen, select “Remove” to uninstall the FFCF Manager software or select “Repair” (or “Modify”) as needed to re-install or alter the existing installation of the software. Then click Next. Multi-Tech Systems, Inc. FF200 FaxFinder Fax Server Admin User Guide Chapter 8: Device Manager Installation & Operation...
- Page 160 5. At the next screen, confirm your decision to uninstall the Device Manager software by clicking Yes. 6. A transient screen appears while files are being removed. 7. At the ‘completion’ screen, click Finish. Multi-Tech Systems, Inc. FF200 FaxFinder Fax Server Admin User Guide...
-
Page 161: Chapter 9 - Troubleshooting
If the FaxFinder unit does reply to the ping and you are still unable to view the FaxFinder web page, then call Multi-Tech Tech Support for more assistance (1-800-972-2439). 2. What if I don't get an email when I set the mail server address ? This pertains to the procedure “Setting Up the Mail Server.”... - Page 162 If you can send an email to yourself using the email software, then there is a problem between your mail server and the FaxFinder unit. Call Multi-Tech Tech Support (1-800- 972-2439). CAUSE C: The client PC running the mail software cannot connect to the mail server.
-
Page 163: What If The Faxfinder Doesn't Answer A Fax Call
Email Status to see if it has No Errors. Based on these indications perhaps a solution can be found. If not, call MultiTech Tech Support (1-800-972-2439). Multi-Tech Systems, Inc. FF200 FaxFinder Fax Server Admin User Guide Chapter 9: Troubleshooting... -
Page 164: Chapter 10 - Regulatory Information
7. Connection to party line service is subject to state tariffs. Contact the state public utility commission, public service commission or corporation commission for information. 8. No repairs are to be made by you. Repairs are to be made only by Multi-Tech Systems or its licensees. Unauthorized repairs void registration and warranty. -
Page 165: Cfr Part 15 Regulation
12. Manufacturing Information on telecommunications device (modem) embedded in FF200: Manufacturer: Multi-Tech Systems, Inc. Trade Name: Socket Modem Model Number: MT5634SMI Registration No: AU7USA-25814-M5-E Ringer Equivalence: 0.3B Modular Jack (USOC): RJ11C or RJ11W (single line) Service Center in USA: Multi-Tech Systems, Inc. -
Page 166: Canadian Limitations Notice
This Class B digital apparatus meets all requirements of the Canadian Interference-Causing Equipment Regulations. Cet appareil numérique de la classe B respecte toutes les exigences du Reglement Canadien sur le matériel brouilleur. Multi-Tech Systems, Inc. FF200 FaxFinder Fax Server Admin User Guide Chapter 10: Regulatory Information... -
Page 167: Weee Statement
Hazardous Substances) complements the WEEE Directive by banning the presence of specific hazardous substances in the products at the design phase. The WEEE Directive covers all Multi-Tech products imported into the EU as of August 13, 2005. EU-based manufacturers, distributors, retailers and importers are obliged to finance the costs of recovery from municipal collection points, reuse, and recycling of specified percentages per the WEEE requirements. -
Page 168: Multi-Tech Systems, Inc. Ff200 Faxfinder Fax Server Admin User Guide
Repair Multi-Tech Warranty Statement Multi-Tech Systems, Inc., (hereafter “MTS”) warrants that its products will be free from defects in material or workmanship for a period of two, five, or ten years (depending on model) from date of purchase, or if proof of purchase is not provided, two, five, or ten years (depending on model) from date of shipment. - Page 169 Repairs for damages caused by lightning storms, water, power surges, incorrect installation, physical abuse, or user-caused damages are billed on a time-plus-materials basis. Repair Procedures for International Distributors Distributors should contact Amex, Inc., for information about the repairs for your Multi-Tech product. Amex, Inc. 2724 Summer Street NE Minneapolis, MN 55413 U.S.A.
Need help?
Do you have a question about the FaxFinder FF200 and is the answer not in the manual?
Questions and answers