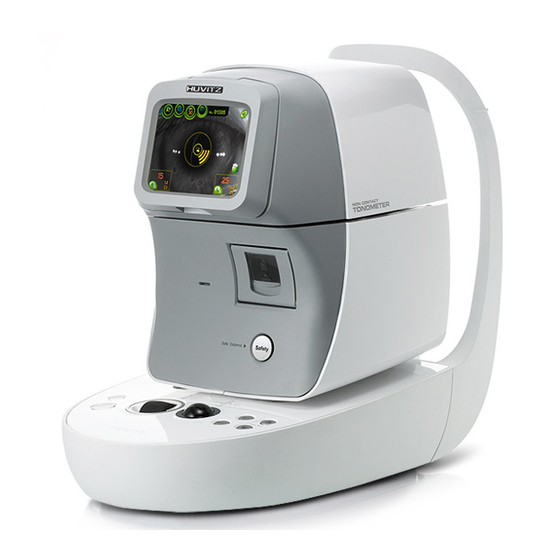
Huvitz HNT-7000 Manual
Change the motor
Hide thumbs
Also See for HNT-7000:
- Service manual (64 pages) ,
- User manual (58 pages) ,
- Software upgrade (11 pages)
Advertisement
Quick Links
Advertisement

Summary of Contents for Huvitz HNT-7000
- Page 1 HNT-7000 Change the Motor HUVITZ Co.,Ltd Customer Service Department 1/17 Rev 1.0, 2012. 01. 11...
-
Page 2: How To Change
How to Change. 1. Power on 2. Y-AXIS is up !! 3. Z-AXIS move to Head-Rest 4. Remover the Case !! Remove the volts & volts-cap.(4ea) HUVITZ Co.,Ltd Customer Service Department 2/17 Rev 1.0, 2012. 01. 11... - Page 3 Remove the volts.(4ea) P ull & disassemble the front case D Remove the remaining connectors. isassemble the Printer data cable. HUVITZ Co.,Ltd Customer Service Department 3/17 Rev 1.0, 2012. 01. 11...
- Page 4 Remove the volts.(4ea) P ull & disassemble the back case. HUVITZ Co.,Ltd Customer Service Department 4/17 Rev 1.0, 2012. 01. 11...
- Page 5 5. Replace the Motor !! Remove the connectors. Cut the cable-ties. Cut the cable-ties, agian. Pull out the connectors. HUVITZ Co.,Ltd Customer Service Department 5/17 Rev 1.0, 2012. 01. 11...
- Page 6 Disassemble the “Head” part. (Attention : Do not cut the motor cables) HUVITZ Co.,Ltd Customer Service Department 6/17 Rev 1.0, 2012. 01. 11...
- Page 7 Remove the volts. D isassemble the Z-Encoder Assy. Disassemble the X-Motor Assy. Disassemble the Z-Motor Assy. HUVITZ Co.,Ltd Customer Service Department 7/17 Rev 1.0, 2012. 01. 11...
- Page 8 Appearance of removing motors. Please change the motor that we sent. (Pay attention to the direction of link HUVITZ Co.,Ltd Customer Service Department 8/17 Rev 1.0, 2012. 01. 11...
- Page 9 Seal the screws.(4ea) Assemble in the direction of the arrow. (This is symmetrical spot. Assemble the “Head” part. Pay Attention to assemble of holes) HUVITZ Co.,Ltd Customer Service Department 9/17 Rev 1.0, 2012. 01. 11...
- Page 10 Assemble in the direction Seal the screws.(4ea) of the arrow. Connect the harness. Assemble the Z-Encoder Assy. HUVITZ Co.,Ltd Customer Service Department 10/17 Rev 1.0, 2012. 01. 11...
- Page 11 Tie the cable-ties. Tie the cable-ties, too. Assemble the “Motor Connect”. (Check the names of board & connectors.) HUVITZ Co.,Ltd Customer Service Department 11/17 Rev 1.0, 2012. 01. 11...
- Page 12 6. Assemble the “Case” !! Please assemble the case making inverted of disassemble. 7. Replace the XB-Motor !! Remove the volts. (4ea) Remove the connectors. (2ea) HUVITZ Co.,Ltd Customer Service Department 12/17 Rev 1.0, 2012. 01. 11...
- Page 13 Put aside as shown Remove the volts. Disassemble the picture. “Bottom Case”. Disassemble the Lift the cover and remove the “Bottom Cover”. connector of “Track Ball”. HUVITZ Co.,Ltd Customer Service Department 13/17 Rev 1.0, 2012. 01. 11...
- Page 14 Disassemble the “Slide Case”. Remove the bolts.(2ea) Disassemble the motor from “Timming Belt”. Cut the harness from motor. HUVITZ Co.,Ltd Customer Service Department 14/17 Rev 1.0, 2012. 01. 11...
- Page 15 Peel the coverings of harness. Replace “Sayama Motor” (Ratio 120/1) Twist the same color harness. (white : (+) & Gray : (-)) HUVITZ Co.,Ltd Customer Service Department 15/17 Rev 1.0, 2012. 01. 11...
- Page 16 (Soldering is th better.) W rap the connecting point with tape. Connect motor with the belt. Adjust the belt tension. HUVITZ Co.,Ltd Customer Service Department 16/17 Rev 1.0, 2012. 01. 11...
- Page 17 “Pacing Progress toward People” We are making a great company together!! - Thanks - HUVITZ Co.,Ltd Customer Service Department 17/17 Rev 1.0, 2012. 01. 11...


Need help?
Do you have a question about the HNT-7000 and is the answer not in the manual?
Questions and answers