
Related Manuals for Huvitz HRK-7000


Summary of Contents for Huvitz HRK-7000
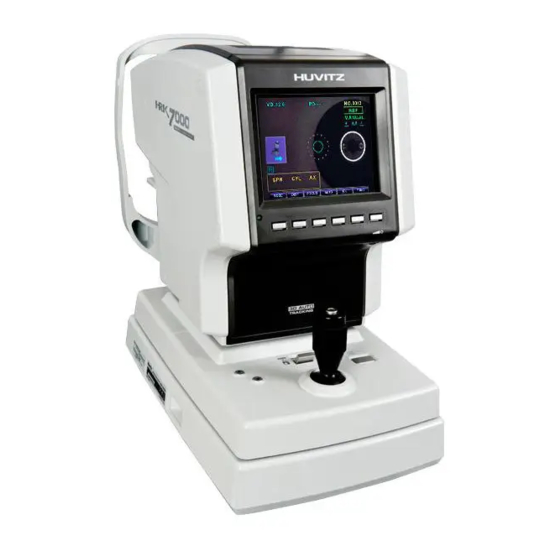
- Page 1 --------------------------------------------------------Auto Ref/Keratometer HRK-7000/7000A 1 User’s Manual Auto Ref/Keratometer HRK-7000/7000A...
- Page 2 The information in this publication has been carefully checked and is believed to be entirely accurate at the time of publication. HUVITZ assumes no responsibility, however, for possible errors or omissions, or for any consequences resulting from the use of the information...
- Page 3 --------------------------------------------------------Auto Ref/Keratometer HRK-7000/7000A 3 contained herein. HUVITZ reserves the right to make changes in its products or product specifications at any time and without prior notice, and is not required to update this documentation to reflect such changes. ©2004 - 2007 - Huvitz Co., Ltd.
-
Page 4: Table Of Contents
4 Auto Ref/Keratometer HRK-7000/7000A -------------------------------------------------------- Contents Introduction ........................ 7 1.1. Overview ......................7 1.2. Classification ....................7 Safety Information ...................... 8 2.1. Overview ......................8 2.2. Safety Symbol ....................9 2.3. Environmental Considerations ............... 11 2.4. Safety Precaution ................... 13 Characteristics ...................... - Page 5 --------------------------------------------------------Auto Ref/Keratometer HRK-7000/7000A 5 8.2.1. Manual Measurement Mode ..............41 8.2.2. Auto Measurement Mode ..............44 8.3. Corneal Curvature / Refractive Power Measurement Mode (K&R Mode) .. 45 8.3.1. Manual Measurement Mode ..............45 8.3.2. Auto Measurement Mode ..............48 8.3.3.
- Page 6 6 Auto Ref/Keratometer HRK-7000/7000A -------------------------------------------------------- 9.6. Power saving Function ................... 85 10. Self diagnosis & Maintenance ................86 10.1. Before calling for serviceman ................. 86 10.2. Replacement ....................89 10.2.1. Printer paper ..................89 10.2.2. Chin rest paper ..................90 10.2.3.
-
Page 7: Introduction
--------------------------------------------------------Auto Ref/Keratometer HRK-7000/7000A 7 Introduction 1.1. Overview Auto Ref/Keratometer HRK-7000A is the equipment to provide the information of Spherical, Cylindrical and Axis while measuring the refraction of examinee’s eyes. Auto Ref/Keratometer HRK-7000A is the equipment that can measure the corneal curvature of examinee. -
Page 8: Safety Information
8 Auto Ref/Keratometer HRK-7000/7000A -------------------------------------------------------- Safety Information 2.1. Overview Safety is everyone’s responsibility. The safe use of this equipment is largely dependent upon the installer, user, operator, and maintainer. It is imperative that personnel study and become familiar with this entire manual before attempting to install use, clean, service or adjust this equipment and any associated accessories. -
Page 9: Safety Symbol
--------------------------------------------------------Auto Ref/Keratometer HRK-7000/7000A 9 2.2. Safety Symbol The International Electrotechnical Commission (IEC) has established a set of symbols for medical electronic equipment which classify a connection or warn of any potential hazards. The classifications and symbols are shown below. I and O on power switch represent ON and OFF respectively. - Page 10 10 Auto Ref/Keratometer HRK-7000/7000A -------------------------------------------------------- Hot surface. MEDICAL EUIPMENT WITH RESPECT TO ELECTRIC SHOCK FIRE AND MECHANICAL HAZARDS ONLY IN UL60601-1 ACCORDANCE WITH UL 60601-1, AND CAN/CSA C22.2 CAN/CSA C22.2 NO.601.1 NO.601.1 Disposal of your old appliance When this crossed-out wheeled bin symbol is attached to a product it means the product is covered by the European Directive 2002/96/EC.
-
Page 11: Environmental Considerations
--------------------------------------------------------Auto Ref/Keratometer HRK-7000/7000A 11 2.3. Environmental Considerations Please avoid the environment below for the operation and storage of the equipment. Where the equipment is exposed to water vapor. Don’t operate the equipment with wet hands. Where the machine is exposed directly to the sunlight. - Page 12 12 Auto Ref/Keratometer HRK-7000/7000A -------------------------------------------------------- Where the machine can be exposed to the chemical or flammable substances. Please keep the equipment out of dust and do not let inserted any metal parts such as coins, clips, etc. Do not disassemble or open the machine. The manufacture shall have no responsibility for any problems caused by these.
-
Page 13: Safety Precaution
The equipment must be operated only by, or under direct supervision of properly trained and qualified person/s. Modifications of this equipment may only be carried out by Huvitz’s service technicians or other authorized persons. Customer maintenance of this equipment may only be performed as stated in the User’s Manual and Service Manual. - Page 14 The equipment may only be used together with accessories supplied by Huvitz’s. If the customer makes use of other accessories, use them only if there are usability under technical safety aspects has been proved and confirmed by Huvitz or the manufacturer of the accessory.
-
Page 15: Characteristics
--------------------------------------------------------Auto Ref/Keratometer HRK-7000/7000A 15 Characteristics It is possible to measure the refractive power and corneal curvature with one(1) set of the machine: Refractometry and Keratometry As the measurement range of refractive power is wide from-25D to +22D, it can measure the severe myopia. -
Page 16: Note For Use
16 Auto Ref/Keratometer HRK-7000/7000A -------------------------------------------------------- Note for Use Do not hit or drop the instrument. The instrument may be damaged by the strong impact. The impact may damage the function of this instrument. Handle it with care. The precision of measurement can be affected when the machine is exposed to the direct sunlight or too bright indoor illumination. -
Page 17: Names And Functions Of Each Part
--------------------------------------------------------Auto Ref/Keratometer HRK-7000/7000A 17 Names and functions of each part 5.1. Main parts [Figure 1. Front] 1. Height Adjustment Mark: Adjusts the eyes’ height of examinees 2. Operation Buttons: Selecting of functions ٍ 3 . Operation Lamp : Indicates whether or not the electric power is on 4. - Page 18 18 Auto Ref/Keratometer HRK-7000/7000A -------------------------------------------------------- [Figure 2. Back Section] 1. Forehead Rest: Preventing the vibration by fixing the forehead 2. Measuring Object Lens: Measuring the image imaging on the retina of eyes. 3. Chin Rest: Preventing the vibration by fixing the chin...
- Page 19 --------------------------------------------------------Auto Ref/Keratometer HRK-7000/7000A 19 [Figure 3. Bottom Section] 1. Power Supply Socket: A socket connecting to exterior power plug 2. Serial Interface Connector: A terminal connecting to the exterior equipment 3. Exterior Monitor Connection Connector: Connecting into the exterior monitor 4.
-
Page 20: Explanation On Switches In Front
20 Auto Ref/Keratometer HRK-7000/7000A -------------------------------------------------------- 5.2. Explanation on Switches in Front ① ⑦ ⑧ ⑨ ⑩ ⑪ ② ③ ④ ⑥ ⑤ [Figure 4. Front Section Switches] 1. MODE Button: A switch to change the mode for measurement 2. DISP Button: A switch to indicate the measured results on the monitor 3. -
Page 21: Installation Of Equipment & Preparation Of Measurement
--------------------------------------------------------Auto Ref/Keratometer HRK-7000/7000A 21 Installation of Equipment & Preparation of Measurement 1. Release of Lock on Stage Section Unlock the clamping bolt at the bottom part of Chin-rest of the machine by rotating it counterclockwise, and change the stage fixing lever behind the joystick to the direction of UNLOCK. - Page 22 22 Auto Ref/Keratometer HRK-7000/7000A -------------------------------------------------------- 6. Check of Setup As for setup of corneal vertex distance, indication of CYL, unit of SPH/CYL, indication type of corneal measurement, corneal equivalent curvature, date, etc, please check them in SETUP mode. 7. Transmission to Other Machines In case of transmitting the measured results to other machines, prepare other machines while connecting the cable into the interface connector of this machine.
-
Page 23: Exercise Through Model Eye
--------------------------------------------------------Auto Ref/Keratometer HRK-7000/7000A 23 Exercise through Model Eye 1. Power On of Main Body Connect the power plug appropriately as shown in the picture. Let the power switch on. Measuring screen appears as system check is completed. [Figure 7. Power Cable Connection] 2. - Page 24 24 Auto Ref/Keratometer HRK-7000/7000A -------------------------------------------------------- 4. Change to K&R, REF Modes If “K&R” or “REF” is not indicated on the monitor, push the MODE button until one of them is to appear. 5. Adjustment of Position for Measurement & Focus Tilt the operation lever over the model eye until the bright dots appear around the internal array ring.
- Page 25 --------------------------------------------------------Auto Ref/Keratometer HRK-7000/7000A 25 Tilt the joystick slightly to the left. Tilt the joystick slightly to the right. Pull the joystick forward. Pull the joystick backward.
- Page 26 26 Auto Ref/Keratometer HRK-7000/7000A -------------------------------------------------------- Move the chinrest down. Move the chinrest up. [ Figure 10. When the main body is not within the working range of auto-tracking ] Too close to the patient’s eye.
- Page 27 --------------------------------------------------------Auto Ref/Keratometer HRK-7000/7000A 27 Optimum condition. Too far from the patient’s eye. [ Figure 11. Focusing Indicator] External Array Ring Internal Array Ring [ Figure 12. Adjustment of Measuring Position & Focus ]...
- Page 28 28 Auto Ref/Keratometer HRK-7000/7000A -------------------------------------------------------- 6. Measurement Manual Adjustment ① Adjust the focus and position of model eye as like in the procedure of adjusting measurement position & focus explained in the previous page. ② Push the measurement switch. In case that the measurement is not...
-
Page 29: Measurement
The change of measurement mode is to be set up as shown in the above figure as the product is wrapped in Huvitz. IOL button is possible to use in K&R measurement mode and REF measurement mode only. As pushing IOL button, the function of measuring IOL is to be performed, and the function stops as pushing the button again (refer to the section 8.6). - Page 30 30 Auto Ref/Keratometer HRK-7000/7000A -------------------------------------------------------- Distance) is to be indicated in the mode of refractive power measurement. As pushing VD button, the refractive value according to VD value is to be indicated while the value of VD changes from 0.0 to the values (12/13.5/15mm) selected in user SETUP Mode.
-
Page 31: Refractometry (Ref Mode)
--------------------------------------------------------Auto Ref/Keratometer HRK-7000/7000A 31 8.1. Refractometry (REF Mode) It is the mode to measure the refractive power solely. 1. Let the power switch “ON”. The measurement window as shown in the picture below appear on the screen of monitor as system check is completed. -
Page 32: Manual Measurement Mode
32 Auto Ref/Keratometer HRK-7000/7000A -------------------------------------------------------- 3. Check the user Setup mode. Check and select the diverse functions relating to measurement including VD value or printing condition. Input the message wanted to be printed together with measurement data (refer to section 9.5). - Page 33 --------------------------------------------------------Auto Ref/Keratometer HRK-7000/7000A 33 ② Adjustment of Measurement Position and Focus CAUTION Do not insert your hands or fingers between stage and base. Also, make sure that the examinee should not put his or her hands or fingers there. Hands or fingers can get injured.
- Page 34 34 Auto Ref/Keratometer HRK-7000/7000A -------------------------------------------------------- Manual/Auto Iris Pupil External Array Ring (Min. Radius of Iris Φ 2.0mm) [ Figure 17. REF Manual Mode Screen ]...
- Page 35 --------------------------------------------------------Auto Ref/Keratometer HRK-7000/7000A 35 NOTE ● As it is not enough to adjust it by tilting the operation lever, adjust it by pushing the stage to the directions of left/right. ● If the image does not appear well because it is too bright or dark, adjust the brightness by rotating the knob at the bottom of HRK-7000A monitor(Brightness adjustment).
- Page 36 36 Auto Ref/Keratometer HRK-7000/7000A -------------------------------------------------------- ⑤ Measurement of Counter-side eye - Measure the left-side eye by pushing the stage to the direction of right while holding the operation lever. - As measuring the left/right eyes, the value of PD (Pupil Distance) is to be indicated on the monitor.
- Page 37 --------------------------------------------------------Auto Ref/Keratometer HRK-7000/7000A 37 NOTE ● As it is printed, the values measured so far are to be removed. ● As a thermal printing record, the printed characters are easy to be faded away. Please make it copied if you want to keep it for a long time.
-
Page 38: Auto Measurement Mode
38 Auto Ref/Keratometer HRK-7000/7000A -------------------------------------------------------- 8.1.2. Auto Measurement Mode As pushing Auto button in Manual Measurement mode, it automatically changes to the Auto measurement mode. As the condition of good array between the machine and the measured eye is reached, the measurement is to be performed automatically without pushing the STOP button. - Page 39 --------------------------------------------------------Auto Ref/Keratometer HRK-7000/7000A 39 ③ Measurement of Another Eye - Measure the left eye according to the same procedure by moving the stage to the right side. - As the measurement to both eyes is completed, the value of PD is to be indicated automatically on the screen of monitor.
- Page 40 40 Auto Ref/Keratometer HRK-7000/7000A -------------------------------------------------------- - As the message of TRY AGAIN happens, please refer to the explanation below. In case of TRY AGAIN Management Measure it after adjusting the exact position Poor position adjustment again. Let the examinee open the eye wide, or...
-
Page 41: Keratometry (Ker Mode)
--------------------------------------------------------Auto Ref/Keratometer HRK-7000/7000A 41 8.2. Keratometry (KER Mode) It is the mode to measure the corneal curvature solely. Do not measure the base curve of hard contact lens in this mode. Please refer to CLBC mode in section 8.5 regarding the base curve of hard contact lens. - Page 42 42 Auto Ref/Keratometer HRK-7000/7000A -------------------------------------------------------- Iris Pupil External Array Ring (Min. radius of pupil Φ 2.0mm) [ Figure 21. Screen indicating KER mode ] ③ Perform the same 4, 5 procedure of the consecutive measurement mode of refractive power. ④...
- Page 43 --------------------------------------------------------Auto Ref/Keratometer HRK-7000/7000A 43 [ Figure 22. Example of Print ]...
-
Page 44: Auto Measurement Mode
44 Auto Ref/Keratometer HRK-7000/7000A -------------------------------------------------------- 8.2.2. Auto Measurement Mode As pushing Auto button in Manual measurement mode, it is to be changed to Auto measurement mode. As the condition of good array between the machine and measured eye is reached, the measurement is to be performed without pushing the measurement button. -
Page 45: Corneal Curvature / Refractive Power Measurement Mode (K&R Mode)
--------------------------------------------------------Auto Ref/Keratometer HRK-7000/7000A 45 8.3. Corneal Curvature / Refractive Power Measurement Mode (K&R Mode) This is the mode to consecutively perform the measurement of corneal curvature and refractive power. Check whether or not the measurement screen appears on the screen of monitor. - Page 46 46 Auto Ref/Keratometer HRK-7000/7000A -------------------------------------------------------- Iris Pupil Array Ring Mire Image [ Figure 23. Screen indicating K&R Mode ] ③ Perform the same procedure as like in procedure 4, 5 of section 8.1.1. ④ Print the measured result through the same procedure as like in procedure 6 of...
- Page 47 --------------------------------------------------------Auto Ref/Keratometer HRK-7000/7000A 47 [ Figure 24. Example of Print ]...
-
Page 48: Auto Measurement Mode
48 Auto Ref/Keratometer HRK-7000/7000A -------------------------------------------------------- ⑤ Selection of Screen Indication Type - In the measurement mode including the refractive power measurement, you can designate the sign of astigmatic refractive power in SETUP mode. - Also, you can indicate the measured data of refractive power on the screen according to VD value in the measurement mode including the refractive power measurement. -
Page 49: Diverse Indications
--------------------------------------------------------Auto Ref/Keratometer HRK-7000/7000A 49 8.3.3. Diverse Indications Meaning of Kind Name Measures Signs Measured Indicating value of Measure again reliability reliability Exceeding measurable exceeds Measurement range +22D of Refraction Exceeding Impossible measurable exceeds range –25D measure Exceeding measurable exceeds range ±10D... -
Page 50: Keratometry Peripheral Measurement (Ker-P Mode)
50 Auto Ref/Keratometer HRK-7000/7000A -------------------------------------------------------- 8.4. Keratometry Peripheral Measurement (KER-P Mode) It is the mode to measure the curvature of part around cornea. Based upon the center of cornea, measure the curvature of part around cornea from the positions of up/down and left/right direction. - Page 51 --------------------------------------------------------Auto Ref/Keratometer HRK-7000/7000A 51 [ Figure 25. Screen indicating KER-P mode ] In case of corneal center, R1 : Radius of curvature on maximum meridian R2 : Radius of curvature on minimum meridian AX : Axis on the radius of curvature on maximum meridian...
- Page 52 52 Auto Ref/Keratometer HRK-7000/7000A -------------------------------------------------------- at the bottom of measurement mode indication. Four(4) boxes are to be indicated in up/down, left/right side of Mire ring. Each box indicates the proceeding state of measurement on part around cornea. If there is...
- Page 53 --------------------------------------------------------Auto Ref/Keratometer HRK-7000/7000A 53 [ Figure 26. Screen indicating KER-P Mode ]...
-
Page 54: Measurement Of Contact Lens Base Curve(Clbc Mode)
54 Auto Ref/Keratometer HRK-7000/7000A -------------------------------------------------------- 8.5. Measurement of Contact Lens Base Curve(CLBC Mode) It is the mode to measure base curve of contact lens (concave surface). Check whether or not the measurement screen appears on the screen of monitor. Keep pushing MODE button while selecting CLBC mode until “CLBC” is to be indicated on the right upper side of screen. - Page 55 --------------------------------------------------------Auto Ref/Keratometer HRK-7000/7000A 55 performed consecutively. - As the measurement is completed, the measured result is to be indicated on the screen of monitor. NOTE The measure result of astigmatic axis in base curve(concave surface) of contact lens has the difference of 90° compared with the measured value of astigmatic axis in the corneal curvature(convex surface).
-
Page 56: Intraocular Lens (Iol) Measurement Mode (Iol Mode)
56 Auto Ref/Keratometer HRK-7000/7000A -------------------------------------------------------- 8.6. Intraocular Lens (IOL) Measurement Mode (IOL Mode) The cases that light is reflected from the surface of IOL, that the crystalline lens is in opacity just like a cataract patient , or that the radius of pupil is very small can cause the error in the measured value of refractive power. -
Page 57: Retro-Illum Measurement Mode (Retro-Illum Mode)
--------------------------------------------------------Auto Ref/Keratometer HRK-7000/7000A 57 8.7. Retro-ILLUM Measurement Mode (Retro-ILLUM Mode) Retro-Illum measurement mode is the measuring function to use usefully in the following cases. It is to examine the crystalline lens of patient who has the severe symptom of cataract or undergoes it, or to measure its refractive power. - Page 58 58 Auto Ref/Keratometer HRK-7000/7000A -------------------------------------------------------- [ Figure 30. Retro-illumination Observation Window ] [Observe] - As Ret-ILLUM mode is to be selected by pushing ILLUM measurement button, [Observe] window is to appear on the screen together with Ret-Illum image spread out reflected from retina.
- Page 59 --------------------------------------------------------Auto Ref/Keratometer HRK-7000/7000A 59 left/right eye. By using button and button, select the image. Also, as pushing SEL button, the selected Ret. Illum image is to be enlarged. As pushing Print button amongst the menus of enlarged window, it is possible to output the print of Ret. Illum image. If you push EXIT button, it is to go back to DIS window again.
- Page 60 60 Auto Ref/Keratometer HRK-7000/7000A -------------------------------------------------------- [ Figure 31. Retro-Illum. Measure Window ] <User Menu > : By using the joystick measurement button, you can store the observed Ret. Illum image and the measured data of sight refractive power in memory while changing it as a static window.
-
Page 61: Observation On Retro-Illum
--------------------------------------------------------Auto Ref/Keratometer HRK-7000/7000A 61 Button: It is the button to decrease the intensity of Ref LED for one (1) level. Button: It is the button to increase the intensity of Ref LED for one (1) level. Measurement Mode Return: As pushing EXIT button, it is to finish Ret. Illum mode, and to return to the ordinary measurement mode. -
Page 62: Storage
62 Auto Ref/Keratometer HRK-7000/7000A -------------------------------------------------------- - As pushing Mode button in [Observe] window, it is to be changed to [Measure] window. At this time, as pushing Mode button again, [Observe] window is to return. Position the bright dot which indicates LED light to shed on the eye so... -
Page 63: Call For Stored Image
--------------------------------------------------------Auto Ref/Keratometer HRK-7000/7000A 63 8.7.5. Call for Stored Image [ Figure 32. Window indicating Stored Image ] ① In order to call the stored Ret-Illumination image for two eyes on the screen of monitor, enter Display mode by pushing DISP button. -
Page 64: Return To Measurement Mode
64 Auto Ref/Keratometer HRK-7000/7000A -------------------------------------------------------- [ Figure 33. Window indicating stored image(enlarged) ] 8.7.6. Return to measurement mode As pushing EXIT button in [Observe] or [Measure] window, you can return to [REF], [KER], [K&R], [KER-P] or [CLBC] measurement mode. -
Page 65: Other Modes
--------------------------------------------------------Auto Ref/Keratometer HRK-7000/7000A 65 Other Modes 9.1. Acuity Map Mode (Z-MAP Mode) Zernike Map indicates the distribution of refractive power in pupil area. Based upon the wavefront of emmetropes, Z-Map is drawn as a kind of topographical map having the elevation according the degree of distortion(aberration) of wavefront come from myopia or hypermetropia. - Page 66 66 Auto Ref/Keratometer HRK-7000/7000A -------------------------------------------------------- Map Level on the left side in window is the aberration value of wavefront, and it is the color table to draw map. The max and min value of the aberration of measured wavefront is indicated by the unit of micrometer(um). The wavefront aberration of emmetropes is 0, and the severer the myopia and hypermetropia is, it is to have higher wavefront aberration of (+) and (-) sign respectively.
-
Page 67: Change Of Window
--------------------------------------------------------Auto Ref/Keratometer HRK-7000/7000A 67 As pushing button, it is changed to the graph which is to be seen as a sectional diagram as the map is cut horizontally and perpendicularly. Map information items indicated on right side of window are as follows. - Page 68 68 Auto Ref/Keratometer HRK-7000/7000A -------------------------------------------------------- As the map is drawn for the first time, the guide message is to be indicated as “Calculating Map” for some time of standby for calculation. As changing the MAP item n user SETUP as ON, Zernike Map window is to be indicated directly on right bottom in the measurement window of REF and KNR Mode.
-
Page 69: Measurement Of Corneal Radius(Size Mode)
--------------------------------------------------------Auto Ref/Keratometer HRK-7000/7000A 69 9.2. Measurement of Corneal Radius(SIZE Mode) It is the mode to measure the corneal radius. Check the measurement window on the screen of monitor. Adjust the position and focus so that the image of eye to be measured can be seen apparently. - Page 70 70 Auto Ref/Keratometer HRK-7000/7000A -------------------------------------------------------- Adjustment of measurement position and focus - Ask the examinee to look at the internal fixed target. - Adjust the position so that the pupil shall be in between two(2) perpendicular bars by moving the operation lever.
- Page 71 --------------------------------------------------------Auto Ref/Keratometer HRK-7000/7000A 71 Measuring Bar Iris Moving right perpendicular bar to right side Moving right perpendicular bar to left side Moving left perpendicular bar to right side Moving left perpendicular bar to left side Selecting measured value1,2 Terminating measuring size of pupil [ Figure 39.
- Page 72 72 Auto Ref/Keratometer HRK-7000/7000A -------------------------------------------------------- Measured value Measured value Average [ Figure 40. Window indicating repletion of Size Mode Measurement ] Measurement of the other eye - Measure the other eye in the same way while holding the operation lever and pushing the stage to the counter direction.
-
Page 73: Virtual Comparison Mode
--------------------------------------------------------Auto Ref/Keratometer HRK-7000/7000A 73 9.3. VIRTUAL COMPARISON Mode A Virtual comparison Function allows the patient to compare the current view(uncorrected eye view) with the view corrected by AR measurement. By changing the distance to the chart, the patient can experience the virtual comparison. - Page 74 74 Auto Ref/Keratometer HRK-7000/7000A -------------------------------------------------------- [ Figure 41. Display of VIRTUAL COMPARISON Mode ]...
-
Page 75: Display Mode
--------------------------------------------------------Auto Ref/Keratometer HRK-7000/7000A 75 9.4. DISPLAY Mode You can see the measured results(Max ten(10) units of data) stored in memory in this mode. As pushing DISPLAY mode in the measurement mode, it changes to DISPLAY Mode. It returns to the measurement mode as pushing EXIT button again. -
Page 76: User Setup Mode
76 Auto Ref/Keratometer HRK-7000/7000A -------------------------------------------------------- Measured Result of Keratometry ② It indicates the latest measured result of max amount of ten(10) times(refractive power of left/right eyes). As pushing CLEAR button, the stored data is to be removed. [ FIgure 43. Measured Result of Keratometry ] 9.5. - Page 77 --------------------------------------------------------Auto Ref/Keratometer HRK-7000/7000A 77 [ Figure 44. Setup Mode Information (page 1) ] [How to change page] As pushing PAGE button, it is to enter the next page. [How to change item] Select the wanted item while pushing button or button.
- Page 78 78 Auto Ref/Keratometer HRK-7000/7000A -------------------------------------------------------- [How to enter the measurement mode] As pushing EXIT button, window as below is to pup up. Cancel : As intending to return to Setup mode again. Save & Exit : As intending to store the content and to return to the measurement...
- Page 79 --------------------------------------------------------Auto Ref/Keratometer HRK-7000/7000A 79 Serial number, Date & Time, Type of Output [ Figure 45. Setup Mode Information (page 2) ] [Content of Item] : 2/4 Page [COUNT] Selection whether or not to use serial number [NO.] Setup of Serial Number : As pushing...
- Page 80 80 Auto Ref/Keratometer HRK-7000/7000A -------------------------------------------------------- COMMUNICATION Setup for communication to other machines [BPS] Select the one among 9600, 57600, and 112500bps as its data transfer rate. [RS232] Setup of transmission method(method and version of other equipment) [ Figure 46. Setup Mode Information (page 3) ] [Content of Item] : 3/4 Page DATE &...
- Page 81 --------------------------------------------------------Auto Ref/Keratometer HRK-7000/7000A 81 [SET] After selecting item by pushing button or button, you can change the value by using button or button. PRINT Print Setup [A-PRT] In case of measuring in AUTO START Mode, it is to print out the measured result automatically as the each measurement to left/right eyes is completed one after the other.
- Page 82 82 Auto Ref/Keratometer HRK-7000/7000A -------------------------------------------------------- [ Figure 47. Setup Mode Information (page 4) ] [Content of Item] : 4/4 Page PRINTER MESSAGE Input the measured data and message to be outputted through printer by using the function of internal printer message input.
- Page 83 --------------------------------------------------------Auto Ref/Keratometer HRK-7000/7000A 83 button or button. VIRTUAL COMPARISON [NEAR] The near working distance of the chart can be set. [ADD] The addition power can be set. [ Figure 48. Character Input ] Other Setup [LANG] You can select the characters indicated on the screen among the supported multi languages.
- Page 84 84 Auto Ref/Keratometer HRK-7000/7000A --------------------------------------------------------...
-
Page 85: Power Saving Function
--------------------------------------------------------Auto Ref/Keratometer HRK-7000/7000A 85 9.6. Power saving Function The power saving function begins to operate if you do not operate the machine at all for five(5) minutes or so. It is to return to the measurement mode as pushing any... -
Page 86: Self Diagnosis & Maintenance
86 Auto Ref/Keratometer HRK-7000/7000A -------------------------------------------------------- 10. Self diagnosis & Maintenance 10.1. Before calling for serviceman In case that abnormality happens or the machine operates abnormally, a warning sign is to be indicated. In this case, perform the settlements below. If the machine does not return to the normal condition in spite of the measures below, contact to the agent where you bought the machine after switching the power off. - Page 87 --------------------------------------------------------Auto Ref/Keratometer HRK-7000/7000A 87 ② Messages during measurement Message Cause Method of Settlement Refer to page 15 Refer to page 15 TRY AGAIN Objective glass in the measurement Clean the glass window is polluted Sphere of examinee’s eye exceeds +22D Impossible to Curvature radius of examinee’s eye...
- Page 88 88 Auto Ref/Keratometer HRK-7000/7000A -------------------------------------------------------- ③ Message as printing Message Cause Method of settlement -There is no printer paper or Install printer paper or close CHECK PAPER lever is not closed. the lever.
-
Page 89: Replacement
--------------------------------------------------------Auto Ref/Keratometer HRK-7000/7000A 89 10.2. Replacement 10.2.1. Printer paper As red line appears on the paper, immediately change the print paper with new one. ① Open the printer cover. ② Cut the paper inserted in the printer, and take it away from it. Take paper roll together with shaft out of the printer, and pull the rotating shaft away from paper roll. -
Page 90: Chin Rest Paper
90 Auto Ref/Keratometer HRK-7000/7000A -------------------------------------------------------- 10.2.2. Chin rest paper ① Pull two(2) pins out of the chin-rest. ② Push the pins into the holes of chin-rest paper. You can put 50 sheets of it on. ③ Insert the pins into each one of two(2) holes in the chin-rest. -
Page 91: Cleaning Equipment
--------------------------------------------------------Auto Ref/Keratometer HRK-7000/7000A 91 10.3. Cleaning Equipment ① The equipment should be kept as clean basically. Do not use the solvents such as strongly volatile substance, thinner, benzene, etc. ② Put some soapy water to the soft cloth, and twist the water out of the cloth. Then, polish each part of the equipment. -
Page 92: Service Information
92 Auto Ref/Keratometer HRK-7000/7000A -------------------------------------------------------- 11. Service Information Repair: If the problem is not solved in spite of the settlement according to the contents of chapter 10, please contact to Huvitz’s agent with the information on the following items. ④... -
Page 93: Main Specifications
--------------------------------------------------------Auto Ref/Keratometer HRK-7000/7000A 93 12. Main Specifications Measurement Mode Continuous Keratometry & Refractometry (K/R Mode) Refractometry (REF Mode), Keratometry (KER Mode) Keratometry Peripheral (KER-P Mode) Base Curve of Contact Lens(CLBC Mode) Refractometry Vertex Distance(VD) 0.0, 12, 13.5, 15.0 -25.00 ~ +22.00D (In case of VD=12mm) 0.00 ~ ±10.00D (0.12/0.25D Unit) - Page 94 94 Auto Ref/Keratometer HRK-7000/7000A -------------------------------------------------------- Working range of auto-tracking Up & Down ± 15 mm Right & Left ± 5 mm±2mm Back & Forth ± 5 mm±2mm Working range of auto-shooting Up & Down ± 0.13 mm or less Right & Left ±...
-
Page 95: Accessories
--------------------------------------------------------Auto Ref/Keratometer HRK-7000/7000A 95 13. Accessories [ Figure 53. Accessories ] 1. Power Cable(AC 220V / 60Hz Power plug or other)·····························1 unit 2. Model Eye (Sph —5.0D~-5.5D)·····················································1 unit 3. Chin Rest Paper(100 sheets)··················································· 1 bundle 4. Printer Paper········································································2 rolls 5. Wind-blower·············································································1 unit 6. -
Page 96: Service Information
Dealer’s Name: Dealer Address: Dealer Phone No.: Model No.: Serial No.: ( Huvitz recommends customers to fill up the following form after purchase and retain this manual as a permanent record of purchase.) Write us at: Tel: +82-31-442-8868 HUVITZ Co., Ltd. - Page 97 --------------------------------------------------------Auto Ref/Keratometer HRK-7000/7000A 97...
Need help?
Do you have a question about the HRK-7000 and is the answer not in the manual?
Questions and answers
Hi! I need adjuster lever part
The adjuster lever on the Huvitz HRK-7000 is used for adjusting the focus by moving it forward/backward, left/right, and up/down. It is also used for height adjustment and aligning the image during measurements.
This answer is automatically generated
Кака зафиксировать дату и время? каждый день приходится водить, не сохраняются данные .
Hello I need this user manal Related Manuals for Huvitz HRK-7000 in French Langage