Table of Contents
Advertisement
Quick Links
IMPERX
Cheetah 3G-SDI CMOS Camera
User Guide
with SMPTE
output
®
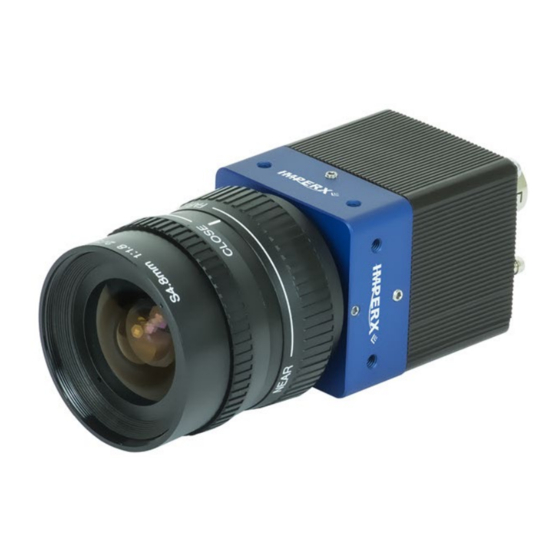
The Imperx Cheetah 3G-SDI cameras provides broadcast quality video imaging with
high sensitivity in a compact and ruggedized design. The camera's Sony Pregius CMOS
image sensor delivers 1920 x 1080 resolution at up to 60 progressive frames per
second. It provides the superior motion capture needed in a wide range of
applications such as industrial imaging, surveillance, metrology, and medical and
scientific imaging. The 3G-SDI cameras are easy to configure and are SMPTE 292M
and 424M compliant.
Revision 1.4
Advertisement
Table of Contents

Subscribe to Our Youtube Channel
Related Manuals for Imperx Cheetah 3G-SDI


Summary of Contents for Imperx Cheetah 3G-SDI
- Page 1 ® The Imperx Cheetah 3G-SDI cameras provides broadcast quality video imaging with high sensitivity in a compact and ruggedized design. The camera’s Sony Pregius CMOS image sensor delivers 1920 x 1080 resolution at up to 60 progressive frames per second.
- Page 2 Cheetah Pregius Camera User Manual | 3G-SDI Interface About Imperx, Inc. IMPERX, Inc. is a leading designer and manufacturer of high performance, high quality digital cameras, frame grabbers, and accessories for industrial, commercial, military, and aerospace imaging applications including flat panel inspection, biometrics, aerial mapping, surveillance, traffic management, semiconductors and electronics, scientific &...
- Page 3 IMPERX warrants performance of its products and related software to the specifications applicable at the time of sale in accordance with IMPERX’s standard warranty, which is 2 (two) years parts and labor. FOR GLASSLESS CAMERAS THE CCD OR CMOS IS NOT COVERED BY THE WARRANTY.
-
Page 4: Table Of Contents
Cheetah Pregius Camera User Manual | 3G-SDI Interface TABLE OF CONTENTS About the 3G-SDI Camera ................8 General ..........................8 Key Features ....................... 9 Technical Specifications ....................10 C1911 Technical Specifications ................. 10 C1920 Technical Specifications ................. 11 C2010 Technical Specifications ................. 12 Camera Configuration ...................... - Page 5 Cheetah Pregius Camera User Manual | 3G-SDI Interface Enhancement ......................52 Color Control ........................53 Adjusting White Balance ................... 53 Output Control ......................... 54 Test Patterns ......................56 Overlays ........................57 P-Iris Lens Control ..................... 58 Camera Features ..................59 Exposure Control ......................59 Automatic Exposure Control ....................
- Page 6 Appendix C: Look Up Tables ................92 Creating an LUT Using a Text Editor ................. 92 Creating an LUT Using Microsoft Excel ................93 Creating an LUT Using Imperx Toolkit ................94 Uploading the LUT File ..................... 98 April 14, 2021 Page Rev 1.4...
- Page 7 Cheetah Pregius Camera User Manual | 3G-SDI Interface REVISION HISTORY Revision Date Reviser Comments 10/4/2017 R. Johnston Initial release approval. 11/16/2017 R. Johnston Added C1920 camera and updated GUI screens. 11/29/2018 K. Wetzel Added image plane mechanical drawing; Added P-Iris Lens Control GUI screen Edited AEC/AGC text, page 28 Adjusted operating temperature and storage to: from -30 °C to +75 °C only (removed the 1.5G and 3.0G).
-
Page 8: About The 3G-Sdi Camera
Sony IMX-265LQR The Cheetah 3G-SDI camera is an advanced, ruggedized, small profile 1080 progressive scan digital camera. It is fully programmable and field upgradeable and features a built-in image- processing engine, low power consumption, low noise, and high dynamic range (12 F-Stops) with frame rates up to 60 frames per second. -
Page 9: Key Features
Cheetah Pregius Camera User Manual | 3G-SDI Interface Key Features • 1080p Mono and Color 23.98p, 24p; 25p; 29.97p, 30p; 50p, 59.94p, 60p • 720p Mono and Color 50p, 59.94p, 60p (C1920 and C2010 cameras only) Color - 3x10-bit (YCrCb) data •... -
Page 10: Technical Specifications
Cheetah Pregius Camera User Manual | 3G-SDI Interface Technical Specifications C1911 Technical Specifications Specifications C1911 3G-SDI Active image resolution 1920 (H) x 1080 (V) Pixel size 4.5 μm Optical format 1/1.58” optical format, 10.1 mm diagonal Video output Digital, 10 bit Output structure YUV422 Data clock... -
Page 11: C1920 Technical Specifications
Cheetah Pregius Camera User Manual | 3G-SDI Interface C1920 Technical Specifications Specifications C1920 3G-SDI Active image resolution 1920 (H) x 1080 (V) Pixel size 5.86 μm Optical format 1/1.23”, 13 mm diagonal Video output Digital, 10 bit Output structure YUV422 Data clock 37.08789/37.125 MHz Camera interface... -
Page 12: C2010 Technical Specifications
Cheetah Pregius Camera User Manual | 3G-SDI Interface C2010 Technical Specifications Specifications C2010 3G-SDI Active image resolution 1920 (H) x 1080 (V) Pixel size 3.45 μm Optical format 1/2.35”, 7.7 mm diagonal Video output Digital, 10 bit Output structure YUV422 Data clock 37.08789/37.125 MHz Camera interface... -
Page 13: Camera Configuration
SDI-C2010C-RC000: Cheetah Color camera with C-Mount and 3G-SDI / HD-SDI interface. SDI-C1911M-RV000: Cheetah Monochrome camera with C-Mount Video Iris and 3G-SDI / HD-SDI interface. Imperx recommends using the PS12V16A or PS12V19A power supply for powering SDI-C1911, SDI-C1920, and SDI-C2010 cameras April 14, 2021 Page Rev 1.4... -
Page 14: Power Supply Ordering Information
Cheetah Pregius Camera User Manual | 3G-SDI Interface Power Supply Ordering Information Part Number Description Compatible with PS12V16A Power Supply C1911, C1920, C2010 12 V DC, 3 A, With one strobe and one trigger, 1.75 m length PS12V19A Power Supply C1911, C1920, C2010 with P-Iris/ Video Iris 12 V DC, 3 A, lens control... -
Page 15: Hardware
Cheetah Pregius Camera User Manual | 3G-SDI Interface Hardware Camera Connectivity The Cheetah 3G-SDI camera connects to outside equipment using two connectors on the back panel of the camera. The back panel also provides an LED status indicator. mini push-pull coaxial connector... -
Page 16: Pin Assignments
The Hirose connector on the camera’s back panel is a male type miniature locking receptacle #HR10A-10R-12PB(71). The mating part is a female Hirose type miniature locking plug #HR10A-10P-12S(73). The Imperx PS12V16A power supply (sold separately – see section PS12V16A Power Supply) -
Page 17: Connecting A Video Iris Lens
Cheetah Pregius Camera User Manual | 3G-SDI Interface Connecting a Video Iris Lens The Cheetah 3G-SDI cameras are available with optional Video Iris lens. A Video Iris lens uses a motor for adjusting the iris position when lighting conditions change. It is equipped with an amplifier and operated by a video signal from the camera. - Page 18 Cheetah Pregius Camera User Manual | 3G-SDI Interface Signal Name IRIS RTN 12 V DC Power Return (Video Iris) TLS IN1/OUT1 RTN Tri-level Sync Input and Out 1 Return (TTL) IRIS VCC 12 V DC Power (Video Iris) IRIS VIDEO Video Iris signal April 14, 2021 Page...
-
Page 19: Connecting A P-Iris Lens
Cheetah Pregius Camera User Manual | 3G-SDI Interface Connecting a P-IRIS Lens The Cheetah 3G-SDI cameras are available with optional P-Iris lens. A P-Iris lens uses a stepper motor for adjusting the iris position when lighting conditions change. Signals from the camera’s Hirose connector provide power and control the P-Iris through an external cable. -
Page 20: Led Status
Cheetah Pregius Camera User Manual | 3G-SDI Interface Signal Name P-Iris Phase B- Mapped to the pin 4 of a P-Iris jack TLS IN1/OUT1 RTN Tri-level Sync Input and Out 1 Return (TTL) P-Iris Phase B+ Mapped to the pin 1 of a P-Iris jack P-Iris Phase A- Mapped to the pin 3 of a P-Iris jack LED Status... -
Page 21: Camera Connection Diagram
Cheetah Pregius Camera User Manual | 3G-SDI Interface Camera Connection Diagram The follow illustration shows an example setup of C2010 components and cabling. PS12V16A or PS12V19A April 14, 2021 Page Rev 1.4 21 of 99... -
Page 22: Ps12V16A Power Supply
Cheetah Pregius Camera User Manual | 3G-SDI Interface PS12V16A Power Supply The PS12V16A power supply provides +12 V DC ± 5% and up to 3 A DC current. The operating input voltage ranges from 100 to 240 V AC. The PS12V16A power supply is comprised of three components: Item Qty. -
Page 23: Ps12V19A Power Supply With Support For P-Iris / Video Iris Lens Control
Cheetah Pregius Camera User Manual | 3G-SDI Interface PS12V19A Power Supply with Support for P-Iris / Video Iris Lens Control The PS12V19A power supply provides +12 V DC ± 5% and up to 3 A DC current to the Cheetah 3G-SDI camera with a P-Iris or Video Iris lens. -
Page 24: Ps12V16A And Ps12V19A Specifications
Cheetah Pregius Camera User Manual | 3G-SDI Interface PS12V16A and PS12V19A Specifications Specifications Description Input Voltage 100–240 V AC Frequency 50–60 Hz Current 1 A max Inrush Current 70 A max / 230 V AC (cold start @ 25 °C, full load) Efficiency Eff (av) ≥... -
Page 25: Connecting The Ps12V16A / Ps12V19A Power Supply
Cheetah Pregius Camera User Manual | 3G-SDI Interface Connecting the PS12V16A / PS12V19A Power Supply 1. Connect a power cord to the PS12V10 power adapter. 2. Connect the KPPX-4P plug of the PS12V10 power adapter to the KPJX-CM-4S socket of the CBL-PWR-0016 / CBL-PWR-0019 cable . - Page 26 Cheetah Pregius Camera User Manual | 3G-SDI Interface PS12V16A Connection Diagram PS12V19A Connection Diagram April 14, 2021 Page Rev 1.4 26 of 99...
-
Page 27: Electrical Connectivity
Cheetah Pregius Camera User Manual | 3G-SDI Interface Electrical Connectivity Tri-Level Sync Input IN1 The external inputs in Cheetah HD-SDI cameras are connected directly to the camera hardware as shown in the following figures. The input signals Signal and Return are used to connect to an external input on the outside source. -
Page 28: Mechanical Drawings
Cheetah Pregius Camera User Manual | 3G-SDI Interface Mechanical Drawings The camera housing is made of precision-machined aluminum. For maximum flexibility, the camera has eight M3X0.5mm mounting holes located towards the front and the back. An additional plate with ¼-20 UNC (tripod mount) and hardware ship with each camera. Front View: Back View: April 14, 2021... - Page 29 Cheetah Pregius Camera User Manual | 3G-SDI Interface Top View Side View with Image Plane: April 14, 2021 Page Rev 1.4 29 of 99...
-
Page 30: Mounting Plate
Cheetah Pregius Camera User Manual | 3G-SDI Interface Mounting Plate April 14, 2021 Page Rev 1.4 30 of 99... -
Page 31: Optical
Cheetah Pregius Camera User Manual | 3G-SDI Interface Optical The Cheetah 3G-SDI camera cross-section comes with an adapter for C-mount lenses that have a 17.53 mm back focal distance. You can use an F-mount lens with a C-mount camera using an F-mount–to-C-mount adapter. -
Page 32: Environmental
Cheetah Pregius Camera User Manual | 3G-SDI Interface Environmental Always operate the camera within temperature and humidity specifications listed below. Specification Definition Operating temperature -30 °C to +75 °C Storage temperature -40 °C to + 85 °C Relative humidity 10% to 90% non-condensing Avoid direct exposure to moisture and liquids. -
Page 33: Configuration Software
4. Click Uninstall. Installation 1. Locate the executable file (Cheetah_Pregius_x_x_x_xxxx.exe) in the ZIP folder available upon registering your camera on the Imperx website. 2. Drag the file to your computer desktop. If a Security screen appears, click OK. April 14, 2021 Page Rev 1.4... - Page 34 Cheetah Pregius Camera User Manual | 3G-SDI Interface 3. Double click the executable file (Cheetah_Pregius_x_x_x_xxxx.exe) on your desktop. The Welcome Setup screen opens. Note the recommendation to close other applications and then click Next. 4. When the License Agreement screen appears, read the agreement and click I Agree. April 14, 2021 Page Rev 1.4...
- Page 35 Cheetah Pregius Camera User Manual | 3G-SDI Interface 5. On the Choose Components screen, make sure the Cheetah Pregius CamConfig component is selected and then click Next. 6. On the Choose Install Location screen, accept the default destination folder or click Browse and select a different location and then click Install.
- Page 36 Cheetah Pregius Camera User Manual | 3G-SDI Interface 7. On the Installation Complete screen, select the check box to register your software and then click Next. When the Imperx website appears, complete the Subscriber Registration and click Submit. 8. On the Completing Cheetah Pregius CamConfig Setup screen, click Finish. The Cheetah Pregius Configurator icon appears on your desktop.
-
Page 37: Starting Camconfig
It communicates with each COM port and attempts to query the attached camera. If the software detects an attached Imperx Cheetah 3G-SDI camera, it displays the port and camera type on the Select Port screen. You can repeat the discovery procedure by clicking Rescan Ports. -
Page 38: Main Window
Cheetah Pregius Camera User Manual | 3G-SDI Interface Main Window The main window appears after you select a camera. It provides menu and view options, a help file, camera information, and configuration options. The camera’s name and status appear at the bottom of the main window. -
Page 39: Menu
Cheetah Pregius Camera User Manual | 3G-SDI Interface Menu The Menu provides access to load options, settings, the command terminal, and more. Run Application This starts any other executable file that you normally use, such as a frame-grabber application. CamConfig remembers the location of such files in the host computer. Load From . - Page 40 Defect Pixel Map window into a .dpm or .hpm file. You can download the factory DPM and HPM, add defective pixels to the factory map, and then upload the updated map to the camera using Imperx Upload Utility. April 14, 2021 Page Rev 1.4...
- Page 41 Cheetah Pregius Camera User Manual | 3G-SDI Interface Command Terminal The Command Terminal shows information about all commands sent to or received by the camera. It also lets you communicate directly with the camera by entering write or read commands directly into the text box on the Command Terminal screen. To write a command to a camera register, the command terminal must send a sequence of 7 bytes to the camera.
- Page 42 Cheetah Pregius Camera User Manual | 3G-SDI Interface Connection Use the Connection menu to switch ports and change baud rates. Switch Port: use this option to switch the com port/camera. You can also Rescan Ports before switching. Set Baud Rate: use this to change the speed of data transmission.
-
Page 43: View
Cheetah Pregius Camera User Manual | 3G-SDI Interface View Use the View menu to display or hide the following panels: Gain & Exposure, Output Control, Strobe Control, I/O Control, Image Parameters, and Color Control on the screen. Gain & Exposure: Controls the exposure time, analog and digital gain. -
Page 44: Gain & Exposure Control
Cheetah Pregius Camera User Manual | 3G-SDI Interface Gain & Exposure Control Gain & Exposure control lets you set the camera’s exposure, gain, AEC, AGC, and AIC. Exposure Control Exposure control lets you set the camera’s exposure time manually from the Time tab, Shutter Speed tab, or Wheel Degrees tab. - Page 45 Cheetah Pregius Camera User Manual | 3G-SDI Interface Time Tab The Time tab controls the ability to set the exposure time on any of the tabs. If you enable Internal, the Exposure Time slider shows you the minimum and maximum exposure times available.
-
Page 46: Gain Control
Cheetah Pregius Camera User Manual | 3G-SDI Interface Gain Control The gain control allows you to manually adjust gain and offset. Use the Gain field to control the signal amplification from the camera sensor. You can set the gain value in decibels ranging from 0.0 to 48.0 dB. Settings in the 0 dB to 24 dB range operate in the analog domain. - Page 47 Cheetah Pregius Camera User Manual | 3G-SDI Interface You can define the AOI with width and height (X and Y) coordinates and set the speed of convergence, which determines how fast the camera stabilizes after a change in luminance. Area: Use the Area controls to define an active Area of Interest (AOI).
- Page 48 Cheetah Pregius Camera User Manual | 3G-SDI Interface Peak – the firmware calculates the peak luminance value (maximum • luminance level) within the image (in output counts) or within the AOI and compares the value to the target (Limit value) to determine changes to the exposure/gain settings.
-
Page 49: I/O Control
Cheetah Pregius Camera User Manual | 3G-SDI Interface I/O Control HD video signals have high data rates and the potential for timing jitter. Tri-level sync (genlock) resolves this potential issue by locking the HD video signals between the camera and the display monitor. -
Page 50: Strobe Control
Cheetah Pregius Camera User Manual | 3G-SDI Interface Strobe Control The strobe output screen enables synchronizing two external light sources (strobes) with the camera timing. This helps maximize camera efficiency in low-level lighting conditions. To enable a strobe: 1. Click I/O Control on the CamConfig screen. 2. -
Page 51: Image Control
Cheetah Pregius Camera User Manual | 3G-SDI Interface Image Control The Image Control screen controls the image processing features implemented into the camera. This includes gamma and black gamma settings, the user-defined lookup tables, one- and two- point corrections, and threshold settings. Gamma Enabling gamma allows stretching and compressing image luminance (brightness) in a scene with wide dynamic range so both bright and dark areas are visible on the display. -
Page 52: Lookup Table
The camera supports up to four LUTs; one is factory pre-set with Gamma 0.45. Users can upload custom LUTs using the Imperx Upload Utility. Select an LUT from the Lookup Table drop-down. The check box enables/disables your selected LUT’s control of the camera’s base gamma settings. -
Page 53: Color Control
Cheetah Pregius Camera User Manual | 3G-SDI Interface Color Control White balance adjusts the gains of the red, green and blue channels to compensate for the spectral content of the source. The Color Control screen provides several options for adjusting white balance. -
Page 54: Output Control
Cheetah Pregius Camera User Manual | 3G-SDI Interface To get the best white balance for the R, G, and B coefficients when the spectral source is constant: 1. Image a grey or white target over the camera’s entire field of view using the intended lighting source. - Page 55 Cheetah Pregius Camera User Manual | 3G-SDI Interface The maps identify the coordinates of dead and hot pixels. The camera uses these maps to correct the pixels during output. Mirror: Select Horizontal to flip the image horizontally. Select Vertical to flip the image vertically.
-
Page 56: Test Patterns
Cheetah Pregius Camera User Manual | 3G-SDI Interface Test Patterns Use the test mode controls to generate test patterns for gauging image quality. The GUI provides several types of test patterns. Test Pattern: Click the drop-down and select any of the following test patterns to appear on your monitor: Test Patterns Description... -
Page 57: Overlays
Cheetah Pregius Camera User Manual | 3G-SDI Interface Overlays Superimposed mode allows you to overlay patterns on live video. The Output Control screen provides several options: Crosshair: Selecting the Crosshair check box displays a single crosshair centered in the middle of the image. You can adjust the brightness of the crosshair to improve its visibility on top of the images. -
Page 58: P-Iris Lens Control
Cheetah Pregius Camera User Manual | 3G-SDI Interface P-Iris Lens Control If your camera uses a P-Iris lens, the CamConfig GUI provides a P-Iris Control screen for manual control over the iris position. Depending on the lens type, the iris position and limits are shown in steps (Default lens type) or f-numbers (Kowa LM25JC5MM-IR, Xenoplan XNP 1,4/17, or Computar MG5020KC lenses). -
Page 59: Camera Features
Cheetah Pregius Camera User Manual | 3G-SDI Interface Camera Features Exposure Control During normal camera operation with exposure control off, the readout frame time determines the exposure time. However, the camera’s electronic exposure control can precisely control the image exposure time under bright light conditions. The electronic exposure control does not affect the frame rate;... -
Page 60: Automatic Gain Control
Cheetah Pregius Camera User Manual | 3G-SDI Interface Automatic Gain Control Automatic gain control (AGC) enables the camera to maintain the same image brightness during changing light conditions. In AGC mode, you can set the image luminance (brightness), and the camera will adjust the gain accordingly. -
Page 61: Video Iris Control
Cheetah Pregius Camera User Manual | 3G-SDI Interface Video Iris Control The camera has a built-in video iris control feature, which is hardware compatible with a Video Iris lens. If AIC is enabled, the camera provides an analog video signal (via a 12-pin HIROSE connector), which is used by the lens to control the iris. - Page 62 Cheetah Pregius Camera User Manual | 3G-SDI Interface Default limits Value Description Gain Limits Gain Minimum Limit 0 dB Gain Maximum Limit 48 dB Exposure Limits Exposure Minimum Varies Depends on camera model. Limit Exposure Maximum Varies Depends on current frame time. Limit Iris Limits Iris Minimum Limit...
-
Page 63: I/O Control
A second opto-isolated strobe is available. An optional P-Iris control can replace the second opto-isolated strobe. A custom interface cable to support the second strobe and firmware update are required. Contact IMPERX customer service for details. Strobe Control The 3G-SDI camera supports two independently controlled strobe signals. Typically, the strobe output synchronizes an external light source or additional cameras with the master camera timing. -
Page 64: Gamma Control
Cheetah Pregius Camera User Manual | 3G-SDI Interface Gamma Control The camera’s built-in processing engine enables adjustments to the luminance (brightness) of an image on the monitor. Using gamma correction, you can control, stretch, or compress the image luminance with eight different gamma curves from darker (2.2) to brighter (1/2.2). You can also apply black gamma correction specifically to adjust the darker portions of an image or the brighter portions of the image and apply one of four User configurable LUTs. -
Page 65: Image Sensor Technology
Cheetah Pregius Camera User Manual | 3G-SDI Interface Image Sensor Technology A CMOS camera is an electronic device for converting light into an electrical signal. The C1920 camera contains the 1 Generation Sony Pregius CMOS (Complementary Metal-Oxide Semiconductor) image sensor with 5.86-micron square pixels. The C2010 camera contains 2 Generation Sony Pregius CMOS image sensor with 3.45-micron square pixels. -
Page 66: Spectral Responses
Cheetah Pregius Camera User Manual | 3G-SDI Interface Spectral Responses Cheetah C1911 Spectral Response Sony IMX429 Color Spectral Response Sony IMX429 Mono Spectral Response April 14, 2021 Page Rev 1.4 66 of 99... -
Page 67: Cheetah C1920 Spectral Response
Cheetah Pregius Camera User Manual | 3G-SDI Interface Cheetah C1920 Spectral Response Sony IMX174 Color Spectral Response Sony IMX174 Mono Spectral Response April 14, 2021 Page Rev 1.4 67 of 99... -
Page 68: Cheetah C2010 Spectral Response
Cheetah Pregius Camera User Manual | 3G-SDI Interface Cheetah C2010 Spectral Response Sony IMX265 Color Spectral Response Sony IMX265 Mono Spectral Response April 14, 2021 Page Rev 1.4 68 of 99... -
Page 69: Register-Based Commands
Cheetah Pregius Camera User Manual | 3G-SDI Interface Register-based Commands You can control all of the cameras resources (internal registers, video amplifiers and parameter flash) using a simple, register-based command protocol (Appendix A – Camera Register) with the Camera’s RS-232 serial interface. The interface is bi-directional. You issue commands, and the camera issues responses (status or information type). -
Page 70: Write Operation
Cheetah Pregius Camera User Manual | 3G-SDI Interface You can update each camera control register independently. The serial protocol defines all registers as 16-bit address (hex format) and 32-bit data (hex format). Camera registers using fewer than 32-bits in width must be padded with 0s on writes; unused bits are ignored on reads. -
Page 71: Read Operation
Cheetah Pregius Camera User Manual | 3G-SDI Interface Example: Write to register address 0x0410, data value = 0x11223344: Camera Write Command: <0x57> <04> <10> <11> <22> <33> <44> Read Operation To read from any given camera register, send a sequence of 3 bytes to the camera. If there is no error, the camera returns 5 bytes –... -
Page 72: Error Code Description
Cheetah Pregius Camera User Manual | 3G-SDI Interface Error Code Description To manage camera reliability, use the following not-acknowledge error codes: x00 – No error x01 – Invalid command. An invalid command (not 52 or 57) sent to the camera. x02 –... -
Page 73: Appendix A - Camera Registers
Cheetah Pregius Camera User Manual | 3G-SDI Interface Appendix A – Camera Registers This appendix provides a quick reference to the 3G-SDI camera configuration workspace registers. Abbreviation Description read/write read only write only Saving and Restoring Registers Address Register Data Type Usage Name... -
Page 74: Camera Information Registers
Cheetah Pregius Camera User Manual | 3G-SDI Interface Camera Information Registers Address Register Name Data Type Usage 0x6004 Firmware_Revis Data (23:0) <FW Revision > Returns Data (27:24) <CMOS color> Camera main Data (31:28) <Firmware image> firmware revision 0x6008 FPGA EPCS Data (15:0) <Customer ID >... -
Page 75: Gain, Exposure And Aec/Agc/Aic
Cheetah Pregius Camera User Manual | 3G-SDI Interface Gain, Exposure and AEC/AGC/AIC Address Register Data Type Usage Name 0x0544 Exposure Data (1:0) 00 – off – no exposure control Determines Control 10 – internal – exposure control mode. Mode register 0x0548 sets the camera exposure Others –... - Page 76 Cheetah Pregius Camera User Manual | 3G-SDI Interface Address Register Data Type Usage Name 0x017C AEC AGC Data (1:0) 00 – average luminance Luminance 01 – peak luminance Average or 10 or 11 – reserved Peak Select Data (31:2) 0x0004 CMOS_Sen Data (8:0) <value>...
-
Page 77: Image Processing
Cheetah Pregius Camera User Manual | 3G-SDI Interface Address Register Data Type Usage Name 0x05C8 AEC_Mini Data (10:0) <value> – minimum exposure mum_Expo time limit in exposure sure Limit increments. Max exposure is 6 increments Min exposure is 1124 increments (See Internal Exposure Timer Register 0x0548 description) Data (31:11):... -
Page 78: Data Out And Test Patterns
Cheetah Pregius Camera User Manual | 3G-SDI Interface Address Register Data Type Usage Name 0x019C Black Data (1:0) 00 – 10% Selects Black Gamma 01 – 20% Gamma values Values 10 – 30% 10%, 20%, and Data (31:2) 30%. Data Out and Test Patterns Address Register Data... - Page 79 Cheetah Pregius Camera User Manual | 3G-SDI Interface Address Register Data Type Usage Name Data (31:4) 0x0130 Superimpo Data (0) 0 – disable X&Y lines 1 – enable X&Y Lines X & Y Lines Data (31:1) 0x0134 Superimpo Data (0) 0 –...
-
Page 80: Color
Cheetah Pregius Camera User Manual | 3G-SDI Interface Color Address Register Data Type Usage Name 0x0300 White Data (2:0) 000 – Off Balance 001 – WB Once Options 010 – WB Auto 011 – WB Manual 100 – Indoor 3200K 101 –... -
Page 81: Strobe
Cheetah Pregius Camera User Manual | 3G-SDI Interface Strobe Address Register Data Type Usage Name 0x055C Strobe One Data (1:0) 00 – disable Strobe #1 Standard. Enable 01 – enable Strobe #1 each frame Data (31:2) 0x0560 Strobe Two Data (1:0) 00 –... -
Page 82: P-Iris Controls
*Note: Contents of Reg 0194 must be less than Reg 0198 range. 0x0198 Auto Iris Data (7:0) <Minimum Iris Aperture> Min. Aperture minimum Data (31:8) is dependent Aperture upon Iris manufacture. Contact Imperx for assistance. April 14, 2021 Page Rev 1.4 82 of 99... -
Page 83: Appendix B: Creating Dpc/Hpc Table
Cheetah Pregius Camera User Manual | 3G-SDI Interface Appendix B: Creating DPC/HPC table Overview Dead Pixel Correction and Hot Pixel Correction work with predetermined and preloaded Dead and Hot pixel maps. The Dead Pixel Map (DPM) and Hot Pixel Map (HPM) are downloaded into the camera’s non-volatile memory. -
Page 84: Editing Dpm/Hpm Files
Cheetah Pregius Camera User Manual | 3G-SDI Interface Editing DPM/HPM Files You can edit DPM and HPM files in Microsoft Notepad or any other editing software. The file is a simple text file and looks like this: -- Defective Pixel Map, -- Date: 12.12.2019, -- Model#: SDI-C2010M, -- Serial#: 900001,... -
Page 85: Finding Hot Pixels
Cheetah Pregius Camera User Manual | 3G-SDI Interface Finding Hot Pixels To see the hot pixels that are not in the factory HPM: 1. Make sure that HPC is set to Static on the Output Control screen. The camera corrects the known hot pixels automatically. Set the longest exposure time and slowest frame rate expected. -
Page 86: Locating And Adding Pixel Coordinates
Cheetah Pregius Camera User Manual | 3G-SDI Interface Locating and Adding Pixel Coordinates Follow the steps below to find first pixel coordinates, locate and adjust defective pixel coordinates, and accurately place defective pixel coordinates into the pixel map. STEP 1: Find the First Pixel Coordinates Your frame grabber’s first pixel coordinates can affect the location accuracy of hot pixel coordinates. - Page 87 Cheetah Pregius Camera User Manual | 3G-SDI Interface STEP 2: Find Hot Pixel Coordinates Click the hot pixel to find its X, Y coordinates. Click the pixel to display X, Y coordinates below. X:593 Y:2816 The coordinates are 593, 2816 ― where X (Column) = 593 and Y (Row) = 2816. IMPORTANT: Frame grabbers from different manufacturers may display pixel location coordinates in different order, for example: X (Column), Y (Row) or,...
- Page 88 Cheetah Pregius Camera User Manual | 3G-SDI Interface STEP 4: Add Hot Pixel Coordinates to Hot Pixel Map Place the hot pixel coordinates in the Hot Pixel Map file in ascending (increasing) numerical order of the Y (row) coordinate. The value of all Y coordinates should progressively increase as you look down the list of X, Y coordinates.
-
Page 89: Creating A New Dpm/Hpm File
Cheetah Pregius Camera User Manual | 3G-SDI Interface Creating a New DPM/HPM File You can create your own HPM files using any ASCII text editor, such as “Notepad” or similar. Alternatively, any spreadsheet program (i.e. Microsoft Excel) can be used by converting the spreadsheet into a comma delimited (.csv) file. -
Page 90: Uploading Dpm / Hpm Files
To upload the DPM/HPM file: Connect and power up your camera. 2. Start the Imperx Upload Utility and wait for the Utility to detect the camera. If the utility does not detect the camera, click Refresh to restart the device collection. - Page 91 Cheetah Pregius Camera User Manual | 3G-SDI Interface 4. Browse for either the edited .dpm file or .hpm file, select it, and click Upload. Wait for the upload to finish. 5. After the upload is completed, do a power cycle on the camera. 6.
-
Page 92: Appendix C: Look Up Tables
Cheetah Pregius Camera User Manual | 3G-SDI Interface Appendix C: Look Up Tables Creating an LUT Using a Text Editor You can use any ASCII text editor, such as Notepad or similar, to create a custom LUT. Alternatively, any spreadsheet program (i.e. Microsoft Excel) can be used by converting the spreadsheet into a comma delimited (.csv) file. -
Page 93: Creating An Lut Using Microsoft Excel
Cheetah Pregius Camera User Manual | 3G-SDI Interface Creating an LUT Using Microsoft Excel The LUT file can be created in Excel as follows: 1. Create the spreadsheet as shown below (note that 4096 rows are required in the table). 2. -
Page 94: Creating An Lut Using Imperx Toolkit
Cheetah Pregius Camera User Manual | 3G-SDI Interface Creating an LUT Using Imperx Toolkit 1. On the Tools tab, open LUT Manager utility. 2. Create a new LUT file. On the Create LUT dialog box, select the LUT type, set the input and output bit depth to 12, and click OK. - Page 95 Cheetah Pregius Camera User Manual | 3G-SDI Interface 6. For a color camera, you can set a transfer function for each channel. Use R, G, and B tabs on the left to switch between the channels. 7. To save the LUT file, go to File > Save as…. Example A modified sigmoid function can be used to enhance low contrast images.
- Page 96 Cheetah Pregius Camera User Manual | 3G-SDI Interface The sigmoid curves with varied threshold and contrast factor parameters are shown below: To apply a convex part of the curve within the range from 0 to 4095, use the following formula: 2*4095*(1/(1+(exp(-2*(x/(4095/4)))))-0.5) the midpoint is shifted to the 0;...
- Page 97 Cheetah Pregius Camera User Manual | 3G-SDI Interface To apply a concave part of the curve within the range from 0 to 4095, use the following formula: 2*4095*(1/(1+(exp(-2*(x/(4095/4)-4))))) the midpoint is shifted to the 4095; 4095 position April 14, 2021 Page Rev 1.4 97 of 99...
-
Page 98: Uploading The Lut File
To upload the LUT file: 1. Connect and power up your camera. 2. Start the Imperx Upload Utility and wait for the Utility to detect the camera. If the utility does not detect the camera, click Refresh to restart the device collection. - Page 99 Cheetah Pregius Camera User Manual | 3G-SDI Interface 3. Browse for the .lut file, select it, and click Upload. Select to which camera’s LUT (LUT1–LUT4) to upload the .lut file you created. Wait for the upload to finish. 4. After the upload is completed, do power cycle the camera. 5.
Need help?
Do you have a question about the Cheetah 3G-SDI and is the answer not in the manual?
Questions and answers