Table of Contents
Advertisement
Quick Links
IMPERX
Cheetah Pregius Cameras
User Manual (Preliminary)
10 GigE Vision Interface with SFP+
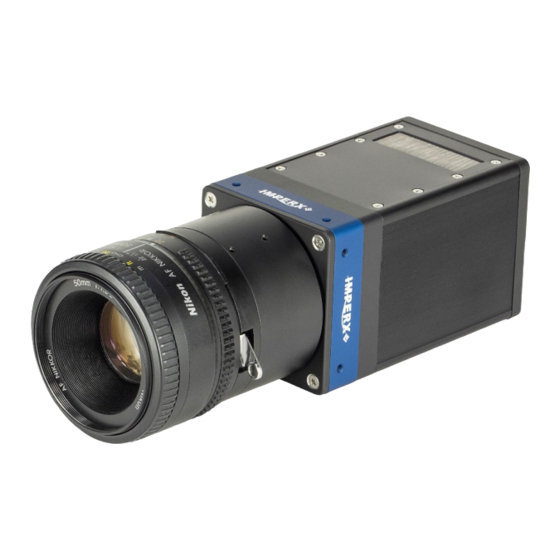
The Imperx Cheetah CMOS cameras provide exceptional video image quality in a
remarkably compact and ruggedized design with resolutions of 17, 20 and 31 MP. The
cameras use Sony 3
rd
generation Pregius CMOS sensors for their high sensitivity, image
clarity, and high dynamic range. They achieve frame rates up to 56.5 frames per second
with 10 GigE Vision interface. An SFP+ connector is provided to mate with various
transceiver modules
Revision 1.0
Advertisement
Table of Contents

Related Manuals for Imperx Cheetah Pregius SFP-C5440


Summary of Contents for Imperx Cheetah Pregius SFP-C5440
- Page 1 Cheetah Pregius Cameras User Manual (Preliminary) 10 GigE Vision Interface with SFP+ The Imperx Cheetah CMOS cameras provide exceptional video image quality in a remarkably compact and ruggedized design with resolutions of 17, 20 and 31 MP. The cameras use Sony 3 generation Pregius CMOS sensors for their high sensitivity, image clarity, and high dynamic range.
- Page 2 Cheetah Pregius Camera with 10 GigE Vision Interface – User Manual About Imperx, Inc. IMPERX, Inc. is a leading designer and manufacturer of high performance, high quality digital cameras, frame grabbers, and accessories for industrial, commercial, military, and aerospace imaging applications including flat panel inspection, biometrics, aerial mapping, surveillance, traffic management, semiconductors and electronics, scientific &...
- Page 3 Warranty IMPERX warrants performance of its products and related software to the specifications applicable at the time of sale in accordance with IMPERX’s standard warranty, which is 2 (two) years parts and labor. Do not open the housing of the camera. Warranty voids if the housing has been open or tampered.
-
Page 4: Table Of Contents
Cheetah Pregius Camera with 10 GigE Vision Interface – User Manual TABLE OF CONTENTS About the Camera ..................10 General ..........................10 Key Features ........................ 11 Technical Specifications ..................... 12 SFP-C5440 Camera Specifications ................12 SFP-C4440 Camera Specifications ................13 SFP-C6440 Camera Specifications ................ - Page 5 Cheetah Pregius Camera with 10 GigE Vision Interface – User Manual User Set Control ......................62 Configuring an Ethernet Adapter and Host Computer ........63 Jumbo Frames ........................64 Receive/Transmit Buffers ....................64 Interrupt Moderation Rate ....................65 Adjusting Jumbo Frames, Receive/Transmit Buffers, and Interrupt Moderation Rate in Windows ..........................
- Page 6 Cheetah Pregius Camera with 10 GigE Vision Interface – User Manual Exposure Control in Trigger Mode ................113 Global Shutter ......................114 Automatic Exposure and Gain Control ................115 P, I, and D Coefficients ..................... 117 Proportional Response ....................118 Integral Response ......................
- Page 7 Cheetah Pregius Camera with 10 GigE Vision Interface – User Manual Creating a DPM Using Imperx Toolkit ................159 Creating an HPM Using Imperx Toolkit ................160 Uploading DPM / HPM Files .................... 161 Appendix C: Look Up Tables ................. 163 Creating an LUT Using a Text Editor ................
- Page 8 Cheetah Pregius Camera with 10 GigE Vision Interface – User Manual REVISION HISTORY Revision Date Reviser Comments 08/12/2020 I. Barabanova Preliminary version 10/08/2020 I. Barabanova Initial release October 8, 2020 Page Rev 1.0 8 of 170...
- Page 9 Cheetah Pregius Camera with 10 GigE Vision Interface – User Manual TERMINOLOGY Defective pixels – these are pixels whose sensitivity deviates due to fluctuations in the CMOS manufacturing process and materials. Fast trigger mode – a camera exposes a frame and then exposes the next frame while reading out the previous frame.
-
Page 10: About The Camera
Cheetah Pregius Camera with 10 GigE Vision Interface – User Manual About the Camera General The 10 GigE Vision SFP+ Cheetah CMOS cameras are built around advanced Sony Pregius CMOS image sensors with global shutter for high quality images in a small ruggedized form factor. Cheetah cameras are progressive scan digital cameras featuring a built-in image-processing engine, low power consumption, low noise, high dynamic range (71 dB), and fast frame rates for high throughput applications. -
Page 11: Key Features
Cheetah Pregius Camera with 10 GigE Vision Interface – User Manual Key Features • Global shutter (GS) Color and monochrome versions • Fast frame rates • • High data transfer rates up to 10 Gbit/s • Internal and external exposure controls Automatic exposure and gain control (AEC/AGC) •... -
Page 12: Technical Specifications
Cheetah Pregius Camera with 10 GigE Vision Interface – User Manual Technical Specifications SFP-C5440 Camera Specifications Specifications SFP-C5440 (17 MP) Active image resolution 5472 (H) x 3084 (V) Pixel size 3.45 µm Optical format 4/3 inch Shutter Global Frame rate (max) 56.5 fps (8-bit), TBD (10, 12-bit unpacked), TBD (10, 12-bit packed) Sensor digitization 10 or 12-bit... -
Page 13: Sfp-C4440 Camera Specifications
Cheetah Pregius Camera with 10 GigE Vision Interface – User Manual SFP-C4440 Camera Specifications Specifications SFP-C4440 (20 MP) Active image resolution 4416 (H) x 4436 (V) Pixel size 3.45 µm Optical format 4/3 inch Shutter Global Frame rate (max) 39.6 fps (8-bit), TBD (10, 12-bit unpacked), TBD (10, 12-bit packed) Sensor digitization 10 or 12-bit Dynamic range... -
Page 14: Sfp-C6440 Camera Specifications
Cheetah Pregius Camera with 10 GigE Vision Interface – User Manual SFP-C6440 Camera Specifications Specifications SFP-C6440 (31 MP) Active image resolution 6464 (H) x 4860 (V) Pixel size 3.45 µm Optical format APS-C Shutter Global Frame rate (max) 35.4 fps (8-bit), 25.8 fps (10, 12-bit packed) Sensor digitization 10 or 12-bit Dynamic range... -
Page 15: Ordering Information
SFP-C5440C-RL000: Cheetah Color 17 MP camera with Canon EF EOS Active Mount and 10 GigE Vision with SFP+ connector • An external power supply is required. The Imperx PS12V04A power supply is available for use with SFP cameras and can be purchased • separately. Accessories Imperx offers a power supply for use with the cameras. -
Page 16: Technical Support
If the test pattern is not present, power off the camera, check all the cabling, frame grabber settings, and computer status. If you still have problems with the camera operation, contact technical support at: Email: support@imperx.com Toll Free 1 (866) 849-1662 or (+1) 561-989-0006 Fax: (+1) 561-989-0045 Visit our website: www.imperx.com... -
Page 17: Hardware
Cheetah Pregius Camera with 10 GigE Vision Interface – User Manual Hardware This chapter contains the detailed information needed for the initial design-in process: connector types, pin numbering and assignments • • electrical connectivity and voltage requirements • mechanical drawings and cabling optical and environmental information •... -
Page 18: Sfp Transceiver Module Options
Available for purchase; contact Imperx sales: sales@imperx.com or +1-561-989-0006. For a multi-mode fiber optic connection, both the Imperx SFP camera and the NIC card must have a 10GBase-SR SFP+ Multi-mode Fiber Transceiver installed like the one shown above. October 8, 2020 Page Rev 1.0... -
Page 19: 10Gbase-T Copper Example
For example, the above transceiver is suitable for distances up to 30 m. To help clients achieve first iteration success, Imperx offers a variety of transceiver modules and a 10G SFP+ NIC card for sale which have been tested together. Contact Imperx sales department for more information: sales@imperx.com... -
Page 20: Pin Assignments
Cheetah Pregius Camera with 10 GigE Vision Interface – User Manual Pin Assignments The 12-pin Hirose connector on the camera’s back panel is a male type miniature locking receptacle #HR10A-10R-12PB(71). Signal Name 12/24 VDC Return 12 or 24 VDC Main Power Return +12/24 VDC 12 or 24 VDC Main Power Reserved... -
Page 21: Camera Led Status Indicator
Cheetah Pregius Camera with 10 GigE Vision Interface – User Manual Camera LED Status Indicator The camera has a red-green-yellow LED on the back panel of the camera. The following LED colors and light patterns indicate the camera status and mode of operation: LED Color Light Patterns Status Description... -
Page 22: Powering The Camera
The external power supply should provide 6.5 V – 33 V DC with the inrush current 2 A @ 12 V. The power supply should terminate in a female HIROSE plug #HR10A-10P-12S(73). Imperx offers the PS12V04A Standard Power Supply adapter for use with the cameras. The PS12V04A power supply can be purchased separately. It ships with a power cable that terminates in a female HIROSE plug #HR10A-10P-12S(73). -
Page 23: Ps12V04A Standard Power Supply
Cheetah Pregius Camera with 10 GigE Vision Interface – User Manual PS12V04A Standard Power Supply Imperx recommends using the PS12V04A power adapter for powering C4440, C5440, and C6440 cameras. October 8, 2020 Page Rev 1.0 23 of 170... - Page 24 Cheetah Pregius Camera with 10 GigE Vision Interface – User Manual PS12V04A Power Supply Specs Cable length • Supplied AC power input cable (IEC): 1.8 m (6’) 100–240 V AC, 50–60 Hz 1 A. Power supply output (+12 V): 1.5 m (5’) ± 15 cm (6”) connector HIROSE #HR10A-10P-12S. •...
-
Page 25: Active Canon Ef Mount
Cheetah Pregius Camera with 10 GigE Vision Interface – User Manual Active Canon EF mount The Canon EF lens mount provides active lens control for C4440, C5440, and C6440 cameras. The cameras provide communication and power to the mount through an internal connector on the front of the camera. -
Page 26: Electrical Connectivity
Cheetah Pregius Camera with 10 GigE Vision Interface – User Manual Electrical Connectivity The Cheetah camera has two external inputs, INPUT1 and INPUT2. INPUT1 is optically isolated while INPUT2 accepts low voltage TTL (LVTTL). The camera provides two general-purpose outputs. Output OUT1 is a 5 V TTL compatible signal and output OUT2 is opto-isolated. The following figures show the external input and output electrical connections. -
Page 27: Opto-Isolated Output
Cheetah Pregius Camera with 10 GigE Vision Interface – User Manual Opto-Isolated Output Opto-isolated output is an optically isolated switch. There is no pull-up voltage on either contact. An external pull-up voltage of up to 25 V is required for operation. Output is not polarity sensitive. - Page 28 Cheetah Pregius Camera with 10 GigE Vision Interface – User Manual OUT2 High side load driver circuit: – from 2.5 V to 25 V (DC or peak AC) R3 – from 50 R to 500 R – from 1 mA to 50 mA October 8, 2020 Page Rev 1.0...
-
Page 29: Mechanical Drawings
Cheetah Pregius Camera with 10 GigE Vision Interface – User Manual Mechanical Drawings The camera housing is made of precision-machined aluminum. For maximum flexibility, the camera has eight M3X0.5mm mounting holes located towards the front of the camera on all four sides. - Page 30 Cheetah Pregius Camera with 10 GigE Vision Interface – User Manual Top View: Left Side View: Right Side View with Image Plane: October 8, 2020 Page Rev 1.0 30 of 170...
-
Page 31: Mounting Plate
Cheetah Pregius Camera with 10 GigE Vision Interface – User Manual Mounting Plate October 8, 2020 Page Rev 1.0 31 of 170... -
Page 32: Optical
Please refer to the Sensor Cleaning Procedure document found in the camera’s information ZIP file or contact Imperx support for cleaning procedures. Avoid touching or cleaning the front surface of the image sensor. If the sensor needs cleaning, use soft lint free cloth and an optical cleaning fluid. -
Page 33: Environmental
Cheetah Pregius Camera with 10 GigE Vision Interface – User Manual Environmental Always operate the camera within temperature and humidity specifications listed below: Specification Definition Operating temperature -30 °C to +70 °C (EST) (with a fiber 10GBase-R transceiver module); -30 °C to +45 °C (with a copper 10GBase-T transceiver module) Storage temperature -40 °C to + 85 °C Relative humidity... -
Page 34: Handling The Camera
Cheetah Pregius Camera with 10 GigE Vision Interface – User Manual Handling the Camera When mounting the camera, make sure the inlet and outlet openings are not blocked by surrounding objects. The fan automatically turns on if the internal camera temperature exceeds 65 °C. -
Page 35: Genicam Tm Api Module - Configuring The Camera
(GUI). The GUI is bi-directional allowing you to issue commands to the camera and allowing the camera to issues responses (either status or information). The Cheetah camera ships with the Imperx Camera SDK software which includes the SDK and IpxPlayer application to control the camera and view/save images. -
Page 36: Device Control
Cheetah Pregius Camera with 10 GigE Vision Interface – User Manual Device Control Device Control provides read-only information about the camera’s XML file and enables camera reset functionality. Parameter Name Type Value Access Description DeviceVendorName String Provides the name of the manufacturer of the camera DeviceModelName String... - Page 37 Cheetah Pregius Camera with 10 GigE Vision Interface – User Manual Temperature Control Temperature Control allows you to set the fan’s operation mode and the temperature at which the fan turns on in Auto mode. The fan automatically turns on—even if the fan operation mode is Off— when the internal camera temperature exceeds 65 °C.
-
Page 38: Version Information
Returns the firmware version number. FirmwareBuild Integer Returns firmware build number. CustomerID Integer Returns Customer ID for custom cameras (0 = Imperx Standard camera). FamilyID Integer Returns the camera family ID. XMLVersion Integer Returns XML version. October 8, 2020 Page Rev 1.0... -
Page 39: Image Format Control
Cheetah Pregius Camera with 10 GigE Vision Interface – User Manual Image Format Control Image Format Control lets you change screen resolution, select pixel format, and more. Parameter Name Type Value Access Description SensorWidth Integer Returns effective width of sensor in pixels. SensorHeight Integer Returns effective height... - Page 40 Cheetah Pregius Camera with 10 GigE Vision Interface – User Manual Parameter Name Type Value Access Description PixelFormat Enumeration String Sets output data pixel Num. format. Color cameras, Mono8 0x01080001 without image flipping Mono10 0x01100003 or reversal, use Mono10Packed 0x010C0004 BayerRG8, BayerRG10 or Mono12 0x01100005...
- Page 41 Cheetah Pregius Camera with 10 GigE Vision Interface – User Manual Parameter Name Type Value Access Description DecimationVertical Integer Min: 1 Vertical sub-sampling of Max: 2 the image. This reduces the vertical resolution (height) of the image by the specified vertical decimation factor.
- Page 42 Cheetah Pregius Camera with 10 GigE Vision Interface – User Manual Parameter Name Type Value Access Description Enumeration String SensorShutterMode Returns the shutter Global mode of the device. BinningHorizontal/Vertical Mode value: Sum: The response from the combined cells is added, resulting in increased sensitivity. Currently, the camera performs Summation mode only.
- Page 43 Cheetah Pregius Camera with 10 GigE Vision Interface – User Manual GreyHorizontalRampMoving: Image is filled horizontally with digital pattern that goes from the darkest possible value to the brightest and that moves horizontally from left to right at each frame. GreyVerticalRampMoving: Image is filled vertically with digital pattern that goes from the darkest possible value to the brightest and that moves vertically from top to...
-
Page 44: Acquisition Control
Cheetah Pregius Camera with 10 GigE Vision Interface – User Manual Acquisition Control Acquisition Control lets you configure settings for image capture, exposure, frame rates, triggers, and so on. It also provides read-only information on frame and exposure time. Parameter Name Type Value Access Description... - Page 45 Cheetah Pregius Camera with 10 GigE Vision Interface – User Manual Parameter Name Type Value Access Description AcquisitionFrameRate Float Controls the acquisition rate (in Hz) of frames captured. AcquisitionLineTimeEna Boolean Controls if the AcquisitionLineTime feature are writable and used to control the acquisition line time.
- Page 46 Cheetah Pregius Camera with 10 GigE Vision Interface – User Manual Parameter Name Type Value Access Description TriggerFilterTime Integer Min: 0 Specifies the minimum Max: 65535 Trigger signal pulse width. Any pulse shorter than the selected time is ignored. TriggerDelay Integer Min: 0 Specifies delay between...
-
Page 47: Analog Control
Cheetah Pregius Camera with 10 GigE Vision Interface – User Manual Analog Control Analog Control provides parameters for configuring gain, black level, gamma correction, and auto white balance. Parameter Name Type Value Access Description Gain Float Min: 0.0 Controls the selected gain as an Max: 48.0 absolute physical value. -
Page 48: Auto White Balance, Exposure And Gain Algorithm Control
Cheetah Pregius Camera with 10 GigE Vision Interface – User Manual Auto White Balance, Exposure and Gain Algorithm Control Auto Algorithm Control lets you configure settings for AWB (Automatic White Balance), AEC (Automatic Exposure Control), and AGC (Automatic Gain Control) algorithms. You can set the camera to AEC/AGC to keep the same image brightness during changing lighting conditions. - Page 49 Cheetah Pregius Camera with 10 GigE Vision Interface – User Manual Parameter Name Type Value Access Description ExposureGainAutoTargetThres Integer Min: 0 Sets the acceptable hold Max: 4095 steady-state error of the luminance level to be maintained during AGC or AEC. Normal initial setting for stability is 16.
- Page 50 Cheetah Pregius Camera with 10 GigE Vision Interface – User Manual Exposure Auto PID Coefficients Imperx do not recommend changing min and max limits of the P coefficient. Doing so may cause oscillations and destabilize a PID controller. Imperx sets up optimal values to balance the speed and stability of the AEC algorithm.
- Page 51 Cheetah Pregius Camera with 10 GigE Vision Interface – User Manual Gain Auto PID Coefficients Imperx does not recommend changing the P, I, and D coefficients. Doing so may cause oscillations and destabilize a PID controller. Imperx sets up optimal values to balance the speed and stability of the AGC algorithm.
-
Page 52: Data Correction
Cheetah Pregius Camera with 10 GigE Vision Interface – User Manual Data Correction Data Correction parameters enable you to implement look-up tables and other techniques to improve image sensor performance. Parameter Name Type Value Access Description LUTEnable Enumeration String Num. Selects and enables LUT to be used in processing image. -
Page 53: Digital Input / Output Control
Cheetah Pregius Camera with 10 GigE Vision Interface – User Manual Digital Input / Output Control Digital Input / Output Control allows you to map camera’s inputs and outputs and configure strobes. Parameter Name Type Value Access Description Enumeration String Num. - Page 54 Cheetah Pregius Camera with 10 GigE Vision Interface – User Manual Parameter Name Type Value Access Description Strobe2Reference Enumeration String Num. Sets the reference event for Exposure Strobe #2 signal. Readout Trigger Strobe2Enable Enumeration String Num. Enables or disables the Strobe #2. Strobe2Width Integer Min: 1...
- Page 55 Cheetah Pregius Camera with 10 GigE Vision Interface – User Manual Depending on line selected under LineSelector (Input or Output), you can apply the following controls: LineSelector Available controls Values Input1 or Input2 LineInverter True False Output1 or Output2 LineInverter True False LineSource...
-
Page 56: Pulse Generator
Cheetah Pregius Camera with 10 GigE Vision Interface – User Manual Pulse Generator The camera provides an internal pulse generator for generating a trigger signal. You can program it to generate a discrete sequence or a continuous trail of pulse signals. Parameter Name Type Value... -
Page 57: Canon Lens Control
Cheetah Pregius Camera with 10 GigE Vision Interface – User Manual Canon Lens Control If using Canon lens control, the following parameters provide options for controlling the lens or checking its status. Parameter Name Type Value Access Description GetLensStatus Command Requests value of Lens Status register. - Page 58 Cheetah Pregius Camera with 10 GigE Vision Interface – User Manual Parameter Name Type Value Access Description FarStep Command Drives the focus in the Far direction by the amount defined in the FocusStepValue feature. FocusStop Command Stops the focus movement immediately. GetFocusEncoderStatus Command Requests the focus encoder position value.
-
Page 59: Transport Layer Control
Cheetah Pregius Camera with 10 GigE Vision Interface – User Manual Transport Layer Control The Transport Layer Control provides a variety of configuration settings and read-only information for configuring communications between the cameras and other devices with the 10 GigE Vision interface. Parameter Name Type Value... - Page 60 Cheetah Pregius Camera with 10 GigE Vision Interface – User Manual Parameter Name Type Value Access Description GevPersistentSubnetMask Integer This feature indicates the Persistent subnet mask associated with the Persistent IP address on this network interface. GevPersistentDefaultGateway Integer Indicates the persistent default gateway for this network interface.
- Page 61 Cheetah Pregius Camera with 10 GigE Vision Interface – User Manual Parameter Name Type Value Access Description GevSCPHostPort Integer Indicates the port to which the device must send data stream. GevSCPSFireTestPacket Boolean When this bit is set, the device fires one test packet. GevSCPSDoNotFragment Boolean This bit is copied into the do...
-
Page 62: User Set Control
Cheetah Pregius Camera with 10 GigE Vision Interface – User Manual User Set Control User Set Control allows you to save custom settings and reload them into the camera as needed. Parameter Name Type Value Access Description UserSetSelector Enumeration String Num. -
Page 63: Configuring An Ethernet Adapter And Host Computer
Cheetah Pregius Camera with 10 GigE Vision Interface – User Manual Configuring an Ethernet Adapter and Host Computer For the best system performance, configure the following parameters of your network interface card (NIC): Jumbo Frames (Jumbo Packets), Receive/Transmit Buffers, Interrupt Moderation Rate to the values shown below. -
Page 64: Jumbo Frames
Cheetah Pregius Camera with 10 GigE Vision Interface – User Manual Jumbo Frames Jumbo Frames (or Jumbo Packets) parameter allows for payloads larger than the standard maximum transmission unit (MTU) of 1,500 bytes and supports up to 9,000 bytes per packet. Jumbo Frames are used to reduce the overhead load per packet, decrease CPU load, and increase data transfer rate. -
Page 65: Interrupt Moderation Rate
Cheetah Pregius Camera with 10 GigE Vision Interface – User Manual Interrupt Moderation Rate Interrupt Moderation Rate (or Interrupt Throttling) sets the maximum number of interrupts per second to the CPU when processing the transmitted and received packets. Minimizing the interval between interrupts reduces the latency on each packet but increases CPU usage and decreases throughput. -
Page 66: Adjusting Jumbo Frames, Receive/Transmit Buffers, And Interrupt Moderation Rate In Windows
Cheetah Pregius Camera with 10 GigE Vision Interface – User Manual Adjusting Jumbo Frames, Receive/Transmit Buffers, and Interrupt Moderation Rate in Windows 1. Click Start icon → Windows System → Control Panel. 2. Click Hardware and Sound → Devices and Printers → Device Manager. 3. - Page 67 Cheetah Pregius Camera with 10 GigE Vision Interface – User Manual 4. On the Advanced tab, set the following parameters: • Jumbo Packet (or Jumbo Frame) → Set Value to 9014 Bytes (or 9 KB MTU, 9000, 16K – depends on NIC). Receive Buffers (or Receive Descriptors) →...
-
Page 68: Configuring A Host Computer
When too many frames have been dropped, the video acquisition rate slows down. The following pop-up window opens: Imperx recommends turning off any Firewalls, antivirus software, and third-party filter drivers and to disable Windows Performance Monitor (perfmon.exe) or Wireshark (use it solely for debugging purposes), and not opening the Networking tab in Windows Task Manager. -
Page 69: Disabling Windows Firewall For All Connections
Cheetah Pregius Camera with 10 GigE Vision Interface – User Manual Disabling Windows Firewall for All Connections 1. Click Start icon → Windows System → Control Panel. 2. Click System and Security → Windows Defender Firewall. 3. On the left panel, click Turn Windows Defender Firewall on or off. The Customize settings windows opens. -
Page 70: Disabling Windows Firewall For Selected Network Adapters
Cheetah Pregius Camera with 10 GigE Vision Interface – User Manual Disabling Windows Firewall for Selected Network Adapters 1. Click Start icon → Windows System → Control Panel. 2. Click System and Security → Windows Defender Firewall. 3. On the left panel, click Advanced settings. The Windows Defender with Advanced Security windows opens. - Page 71 Cheetah Pregius Camera with 10 GigE Vision Interface – User Manual 6. The Protected Network Connections for the Private Profile windows shows a list of the network connections with the firewall turned on. To disable the firewall, uncheck those connections that contain your cameras. Click OK. October 8, 2020 Page Rev 1.0...
-
Page 72: Multiple Nics In A Single Host Pc
Cheetah Pregius Camera with 10 GigE Vision Interface – User Manual Multiple NICs in a Single Host PC When several NICs are installed in the same host PC, you have to assign a unique IP address to each NIC. You can use one of the following methods: Method When to use Configuring a static IP address... - Page 73 Cheetah Pregius Camera with 10 GigE Vision Interface – User Manual 6. Select Use the following IP address and assign an IP address to the network adapter. The Default gateway field should be blank. 7. Click OK. 8. Repeat steps 4–6 for each NIC on your computer. October 8, 2020 Page Rev 1.0...
-
Page 74: Configuring A Dynamic Ip Address Via Dhcp In Windows
Cheetah Pregius Camera with 10 GigE Vision Interface – User Manual Configuring a Dynamic IP Address via DHCP in Windows For a NIC to obtain an IP address automatically, follow the steps below. 1. Click Start icon → Windows System → Control Panel. 2. - Page 75 Cheetah Pregius Camera with 10 GigE Vision Interface – User Manual 6. Make sure that Obtain an IP address automatically is enabled. The DHPC server assigns a dynamic IP address to the NIC. If the server is not available, the IP address is assigned by the NIC itself. If more than one NIC have Obtain an IP address automatically setting enabled (by default) and the DHPC server is not found, the IP addresses will not be assigned correctly.
-
Page 76: Configuring Power Management In Windows
Cheetah Pregius Camera with 10 GigE Vision Interface – User Manual Configuring Power Management in Windows For the applications with extended periods of image streaming, configuring power management is required. Typically, if there is no activity from the keyboard or mouse, the computer or NIC goes to sleep, and the image stream gets interrupted. - Page 77 Cheetah Pregius Camera with 10 GigE Vision Interface – User Manual To change power plan settings for the NIC: 1. Click Start icon → Windows System → Control Panel. 2. Click Network and Internet → Network and Sharing Center. 3. On the left panel, click Change adapter settings. 4.
-
Page 78: Software Gui
Overview The IpxPlayer software application provides a graphical user interface (GUI) with functionality for controlling Imperx camera parameters, acquiring video, showing acquired video, and saving acquired images or video on the host computer. The application also collects and displays statistical information on acquired images and generates a log of data transfers between the camera and the host computer. -
Page 79: Compatibility
Saves and loads camera configuration files. Installing the Software Use the installation wizard to install the Imperx Camera SDK software supplied with your camera. If a previous version of the GUI software is installed on your computer, you must remove it before completing the installation. -
Page 80: Installation
Cheetah Pregius Camera with 10 GigE Vision Interface – User Manual Installation 1. Locate the executable file (IpxCameraSdk***.exe) on the media that shipped with your camera. 2. Drag the file to your computer desktop. If a Security screen appears, click OK. 3. - Page 81 Cheetah Pregius Camera with 10 GigE Vision Interface – User Manual 6. On the Choose Install Location screen, accept the default destination folder or click Browse and select a different location, click Next and then Install. The installer prompts you to uninstall any existing versions of the software from your computer before continuing the installation.
- Page 82 7. On the Installation Complete screen, select the check box to register your software and click Next. When the Imperx website appears, complete the Subscriber Registration and click Submit. 8. On the Completing Imperx Camera SDK Setup screen, select Reboot now and click Finish. The Imperx IpxPlayer icon appears on your desktop. October 8, 2020 Page Rev 1.0...
-
Page 83: Camera Sdk
Cheetah Pregius Camera with 10 GigE Vision Interface – User Manual Camera SDK The installation process places the Imperx camera SDK files on your computer’s hard drive using following structure: <InstallationFolder> – root SDK folder (usually, on the Windows OS, it is C:\Program Files\Imperx\Imperx Camera SDK\). -
Page 84: Connecting To Cameras
2. Click Camera menu and select Connect (or click the camera icon The Select Camera dialog appears. The dialog lists all connected cameras. The version number refers to the installed Imperx GUI driver 3. Select a camera listed on the dialog. - Page 85 Cheetah Pregius Camera with 10 GigE Vision Interface – User Manual To Set the IP Address: 1. Click Set IP Address. 2. When the Set IP Address screen appears, click OK. 3. On the Select Camera screen, click OK. 4. After the camera connects, click the play icon on the IpxPlayer to begin capturing and displaying images.
-
Page 86: Using The Ipxplayer
Cheetah Pregius Camera with 10 GigE Vision Interface – User Manual Using the IpxPlayer The IpxPlayer displays and controls camera features and attributes based on an XML file stored in Flash memory inside the camera. The main window provides access to menus, shortcut icons, camera parameters, live images, capture options, a log, and camera statistics. -
Page 87: Saving And Loading Configurations
Cheetah Pregius Camera with 10 GigE Vision Interface – User Manual Display Menu Increases the zoom by 25 percent around the center of the Zoom IN image when clicked. Decreases the zoom by 25 percent around the center of the Zoom OUT image when clicked. -
Page 88: Camera Parameters Panel
Provides visibility of more advanced features that, if set incorrectly, might cause the camera to work improperly. Device Control Panel The Device Controls parameters provide information about the camera. DeviceVendorName Imperx, Inc. DeviceModelName Full camera part number. DeviceVersion Camera Hardware version. - Page 89 Cheetah Pregius Camera with 10 GigE Vision Interface – User Manual DeviceUserID User-defined camera name. DeviceSFNCVersionMajor The major version number of the GenICam Standard Features Naming Convention. DeviceSFNCVersionMinor The minor version number of the GenICam Standard Features Naming Convention. DeviceSFNCVersionSubMinor The sub major version number of the GenICam Standard Features Naming Convention.
-
Page 90: Version Info Panel
The Firmware Image ID (F=Factory or A=Application). CameraHeadFirmwareVersion The Firmware version number. CameraHeadFirmwareBuild The Firmware build number. CustomerID The Customer ID for custom firmware (0=Imperx standard firmware). FamilyID The Family ID. XmlVersion The version of the XML file. October 8, 2020 Page Rev 1.0... -
Page 91: Image Format Control Panel
Cheetah Pregius Camera with 10 GigE Vision Interface – User Manual Image Format Control Panel Provides information on the camera base resolution and output resolution. SensorWidth Effective width of the sensor in pixels. SensorHeight Effective height of the sensor in pixels. WidthMax Maximum width of the image in pixels calculated after horizontal binning, decimation, or any other functions change horizontal dimension of image. - Page 92 Cheetah Pregius Camera with 10 GigE Vision Interface – User Manual PixelSize Number of bits per pixel in memory (8-, 10-, or 12-bits). PixelColorFilter Shows the color filter pattern. BinningVertical Sets number of rows to combine. BinningHorizontal Sets number of columns to combine. DecimationVertical Sets number of rows to skip DecimationHorizontal...
-
Page 93: Acquisition Control Panel
Cheetah Pregius Camera with 10 GigE Vision Interface – User Manual Acquisition Control Panel Acquisition Control determines the data flow between the camera and the computer. AcquisitionMode Supports three modes of acquiring images: SingleFrame, MultiFrame, and Continuous. AcquisitionStart Starts the acquisition of the device. AcquisitionStop Stops the acquisition of the device at the end of the current frame. - Page 94 Cheetah Pregius Camera with 10 GigE Vision Interface – User Manual AcquisitionFrameRateEnable Controls the acquisition frame rate/frame time. If this mode is On, you can extend frame time beyond the free-running frame time. AcquisitionFrameTime Allows you to set the actual frame time in microseconds. Changes to AcquisitionFrameTime affect the AcquisitionFrameRate setting.
-
Page 95: Analog Control Panel
Cheetah Pregius Camera with 10 GigE Vision Interface – User Manual Analog Control Panel These parameters define analog and digital gain controls. Gain Sets analog/digital gain from 0 to 48 dB with 0.1 dB step. GainAuto Sets the automatic gain control (AGC) mode. can be set to ExposureMode Timed, PulseWidth, or Off. -
Page 96: Auto Algorithm Control Panel
Cheetah Pregius Camera with 10 GigE Vision Interface – User Manual Auto Algorithm Control Panel Auto Algorithm Control lets you configure settings for AWB (Automatic White Balance), AEC (Automatic Exposure Control), and AGC (Automatic Gain Control) algorithms. You can set the camera to AEC/AGC to keep the same image brightness during changing lighting conditions. - Page 97 Cheetah Pregius Camera with 10 GigE Vision Interface – User Manual ExposureAutoUpperLimit Sets the maximum exposure time value in microseconds. GainAutoLowerLimit Sets the minimum gain when GainAuto is Continuous (step is 0.1 dB). GainAutoUpperLimit Sets the maximum gain (up to 48 dB in 0.1 dB steps). ExposureGainAutoPriority Selects whether to adjust gain or exposure first.
-
Page 98: Data Correction Panel
Cheetah Pregius Camera with 10 GigE Vision Interface – User Manual Data Correction Panel These parameters enable data correction and image improvements with Look-up tables and file corrections. LUTEnable Selects LUT to be used in processing image (LUT1 – LUT4). LUT1 and LUT3 are pre-programmed with Gamma 0.45, LUT2 and LUT 4 are preprogrammed with negative LUT. -
Page 99: Digital Io Control Panel
Cheetah Pregius Camera with 10 GigE Vision Interface – User Manual Digital IO Control Panel These controls enable you to map camera’s inputs and outputs and configure strobes. LineSelector Selects the physical line (or pin) of the external camera connector or the virtual line of the Transport Layer to configure. -
Page 100: Pulse Generator Panel
Cheetah Pregius Camera with 10 GigE Vision Interface – User Manual Pulse Generator Panel The Pulse Generator provides a signal generator for camera sourced trigger or control signals. PulseGenGranularity Sets the Pulse Generator main timing resolution. The x1 resolution is in microseconds. -
Page 101: Canon Lens Control
Cheetah Pregius Camera with 10 GigE Vision Interface – User Manual Canon Lens Control If using Canon EF Active lens mount, the following parameters are available for controlling the lens or checking its status. GetLensStatus Requests value of Lens Status register. LensStatus Returns status of Lens after GetLensStatus runs. - Page 102 Cheetah Pregius Camera with 10 GigE Vision Interface – User Manual Focus Panel NearFull Drives the focus to the fully Near position. FarFull Drives the focus to the fully Far position. FocusStepValue Sets the focus step size for NearStep and FarStep focus. A typical step size has a value of 4.
- Page 103 Cheetah Pregius Camera with 10 GigE Vision Interface – User Manual Iris Panel CurrentFNumber F-number value of the lens iris. Value of 0.0 signals an unknown iris position. CloseirisFull Closes the iris to the fully closed position. OpenIrisFull Fully opens the iris. CloseIrisStep Closes the iris based on amount entered in the IrisStepValue feature.
-
Page 104: Transport Layer Control
Cheetah Pregius Camera with 10 GigE Vision Interface – User Manual Transport Layer Control The Transport Layer controls the exchange of data between the camera and the host computer. PayloadSize Provides the number of bytes transferred for each image on the stream channel, including any end-of-line, end-of-frame statistics, or other stamp data. - Page 105 Cheetah Pregius Camera with 10 GigE Vision Interface – User Manual GevCurrentIPConfigurationDHCP Indicates whether a DHCP IP configuration scheme is activated on the network interface. GevCurrentIPConfigurationPersistentIP Indicates whether a Persistent IP configuration scheme is activated on the network interface. A persistent IP address is hard-coded in non-volatile memory.
-
Page 106: User Set Controls
Cheetah Pregius Camera with 10 GigE Vision Interface – User Manual GevSCPSPacketSize The stream packet size to send on this channel, except for data leader and data trailer, and the last data packet that might be of smaller size (since packet size is not necessarily a multiple of block size for stream channel). -
Page 107: Capture Panel
Cheetah Pregius Camera with 10 GigE Vision Interface – User Manual Capture Panel The Capture panel provides options for recording images and video and saving them to the computer hard drive. Click the Capture tab at the bottom of the IpxPlayer screen to access the panel. -
Page 108: Log Panel
Cheetah Pregius Camera with 10 GigE Vision Interface – User Manual Log Panel The Log panel shows data transfers to or from the connected camera. Log information provides a numeric identifier assigned by the application, the transfer time, the control channel, and the message. -
Page 109: Statistics Panel
Cheetah Pregius Camera with 10 GigE Vision Interface – User Manual Statistics Panel The Statistics panel displays camera performance and other information based on settings and parameters. Frames acquired The number of frames acquired after you click the Play button. Timestamp [ns] The current value of the timestamp in the acquired image in nanoseconds. -
Page 110: Camera Features
Cheetah Pregius Camera with 10 GigE Vision Interface – User Manual Camera Features Image Data Flow CMOS Sensor Binning (for mono Reverse X/Y Analog Vertical ROI Analog Imager cameras only) Decimation DIgital Analog Offset Analog Gain Statistic for AEC/AGC FPGA Statistic for AWB Digital SLVS EC... -
Page 111: Exposure Control
Cheetah Pregius Camera with 10 GigE Vision Interface – User Manual Exposure Control The camera provides three exposure control modes—Off, Timed, and Trigger Width. In the Timed mode, you can control exposure time manually or automatically. To enable manual control, set ExposureAuto to Off and specify the exposure time using the ExposureTime setting. To enable AEC (Automatic Exposure Control), set ExposureAuto to Once or Continuous. - Page 112 Cheetah Pregius Camera with 10 GigE Vision Interface – User Manual To reduce the image exposure time under bright lighting conditions, set the exposure control mode to Timed. The electronic exposure control does not affect the frame rate; it only changes the exposure time.
-
Page 113: Exposure Control In Trigger Mode
Cheetah Pregius Camera with 10 GigE Vision Interface – User Manual Exposure Control in Trigger Mode In trigger mode, you can synchronize the camera’s acquisition cycle to an external signal by setting the exposure control to either Timed or Trigger Width. Trigger mode can be set to either Standard or Fast (see Camera Triggering). -
Page 114: Global Shutter
Cheetah Pregius Camera with 10 GigE Vision Interface – User Manual In Standard Trigger mode, the maximum exposure time is defined by the formula: Exposure Time (max) = Trigger Period – Readout Time, where the Readout Time is equal to the CurrentFrameTime (in free-running mode, with AcquisitionFrameRateEnable off). -
Page 115: Automatic Exposure And Gain Control
Cheetah Pregius Camera with 10 GigE Vision Interface – User Manual Automatic Exposure and Gain Control Automatic exposure control (AEC) and automatic gain control (AGC) enable the camera to maintain the same image brightness during the changing lighting conditions. You can enable both AEC and AGC independently or together by setting ExposureAuto and GainAuto to either Once or Continuous. - Page 116 Cheetah Pregius Camera with 10 GigE Vision Interface – User Manual luminance (or threshold) is achieved, the exposure is applied. The camera varies the exposure until either the target image luminance (or threshold) is reached or one of exposure limits is reached. By default, the ExposureGainAutoPriority control are set to ExposureTime.
-
Page 117: P, I, And D Coefficients
Cheetah Pregius Camera with 10 GigE Vision Interface – User Manual P, I, and D Coefficients The P (Proportional), I (Integral), and D (Derivative) coefficients of PID feed-back control loops determine speed and stability of AEC and AGC algorithms. A PID controller continuously calculates a difference (an error) between a setpoint (SP)— ExposureGainAutoTarget—... -
Page 118: Proportional Response
Cheetah Pregius Camera with 10 GigE Vision Interface – User Manual Proportional Response The proportional response is a difference (error) between the setpoint and the process variable. This error is then multiplied by the proportional coefficient P. Increasing the P coefficient increases the speed of the control algorithm and degrades its stability. -
Page 119: Camera Triggering
Changing the coefficients may cause oscillations and destabilize the system. If you need to change the coefficients, please contact Imperx support. Imperx sets up optimal P, I, and D coefficients to balance the speed and stability of AEC and AGC algorithms. XML Parameter Default value... - Page 120 Cheetah Pregius Camera with 10 GigE Vision Interface – User Manual Standard Trigger Mode In Standard Trigger mode, the camera first performs the exposure and then reads out the image. An external timing pulse controls the start of the exposure if exposure control mode is set to Timed.
- Page 121 Cheetah Pregius Camera with 10 GigE Vision Interface – User Manual Setting exposure control mode to Trigger Width allows the external timing pulse to control the exposure duration. Standard trigger mode, Exposure control is Trigger Width GenICam controls TriggerMode: On TriggerOverlap: Off TriggerSource: Line 1 (or Line2, Pulse Generator) TriggerActivation: Rising Edge (or Falling Edge)
- Page 122 Cheetah Pregius Camera with 10 GigE Vision Interface – User Manual Fast Trigger Mode In Fast Trigger mode, the exposure and readout are overlapped in a way that is similar to free- running (untriggered mode). Fast trigger mode depends upon a constant and stable trigger source so the camera can position the exposure period to conclude just as the previous frame readout ends.
-
Page 123: Trigger Sources
Cheetah Pregius Camera with 10 GigE Vision Interface – User Manual You can adjust the exposure duration to be equal to the external pulse width by setting the exposure control mode to Trigger Width. The new exposure begins with the next trigger pulse during the readout of the current frame. -
Page 124: Configuring The Trigger
Cheetah Pregius Camera with 10 GigE Vision Interface – User Manual Configuring the Trigger To configure the camera to work in trigger mode, follow the steps below: 1. Turn off the camera image acquisition. 2. In the Acquisition Control menu, set TriggerMode to On. 3. - Page 125 Cheetah Pregius Camera with 10 GigE Vision Interface – User Manual TriggerDebounceTime Defines the time period following a triggering event in which no additional triggers will be accepted by the camera. Always set the TriggerDebounceTime to a value higher than the trigger signal’s pulse width.
-
Page 126: Video Amplifier Gain And Offset
Black Level Auto-calibration and Offset The camera automatically adjusts black level based on measurements of the dark reference lines at the start of each frame. Imperx recommends leaving the BlackLevelAuto engaged (Continuous). If SensorBlackLevelRecomended disabled (set to false), you can set the BlackLevel manually and adjust it from 0 to 4095 counts. -
Page 127: Pulse Generator Settings
Cheetah Pregius Camera with 10 GigE Vision Interface – User Manual Camera Output – 10 bits If the camera is set to output 8-bit data, sensor most significant data bits (P2 to P9) map to D0 (LSB) to D7 (MSB). Camera Output –... -
Page 128: Input / Output Control
Cheetah Pregius Camera with 10 GigE Vision Interface – User Manual Input / Output Control The camera supports two inputs and two outputs (TTL and opto-isolated): Input / Output # Pin # Description Voltage/Current Input 1 Pin 8 and Pin10 (Return) Opto-isolated Voltage 3.3–24 V, Current (min) 3.3 mA... -
Page 129: Strobe And Synchronization Controls
Cheetah Pregius Camera with 10 GigE Vision Interface – User Manual Strobe and Synchronization Controls The camera allows you to synchronize your system from several references. You can synchronize with the trigger input, the start, middle or end of exposure, or the internal pulse generator signals. -
Page 130: Configuring The Strobe In Free-Running Mode
Cheetah Pregius Camera with 10 GigE Vision Interface – User Manual Configuring the Strobe in Free-Running Mode In free-running mode, you can set the strobe pulse duration (StrobeWidth) and the delay (StrobeDelay) with respect to the start of the exposure or the start of the readout period. The strobe period is equal to the frame time. - Page 131 Cheetah Pregius Camera with 10 GigE Vision Interface – User Manual Strobes Positioned with Respect to the Start of Exposure and Readout, Free-running Mode GenICam controls TriggerMode: Off LineSelector: Output1 (or Output2) LineSource: Strobe1 (or Strobe2) Strobe1Reference: Exposure Strobe1Enable: On Strobe1Width: User-specified (in µs) Strobe1Delay: User-specified (Min.= 10 µs) Strobe2Reference: Readout...
-
Page 132: Configuring A Strobe In Trigger Mode
Cheetah Pregius Camera with 10 GigE Vision Interface – User Manual Configuring a Strobe in Trigger Mode If the camera is in the Trigger mode (Standard or Fast Trigger), you can set the strobe pulse duration and the delay with respect to the trigger pulse active edge, start of the exposure, or start of the readout period. - Page 133 Cheetah Pregius Camera with 10 GigE Vision Interface – User Manual 9. If necessary, set Strobe2Delay. Without a delay, the strobe occurs simultaneously with the start of exposure. 10. Set Strobe2Width to a desired value. Strobes Positioned with Respect to a Trigger, Exposure Start, or Readout Start Standard Trigger Mode GenICam controls TriggerMode: On...
- Page 134 Cheetah Pregius Camera with 10 GigE Vision Interface – User Manual Strobe 1 is positioned with respect to the exposure start with a trigger delay. The camera is in Standard Trigger mode with Timed Exposure Control. Strobes Positioned with Respect to the Exposure Start Standard Trigger Mode GenICam controls TriggerMode: On...
- Page 135 Cheetah Pregius Camera with 10 GigE Vision Interface – User Manual If your application requires activating a light source before the start of the exposure period, you can use StrobeReference and StrobeDelay settings to position the strobe to occur earlier that the exposure.
-
Page 136: Area Of Interest
Cheetah Pregius Camera with 10 GigE Vision Interface – User Manual Area of Interest For some applications, you might not need the entire image, but only a portion of it. To accommodate this requirement, the Cheetah camera allows you to create one Region of Interest (ROI), also known as an Area of Interest (AOI). -
Page 137: Binning And Subsampling Decimation
Cheetah Pregius Camera with 10 GigE Vision Interface – User Manual Binning and Subsampling Decimation Binning The principal objective of the binning function is to reduce the image resolution with better final image quality than a subsampling function. Binning reduces the output resolution by summing several pixels together and has the advantage of reducing aliasing, increasing signal-to-noise ratio (SNR). -
Page 138: Subsampling Decimation
Cheetah Pregius Camera with 10 GigE Vision Interface – User Manual Subsampling Decimation Subsampling reduces the number of pixels output by reducing the output frame size but maintains the full field of view. If an area of interest (AOI) is selected, then the field of view of the AOI is maintained. -
Page 139: Lookup Tables
12-bit data by 4 to get 10-bit pixel values for output to the camera interface. The camera supports a Gamma control feature and four separate LUTs. All LUTs are available for modifications. You can generate and upload a custom LUT using the Imperx Upload Utility (see Uploading the LUT File). -
Page 140: User Defined Lut
Cheetah Pregius Camera with 10 GigE Vision Interface – User Manual User Defined LUT You can define any 12-bit to 12-bit transformation as a user LUT and upload it to the camera using Imperx Upload Utility (see Uploading the LUT File). You can specify a transfer function to match the camera’s dynamic range to the scene’s dynamic range. -
Page 141: Hot And Defective Pixel Correction
The camera uses a factory installed flat field correction (located in FFC0) algorithm to correct some of the image sensor’s non-uniformity. You can upload your own FFC table to one of the FFC1 – FFC8 tables using Imperx Upload Utility. While not recommended, you can disable the FFC. -
Page 142: Test Image Pattern
Cheetah Pregius Camera with 10 GigE Vision Interface – User Manual Test Image Pattern The camera can output several test images to verify the camera’s general performance and connectivity to the computer. This ensures that all the major modules in the hardware are working properly and the connection between your computer and camera is synchronized, that is, the image framing, output mode, communication rate, and so on are properly configured. - Page 143 Cheetah Pregius Camera with 10 GigE Vision Interface – User Manual Manual Control over the Correction Coefficients (AWB mode: Off) To adjust the Red and Blue channel gain coefficients with respect to Green (the reference), use the control BalanceRatioSelector to point to the color (Red or Blue) whose gain should be adjusted.
- Page 144 Cheetah Pregius Camera with 10 GigE Vision Interface – User Manual AWB mode: Once For the best color reproduction when the source has a stable spectral output, Imperx suggests illuminating a uniformly grey card with the intended source then using the Once option to determine the coefficients and then saving these coefficients into the camera and saving this configuration to one of the User Sets.
-
Page 145: Configuration Memory
Cheetah Pregius Camera with 10 GigE Vision Interface – User Manual Configuration Memory The camera has built-in configuration memory divided into six segments: Work Space, Factory Space (Default), User Space #0, #1, #2 or #3. The Work Space segment contains the current camera settings while the camera is powered up and operational. - Page 146 You can create custom LUT tables using the Imperx IPX Toolkit utility and upload these tables to the parameter Flash using the Imperx Upload Utility. Both the IPX Toolkit and IPX Upload Utility are available from the Imperx website https://www.imperx.com/.
-
Page 147: Image Sensor Technology
Cheetah Pregius Camera with 10 GigE Vision Interface – User Manual Image Sensor Technology General Information A CMOS camera is an electronic device for converting light into an electrical signal. The C4440, C5440, and C6440 cameras contain Sony Pregius CMOS (Complementary Metal-Oxide Semiconductor) image sensors with 3.45-micron square pixels. -
Page 148: Spectral Sensitivity
Cheetah Pregius Camera with 10 GigE Vision Interface – User Manual Spectral Sensitivity A set of color filters (red, green, and blue) arranged in a Bayer pattern over the pixels generates color images. The starting color is Red for SONY Pregius image sensors and follows the pattern: red, green, red, green, red, …... -
Page 149: Appendix A: Spectral Response
Cheetah Pregius Camera with 10 GigE Vision Interface – User Manual Appendix A: Spectral Response Cheetah C4440 Spectral Response Sony IMX367 Color Spectral Response Sony IMX367 Mono Spectral Response October 8, 2020 Page Rev 1.0 149 of 170... -
Page 150: Cheetah C5440 Spectral Response
Cheetah Pregius Camera with 10 GigE Vision Interface – User Manual Cheetah C5440 Spectral Response Sony IMX387 Color Spectral Response Sony IMX387 Mono Spectral Response October 8, 2020 Page Rev 1.0 150 of 170... -
Page 151: Cheetah C6440 Spectral Response
Cheetah Pregius Camera with 10 GigE Vision Interface – User Manual Cheetah C6440 Spectral Response Sony IMX342 Color Spectral Response Sony IMX342 Mono Spectral Response October 8, 2020 Page Rev 1.0 151 of 170... -
Page 152: Appendix B: Creating Hot And Defective Pixel Correction Maps
Cheetah Pregius Camera with 10 GigE Vision Interface – User Manual Appendix B: Creating Hot and Defective Pixel Correction Maps Overview Hot Pixel Correction and Defective Pixel Correction work with predetermined and preloaded Hot and Defective pixel maps. Hot Pixel Map (HPM) and Defective Pixel Map (DPM) are uploaded into the camera’s non-volatile memory. -
Page 153: Finding Defective Pixels
1. Set DefectPixelCorrection to Off in the Data Correction menu. 2. Make sure that BadPixelCorrection is set to Factory. 3. Repeat steps 2–4 of the previous procedure. To obtain the factory DPM file, contact Imperx technical support at: Email: support@imperx.com Toll Free: 1 (866) 849-1662 or (+1) 561-989-0006 Fax: (+1) 561-989-0045 Visit our website: www.imperx.com. - Page 154 1. Set BadPixelCorrection to Off in Data Correction menu. 2. Make sure that DefectPixelCorrection is set to Factory. 3. Repeat steps 2–6 of the previous procedure. To obtain the factory HPM file, contact Imperx technical support at: Email: techsupport@imperx.com Toll Free: 1 (866) 849-1662 or (+1) 561-989-0006 Fax: (+1) 561-989-0045 Visit our website: www.imperx.com.
-
Page 155: Locating And Adding Pixel Coordinates
Cheetah Pregius Camera with 10 GigE Vision Interface – User Manual Locating and adding pixel coordinates Follow the steps below to find first pixel coordinates, locate and adjust defective pixel coordinates, and accurately place defective pixel coordinates into the pixel map. STEP 1: Find the First Pixel Coordinates Your frame grabber’s first pixel coordinates can affect the location accuracy of defective pixel coordinates. - Page 156 Cheetah Pregius Camera with 10 GigE Vision Interface – User Manual STEP 2: Find Defective Pixel Coordinates Click the defective pixel to find its X, Y coordinates. Click the pixel to display X, Y coordinates below. X:593 Y:4816 The coordinates are 593, 4816, where X (Column) = 593 and Y (Row) = 4816. IMPORTANT: Frame grabbers from different manufacturers may display pixel location coordinates in different order, for example: X (Column), Y (Row) or,...
- Page 157 Cheetah Pregius Camera with 10 GigE Vision Interface – User Manual STEP 4: Add Defective Pixel Coordinates to Defective Pixel Map Place the defective pixel coordinates in the Defective Pixel Map file in ascending (increasing) numerical order of the Y (row) coordinate. The value of all Y coordinates should progressively increase as you look down the list of X, Y coordinates.
-
Page 158: Creating A Dpm/Hpm Using A Text Editor
Cheetah Pregius Camera with 10 GigE Vision Interface – User Manual Creating a DPM/HPM Using a Text Editor You can create your own DPM and HPM files using any ASCII text editor, such as Notepad or similar. Alternatively, any spreadsheet program (i.e. Microsoft Excel) can be used by converting the spreadsheet into a comma delimited (.csv) file. -
Page 159: Creating A Dpm Using Imperx Toolkit
Cheetah Pregius Camera with 10 GigE Vision Interface – User Manual Creating a DPM Using Imperx Toolkit 1. Set DefectPixelCorrection to Off in the Data Correction menu. 2. Make sure that BadPixelCorrection is set to Factory. 3. Make sure that TriggerMode and ExposureMode are set to Off, and the camera resolution is set to maximum. -
Page 160: Creating An Hpm Using Imperx Toolkit
Cheetah Pregius Camera with 10 GigE Vision Interface – User Manual Creating an HPM Using Imperx Toolkit 1. Set BadPixelCorrection to Off in the Data Correction menu. 2. Make sure that DefectivePixelCorrection is set to Factory. 3. Set the longest exposure time and slowest frame rate expected. -
Page 161: Uploading Dpm / Hpm Files
Cheetah Pregius Camera with 10 GigE Vision Interface – User Manual Uploading DPM / HPM Files After saving the maps, you can upload them to the camera using the Imperx Upload Utility. The Upload Utility enables uploads of DPM, HPM, and other files to your camera. - Page 162 Cheetah Pregius Camera with 10 GigE Vision Interface – User Manual 4. Browse for either the edited .dpm file or .hpm file, select it, and click Upload. Wait for the upload to finish. 5. After the upload is completed, do a power cycle on the camera. 6.
-
Page 163: Appendix C: Look Up Tables
Cheetah Pregius Camera with 10 GigE Vision Interface – User Manual Appendix C: Look Up Tables Creating an LUT Using a Text Editor You can use any ASCII text editor, such as Notepad or similar, to create a custom LUT. Alternatively, any spreadsheet program (i.e. -
Page 164: Creating An Lut Using Microsoft Excel
Cheetah Pregius Camera with 10 GigE Vision Interface – User Manual Creating an LUT Using Microsoft Excel The LUT file can be created in Excel as follows: 1. Create the spreadsheet as shown below (note that 4096 rows are required in the table). 2. -
Page 165: Creating An Lut Using Imperx Toolkit
Cheetah Pregius Camera with 10 GigE Vision Interface – User Manual Creating an LUT Using Imperx Toolkit 1. On the Tools tab, open LUT Manager utility. 2. Create a new LUT file. On the Create LUT dialog box, select the LUT type, set the input and output bit depth to 12, and click OK. - Page 166 Cheetah Pregius Camera with 10 GigE Vision Interface – User Manual 6. For a color camera, you can set a transfer function for each channel. Use R, G, and B tabs on the left to switch between the channels. 7. To save the LUT file, go to File > Save as…. Example A modified sigmoid function can be used to enhance low contrast images.
- Page 167 Cheetah Pregius Camera with 10 GigE Vision Interface – User Manual The sigmoid curves with varied threshold and contrast factor parameters are shown below: To apply a convex part of the curve within the range from 0 to 4095, use the following formula: 2*4095*(1/(1+(exp(-2*(x/(4095/4)))))-0.5) the midpoint is shifted to the 0;...
- Page 168 Cheetah Pregius Camera with 10 GigE Vision Interface – User Manual To apply a concave part of the curve within the range from 0 to 4095, use the following formula: 2*4095*(1/(1+(exp(-2*(x/(4095/4)-4))))) the midpoint is shifted to the 4095; 4095 position October 8, 2020 Page Rev 1.0...
-
Page 169: Uploading The Lut File
Cheetah Pregius Camera with 10 GigE Vision Interface – User Manual Uploading the LUT File After saving the LUT into the .lut file, you can upload it into the camera using the Imperx Upload Utility. To upload the LUT file: 1. - Page 170 Cheetah Pregius Camera with 10 GigE Vision Interface – User Manual 3. Browse for the .lut file, select it, and click Upload. Select to which camera’s LUT (LUT1–LUT4) to upload the .lut file you created. Wait for the upload to finish. 4.
Need help?
Do you have a question about the Cheetah Pregius SFP-C5440 and is the answer not in the manual?
Questions and answers