Table of Contents
Advertisement
LYNX Manual RA02
IPX-LYNX
HIGH-RESOLUTION, FAST, FIELD UPGRADEABLE,
PROGRAMMABLE, 8/10/12 BIT, CAMERA LINK
DIGITAL CAMERAS
User's Manual
CONFIDENTIAL NOTICE:
Copyright © 2005, Imperx, Inc. All rights reserved.
Any unauthorized use, duplication or distribution of this document or any part thereof,
without the prior written consent of Imperx Corporation is strictly prohibited.
of
5/6/2005
www.imperx.com
1
154
Advertisement
Table of Contents

Related Manuals for Imperx IPX-VGA120-L


Summary of Contents for Imperx IPX-VGA120-L
-
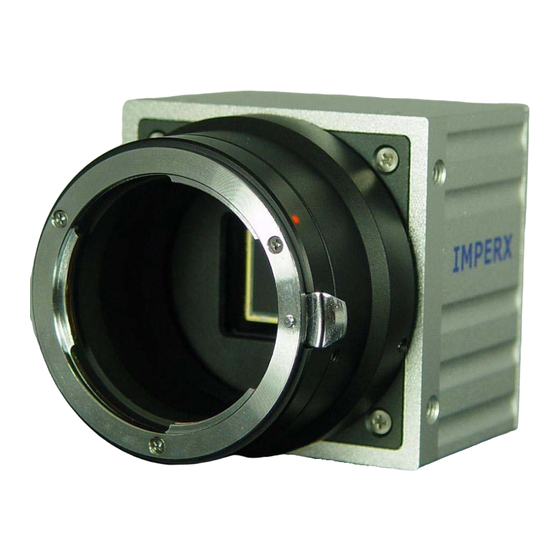
Page 1: Digital Cameras
DIGITAL CAMERAS User’s Manual CONFIDENTIAL NOTICE: Copyright © 2005, Imperx, Inc. All rights reserved. Any unauthorized use, duplication or distribution of this document or any part thereof, without the prior written consent of Imperx Corporation is strictly prohibited. 5/6/2005 www.imperx.com... -
Page 2: Revision History
LYNX Manual RA02 Revision History RA01 04/01/05 P. Dinev First Release RA02 05/03/05 P. Dinev IPX-VGA90-L deleted, IPX-1M48-L has 1000(H) x 1000(V), strobe wiring - corrected. 5/6/2005 www.imperx.com... -
Page 3: Table Of Contents
2.1.2 Dual Output_____________________________________________________ 36 2.1.3 Center Columns Output (IPX-VGA210-L only) ________________________ 37 2.1.4 Timing Diagrams ________________________________________________ 39 IPX-VGA120-L, IPX-VGA210-L _________________________________________ 39 IPX-VGA210-L – Center Columns Operation _____________________________ 41 IPX-1M48-L __________________________________________________________ 42 IPX-2M30-L __________________________________________________________ 44 IPX-2M30H-L ________________________________________________________ 46 IPX-4M15-L __________________________________________________________ 48... - Page 4 Load From Factory ( )___________________________________________ 93 ‘lff’ 3.6.4 Load From User ( )_____________________________________________ 94 ‘lfu’ 3.6.5 Save To Factory ( ) _____________________________________________ 94 ‘stf’ 3.6.6 Save To User ( ) _______________________________________________ 94 ‘stu’ Retrieving Manufacturing Data _______________________________________ 95 5/6/2005 www.imperx.com...
- Page 5 Set Horizontal Mode ( )__________________________________ 108 ‘shm’ 3.8.12.2 Get Horizontal Mode ( ) _________________________________ 108 ‘ghm’ 3.8.13 Vertical Mode __________________________________________________ 109 3.8.13.1 Set Vertical Mode ( ) ____________________________________ 109 ‘svm’ 3.8.13.2 Get Vertical Mode ( ) ____________________________________ 109 ‘gvm’ 5/6/2005 www.imperx.com...
- Page 6 WARRANTY______________________________________________________ 125 Appendix A – Camera Configuration Reference __________________________________ 126 A.1 General Commands ___________________________________________________ 127 A.2 Retrieving Manufacturing Data _________________________________________ 128 A.3 Retrieving Camera Performance ________________________________________ 128 A.4 Restricted Commands _________________________________________________ 129 A.5 Configuring Workspace Settings ________________________________________ 130 5/6/2005 www.imperx.com...
- Page 7 D.2 Using an ASCII text editor _____________________________________________ 149 D.3 Using Microsoft Excel _________________________________________________ 150 Appendix E – Software Installation ____________________________________________ 151 E.1 Software Suite________________________________________________________ 152 E.2 Software Installation from CD __________________________________________ 153 E.3 Software Upgrade from Web Site________________________________________ 153 5/6/2005 www.imperx.com...
- Page 8 Figure 1.6 - Camera Power Connector (viewed from rear) ............25 Figure 1.7 - C-mount cameras – IPX-VGA/1M48/2M30/2M30H ..........26 Figure 1.8 - F-mount cameras – IPX-4M15 and IPX-11M ............26 Figure 1.9 - IPX-VGA120-L and IPX-VGA0210-L..............27 Figure 1.10 - IPX-1M48-L......................28 Figure 1.11 - IPX-2M30-L and IPX-2M30H-L................29 Figure 1.12 - IPX-4M15-L......................
- Page 9 Figure 2.25 - Single / Dual Output Frame Timing (IPX-11M5-L) ........... 51 Figure 2.26 - Horizontal and Vertical Window Positioning ............52 Figure 2.27 - Frame Rate vs. Vertical Window Size (IPX-VGA120-L)........54 Figure 2.28 - Frame Rate vs. Vertical Window Size (IPX-VGA210-L)........55 Figure 2.29 - Frame Rate vs.
- Page 10 Figure C.3 – Serial Transport Properties dialog ..............143 Figure C.4 – Camera Link Transport Properties dialog ............144 Figure C.5 – Transport dialog....................145 Figure C.6 – Loader View dialog ....................146 Figure C.7 –Terminal View dialog.................... 147 5/6/2005 www.imperx.com...
- Page 11 Table A.1 – General commands ....................127 Table A.2 – Retrieving manufacturing data ................128 Table A.3 – Retrieving camera performance ................128 Table A.4 – Restricted commands ..................... 129 Table A.5 – Workspace ‘SET’ commands................. 132 Table A.6 – Workspace ‘GET’ commands................135 5/6/2005 www.imperx.com...
-
Page 12: Chapter 1 - Introduction
LYNX Manual RA02 Chapter 1 – Introduction Introduction This chapter outlines the key features of the Lynx camera. 5/6/2005 www.imperx.com... -
Page 13: Lynx Family
The camera’s image processing engine is based on a 1 million gate FPGA and a 32-bit RISC processor. The LYNX family consists of the following 14 cameras: High Speed: IPX-VGA120-L 640x480 120fps monochrome IPX-VGA120-LC 640x480 120fps color... -
Page 14: General Description
• Temperature monitor User LUT • • Field upgradeable Temperature alarms • • Software External trigger • • Firmware Pre-exposure • • User LUTs Fast triggering • • Automatic Iris Control – optional Double exposure • Capture duration 5/6/2005 www.imperx.com... -
Page 15: Lynx Technical Specifications
Blue) arranged in a “Bayer” pattern, are placed over the pixels. The starting color is Green. Figure 1.1 shows the CCD pixel structure. Table 1.1 shows the individual pixel structure for different LYNX cameras. Figures 1.2, 1.3 and 1.4 show the camera’s spectral response. Figure 1.0 - CCD Pixel Structure www.imperx.com 5/6/2005... -
Page 16: Figure 1.1 - Spectral Response - Monochrome Quantum Efficiency
Frame rate - dual 120/210 fps 48 fps 33 fps 33 fps 15 fps 5 fps Table 1.0 - Pixel structure for different LYNX cameras. Figure 1.1 - Spectral response – monochrome quantum efficiency (Measured with the cover glass) www.imperx.com 5/6/2005... -
Page 17: Figure 1.2 - Spectral Response - Color Quantum Efficiency
LYNX Manual RA02 Figure 1.2 - Spectral response – color quantum efficiency (Measured with the cover glass) Figure 1.3 - Spectral response – UV quantum efficiency (Measured without the cover glass) www.imperx.com 5/6/2005... -
Page 18: Table 1.1 - Camera Specifications
LYNX Manual RA02 Specifications IPX-VGA120-L IPX-VGA210-L Active image pixels 640 (H) x 480 (V) 640 (H) x 480 (V) Active image area 5.87 mm x 4.71 mm 5.87 mm x 4.71 mm (0.231” x 0.185”) (0.231” x 0.185”) Pixel size 7.4 µm... -
Page 19: Specifications
Operating: -5 to 50 C Operating: -5 to 50 C Storage: -10 to 65 C Storage: -10 to 65 C Storage: -10 to 65 C Relative humidity 80% non-condensing 80% non-condensing 80% non-condensing Table 1.1 - Camera Specifications (cont.) www.imperx.com 5/6/2005... - Page 20 Power consumption Upgradeable firmware Upgradeable software Environmental Operating: -5 to 50 C Operating: -5 to 50 C Storage: -10 to 65 C Storage: -10 to 65 C Relative humidity 80% non-condensing 80% non-condensing Table 1.1 - Camera Specifications (cont.) www.imperx.com 5/6/2005...
-
Page 21: Camera Connectivity
Status LED – indicates the status of the camera – refer to Status LED section. Serial Number – shows camera model and serial number. IPX-VGA / 2M30 / 2M30H / 11M5 IPX-1M48 IPX-4M15 Figure 1.4 - Camera Back Panel www.imperx.com 5/6/2005... -
Page 22: Power Supply
Power Supply A universal desktop power supply adapter, providing +12 VDC, +/- 5%, and up to 1.5A constant DC current, is available from Imperx for the LYNX cameras. The operating input voltage ranges from 90 to 240 VAC. CAUTION NOTE... -
Page 23: Table 1.2 - Camera Output Connector - Signal Mapping
- PAIR 9 - PAIR 10 + PAIR 10 + PAIR 11 - PAIR 11 Inner Shield Inner Shield Ground Cable Shield Inner Shield Inner Shield Ground Cable Shield Table 1.2 - Camera Output Connector – Signal Mapping www.imperx.com 5/6/2005... -
Page 24: Table 1.3 - Base Camera Link Bit Assignment
ENABLE 1 FVAL FVAL FVAL FVAL ENABLE 2 DVAL DVAL DVAL DVAL ENABLE 3 CONTROL 0 CC 1 CC 1 CC 1 CC 1 CONTROL 1 CONTROL 2 CONTROL 3 Table 1.3 - Base Camera Link bit assignment www.imperx.com 5/6/2005... -
Page 25: Camera Power Connector
Trigger In - External Trigger Input BNC Black Signal Trigger In + External Trigger Input Shield Strobe Out - Strobe Light Sync Pulse BNC White Signal Strobe Out + Strobe Light Sync Pulse Table 1.5 - BNC Connectors Pin Mapping www.imperx.com 5/6/2005... -
Page 26: Mechanical, Optical And Environmental
Figures 1.9 to 1.13 show the mechanical detail drawings of IPX-VGA, IPX- 1M48, IPX-2M30/H, IPX-4M15 and IPX-11M5 respectively. All dimensions are in millimeters. Figure 1.7 - C-mount cameras – IPX-VGA/1M48/2M30/2M30H Figure 1.8 - F-mount cameras – IPX-4M15 and IPX-11M www.imperx.com 5/6/2005... -
Page 27: Figure 1.9 - Ipx-Vga120-L And Ipx-Vga0210-L
LYNX Manual RA02 IPX-VGA120-L / IPX-VGA210-L (Dimensional Drawings) Figure 1.9 - IPX-VGA120-L and IPX-VGA0210-L www.imperx.com 5/6/2005... -
Page 28: Figure 1.10 - Ipx-1M48-L
LYNX Manual RA02 IPX-1M48-L (Dimensional Drawings) Figure 1.10 - IPX-1M48-L www.imperx.com 5/6/2005... -
Page 29: Figure 1.11 - Ipx-2M30-L And Ipx-2M30H-L
LYNX Manual RA02 IPX-2M30-L / IPX-2M30H-L (Dimensional Drawings) Figure 1.11 - IPX-2M30-L and IPX-2M30H-L www.imperx.com 5/6/2005... -
Page 30: Figure 1.12 - Ipx-4M15-L
LYNX Manual RA02 IPX-4M15-L (Dimensional Drawings) Figure 1.12 - IPX-4M15-L www.imperx.com 5/6/2005... -
Page 31: Figure 1.13 - Ipx-11M5-L
LYNX Manual RA02 IPX-11M5-L (Dimensional Drawings) Figure 1.13 - IPX-11M5-L www.imperx.com 5/6/2005... -
Page 32: Optical
46.5 mm back focal distance. An F-mount lens can be used with a C-mount camera via an F-mount to C-mount adapter, which can be purchased separately – refer to the Imperx web side for more information. The camera performance and signal to noise ratio depends on the illumination (amount of light) reaching the sensor and the exposure time. -
Page 33: Environmental
Avoid touching or cleaning the front surface of the optical sensor. If the sensor needs to be cleaned, use soft lint free cloth and an optical cleaning fluid. Do not use methylated alcohol! www.imperx.com 5/6/2005... -
Page 34: Chapter 2 - Camera Features
LYNX Manual RA02 Chapter 2 – Camera Features Camera Features This chapter discusses the camera’s features and their use. www.imperx.com 5/6/2005... -
Page 35: Resolution And Frame Rate
120 fps 120 fps 30 fps 16 fps 16 fps 7.5 fps 2.5 fps Frame rate - dual 210 fps 48 fps 33 fps 33 fps 15 fps 5 fps Table 2.1 - Pixel Structure and Frame Rates www.imperx.com 5/6/2005... -
Page 36: Dual Output
For normal mode of operation the frame rate can be calculated using the following formula (Formula 1.1). Please note that the formula is not applicable if the shutter is enabled: Frame rate [fps] = 1 / exposure time [sec] (1.1) www.imperx.com 5/6/2005... -
Page 37: Center Columns Output (Ipx-Vga210-L Only)
R (Figure 2.5). In the horizontal direction the first half of the image appears normal and the second half is left/right mirrored. The camera reconstructs the image by flipping the mirrored portion and rearranging the pixels. Figure 2.3 - Center columns output mode of operation www.imperx.com 5/6/2005... -
Page 38: Figure 2.4 - Center Columns Output In Dual Mode Of Operation
LYNX Manual RA02 Figure 2.4 - Center Columns Output in Dual Mode of Operation Figure 2.5 - Center Columns Output in Dual Tap Mode www.imperx.com 5/6/2005... -
Page 39: Timing Diagrams
LYNX Manual RA02 2.1.4 Timing Diagrams IPX-VGA120-L, IPX-VGA210-L In the single mode each line consists of 12 empty pixels (E1 – E12), followed by 24 masked pixels used for black reference (R1 – R24), followed by 4 buffer pixels (B1 – B4), followed by 640 active data pixels (D1 –... -
Page 40: Figure 2.7 - Dual Output Line Timing (Ipx-Vga120/210-L)
FVAL TL = 8000 ns dual output; TL = 16700 ns single output; HB = 1600 ns Figure 2.8 - Single / Dual Center Output Frame Timing (IPX-VGA210-L) IPX-VGA120-L : = 18.38 µs for single = 9.7 µs for dual = 6.73 µs for single center... -
Page 41: Ipx-Vga210-L - Center Columns Operation
6 dark data pixels pixels 150 ns 2850 ns DATA 1 D227 - 0 - - 0 - DATA 2 D228 - 0 - - 0 - LVAL Figure 2.10 - Center Columns Dual Output Line Timing (IPX-VGA210-L) www.imperx.com 5/6/2005... -
Page 42: Ipx-1M48-L
500 active pixels pixels 300 ns 50 ns 12500 ns 200 ns DATA 1 - 0 - - 0 - D999 - 0 - D1000 - 0 - DATA 2 LVAL Figure 2.12 - Dual Output Line Timing (IPX-1M48-L) www.imperx.com 5/6/2005... -
Page 43: Figure 2.13 - Single / Dual Output Frame Timing (Ipx-1M48-L)
- 0 - - 0 - - 0 - - 0 - FVAL TL = 13050 ns dual output; TL = 25900 ns single output; HB = 7200 ns. Figure 2.13 - Single / Dual Output Frame Timing (IPX-1M48-L) www.imperx.com 5/6/2005... -
Page 44: Ipx-2M30-L
16 dark data pixels pixels pixels pixels pixels pixels 100 ns 400 ns 40000 ns 100 ns 100 ns 400 ns DATA D1600 - 0 - - 0 - LVAL Figure 2.15 - Dual output line timing (IPX-2M30-L) www.imperx.com 5/6/2005... -
Page 45: Figure 2.16 - Single / Dual Output Frame Timing (Ipx-2M30-L)
- 0 - - 0 - - 0 - - 0 - FVAL TL = 20600 ns dual output; TL = 41100 ns single output; HB = 4000 ns Figure 2.16 - Single / Dual Output Frame Timing (IPX-2M30-L) www.imperx.com 5/6/2005... -
Page 46: Ipx-2M30H-L
100 ns 700 ns 100 ns 24000 ns DATA 1 D1919 - 0 - - 0 - DATA 2 D1920 - 0 - - 0 - LVAL Figure 2.18 - Dual Output Line Timing (IPX-2M30H-L) www.imperx.com 5/6/2005... -
Page 47: Figure 2.19 - Single / Dual Output Frame Timing (Ipx-2M30H-L)
- 0 - - 0 - - 0 - DL1080 - 0 - FVAL TL = 24900 ns dual output; TL = 49700 ns single output; HB = 4000 ns Figure 2.19 - Single / Dual Output Frame Timing (IPX-2M30H-L) www.imperx.com 5/6/2005... -
Page 48: Ipx-4M15-L
300 ns 700 ns 100 ns 25600 ns DATA 1 D2047 - 0 - - 0 - DATA 2 - 0 - D2048 - 0 - LVAL Figure 2.21 - Dual Output Line Timing (IPX-4M15-L) www.imperx.com 5/6/2005... -
Page 49: Figure 2.22 - Single / Dual Output Frame Timing (Ipx-4M15-L)
- 0 - - 0 - - 0 - - 0 - FVAL TL = 26700 ns dual output; TL = 53100 ns single output; HB = 4000 ns Figure 2.22 - Single / Dual Output Frame Timing (IPX-4M15-L) www.imperx.com 5/6/2005... -
Page 50: Ipx-11M5-L
143 ns 714 ns 572 ns 71428 ns DATA 1 - 0 - D3999 - 0 - DATA 2 - 0 - D4000 - 0 - LVAL Figure 2.24 - Dual Output Line Timing (IPX-11M5-L) www.imperx.com 5/6/2005... -
Page 51: Figure 2.25 - Single / Dual Output Frame Timing (Ipx-11M5-L)
- 0 - - 0 - RL16 - 0 - - 0 - FVAL TL = 145571 nssingle output; TL = 72857 ns single output; HB = 7142 ns Figure 2.25 - Single / Dual Output Frame Timing (IPX-11M5-L) www.imperx.com 5/6/2005... -
Page 52: Area Of Interest
– Figure 2.26. The minimum window size is one line, the maximum is full vertical resolution (Last V line). Table 2.2 shows the allowable values for the ‘Start Line’ and the ‘End Line’. Figure 2.26 - Horizontal and Vertical Window Positioning www.imperx.com 5/6/2005... -
Page 53: Calculating The Frame Rate Using Vertical Window
2.1a – 2.1f, where WS is the window size. The window size is the number of lines in the window (WS = ‘End Line’ – ‘Start Line’ + 1). Figure 2.27 – 2.32 show a graphical representation of the formulas. www.imperx.com 5/6/2005... -
Page 54: Ipx-Vga120-L
= 35.35 x 10 sec., and T is the active line duration (T 18.38 x 10 sec). IPX-VGA120-L FRAME RATE 1000 - - - IPX-VGA120-L Active Lines Figure 2.27 - Frame Rate vs. Vertical Window Size (IPX-VGA120-L) www.imperx.com 5/6/2005... -
Page 55: Ipx-Vga210-L
- center 2500 - . - . - single output - center -------- dual output - - - - - single output 2000 1500 1000 Active Lines Figure 2.28 - Frame Rate vs. Vertical Window Size (IPX-VGA210-L) www.imperx.com 5/6/2005... -
Page 56: Ipx-1M48-L
= 33.1 x 10 for single mode, and T = 20.3 x for dual mode). IPX-1M48-L FRAME RATE ----- dual output - - - single output 1000 Active Lines Figure 2.29 - Frame Rate vs. Vertical Window Size (IPX-1M48-L) www.imperx.com 5/6/2005... -
Page 57: Ipx-2M30-L
T = 24.7 x 10 for dual mode). IPX 2M30-L FRAME RATE ----- dual output - - - single output 1000 1200 Active Lines Figure 2.30 - Frame Rate vs. Vertical Window Size (IPX-2M30-L) www.imperx.com 5/6/2005... -
Page 58: Ipx-4M15-L
T = 30.8 x 10 for dual mode). IPX 4M15-L FRAME RATE ----- dual output - - - single output 1000 1200 1400 1600 1800 2000 Active Lines Figure 2.31 - Frame Rate vs. Vertical Window Size (IPX-4M15-L) www.imperx.com 5/6/2005... -
Page 59: Ipx-11M5-L
T = 80.14 x 10 for dual mode). IPX 11M5-L FRAME RATE ----- dual output - - - single output 1000 1500 2000 2500 Active Lines Figure 2.32 - Frame Rate vs. Vertical Window Size (IPX-11M5-L) www.imperx.com 5/6/2005... -
Page 60: Binning
If horizontal and vertical binning are used simultaneously the image is sub-sampled by 4 and the aspect ratio is preserved. Figure 2.33 - Horizontal and Vertical Binning www.imperx.com 5/6/2005... - Page 61 Vertical binning in single output mode of operation may cause blooming for saturated signal levels. Color version users – horizontal or vertical binning used alone will create color distortions. If used simultaneously, the resulting image will be monochrome. www.imperx.com 5/6/2005...
-
Page 62: Exposure Control
The desired frame rate, and thus the new integration time, can be achieved by moving the vertical transfer pulse, VCCD, beyond the normal integration period (the standard frame time) – Figure 2.35. The resultant frame rate can be calculated using formula 4.1. www.imperx.com 5/6/2005... -
Page 63: Long Integration
The integration time can be programmed in 10 millisecond increments from 10 ms (camera dependent) up to 10 seconds – refer to the ‘sli’ command. Enabling long integration reduces the frame rate. The resultant frame rate can be calculated using formula 4.2. This mode is www.imperx.com 5/6/2005... - Page 64 Long Integration cannot be enabled in Programmable Frame Rate mode. Long Integration cannot be enabled in Shutter mode. Long time integration significantly decreases the signal to noise ratio. More electrons will be collected from the pixels dark current and thus the camera noise will increase significantly. www.imperx.com 5/6/2005...
-
Page 65: External Trigger
The camera behavior for the different sub-modes is described below. www.imperx.com 5/6/2005... -
Page 66: Standard Triggering - Programmable Exposure
– refer to Status LED section. For proper operation - if series of trigger pulses are used, make sure that the timing interval between them is greater than the corresponding frame duration – refer to section 2.1.4 Timing Diagrams. www.imperx.com 5/6/2005... -
Page 67: Fast Synchronized Triggering - Rapid Capture
If the interval between the trigger pulses is greater than 2 or 3 times the standard frame time, it is recommended that the standard triggering option be used. In rapid capture option there is no shutter pulse associated with each trigger, so the very first frame may be over-exposed. www.imperx.com 5/6/2005... -
Page 68: Double Exposure Triggering
CAUTION NOTE It is recommended that the minimum time duration between the events is greater then the vertical transfer pulse duration: a. 5 microseconds for VGA, 1M48, 2M30, 2M30H and 4M15. b. 10 microseconds for 11M5. www.imperx.com 5/6/2005... -
Page 69: Figure 2.40 - Double Exposure Triggering
LYNX Manual RA02 TRIGGER SHUTTER EXPOSURE Exp 1 Exposure 2 DATA DATA 1 DATA 2 STROBE Figure 2.40 - Double Exposure Triggering www.imperx.com 5/6/2005... -
Page 70: Strobe Output
5 V strobe pulse between “+ STROBE” and “– STROBE”. The first one (left) generates an active LOW strobe pulse, and the second one (right) generates an active HIGH strobe pulse. www.imperx.com 5/6/2005... -
Page 71: Figure 2.42 - Strobe Output Electrical Connection (Internal)
Figure 2.42 - Strobe Output Electrical Connection (Internal) STROBE OUT + 5.0V + 5.0V STROBE OUT 1.0K + STROBE + STROBE 1.0K Strobe Strobe - STROBE Active LOW - STROBE Active HIGH Figure 2.43 – Recommended External Strobe Output Electrical Connection www.imperx.com 5/6/2005... -
Page 72: Gain And Offset
Fixed gain (FG) = 0 dB for IPX-1M48-L, FG = 6dB for the rest of the cameras. AFE output AFE gain pixel output black level ~ 20 mV offset light intensity Figure 2.44 - AFE Gain and Offset www.imperx.com 5/6/2005... -
Page 73: Data Output Format
8 bit data, the 8 output bits are mapped to D4 (LSB) to D11 (MSB). Internal Camera Processing - 12 bit Data D10 D11 8 bit output data 10 bit output data 12 bit output data Figure 2.45 - Data Output Format www.imperx.com 5/6/2005... -
Page 74: Transfer Function Correction - User Lut
12-bit to 12-bit – Figure 2.47. If the camera resolution is set to 8-bit or 10-bit, the camera will truncate the corresponding LSBs (see section 2.8). 0.45 Output signal [V] = (input signal [V]) (9.1) www.imperx.com 5/6/2005... -
Page 75: User Defined Lut - Examples
The user can specify a transfer function of their choice to match the camera’s dynamic range to the scene’s dynamic range. There are no limitations to the profile of the function. The LUT must include all possible input values (0 to 4095). Refer to Appendix D. www.imperx.com 5/6/2005... -
Page 76: Figure 2.48 - Custom Lut
In this example only 2 knee points have been introduced, the first one is at (400H) and the second at (A00H). The number of knee points is not limited. Modified TF Original TF Input signal Figure 2.49 - Knee Correction www.imperx.com 5/6/2005... -
Page 77: Figure 2.50 - Contrast Correction
LYNX Manual RA02 Example 3 – Contrast Correction Modified TF Original TF Input signal Figure 2.50 - Contrast Correction Example 4 – Negative Image Modified TF Original TF Input signal Figure 2.51 - Negative Image www.imperx.com 5/6/2005... - Page 78 The original camera data is D0 (LSB) to D11 (MSB) Input Data - 12 bit D10 D11 Create a LUT in which the bits are shifted with two to the right. Modified 12 bit Output Data - (10 bit data + 2 bits shifted right) www.imperx.com 5/6/2005...
- Page 79 The camera output will be 10 bits, but in this case bits D0 to D9 are mapped to the output. Modified 10 bit Output Data If only the standard conversion was applied, D2 to D11 would have been mapped to the output. Standard 10 bit Output Data D10 D11 www.imperx.com 5/6/2005...
-
Page 80: Dynamic Signal-To-Noise Correction
This floor level is then subtracted from each incoming pixel from this line. signal level corrected signal level dark level masked exposed pixels pixels Figure 2.52 - Dynamic Signal-to-Noise Correction www.imperx.com 5/6/2005... -
Page 81: Image Reversal
(i.e. image coming from a mirror). In this mode the image has a normal vertical orientation and full resolution. This feature is available in both single and dual output modes - refer to the ‘sir’ command. Figure 2.53 - Normal and Mirror Image www.imperx.com 5/6/2005... -
Page 82: Negative Image
In this mode the image has a normal vertical and horizontal orientation and full resolution. This feature is available in both single and dual output modes – refer to the ‘sni’ command. Figure 2.54 - Normal and Negative Image www.imperx.com 5/6/2005... -
Page 83: Camera Interface
If the camera reaches this temperature, a message is sent via the serial port and the LED on the back of the camera starts to blink rapidly. The alarm is for indication only and does not prevent the camera from continue to operate normally. www.imperx.com 5/6/2005... -
Page 84: Integration Time Monitor
The camera has a built in frame rate monitor. In any mode of operation ( i.e. normal, AOI, binning, etc. ) the user can query the camera for the current frame rate by issuing a ‘gcs’ command. The current camera speed in units of frames per second will be returned. www.imperx.com 5/6/2005... -
Page 85: Test Mode
#1. The motion is in the vertical direction. The test mode does not exercise and verify the CCD’s functionality. Figure 2.55 - Fixed Pattern #1: Single and Dual Modes Figure 2.56 - Fixed Pattern #2: Single and Dual Modes www.imperx.com 5/6/2005... -
Page 86: Automatic Iris Control
If the brightness level is more than the threshold, the camera sends a signal to close the iris. The camera iris control hardware is compatible only with DC type auto iris lenses. www.imperx.com 5/6/2005... -
Page 87: Chapter 3 - Camera Configuration
LYNX Manual RA02 Chapter 3 – Camera Configuration Camera Configuration This chapter discusses how to configure the camera’s operating parameters. www.imperx.com 5/6/2005... -
Page 88: Overview
‘commands’ to the camera and the camera issuing ‘responses’ (either status or info) to the user. The camera’s parameters can be programmed using the Lynx Configurator graphical user interface or via simple ASCII commands using the Lynx Terminal utility or any terminal emulator. www.imperx.com 5/6/2005... -
Page 89: Configuration Memory
‘factory- space’, ‘user-space #1’ or ‘user-space #2’. Similarly, the user can instruct the camera to save the current workspace settings into either the ‘user-space #1’ or ‘user-space #2’. www.imperx.com 5/6/2005... -
Page 90: Command Format
Error : <text><cr><lf>: error, where <text> is an explanation of the error. The format of the info response string is: see the following sections for details of the <response><cr><lf>: <response> string. www.imperx.com 5/6/2005... -
Page 91: Command Help
The camera will return a list of available commands when the user enters the ‘h’ command. For command specific help, enter , and the camera will display the ‘h <cmd>’ command definition and syntax. For example, entering yields: ‘h svw’ Set vertical window Syntax: svw {y1 y2} www.imperx.com 5/6/2005... -
Page 92: Startup Procedure
For example: ‘Imperx IPX-1M48-L – BL v1.0 SW v2.0 FW v1.5’ The camera reads the ‘Boot From’ variable from the EEPROM and sends one of the following strings as determined by the ‘Boot From’ variable: ‘Loading from Factory…’... -
Page 93: Saving And Restoring Settings
Camera responds with current settings. 3.6.3 Load From Factory ( ‘lff’ command instructs the camera to load its workspace from the ‘lff’ factory space. All current workspace settings will be replaced with the contents of the factory space. Syntax: www.imperx.com 5/6/2005... -
Page 94: Lfu' )
‘stu’ workspace settings into the selected user space. Syntax: stu <1|2> Parameter #1: User #1 configuration space. User #2 configuration space. Example: Camera saves workspace into user #1 stu 1 space. www.imperx.com 5/6/2005... -
Page 95: Retrieving Manufacturing Data
‘gmn’ Syntax: Response: Camera responds with its model number. Example: IPX-1M48-L 3.7.4 Get Firmware Version ( ‘gfv’ command returns the camera’s firmware version. ‘gfv’ Syntax: Response: Camera responds with its firmware version. Example: www.imperx.com 5/6/2005... -
Page 96: Get Software Version ( 'Gsv' )
LYNX Manual RA02 3.7.5 Get Software Version ( ‘gsv’ command returns the camera’s software version. ‘gsv’ Syntax: Response: Camera responds with its software version. Example: www.imperx.com 5/6/2005... -
Page 97: Command Description
3.8.1.2 Get Horizontal Window ( ‘ghw’ command returns the current horizontal area of interest ‘ghw’ setting. Syntax: Response: x1 x2 Example: User enters command. Camera responds with current settings. 100 500 www.imperx.com 5/6/2005... -
Page 98: Vertical Window
3.8.2.2 Get Vertical Window ( ‘gvw’ command returns the current vertical area of interest ‘gvw’ setting. Syntax: Response: y1 y2 Example: User enters command. Camera responds with current settings. 10 120 www.imperx.com 5/6/2005... -
Page 99: Shutter Time
The shutter operates in increments of 10 uSeconds and therefore will round the least significant digit entered. 3.8.3.2 Get Shutter Time ( ‘gst’ command returns the current shutter setting. ‘gst’ Syntax: Response: off|i Example: User enters command. Camera responds with current setting. www.imperx.com 5/6/2005... -
Page 100: Long Integration
Long integration operates in increments of 10 mSeconds and therefore will round the least significant digit entered. 3.8.4.2 Get Long Integration ( ‘gli’ command returns the current long integration setting. ‘gli’ Syntax: Response: off|i Example: User enters command. Camera responds with current setting. www.imperx.com 5/6/2005... -
Page 101: Strobe Position
The strobe operates in increments of 10 uSeconds and therefore will round the least significant digit entered. 3.8.5.2 Get Strobe Position ( ‘gsp’ command returns the current long integration setting. ‘gsp’ Syntax: Response: off|i Example: User enters command. Camera responds with current setting. www.imperx.com 5/6/2005... -
Page 102: Analog Gain
‘gag’ Syntax: gag <0|1|2> Parameter: Selects both taps. Selects tap #1. Selects tap #2. Response: tap#1_gain tap#2_gain Example: User enters command to get gain for tap #2. gag 2 Camera responds with current setting. www.imperx.com 5/6/2005... -
Page 103: Analog Offset
‘gao’ Syntax: gao <0|1|2> Parameter: Selects both taps. Selects tap #1. Selects tap #2. Response: tap#1_offset tap#2_offset Example: User enters command to get offset for gao 0 both taps. Camera responds with both current 64 64 settings. www.imperx.com 5/6/2005... -
Page 104: Dual Tap Mode
Selects single tap opertion. Example: Enables dual tap operation. sdm on 3.8.8.2 Get Dual Mode ( ‘gdm’ command returns the current dual tap mode setting. ‘gdm’ Syntax: Response: on|off Example: User enters command. Camera responds with current setting. www.imperx.com 5/6/2005... -
Page 105: Bit Depth
Selects 10 bit operation. Selects 12 bit operation. Example: Enables 10 bit operation. sbd 10 3.8.9.2 Get Bit Depth ( ‘gbd’ command returns the current bit depth setting. ‘gbd’ Syntax: Response: 8|10|12 Example: User enters command. Camera responds with current setting. www.imperx.com 5/6/2005... -
Page 106: Lookup Table Operation
‘glh’ selected lookup table. Syntax: glh <1|2> Response: Lookup table header text Example: User enters command. glh 1 Camera responds Function is Gamma 0.45 with LUT header Created by Imperx, Inc. text. Date 3/19/05 www.imperx.com 5/6/2005... -
Page 107: Noise Correction Processing
Enables noise correction processing. Disables noise correction processing. Example: Enables noise correction. snc on 3.8.11.2 Get Noise Correction ( ‘gnc’ command returns the current noise correction setting. ‘gnc’ Syntax: Response: on|off Example: User enters command. Camera responds with current setting. www.imperx.com 5/6/2005... -
Page 108: Horizontal Mode
228. 3.8.12.2 Get Horizontal Mode ( ‘ghm’ command returns the current horizontal mode setting. ‘ghm’ Syntax: Response: n|w|b|c Example: User enters command. Camera responds with current setting. www.imperx.com 5/6/2005... -
Page 109: Vertical Mode
3.8.13.2 Get Vertical Mode ( ‘gvm’ command returns the current vertical mode setting. ‘gvm’ Syntax: Response: n|w|b Example: User enters command. Camera responds with current setting. www.imperx.com 5/6/2005... -
Page 110: Test Pattern Generation
Enables a moving vertical test pattern to be generated. Example: Generates a fixed vertical test pattern. stm 2 3.8.14.2 Get Test Mode ( ‘gtm’ command returns the current test mode setting. ‘gtm’ Syntax: Response: off|1|2|3 Example: User enters command. Camera responds with current setting. www.imperx.com 5/6/2005... -
Page 111: Image Reversal Mode
It can also be used in conjunction with horizontal binning or horizontal window. 3.8.15.2 Get Image Reversal ( ‘gir’ command returns the current image reversal setting. ‘gir’ Syntax: Response: on|off Example: User enters command. Camera responds with current setting. www.imperx.com 5/6/2005... -
Page 112: Trigger Operation
Refer to section 2.5 for a detailed description of the various camera triggering modes. 3.8.16.2 Get Trigger ( ‘gtr’ command returns the current trigger mode setting. ‘gtr’ Syntax: Response: off|cc|et s|f|d Example: User enters command. Camera responds with current setting. et s www.imperx.com 5/6/2005... -
Page 113: Set Trigger Duration
Enables CC integration mode. Disables CC integration mode. Example: Enables CC integration. sci on 3.8.16.6 Get CC Integration ( ‘gci’ command returns the current CC integration setting. ‘gci’ Syntax: Response: on|off Example: User enters command. Camera responds with current setting. www.imperx.com 5/6/2005... -
Page 114: Set Pre-Exposure
The pre-exposure is typically used when a single frame, with a defined exposure, is to be captured following a trigger event. 3.8.16.8 Get Pre-Exposure ( ‘gpe’ command returns the current pre-exposure setting. ‘gpe’ Syntax: Response: Example: User enters command. Camera responds with current setting. www.imperx.com 5/6/2005... -
Page 115: Set Double Exposure
Sets the double exposure to 400 uSeconds. sde 400 Notes: The double exposure operates in increments of 1 uSecond. 3.8.16.10 Get Double Exposure ( ‘gde’ command returns the current double exposure setting. ‘gde’ Syntax: Response: Example: User enters command. Camera responds with current setting. www.imperx.com 5/6/2005... -
Page 116: Negative Image Mode
Enables negative image processing. Disables negative image processing. Example: Enables image inversion. sni on 3.8.17.2 Get Negative Image ( ‘gni’ command returns the current negative image setting. ‘gni’ Syntax: Response: on|off Example: User enters command. Camera responds with current setting. www.imperx.com 5/6/2005... -
Page 117: Temperature Monitoring
Disables temperature monitoring. Example: Instructs the camera to enable sta on temperature monitoring. 3.8.18.3 Get Temperature Alarm ( ‘gta’ command returns the current temperature alarm setting. ‘gta’ Syntax: Response: on|off Example: User enters command. Camera responds with current setting. www.imperx.com 5/6/2005... -
Page 118: Set Temperature Threshold
55C and a ‘Warning cleared – high temperature’ when it reaches 48C. 3.8.18.5 Get Temperature Threshold ( ‘gtt’ command returns the current temperature threshold ‘gtt’ settings. Syntax: Response: t1 t2 Example: User enters command. Camera responds with current setting. 55 48 www.imperx.com 5/6/2005... -
Page 119: Programmable Frame Rate
In order to increase the frame rate, vertical AOI must be utilized. 3.8.19.2 Get Frame Rate ( ‘gfr’ command returns the current programmable frame rate ‘gfr’ setting. Syntax: Response: off|i Example: User enters command. Camera responds with current setting. www.imperx.com 5/6/2005... -
Page 120: Set Frame Rate
Vertical window Vertical binning Horizontal center ( IPX-VGA only ) Programmable Frame Rate Long Integration After issuing a command that affects the camera’s speed, the user must wait at least one frame time before issuing the ‘gcs’ command. www.imperx.com 5/6/2005... - Page 121 Vertical binning Horizontal center ( IPX-VGA only ) Programmable Frame Rate Long Integration Shutter After issuing a command that affects the camera’s exposure time, the user must wait at least one frame time before issuing the ‘gce’ command. www.imperx.com 5/6/2005...
-
Page 122: Chapter 4 - Warranty And Support
LYNX Manual RA02 Chapter 4 – Warranty and Support Lynx Warranty and Support This chapter discusses the camera’s warranty and support. www.imperx.com 5/6/2005... -
Page 123: Ordering Information
O - Open frame 11M5 Sensor Type Camera Family M - Monochrome C - Color L - LYNX family U - UV sensitive (no glass) S - Special - user filter For any other custom camera configurations, please contact Imperx, Inc. www.imperx.com 5/6/2005... -
Page 124: Technical Support
If you still have problems with the camera operation, please contact technical support: Email: techsupport@imperx.com Toll Free (866) 849-1662 or (+1) 561-989-0006 Fax: (+1) 561-989-0045 Visit our Web Site: www.imperx.com www.imperx.com... -
Page 125: Warranty
This camera has been tested and complies with the limits of Class A digital device, pursuant to part 15 of the FCC rules. Imperx reserves the right to make changes to its products or to discontinue any product or service without notice, and advises its customers to obtain the latest version of relevant information to verify, before placing orders, that the information being relied on is current. -
Page 126: Appendix A - Camera Configuration Reference
LYNX Manual RA02 Appendix A – Camera Configuration Reference Camera Configuration Reference This appendix provides a quick reference to the camera configuration commands and responses. www.imperx.com 5/6/2005... -
Page 127: General Commands
Camera loads workspace registers from EEPROM user space: 1 = user #1 space 2 = user #2 space Save to User Camera writes workspace registers to EEPROM user space: 1 = user #1 space 2 = user #2 space Table A.1 – General commands www.imperx.com 5/6/2005... -
Page 128: Retrieving Manufacturing Data
Returns the current operating speed ( frame rate ) of the camera: i = camera speed in frames per second Get Camera Exposure Returns the current exposure ( integration ) time of the camera: i = exposure time in uSeconds Table A.3 – Retrieving camera performance www.imperx.com 5/6/2005... -
Page 129: Restricted Commands
32 bit hexadecimal value. This command returns a 16 bit hexadecimal read data. Table A.4 – Restricted commands Note1: Parameters are “assembly#” “assy serial #” “ccd serial#” “mfg date” “model name” For example: smd “ASSY-0074-0001-RA01” “111111” “222222” “03/23/05” “IPX-VGA210-L” www.imperx.com 5/6/2005... -
Page 130: Configuring Workspace Settings
Set Horizontal Mode n|w|b|c Sets the horizontal mode of operation: n = normal w = windowing b = binning c= center Set Vertical Mode n|w|b Sets the vertical mode of operation: n = normal w = windowing b = binning www.imperx.com 5/6/2005... -
Page 131: Trigger Control
Set Pre Exposure Sets the pre-exposure in uSeconds. Set Double Exposure Sets the double exposure in uSeconds. Set CC Integration off|on Enables the CC integration mode: off = camera timing determines exposure on = CC1 pulse width determines exposure www.imperx.com 5/6/2005... -
Page 132: Table A.5 - Workspace 'Set' Commands
Set Temperature Alarm on|off Enables temperature monitoring. Set Temperature Threshold Sets the temperature alarm thresholds: t1 = alarm on temp threshold in degrees C t2 = alarm off temp threshold in degrees C Table A.5 – Workspace ‘SET’ commands www.imperx.com 5/6/2005... -
Page 133: Retrieving Workspace Settings
Get Horizontal Mode n|w|b|c Returns the current horizontal mode settings: n = normal w = windowing b = binning c=center Get Vertical Mode n|w|b Returns the current vertical mode settings: n = normal w = windowing b = binning www.imperx.com 5/6/2005... - Page 134 Returns the current pre-exposure in uSeconds. Get Double Exposure Returns the current double exposure in uSeconds. Get CC Integration off|on Returns the current CC integration mode: off = camera timing determines exposure on = CC1 pulse width determines exposure www.imperx.com 5/6/2005...
-
Page 135: Table A.6 - Workspace 'Get' Commands
= alarm on temp threshold in degrees C t2 = alarm off temp threshold in degrees C Get Current Temperature Returns the current camera temperature. i = temperature in degrees C. Table A.6 – Workspace ‘GET’ commands www.imperx.com 5/6/2005... -
Page 136: Appendix B - Lynx Configurator
LYNX Manual RA02 Appendix B – Lynx Configurator Lynx Configurator This appendix provides a quick reference to using the Lynx camera configuration utility. www.imperx.com 5/6/2005... -
Page 137: Overview
(.DLL and COM) and attempt to query the attached camera (if any). If it finds an attached Imperx camera, it will read the ‘camera type’ information from the camera. It will then display a list box, which includes all DLLs, ports and cameras that it discovered. -
Page 138: Usage
The graphical user interface is very intuitive and self-explanatory. The configuration utility includes an interactive help file, which will guide you through the GUI controls and camera settings. Figure B.2 – LynxConfigurator graphical user interface www.imperx.com 5/6/2005... -
Page 139: Figure B.3 - Terminal Dialog
GUI’s controls, the resultant camera command and response strings will be displayed in this terminal. The user can also enter commands directly into the terminal, which also results in the GUI controls being updated automatically. Figure B.3 – Terminal dialog www.imperx.com 5/6/2005... -
Page 140: Appendix C - Lynx Terminal
LYNX Manual RA02 Appendix C – Lynx Terminal Lynx Terminal This appendix provides a quick reference to using the Lynx camera download and console utility. www.imperx.com 5/6/2005... -
Page 141: Overview
C.2 Setup When the Lynx Terminal is launched, the following screen will appear: Figure C.1 – LynxTerminal main dialog www.imperx.com 5/6/2005... -
Page 142: Figure C.2 - Plug-In Properties Dialog
‘Serial Transport’ or ‘Camera Link’ options. Select the ‘Serial Transport’ option if the camera is connected to the computer using a serial COM port. Select the ‘Camera Link’ option if the computer is connected to the camera using a Camera Link compliant serial interface. www.imperx.com 5/6/2005... -
Page 143: Figure C.3 - Serial Transport Properties Dialog
Figure C.3 – Serial Transport Properties dialog If you have selected ‘Serial Transport’, then you must choose the COM port in the Serial pull-down menu and configure its operating parameters ( i.e. ‘Bits per’, ‘Data Bits’, etc. ). www.imperx.com 5/6/2005... -
Page 144: Figure C.4 - Camera Link Transport Properties Dialog
If you have selected ‘Camera Link’, then the program will display a list of Camera Link compliant serial interfaces ( clser***.dll files ) that it has found. Choose the desired Camera Link interface. The next step is to click on the ‘Transport’ tab to reveal the following screen. www.imperx.com 5/6/2005... -
Page 145: Figure C.5 - Transport Dialog
Select the desired interface, Camera Link or Serial Transport, and click the ‘OK’ button. All of the above settings will be saved in the registry and will automatically be recalled the next time you invoke the Lynx Terminal program. You are now ready to begin communicating with the camera. www.imperx.com 5/6/2005... -
Page 146: Download Utility
BootLoader, Camera Firmware or a user Lookup Table by selecting the appropriate button. The path/filename of the file can be entered manually into the edit box or browsed to by clicking on the ‘…’ button. Clicking on the ‘Load File…’ button begins the download process. www.imperx.com 5/6/2005... -
Page 147: Terminal Utility
Camera commands ( refer to Appendix A ) entered into this console will be sent to the camera using the transport method chosen during the Lynx Terminal setup. Camera responses sent by the camera will be displayed in this console as well. www.imperx.com 5/6/2005... -
Page 148: Appendix D - Creating Look Up Tables
LYNX Manual RA02 Appendix D – Creating Look Up Tables Creating Look Up Tables This appendix provides a reference on how to create a lookup table using both an ASCII editor and an Excel spreadsheet. www.imperx.com 5/6/2005... -
Page 149: Overview
-- and are ignored by parser, :Header, -- this is the text that will get displayed with a 'glh' command, Function is 'Negative Image', Created by John Doe, Date 1/14/05, :Table, --input output, 0,4095 1,4094 2,4093 3,4092 4,4091 4095,0 www.imperx.com 5/6/2005... -
Page 150: Using Microsoft Excel
2 - add the necessary equations into the output cells to generate the transfer function required. 3 - save the file as a .csv ( comma delimited format ). 4 - rename the .csv file to an extension of .lut. www.imperx.com 5/6/2005... -
Page 151: Appendix E - Software Installation
LYNX Manual RA02 Appendix E – Software Installation Software Installation This appendix explains how to install the LYNX software. www.imperx.com 5/6/2005... -
Page 152: Software Suite
LYNX Manual RA02 E.1 Software Suite The LYNX software suite consists of the following files: Windows XP and 2000 application files: ( located in c:\Program_Files\ImperX\LYNX\ ) LYNX_Configurator.exe - LYNX Configurator application LYNX_Terminal.exe - LYNX Terminal main executable CameraLinkPlugin.dll - Camera Link plugin module LoaderViewPlugin.dll... -
Page 153: Software Installation From Cd
LYNX camera. You can retrieve these updates by visiting the download page of our web site at http://www.imperx.com/downloads.asp. Use the following steps to install newly released application software: Uninstall all application and driver files by following the instructions in step 1. - Page 154 LYNX Manual RA02 Download the LYNX_Installer_x_x_x_x.exe file (x represents the revision) from the Imperx web site to a new folder on your PC (we will use the folder C:\new_LYNX as an example). Left mouse click on “Start”, “Run” then enter or browse to “C:\new_LYNX\ LYNX_Installer_x_x_x_x.exe”.
Need help?
Do you have a question about the IPX-VGA120-L and is the answer not in the manual?
Questions and answers