Woodward 505 Installation And Operation Manual
Digital governor for steam turbines with single or split-range actuators
Hide thumbs
Also See for 505:
- Manual for operation and installation (212 pages) ,
- Installation and operation manual (207 pages) ,
- Product manual (138 pages)
Table of Contents
Advertisement
Quick Links
Advertisement
Table of Contents

Related Manuals for Woodward 505


Summary of Contents for Woodward 505
- Page 1 nstallatio on and O Operatio on Manu 50 5 Digit tal Gov vernor r for St team T Turbine with Single e or Sp plit-Ran nge Ac ctuato 9907 7-162, 99 907-163, , 9907-1 Volume Manu ual 85017 c consists of f 2 volume s (85017V1 1 &...
- Page 2 Revisions—Text changes are indicated by a black line alongside the text. Woodward Governor Company reserves the right to update any portion of this publication at any time. Information provided by Woodward Governor Company is believed to be correct and reliable. However, no responsibility is assumed by Woodward Governor Company unless otherwise expressly undertaken.
-
Page 3: Table Of Contents
............1 HAPTER ENERAL NFORMATION Introduction ......................1 General Description ....................3 505 Inputs and Outputs ..................5 Control Overview ....................6 Speed Control ......................9 Auxiliary Control ..................... 9 Load Sharing Input ....................10 ... - Page 4 Speed, Cascade, and Auxiliary Dynamics Adjustments ........139 6. C ..............143 HAPTER OMMUNICATIONS Modbus Communications ...................143 Port Adjustments ....................146 505 Control Modbus Addresses .................146 Specific Address Information ................157 7. S ..............159 HAPTER ERVICE PTIONS Product Service Options ..................159 ...
- Page 5 Figure 1-3a. Overview of 505 Functionality ............7 Figure 1-3b. Overview of 505 Functionality ............8 Figure 1-4. Overview of 505 Functionality Notes ..........12 Figure 1-5. Single or Split-Range Turbine Configurations ........13 Figure 1-6. Single or Split-Range Turbine Configurations ........13 ...
- Page 6 505 Digital Governor Manual 85017V1 Illustrations and Tables Figure 5-8. ACTR Key Screens ................125 Figure 5-9. CONT Key Screens ................126 Figure 5-10. DYN Key Screens ................127 Figure 5-11. STOP Key Screens ................128 Figure 5-12. AUX Key Screens ................129 ...
-
Page 7: Electrostatic Discharge Awareness
PCB from the control cabinet, place it in the antistatic protective bag. To prevent damage to electronic components caused by improper handling, read and observe the precautions in Woodward manual 82715, Guide for Handling and Protection of Electronic Controls, Printed Circuit Boards, and Modules. - Page 8 505 Digital Governor Manual 85017V1 Woodward...
-
Page 9: Chapter 1. General Information
505 controls that have this coating will have a label on the side stating “SULFUR RESISTANT CONFORMAL COATED”. All 505 controllers shipped... - Page 10 505 Digital Governor Manual 85017V1 General Installation and Operating Notes and Warnings This equipment is suitable for use in Class I, Division 2 , Groups A, B, C, and D (Class I, Zone 2, Group IIC) or non-hazardous locations. The 505s are suitable for use in European Zone 2, Group II environments per compliance with EN60079-15, Electrical apparatus for explosive atmospheres –...
-
Page 11: General Description
The 505 microprocessor-based control is designed to control single or dual (split range) actuator steam turbines (extraction steam turbines require the 505E version). The 505 is field programmable which allows a single design to be used in many different control applications and reduces both cost and delivery time. It uses menu driven software to instruct site engineers on programming the control to a specific generator or mechanical drive application. -
Page 12: Figure 1-1. Typical Single Or Dual Inlet Steam Turbine
(24 characters each) display, and a set of 30 keys is located on the 505’s front panel. This OCP is used to configure the 505, make On-Line program adjustments, and operate the turbine/system. Easy to follow instructions are presented in English through the OCP’s two-line display and operators can... -
Page 13: 505 Inputs And Outputs
505 Digital Governor Turbine Control Parameters The 505 interfaces with one or two control valves to control one parameter at a time and limit an additional parameter, if desired. The one controlled parameter is typically speed (or load), however, the 505 could be utilized to control or limit:... -
Page 14: Control Overview
ASCII or RTU and the communications can be RS-232, RS-422, or RS-485. One computer (PC) port to be used for program configuration storage. An overview of the 505 functions is shown in Figure 1-3. Use this block diagram to match the control features to the site-specific application required. -
Page 15: Figure 1-3A. Overview Of 505 Functionality
Manual 85017V1 505 Digital Governor Figure 1-3a. Overview of 505 Functionality Woodward... -
Page 16: Figure 1-3B. Overview Of 505 Functionality
505 Digital Governor Manual 85017V1 Figure 1-3b. Overview of 505 Functionality Woodward... -
Page 17: Speed Control
Remote Speed Setpoint One of the 4–20 mA inputs can be configured to control the speed setpoint. Typically, a process control external to the 505 interfaces with this input to regulate the turbine’s speed or load to control a related process. -
Page 18: Load Sharing Input
DSLC. The 505’s internal summing junction adds this signal with the speed/load PID’s reference. In addition to loadsharing, the DSLC input to the 505 can be used to synchronize the unit to either the plant bus or to the utility. Cascade Control The cascade control can be configured to control any system process, related to or affected by turbine speed or load. -
Page 19: Starting Features
If an idle speed is programmed (either idle/rated or auto start sequence modes), the 505 can provide automatic speed control and critical speed avoidance. A ‘Run’ command can be given through the 505 keypad, a remote contact input, or Modbus communications. In addition, an optional ‘Start Permissive’ contact input can be programmed to prevent a start if, for example, the trip-throttle or stop valve is not closed. -
Page 20: Block Diagrams
505 Digital Governor Manual 85017V1 Block Diagrams Overviews of possible 505 configurations are shown in Figures 1-5 through 1-7. Use these block diagrams to match the control features to the site-specific application requirements. Figure 1-4 lists symbols and their respective explanations. -
Page 21: Figure 1-5. Single Or Split-Range Turbine Configurations
Manual 85017V1 505 Digital Governor ENABLE INPUT REMOTE INPUT RAISE SETPOINT (4−20mA) LOWER ACTUATOR SPEED SCALING DRIVER 1 TURBINE SPEED VALVE ACTUATOR SCALING LIMITER DRIVER 2 855−668 02−12−31 Figure 1-5. Single or Split-Range Turbine Configurations (Speed PID with Remote Setpoint) -
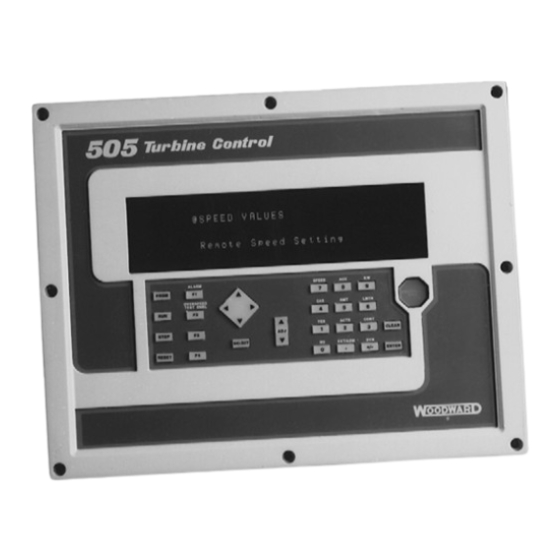
Page 22: Keypad And Display
(Auxiliary PID Configured as a Controller) Keypad and Display The 505’s service panel consists of a keypad and LED display located on the front of the control. The LED display has two, 24 character lines that can be used to display operating parameters and troubleshooting parameters in plain English. - Page 23 Program or Run Mode. SELECT: The Select key is used to select control of the 505 display’s top or bottom line variable. The @ sign is used to indicate which line (variable) can be adjusted by the adjust keys.
-
Page 24: Watchdog Timer/Cpu Fault Control
505 Digital Governor Manual 85017V1 6/LMTR (valve limiter): Enters 6 or displays the valve limiter information (Run Mode) 7/SPEED: Enters 7 or displays the speed control information (Run Mode). 8/AUX (auxiliary): Enters 8 or displays the auxiliary control information (Run Mode). -
Page 25: Chapter 2. Installation Procedures
505 into a new or existing application. Mechanical Data and Hardware Installation If so labeled on the enclosure, the 505 is UL/CUL listed for use in hazardous locations in UL file E156028. This Equipment is suitable for use in Class I, Division 2 , Groups A, B, C, and D (Class I, Zone 2, Group IIC) or non-hazardous locations only. - Page 26 NEMA 4X ratings. A gasket is attached to the rear side of the package’s bezel to properly seal the 505’s face-plate to a panel. All field wiring connects to the 505 through removable terminal blocks located on the 505’s back side.
-
Page 27: Figure 2-1. 505 Control Layout (Standard Enclosure)
Manual 85017V1 505 Digital Governor Figure 2-1. 505 Control Layout (Standard Enclosure) Woodward... -
Page 28: Figure 2-2. 505 Bulkhead-Mounted Enclosure
505 Digital Governor Manual 85017V1 Figure 2-2. 505 Bulkhead-Mounted Enclosure Woodward... -
Page 29: Figure 2-3. Jumper Options
Manual 85017V1 505 Digital Governor Figure 2-3. Jumper Options Figure 2-4. Jumper Locations Woodward... - Page 30 All inputs and outputs to the 505 are made through “CageClamp” terminal blocks on the bottom of the 505 package. For EMI reasons, it is recommend that all low- current wire (terminals 52 through 121) be separated from all high-current wire (terminals 1 through 51).
-
Page 31: Figure 2-5. Cageclamp Terminal Blocks
The 505 is available with three different input power source selections. The part number of the 505 depends on the rating of the input power source it can accept. The ratings of the required input power source on each unit can be identified by the back panel sticker or control part number. -
Page 32: Figure 2-6. Control Wiring Diagram
505 Digital Governor Manual 85017V1 Figure 2-6. Control Wiring Diagram Woodward... -
Page 33: Figure 2-7. Representative 505 I/O Schematic
Manual 85017V1 505 Digital Governor Figure 2-7. Representative 505 I/O Schematic Woodward... -
Page 34: Figure 2-8. Fuse Location
180–264 Vac @ 47–63 Hz Power Supply 58 milliseconds A 24 V power supply is available, within the 505, to power external transducers or devices. This supply has two breaker protected output channels. One power supply channel (VA1) is capable of providing 24 Vdc ±10%, @ 200 mA maximum output current, to power 505 current inputs and auxiliary devices. -
Page 35: Figure 2-9. Shielded Wire Connections
The closer the MPU’s pole piece is to a gear’s teeth and the faster the gear turns the higher a passive MPU’s output amplitude will be. The 505 must sense an MPU voltage of 1 to 25 Vrms for proper operation. - Page 36 MPU or proximity probe. By being able to sense turbine speed down to this level, the 505 can be programmed to turn on or off a turbine turning gear, via a relay output. See Figure 2-7 for proximity probe wiring schematic.
- Page 37 Applications requiring external contact inputs must have the desired function assigned or configured to a specific input. There is a choice of twelve possible contact inputs and twenty-seven programmable functions. If the 505 is configured for a generator application two of the contacts must be configured for the Generator and Utility breaker inputs.
- Page 38 Each actuator driver senses the drive current to allow over- and under-current shutdowns. The 505 can be configured to use one or two actuators. If only one actuator is used and programmed, it must be wired to actuator #1’s output terminals.
- Page 39 RS-232 Wiring A RS-232 link is limited to a distance of 50 feet. The 505 control utilizes terminal blocks 114-117 and 106-109 for RS-232 connections. Figure 2-10 shows typical RS-232 communications connection. The transmit data (TXD), receive data (RXD), and signal ground (SIG GND) must be properly connected as shown.
-
Page 40: Figure 2-10. Typical Rs-232 Communications
An advantage of RS-422 communications is that it uses a differential voltage and can accommodate much longer transmission distances. A RS-422 link can communicate up to a distance of 4000 feet. The 505 control utilizes terminal blocks 108-113 and 116-121 for RS-422 connections. Figure 2-11 shows a typical RS-422 communications connection. -
Page 41: Communications Grounding And Shielding
RS-485 Wiring RS-485 communications can also accommodate transmission distances of up to a distance of 4000 feet. The 505 control utilizes terminal blocks 108-111 and 116-119 for RS-485 connections. Figure 2-12 shows a typical RS- 485 communications connection. The data lines (422R+/485+ and 422R-/485-) and signal ground (SIG GND) must be properly connected as shown. -
Page 42: Figure 2-14. Alternate Multipoint Wiring Without A Separate Signal Ground
505 Digital Governor Manual 85017V1 Non-isolated nodes may not have a signal ground available. If signal ground is not available, use the alternate wiring scheme as shown in Figure 2-14. The alternate way is to connect all circuit grounds of isolated nodes to the shield, and then connect the shield to earth ground at a non-isolated node. -
Page 43: Chapter 3. 505 Control Description
505 Control Description Introduction The 505 uses a digital Low Signal Select (LSS) bus to allow the lowest of three signals to position the turbine’s governor valve. The three signals available to control governor valve position, are a Speed PID output, a programmable Auxiliary PID output, and a valve limiter output. - Page 44 (Start Perm Not Met). The alarm does not need to be cleared but the contact must be closed before the 505 will accept the ‘RUN’ command. After ‘RUN’ has been accepted, the start permissive contact will have no effect on operation.
-
Page 45: Turbine Start Modes
1. Issue a RESET command (to reset all alarms and shutdowns) 2. Issue a RUN command (verify T&T valve is closed before issuing) At this point the 505 will ramp open the governor valve to its maximum position at the ‘Valve Limiter Rate’. ... -
Page 46: Figure 3-2. Manual Start Mode Example
4. Raise the 505’s VALVE LIMITER at a controlled rate. When turbine speed increases to the minimum controlling speed, the 505’s Speed PID will take control of turbine speed by controlling turbine inlet valve position. 5. Raise the 505’s VALVE LIMITER to 100%. -
Page 47: Figure 3-3. Semiautomatic Start Mode Example
2. Open the Trip & Throttle valve (verify that the turbine does not accelerate) 3. Issue a RUN command At this point the 505 will ramp open the governor valve to its maximum position at the ‘Valve Limiter Rate’ setting. ... -
Page 48: Critical Speed Avoidance
A speed setpoint value cannot be directly entered (with the ENTER key) within the programmed critical speed band settings. In the event this is attempted, an error message will appear on the 505 front panel display. If another controlling parameter, besides the Speed PID, drives the turbine’s speed into a critical band for longer than five seconds, the speed setpoint will instantly go to the idle setting and an alarm will occur (Stuck in Critical). -
Page 49: Idle/Rated
Idle/Rated The 505 is equipped with an Idle/Rated function which allows the 505 to automatically ramp turbine speed to the application’s Rated speed setting. When deselected, the turbine speed ramps down to the application’s Idle speed setting (as defaulted in the Service Mode). -
Page 50: Automatic Start Sequence
If a 505 contact input is programmed to select between Idle or Rated speeds, Idle speed is selected when the contact is open and rated speed is selected when it is closed. -
Page 51: Figure 3-6. Automatic Start Sequence
Manual 85017V1 505 Digital Governor The 505 can be configured to utilize an Automatic Start Sequence to start the turbine. This sequencing logic allows the 505 to perform a complete controlled system startup from zero speed to rated speed. With this function, the turbine’s starting ramp rates and idle speed hold times depend on the length of time the unit was shutdown. - Page 52 15 rpm/sec. At 3400 rpm, the sequence would be completed. If the unit was tripped for 2 hours or less and restarted, the 505 would use the Hot Start parameters. If the unit was tripped for 22 hours or longer and restarted, the 505 would use the Cold Start parameters.
-
Page 53: No Idle Programmed
‘MPU Gear Ratio’ and the ‘Teeth Seen By MPU’ settings are configured to allow the 505 to calculate actual turbine speed. One MPU and one proximity probe can be used at the same time, however, they must be mounted on the same gear since the ‘gear ratio’... -
Page 54: Speed Pid Operational Modes
Turbine inlet valve position (505 LSS position) control Generator Load control When not programmed for generator applications, the 505 Speed PID operates in a Speed control mode at all times. When programmed for generator applications, the state of the generator and utility tie breakers determine the operational mode of the Speed PID. -
Page 55: Figure 3-8. Speed Pid Control Modes
With this configuration, no form of droop or second controlling parameter is used by the PID for stability or control. Refer to Figure 3-6. The following Speed PID mode descriptions are based on the 505 program’s default settings. For information on how to change the 505’s defaulted breaker logic, refer to Volume 2 of this manual. - Page 56 PID’s second controlling parameter. A second parameter representing unit load is fed back into the 505’s Speed PID to allow it to control two parameters; speed when operating in an isolated mode, and unit load when paralleled to an infinite bus.
-
Page 57: Figure 3-9. Frequency And Unit Load Relationship
505 Digital Governor Figure 3-9. Frequency and Unit Load Relationship Because the 505’s Speed PID and setpoint are used to control turbine speed and a second parameter, this second parameter (unit load) is normalized to allow all three terms (speed, setpoint, unit load) to be summed together within the PID summing junction. - Page 58 505 uses its LSS bus position to represent or sense turbine inlet valve position when paralleled with an infinite bus. If while controlling generator load, the KW input signal fails the 505 will issue an alarm and revert to turbine inlet valve position to control from.
-
Page 59: Figure 3-10. Speed Relationships
The speed setpoint may be set to a specific level, by directly entering a setpoint value through the 505 keypad or Modbus communications. To “enter” a specific setpoint from the 505 keypad, press the SPEED key to view the speed control screen, press the ENTER key, enter the setpoint level desired, then press the ENTER key again. - Page 60 505 discretely. This Sync Window Rate is defaulted to two rpm/sec and is only used when the generator breaker is open and the speed setpoint is within 10 rpm of rated speed.
- Page 61 Speed PID to be tuned for optimal response. When the 505 is configured for a generator application, the utility tie and generator breakers determine which set of dynamics is used by the Speed PID.
- Page 62 Since RSS is a secondary speed setting function, the Speed PID must be in- control of the 505’s LSS bus to allow the RSS to position the actuator. When configured as a generator application, the RSS will not take control unless both breakers are closed and the speed PID is in control.
- Page 63 This allows for tighter setpoint control to accommodate synchronizing manually or by an automatic synchronizer which interfaces to the 505 discretely. This Sync rate is defaulted to two rpm/sec and is only adjustable through the 505’s Service mode. This rate is only used when the generator breaker is open the speed setpoint is within +10 rpm of rated speed (also tunable through the Service mode).
- Page 64 Optionally the Cascade or Auxiliary control modes may be used to set unit load based on another system parameter. The DSLC interfaces to the 505 via its Speed Bias signal. To configure the 505 to utilize a DSLC for generator synchronizing and load sharing, program the ‘Sync/Load Share input’...
-
Page 65: Figure 3-11. Loadsharing Logic
The ‘Sync/Ld Share Enable’ contact input option is used to enable the Sync/Load Share analog input before the generator breaker is closed. Optionally a Function Key (F3 or F4) can be programmed to enable the 505’s Sync/Load Share analog input instead of an external contact. This discrete enable/disable function is ignored after the generator breaker is closed, and must be reselected after the generator breaker opens. -
Page 66: Cascade Control
When programming a Function Key (F3 or F4) instead of a contact input to enable the 505’s analog Sync/Load Share input, a 505 relay output, can be also be programmed to select a DSLC’s synchronizing mode. To configure the 505 for this functionality, program the ‘Sync/Ld Share Enable’... -
Page 67: Figure 3-12. Cascade Functional Diagram
Since Cascade is a secondary speed setting function, the Speed PID must be in control of the 505’s LSS bus in order for Cascade to take control. When the 505 is configured for a generator application, both the utility tie and generator breakers must be closed, before the Cascade PID can begin controlling a process. - Page 68 Adjustments section in this manual. Cascade Setpoint The Cascade setpoint can be adjusted from the 505 keypad, external contacts, Modbus commands, or through a 4–20 mA analog input. A specific setting can also be directly entered from the 505 keypad or through Modbus commands.
- Page 69 Cascade setpoint slow rate is programmed for 10 psi/sec, the smallest increment it will move is 0.4 psi (1.2 psi for Modbus). A specific setpoint may also be directly entered from the 505 keypad or through Modbus communications. When this is performed, the setpoint will ramp at the ‘Casc Setpt Rate’...
- Page 70 Remote Cascade Setpoint The Cascade setpoint can be positioned through an analog signal. Optionally, one of the 505’s six analog inputs can be programmed to position the Cascade PID setpoint. This allows the Cascade setpoint to be positioned remotely by a process control or distributed plant control system.
- Page 71 2 mA or above 22 mA) an alarm will occur and the Remote Cascade setpoint will be inhibited until the input signal is corrected and the alarm is cleared. Depending on configuration and system conditions, the Remote Cascade Setpoint may be in one of the following states (505 front panel screen messages): ...
-
Page 72: Auxiliary Control
505 Digital Governor Manual 85017V1 When both Remote Cascade Enable and Cascade Control Enable commands are programmed, each function is enabled by its respective command selection. If Remote Cascade Enable is selected, only the Remote Cascade Setpoint will be enabled. If Cascade Control Enable is selected, only Cascade control will be enabled. - Page 73 (running or shutdown), provided a power-up-reset did not occur. Depending on configuration and system conditions, the Auxiliary Limiter may be in one of the following states (505 front panel screen messages): Auxiliary is Enabled—Auxiliary has been enabled but the generator and utility tie breaker permissives have not been met (generator applications only).
- Page 74 Auxiliary control will be disabled and inhibited when the 505 is in frequency control. If the Auxiliary milliamp input signal is out of range (below 2 mA or above 22 mA) an alarm will occur and Auxiliary control will be inhibited until the input signal is corrected and the alarm is cleared.
- Page 75 Auxiliary Setpoint The Auxiliary setpoint can be adjusted from the 505 keypad, external contacts, Modbus commands, or through a 4–20 mA analog input. A specific setting can also be directly entered from the 505 keypad or through Modbus commands.
-
Page 76: Remote Auxiliary Setpoint
Cascade setpoint slow rate is programmed for 10 psi/sec, the smallest increment it will move is 0.4 psi (1.2 psi for Modbus). A specific setpoint may also be directly entered from the 505 keypad or through Modbus communications. When this is performed, the setpoint will ramp at the ‘Aux Setpt Rate’... - Page 77 When the Auxiliary PID is programmed to function as a limiter, the Remote Auxiliary Setpoint may be enabled at any time when the 505 is in the RUN mode. When the Auxiliary PID is programmed as a Controller (enabled/disabled), there...
-
Page 78: Valve Limiter
The valve limiter can also be used to trouble shoot system dynamics problems. If it is believed that the 505 is the source of system instability, the valve limiter can be positioned to manually take control of the valve position. Care should be taken when using the valve limiter in this fashion, so as to not allow the system to reach a dangerous operating point. -
Page 79: Controlled Shutdown
505 to indicate the cause of an emergency shutdown. By wiring trip conditions directly into the 505, instead of a trip string, the 505 can pass a trip signal directly to its output relay (to trip the T&T valve), and also indicate the first trip condition sensed. -
Page 80: Overspeed Test Function
Manual 85017V1 The controlled shutdown sequence can be aborted at any time. During a controlled shutdown sequence, by pressing the STOP key, the 505 will display a ‘Manual Shutdown In Ctrl/Push NO to Disable’ message. Pressing the “NO” key from this screen will cause the shutdown sequence to be aborted, and the control to display a ‘Manual Shutdown Stopped/Push YES to Continue’... -
Page 81: Local/Remote Function
(F3, F4), or Modbus command. When Local mode is selected, the 505 is defaulted to be operable from its front panel only. This mode disables all contact inputs and Modbus commands, with... -
Page 82: Function Keys
See Chapter 6 for a complete listing of all Modbus parameters. Function Keys Function keys, F3 & F4 are located on the 505’s front panel, and can be programmed independently to function as a control panel switch. These keys allow functions to be enabled and disabled from the 505’s front panel, without... - Page 83 When programmed as a level switch the relay will change state when the selected parameter reaches the programmed level (energizes when value is higher the programmed level). The following is a list of the 505’s relay options for level indication:...
- Page 84 The 505 Control Status OK relay is normally energized, and will only de-energize if unit inlet power is lost, the 505’s CPU fails, or the 505 is in the program mode. The Overspeed Test Enable relay will energize when an Overspeed Test is performed.
-
Page 85: Chapter 4. Configuration Procedures
Configuration Procedures Program Architecture The 505 is easy to program, due in large part to the menu-driven software. Basic program architecture is illustrated in Figure 4-1. When the control is powered up, and after the brief CPU self test has been completed, the control displays a ready status (Controlling Parameter/Push Run or Program). -
Page 86: Programming The 505
Programming the 505 Before the 505 can be used to operate any turbine, it must be configured with a valid program. A handy 505 Program Mode Worksheet is provided at the end of this manual. This chapter contains additional information related to completing this worksheet and programming the specific application. - Page 87 ENTER on the 505 keypad the SHUTDOWN CONTROL Y/N prompt will appear. If YES is pressed the 505 will issue a shutdown and the program mode will be accessed. If NO is pressed the 505 will revert to the Select Mode screen and the program mode will not have been accessed.
- Page 88 505 Digital Governor Manual 85017V1 Program Blocks Figure 4-3 shows the 13 program columns. To program the control, simply step through the blocks as described above and configure the control features for the desired application. The first seven program columns must be programmed for every installation.
-
Page 89: Figure 4-3A. Program Mode Blocks
Manual 85017V1 505 Digital Governor Figure 4-3a. Program Mode Blocks Woodward... -
Page 90: Figure 4-3B. Program Mode Blocks
505 Digital Governor Manual 85017V1 Figure 4-3b. Program Mode Blocks Woodward... -
Page 91: Figure 4-3C. Program Mode Blocks
Manual 85017V1 505 Digital Governor Figure 4-3c. Program Mode Blocks Woodward... -
Page 92: Figure 4-3D. Program Mode Blocks
505 Digital Governor Manual 85017V1 Figure 4-3d. Program Mode Blocks Woodward... - Page 93 NO (Yes/No) Select YES followed by the ENTER key to configure an automatic start mode. When configured for an automatic start mode, the 505 controls the turbine speed from zero up to the minimum control speed. The Automatic Start Sequence would be: Operator opens the T&T valve, then push RUN.
- Page 94 Enter YES followed by ENTER if this function is desired. If NO is selected followed by ENTER, then the program will step to ‘Reset Clears Trip Output’ question. If this function is programmed and RUN is selected, the 505 automatically accelerates the speed setpoint to a programmable low idle...
- Page 95 Manual 85017V1 505 Digital Governor LOW IDLE DELAY TIME- HOT (MINUTES) dflt= 1.0 (0.0, 500) Enter the hot start hold time at low idle followed by ENTER. This is the programmable time, in minutes/seconds, that the turbine will wait/hold at the low idle speed when a hot start is determined.
- Page 96 Select YES followed by the ENTER key to allow the external trip input(s) to de- energize the Trip Relay output. When set to NO, an external trip contact input to the 505 will shut down the 505 control but will not de-energize the 505’s trip relay output.
- Page 97 Manual 85017V1 505 Digital Governor OFF-LINE PROPORTIONAL GAIN dflt= 5.0 (0.0, 100) Enter the off-line PID proportional gain percentage followed by ENTER. This value is used to set speed/load control response when the Generator or Utility Tie breaker contacts are open (if the unit is a generator) or if the...
- Page 98 OVERSPEED TRIP LEVEL (rpm) dflt= 1000 (0.0, 20000) Set the 505’s overspeed trip level (in rpm) followed by the ENTER key. This is the governor overspeed trip setpoint only and is not to be used as ultimate overspeed protection.
- Page 99 Manual 85017V1 505 Digital Governor CRITICAL SPEED 2 MIN (rpm) dflt= 1.0 (1.0, 20000) Set the lower limit of the critical speed avoidance band followed by the ENTER key. (Must be less than the ‘Critical Speed 2 Max’ Setting) Operating Parameters Block When this header appears in the display, press the down arrow key to configure this block or press a left or right arrow key to select another block to configure.
- Page 100 Select YES followed by ENTER to issue a trip whenever an actuator fault is detected. If YES, the 505 will issue a shutdown if Actuator 1 has a fault. If NO, an actuator fault alarm will be issued when a fault is detected. An...
- Page 101 The first five (1-5) analog inputs are differential inputs that can be from a self- powered or a loop-powered (24 Vdc from 505) transducer. However, analog input #6 is an isolated analog input and should be used when isolation is required (refer to Chapter 2 for information on the analog input hardware).
- Page 102 505 Digital Governor Manual 85017V1 INPUT 1—4 mA VALUE (UNITS) dflt= 0.0 (-20000, 20000) Set the value (in engineering units) that corresponds to 4 milliamps (mA) on the analog input followed by the ENTER key. If the value on the display is correct, just select the ENTER key which will advance you to the next question.
- Page 103 Manual 85017V1 505 Digital Governor Function Keys Block When this header appears in the display, press the down arrow key to configure this block or press a left or right arrow key to select another block to configure. Each function key option may be configured only once. In addition, the function that the function key uses must be programmed or an error message will occur.
- Page 104 505 Digital Governor Manual 85017V1 MIN AUX SETPOINT (UNITS) dflt= 0.0 (-20000, 20000) Set the min AUX setpoint followed by ENTER. This value is the minimum setpoint value that the auxiliary setpoint can be decreased/lowered to (lower limit of AUX setpoint).
- Page 105 Manual 85017V1 505 Digital Governor REMOTE AUX MAX RATE (UNITS/sec) dflt= 5.0 (0.1, 1000) Enter the maximum rate at which the remote input will move the aux setpoint followed by the ENTER key. AUXILIARY UNITS OF MEASURE: (must choose from list)
- Page 106 505 Digital Governor Manual 85017V1 SPEED SETPOINT UPPER LIMIT (rpm) dflt= 3780 (0.0, 20000) Set the maximum speed setpoint that cascade controller can raise the speed setpoint to followed by the ENTER key. (Must be less than or equal to the ‘Maximum Governor Speed Setpt’...
- Page 107 Manual 85017V1 505 Digital Governor ANALOG READOUT # 1 FUNCTION (must choose from list) Scroll through the option list by using the Adjust Up/Down Arrows or by selecting the NO key until the option desired appears, then press the YES or ENTER keys to select the option/function.
- Page 108 NO (Yes/No) Set to YES followed by ENTER to use the Modbus communications feature of the 505. There are two identical Modbus ports available. Either or both can be configured for use. Select NO followed by ENTER if Modbus communications will not be used.
-
Page 109: Exiting The Program Mode
Manual 85017V1 505 Digital Governor COMMUNICATIONS MODE dflt= 1 (1, 3) Enter the integer corresponding to the serial communications mode required followed by the ENTER key. Enter a ‘1’ for RS-232, a ‘2’ for RS-422 or a ‘3’ for RS-485 communications. If the displayed value is already correct, simply select ENTER. - Page 110 (refer to Figure 4-4 Exiting the Program Mode). To exit the Program mode the “CLEAR’ key is pressed twice. This initiates the 505 to save the configuration and to begin a Configuration Check procedure. If there are no errors in the programming, the 505 front-panel will return to the ready state and display the ‘Controlling Parameter/Press Run or Program’...
- Page 111 Manual 85017V1 505 Digital Governor Critical Speed Program Errors Crit Rate < Slow Rate—The acceleration rate (rpm/second) through the critical speed avoidance band must be faster than the normal speed setpoint rate. Crit Spd Err/No Idle—A critical speed avoidance band was programmed but neither idle/rated or auto start sequence was programmed.
- Page 112 505 Digital Governor Manual 85017V1 Contact #xx Program Err—The specified contact input was programmed for a function that is not also programmed to be used. Either the contact input was mis-programmed or the function required is mis-programmed. For example, contact input #1 is programmed for Remote Cascade Setpoint Enable but Remote Cascade Setpoint was not programmed under the Cascade Program Block.
-
Page 113: Valve/Actuator Calibration & Test
Before initial operation or after a turbine overhaul where any actuator or valve travel may have been affected, the below Valve Calibration procedure should be followed to insure that the 505 is correctly calibrated to the turbine control valve(s). When calibration is complete, 0 to 100% actuator position as displayed by the 505 must equal 0 to 100% actual valve travel. -
Page 114: Calibration/Stroking Procedure
505 to valve resolution. Figures 4-5 and 4-6 graphically show the steps available to stroke the actuator output(s). The stroking option is only available when the 505 control is in a shutdown state. Also, the screens displayed varies with the number of actuators programmed. - Page 115 When calibration is complete, 0 to 100% valve position as displayed by the 505 must equal 0 to 100% actual valve travel. Press the SCROLL DOWN ARROW to step the next desired mode, or the “CLEAR” key twice to save changes and exit Calibration mode.
-
Page 116: Calibration/Stroking Procedure
STEAM TO THE TURBINE MUST BE SHUT OFF BY OTHER MEANS DURING THIS PROCESS. 1. The 505’s Emergency shutdown contact input must be closed or jumpered throughout this procedure (or the 505’s actuator current output will go to ZERO current. - Page 117 505 Digital Governor When calibration is complete, 0 to 100% valve position as displayed by the 505 must equal 0 to 100% actual valve travel. Press the SCROLL DOWN ARROW to step the next desired mode, or the “CLEAR” key twice to save changes and exit Calibration mode.
-
Page 118: Figure 4-5. Stroke Actuator
RUN MODE key will not permanently save any calibration changes. Press the CLEAR key twice to permanently save any minimum or maximum actuator settings into the 505. If variables are tuned or changed but not stored in EEPROM by pressing the CLEAR key twice, then those changes will be lost if power is removed from the control or if the control receives a CPU reset. -
Page 119: Figure 4-6. Stroking Dual Actuators
Actuator output is in manual mode Press the CLEAR key twice to permanently save any minimum or maximum actuator settings into the 505. If variables are tuned or changed but not stored in EEPROM by pressing the CLEAR key twice, then those changes will be lost if power is removed from the control or if the control receives a CPU reset. -
Page 120: Chapter 5. 505 Operation
Run Mode and the Program Mode. The Program Mode is used to configure the 505 for the specific application and set all operating parameters (see Chapter 4). The Run Mode is simply the normal turbine operation mode and is used to view operating parameters and run the turbine. -
Page 121: Figure 5-2A. Overview Of Run Mode
Manual 85017V1 505 Digital Governor Figure 5-2a. Overview of Run Mode Woodward... -
Page 122: Figure 5-2B. Overview Of Run Mode
505 Digital Governor Manual 85017V1 Figure 5-2b. Overview of Run Mode Woodward... -
Page 123: Figure 3-5. Idle/Rated Start
Manual 85017V1 505 Digital Governor Trip Controlling Parameter Remote Messages Messages Messages Message 8 Message 7 Message 4 External Trip Input Shutdown Disabled Enter Shutdown Button Controlled Shutdown Inhibited Overspeed Max Actuator Enabled All Speed Probes Failed Valve Limiter Active... -
Page 124: Keypad And Display
505, make On-Line program adjustments, and operate the turbine/system. No additional panels are required to operate the turbine, every turbine control function can be from the 505’s front panel. However, the turbine can also be operated remotely. Every front panel control operation can be performed remotely through contacts or Modbus communications. -
Page 125: Starting Procedures
An overtemperature or overpressure shutdown device may also be needed for safety, as appropriate. 1. Press the RESET key to clear all alarms and trips. If the 505’s RESET CLEARS TRIP setting is programmed "YES", the 505's shutdown relay will reset or energize upon pressing the RESET key after a shutdown. -
Page 126: Speed Key Screens
Idle/Rated Start For details on the idle/rated startup, refer to Chapter 3. When a RUN command is issued, the 505 automatically displays the SPEED screen and shows the Idle/Rated status. The speed setpoint is instantly set to the actual turbine’s speed. - Page 127 Manual 85017V1 505 Digital Governor When the speed setpoint is ramping to the Rated Setpoint setting it can be stopped at any point that is not within a critical speed avoidance band by issuing a Speed Setpt Raise or Lower command. This can be done by pressing the...
- Page 128 Manual 85017V1 Auto Start Sequence When a RUN command is issued, the 505 automatically displays the SPEED screen (unless used with the Semiautomatic start mode) and shows the Status of the Auto Start Sequence (screen 2). The Speed setpoint is instantly set to the turbine’s actual speed and the sequence will continue from this point.
-
Page 129: Figure 5-5. Direct Setpoint Entry
Manual 85017V1 505 Digital Governor The Speed setpoint can also be directly entered from either of the Modbus links, however, the allowed range is between the minimum and maximum governor speed settings. The allowed setpoint range is limited between the minimum load and the maximum governor settings if the unit is driving a generator and the unit is on-line. -
Page 130: Overspeed Test Function
505 Digital Governor Manual 85017V1 Overspeed Test Function The 505’s Overspeed Test function allows an operator to increase turbine speed above its rated operating range to periodically test turbine electrical and/or mechanical overspeed protection logic and circuitry. This includes the 505’s internal overspeed trip logic and any external overspeed trip device’s settings... -
Page 131: F3 And F4 Keys
Alternatively the turbine’s overspeed logic and circuitry can be tested remotely, by programming an Overspeed Test contact input. The Overspeed Test contact functions as the OSPD key on the 505’s service panel. When the conditions outlined in the above procedure are met, closing this contact allows the Speed setpoint to be increased up to the “Overspeed Test limit”... -
Page 132: Actuator (Actr) Key Screens
505 Digital Governor Manual 85017V1 The valve limiter can be adjusted with the ADJUST UP or DOWN front panel keys from any Limiter screen, Valve Limiter Raise or Lower contact inputs (if programmed), or commands through a Modbus link. In addition the setpoint can be directly entered using the ENTER key from any Limiter screen. -
Page 133: Control (Cont) Key Screens
Figure 5-9 shows the screens that appear when the CONT key is pressed. The CONT key allows operators to monitor what 505 parameter (PID or limiter) is controlling governor valve position (screen 1). From screen 2 the cause of the last turbine shutdown can be viewed and from screen 3 the highest turbine speed reached can be viewed and cleared, if desired. - Page 134 Idle/Rated Start The 505 is running and in the Idle/Rated sequence mode Auto Start Sequence The 505 is running and in the Automatic Start Sequence mode Remote/Speed Speed PID is in control, the Speed Setpoint is in remote control Speed/On-Line...
-
Page 135: Dynamics (Dyn) Key Screens
To adjust the gain settings, the @ symbol must be on the respective display line of the value to be adjusted. The @ symbol is moved by pressing the SELECT key. The controller dynamics are adjustable from the 505’s Service panel only, they cannot be adjusted remotely. Figure 5-10. DYN Key Screens... -
Page 136: Stop Key Screens
505 Digital Governor Manual 85017V1 Stop Key Screens Figure 5-11 shows the possible screens that may appear if the STOP key is pressed. The STOP key is used to perform a controlled/manual turbine shutdown or stop. To perform a Manual Shutdown, select YES from the Status screen or close the Controlled Shutdown contact input (if programmed) or select Controlled Shutdown from a Modbus communications link. - Page 137 Manual 85017V1 505 Digital Governor Figure 5-12. AUX Key Screens Auxiliary as a Controller (using Enable/Disable) When auxiliary control is used as a controller, as opposed to a limiter, the enable/disable function is used to select Auxiliary control. Auxiliary control can be...
- Page 138 505 Digital Governor Manual 85017V1 Auxiliary control is disabled by pressing the front panel NO key from the Aux Status screen (screen 2), opening the Aux Control Enable/Disable contact (if programmed), or selecting “Aux Disable” from either Modbus communications link see Table 5-5). Auxiliary control is also disabled if Cascade control is enabled, or Remote Speed Setpoint control is enabled.
-
Page 139: Remote/Speed Bias (Rmt) Key Screens
Manual 85017V1 505 Digital Governor Relay indications can be programmed to indicate Aux Control Active, Aux Control Enabled, or Aux PID In Control status’. Remote Aux Setpoint The Remote Auxiliary Setpoint function is used to allow the Auxiliary setpoint to be remotely positioned by an analog input. - Page 140 505 Digital Governor Manual 85017V1 Figure 5-13. RMT Key Screens Remote Speed Setpoint The Speed PID setpoint can be remotely set by an analog input, if programmed. This Remote Speed Setpoint input can be enabled by pressing the front panel...
- Page 141 Manual 85017V1 505 Digital Governor The following Remote control indications are available through the Modbus links: Remote Speed Setpt is Enabled, Remote Speed Setpt is Active, Remote Speed Setpt is In Control, Remote Speed Setpt is Inhibited, and the Remote Speed Setpt Input Failed Alarm.
-
Page 142: Unit Load (Kw) Key Screens
The bottom line of the display on screens 1, 2, & 3 show the Load Setpoint. This value and units change depending on the droop mode the 505 is presently using. If the droop is based on the KW input, the units are in ‘KW’ or ‘MW’. If the droop is LSS/Speed Demand (governor valve position), the units are in ‘rpm’. -
Page 143: Cascade (Cas) Key Screens
Manual 85017V1 505 Digital Governor Cascade (CAS) Key Screens For this key to be active, the Cascade function must be programmed. Figure 5-15 shows the possible screens that may appear if the CAS key is pressed. Only the screens related to the Cascade functionality programmed will be displayed. Only when the Remote Cascade Setpoint is programmed, will screen 3 appear. - Page 144 505 Digital Governor Manual 85017V1 The Cascade setpoint can be configured to either track the input for bumpless transfer into control or remain at the last setting. When using the tracking option, the cascade setpoint cannot be changed until Cascade control is enabled.
-
Page 145: Alarms
Manual 85017V1 505 Digital Governor Message 4 Meaning Disabled Remote is not selected Inhibited Remote is inhibited and cannot be enabled Enabled Remote is enabled but not in control of the Setpt Active Remote is in control of the Setpt but not in control of the... -
Page 146: Trips
Each individual alarm condition is available through the Modbus links to monitor the control status. A common alarm indication is also provided. Relay indications can be programmed to indicate a 505 Common Alarm, in addition to the dedicated Alarm Relay output. -
Page 147: Speed, Cascade, And Auxiliary Dynamics Adjustments
D = Derivative (determined by DR and I) If an older type 505 is being replaced by a new 505, the “ P & D ” terms will be the same, however, the “ I ” term should be reduced by a factor of 10 from the old 505’s reset value to achieve the same control response. - Page 148 In cases where a small change in the 505's output results in a large speed or load change (high mechanical gain) it may not be possible to take the 505's gains low enough to reach stable operation.
- Page 149 Manual 85017V1 505 Digital Governor If the unit is not driving a generator and no “Select On-Line Dynamics” contact input is programmed, the Speed Off-Line dynamic settings are used when the turbine speed is below minimum governor speed; .On-Line dynamics are used if the turbine speed is above minimum governor speed.
- Page 150 1 second reduce the Integral gain term (proportional gain may need to be increased also). On an initial startup with the 505, all PID dynamic gain terms will require adjustment to match the respective PID’s response to that of its control loop.
-
Page 151: Chapter 6. Communications
By simply connecting a monitoring device, configured to communicate through Modbus, and to the 505’s defaulted protocol settings (parity, stop bits, etc.), this device can be used to monitor all the 505’s controlling parameters, modes, etc. without effecting control. - Page 152 Program Mode and can be adjusted in the Service Mode, if required. The 505 control is programmed to function as a slave unit only. As a slave unit, the 505 will only respond to a transaction request by a master device. The 505 can directly communicate with a DCS or other Modbus supporting device on a single communications link, or through a multi-dropped network.
- Page 153 Manual 85017V1 505 Digital Governor Figure 6-2. Modbus Frame Definition The Modbus function code tells the addressed slaves what function to perform. The following table lists the function codes supported by this control. Modbus Function Codes Code Definition Reference Address...
-
Page 154: Port Adjustments
505 as signed 16 bit integer values. Since Modbus can only handle integers, values that require a decimal point in the Modbus Master Device are multiplied by a scaling constant before being sent by 505. See Tables 6-7 & 6-8 for defaulted communication constants and ranges. - Page 155 Table 6-5. Boolean Reads (Input Coils) Input coils are logical signals that are readable from, but not writable to, the 505 control. An example of an Boolean read value would be a turbine trip status indication.
- Page 156 Manual 85017V1 Analog Writes (Holding Registers) Holding registers are analog values that are writable to the 505 control. These values can also be read from by a device performing error checking. An example of an analog write value would be a direct speed setpoint value as opposed to raise and lower commands.
- Page 157 Manual 85017V1 505 Digital Governor Addr Description Addr Description 1:0001 Alarm—MPU #1 Failed 1:0043 Trip—Overspeed Trip 1:0002 Alarm—MPU #2 Failed 1:0044 Trip—Loss of Speed Signals 1:0003 Alarm—Cascade Input Failed 1:0045 Trip—Actuator # 1 Fault 1:0004 Alarm—Aux Input Failed 1:0046 Trip—Actuator # 2 Fault 1:0005 Alarm—KW Input Failed...
- Page 158 505 Digital Governor Manual 85017V1 1:0103 Cascade Is Inhibited 1:0147 Spare 1:0104 Rmt Cascade Is Enabled 1:0148 Spare 1:0105 Rmt Cascade Is Active 1:0149 Spare 1:0106 Rmt Cascade Is In Control 1:0150 Spare 1:0107 Rmt Cascade Is Inhibited 1:0151 Shutdown Relay Energized...
- Page 159 Manual 85017V1 505 Digital Governor Addr Description Units Multiplier 3:0017 Auto Seq-Time Left At Low Idle 3:0018 Auto Seq-Low Idle to High Idle Rate rpm/sec none 3:0019 Auto Seq-High Idle Speed Setpoint none 3:0020 Auto Seq-High Idle Delay Time 3:0021...
- Page 160 505 Digital Governor Manual 85017V1 Addr Description Units Multiplier 3:0082 Analog Output 5 3:0083 Analog Output 6 3:0084 Actuator #1 Output 3:0085 Actuator #2 Output 3:0086 Last Trip none none 3:0087 KW units (3 = MW, 4 = KW) none...
- Page 161 Table 6-9. Last Turbine Trip Cause 505 Controlling Parameters The controlling parameter status of the 505 uses an Analog Read register (3:0001) to identify the parameters that are in control. This variable follows what is displayed on the controlling parameter screen, under the ‘CONT’ key. The variable gives the current status of the control and is defined in the following table.
- Page 162 505 Digital Governor Manual 85017V1 Analog Read addresses 3:0088—0093 give the configuration value of the analog inputs, one to six in order. The configuration for the analog inputs are defined in the table below. Value Description Remote Speed Setpt Synchronizing Input...
- Page 163 Manual 85017V1 505 Digital Governor Analog Read addresses 3:0100—0105 give the configuration value of the relays, one to six in order. The configuration for the relays are defined in the table below. Value Description Relay Configured As Level Switch Under speed Switch...
- Page 164 505 Digital Governor Manual 85017V1 Analog Read addresses 3:0106—0117 give the configuration value of the contact inputs, one to twelve in order. The configuration for the contact inputs are defined in the table below. Value Description Generator Breaker Utility Tie Breaker...
-
Page 165: Specific Address Information
(6015/100 = 60.15). A Directly Entered Cascade Setpoint (4:0002) of 61.5 would be sent across the link as 6150 and the 505 automatically divides the value by the Casc Scale Factor and uses the value of 61.5 as the setpoint desired. - Page 166 Two different types of shutdown commands (emergency and controlled) can be issued through Modbus. The Emergency Shutdown command instantly takes the speed setpoint and actuator current to zero. Optionally the 505 can be configured to ignore this Emergency Shutdown command if it is desired to not allow the unit to be tripped through Modbus.
-
Page 167: Chapter 7. Service Options
A Recognized Turbine Retrofitter (RTR) is an independent company that does both steam and gas turbine control retrofits and upgrades globally, and can provide the full line of Woodward systems and components for the retrofits and overhauls, long term service contracts, emergency repairs, etc. -
Page 168: Woodward Factory Servicing Options
Flat Rate Remanufacture: Flat Rate Remanufacture is very similar to the Flat Rate Repair option with the exception that the unit will be returned to you in “like- new” condition and carry with it the full standard Woodward product warranty (Woodward Product and Service Warranty 5-01-1205). This option is applicable to mechanical products only. -
Page 169: Returning Equipment For Repair
To prevent damage to electronic components caused by improper handling, read and observe the precautions in Woodward manual 82715, Guide for Handling and Protection of Electronic Controls, Printed Circuit Boards, and Modules. -
Page 170: Engineering Services
505 Digital Governor Manual 85017V1 Engineering Services Woodward offers various Engineering Services for our products. For these services, you can contact us by telephone, by email, or through the Woodward website. Technical Support Product Training Field Service Technical Support is available from your equipment system supplier, your local Full- Service Distributor, or from many of Woodward’s worldwide locations, depending... -
Page 171: Technical Assistance
Type of Fuel (gas, gaseous, steam, etc) Rating Application Control/Governor Information Please list all Woodward governors, actuators, and electronic controls in your system: Woodward Part Number and Revision Letter Control Description or Governor Type Serial Number Woodward Part Number and Revision Letter... -
Page 172: Appendix . 505 Program Mode Worksheets
505 Digital Governor Manual 85017V1 Appendix. 505 Program Mode Worksheets Governor Serial Number ______________________ Application ________________________________ Date ___________ For details on individual settings, refer to Chapter 4. TURBINE START SPEED SETPOINT VALUES Manual Start YES _____ NO _____ Overspeed Test Lmt (rpm) - Page 173 Manual 85017V1 505 Digital Governor ANALOG INPUTS CASCADE CONTROL Analog Input # 1 Function Use Cascade Control? YES _____NO _____ Input 1 4 mA Value Units Invert Cascade ? YES _____NO _____ Input 1 20 mA Value Units Min Cascade Setpt...
- Page 174 505 Digital Governor Manual 85017V1 RELAYS COMMUNICATIONS Use Relay #1? YES ____NO _____ Use Communications ? YES _____ NO _____ Relay # 1 is Level Switch? YES ____NO _____ Use Modbus Port 1? YES _____ NO _____ Relay 1 Is Level Sw For...
-
Page 175: Declarations
Declarations... - Page 176 Email and Website—www.woodward.com Woodward has company-owned plants, subsidiaries, and branches, as well as authorized distributors and other authorized service and sales facilities throughout the world. Complete address / phone / fax / email information for all locations is available on our website.
Need help?
Do you have a question about the 505 and is the answer not in the manual?
Questions and answers