Table of Contents
Advertisement
Quick Links
Advertisement
Table of Contents

Related Manuals for DALBO MAXICUT 260 Series


Summary of Contents for DALBO MAXICUT 260 Series
- Page 1 MAXICUT Series no: 260-XXX...
- Page 3 Type 400 Congratulations on your new MAXICUT. For safety reasons and for optimal use from your machine, you should read through the user manual thoroughly before using the machine. ©Copyright 2009. All rights reserved DALBO. Your MAXICUT has: Type no.: Serial no.:...
-
Page 5: Table Of Contents
Table of Contents SAFETY ............................7 ............................7 ENERAL ............................8 YDRAULICS ............................8 OUNTING ........................8 AINTENANCE AND REPAIR ..........................8 RIVING ON ROADS ............................9 ORRECT USE TECHNICAL DATA .......................... 10 HOW TO READ THE INSTRUCTION MANUAL ..................11 ............................ - Page 6 Mounting ..........................25 ......................25 EMOVING FITTING OF WHEELS Replacing the bearings ......................26 ......................27 EMOVAL OF THE CUTTER DRUM Replacing the bearings on the cutter drum ................27 Mounting the bearings......................27 Replacement of the cotter ..................... 28 Mounting the blades .......................
-
Page 7: Safety
MAXICUT Safety You will see this symbol in the instruction manual each time advice is given about your safety, the safety of other users, or the functional safety of the machine. All safety instructions must be observed and made available to all users of the machine. General ... -
Page 8: Hydraulics
MAXICUT Hydraulics Prior to any repair work on the hydraulics unit, the machine's undercarriage must be lowered, the pressure must be removed from the unit, the engine must be switched off and the ignition key must be removed. Hydraulic connections must be cleaned thoroughly before connecting. -
Page 9: Correct Use
MAXICUT Out of a regard for the dimensions of the machinery, the driver must enquire with the traffic authorities to ensure that it may be transported on public roads. When transporting the machine, care must be taken not to exceed the total weight and axle load of the tractor and that the load on the front axle is not less than 20 percent of the tractor's overall weight. -
Page 10: Technical Data
MAXICUT Technical data MAXICUT 400 Working width (cm) recommendation) Weight in kg: Without water 3340 approx. With water approx. 4540 Sections (pieces) Wheels 300/80-15.3 Hydraulic requirements Double-acting Single direction Transport: Width (meters) Height (meters) Length (meters) Page 10... -
Page 11: How To Read The Instruction Manual
MAXICUT How to read the instruction manual It is possible that the order in which the topics are listed does not appear as logical. Please refer to the table of contents, where the titles for the relevant topics can be found. -
Page 12: Description Of The Machine
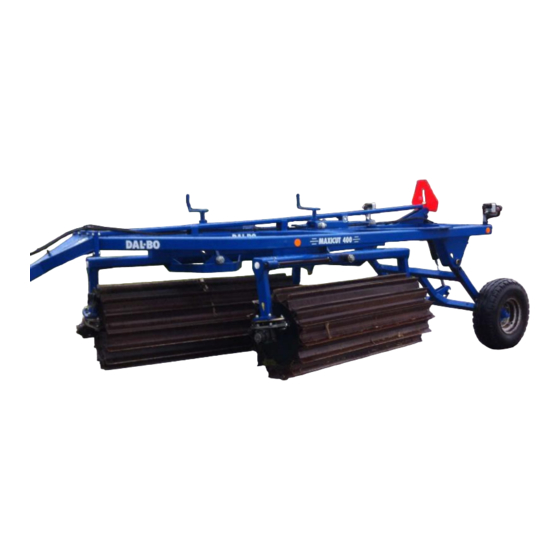
MAXICUT Description of the machine MAXICUT is a powerful knife-drum, designed specifically to drive through crops with long, strong stems. Here the remaining organic residue is cut so that the decay starts faster. The drums are formed as watertight containers, which can be filled with water as needed to increase the machine's weight. -
Page 13: Limitations In The Use Of The Machine
MAXICUT Limitations in the use of the machine The following describes what the machine may/must not be used for: The machine may only be used for tilling organic plant material in agricultural areas that have been cultivated. Those areas to be tilled must have been subject to normal agricultural maintenance, i.e. -
Page 14: Connecting And Disconnecting
MAXICUT Connecting and disconnecting Connecting Fig.2 MAXICUT is connected to the tractor's lift arms and is secured with ball joints and splitters (A) Remember to secure the connection with ball joints and linchpins. Hydraulics As a standard, MAXICUT 400 requires a double-acting hydraulic cylinder, which is then put on a forklift, to transport the machine form one field to another. - Page 15 MAXICUT The drawbar is released from the tractor and the hydraulic hoses are mounted. Remember to release the pressure from the connecting hoses to the hydraulic system before disconnecting the hoses. MAXICUT can be in transport mode or unfolded when disconnected. Page 15...
-
Page 16: Settings
MAXICUT Settings MAXICUT is incredibly easy to work with. The machine's design makes it very easy to set. It is always necessary to check the ramp slope before use to ensure optimum utilization of the machine. Tensile adjustment To obtain a uniform cut across the crops, the knife drums move horizontally, while the side frames move with respect to the ground slope. - Page 17 MAXICUT Page 17...
-
Page 18: Driving And Operating
MAXICUT Driving and operating Proper operation is important in order to get optimal performance from your MAXICUT. This applies not only to working in the field but also in terms of safety. It is therefore crucial that you have thoroughly read the safety precautions that cover the machine. Unfolding and folding Unfolding and folding are conducted with the tractor in park. -
Page 19: Folding
MAXICUT Fig. 5 Fig. 6 5. The wheel frame is tilted up in the air. Fig. 7 Before the tumbling is initiated, the pull must be horizontal. When turning the machine on the headland, the machine must be lifted up onto the wheel frame to avoid unnecessary twisting in the machine's frame construction. -
Page 20: Driving Speed
MAXICUT Driving speed It is recommended that the machine be driven at 18-25 km/h, but driving should always be done according to conditions. If the speed is increased, wear will also increase, especially under dry conditions. At the same time, there is a danger that the knife drum will start throwing soil material and rocks. -
Page 21: Troubleshooting
MAXICUT Troubleshooting Problem Cause Remedy The pull is too weak Align horizontal pull (see "Tensile Alignment") Too much water Divide the water equally between The right side is pulling too much each of the 2 water containers ... -
Page 22: Maintenance
MAXICUT Maintenance Good maintenance ensures a long life for the MAXICUT and therefore optimal use of the machine. Grease fittings have therefore been mounted in places where wear is greatest. All screw connections must be tightened after the first day of work. Cotter pins and bolts should be checked to avoid breakdowns. -
Page 23: Adjustments
MAXICUT Adjustments Wheels The wheel bearing must be lubricated and adjusted once a year. Also make sure you have the correct tyre pressure (see tyres). Adjustments of lubrication and wheel bearings Hub cap is removed. The cotter is removed. The castellated nut is tightened with a 1/6 turn, so that the hole is aligned with the shaft. -
Page 24: Replacements And Repairs
MAXICUT Replacements and repairs Safety is crucial regarding all repair work on MAXICUT. The following items must therefore be observed at all times, as well as the items under safety at the beginning of the instruction manual. Any maintenance and repair work on MAXICUT must only be carried out when the machine is lowered to the ground or is set in transport mode, the break on the tractor is applied, the engine is switched off and the ignition key is removed, so that the machine cannot move or start accidentally. -
Page 25: Change The Gaskets On The Tilt Cylinder
MAXICUT Change the gaskets on the tilt cylinder Fig. 11 3/8”Gas 3/8”Gas ⌀35 ⌀35 The cylinder is emptied of oil by moving the piston carefully back and forth. Move the piston in the middle position, whereby the end cap (pos. 3) is unscrewed from the cylinder tube (pos. -
Page 26: Replacing The Bearings
MAXICUT the wheels so that they are touching the ground and tighten the nuts with 300 Nm. It is important that the wheel nuts and wheel surfaces are clean, otherwise the wheel nuts else may loosen. Replacing the bearings Fig. 12 The hub cap pos. -
Page 27: Removal Of The Cutter Drum
MAXICUT Removal of the cutter drum The repair is performed on a flat surface with MAXICUT connected to a tractor and unfolded with both 2 knife drums resting on the ground. It would be a great help to have a crane or something similar available for both the de- and installation. Replacing the bearings on the cutter drum If no crane is available, both axles on the side sections must be removed to prevent the drum overturning. -
Page 28: Replacement Of The Cotter
MAXICUT Replacement of the cotter If no crane is available, both axles on the side sections must be removed to prevent the drum overturning. Fig. 14 The machine is folded out in work position. Soil remains (A) in between the cotter blades must be cleaned/removed. -
Page 29: Disposal
MAXICUT Disposal MAXICUT must be unfolded. It is crucial to release the pressure from all the cylinders. When mounting/dismounting, attention should be directed towards the weight on the part in question. It is therefore important that this part is supported or lifted up, so there is no risk of crashing/rolling over. -
Page 30: Spare Parts
MAXICUT Spare parts Page 30... -
Page 31: Warranty
No original spare parts were used. DALBO A/S shall in no way be liable for consequential damages, income or losses due to errors. DALBO A/S cannot also be held responsible for hourly labour costs in addition to those which may have been reasonably required for the repair or replacement of warranty parts. -
Page 32: Hydraulics Diagram For Maxicut 400
MAXICUT Hydraulics diagram for MAXICUT 400 51316 Double-acting pilot- operated check valve Tractor pump and valve WHEEL CYLINDER WHEEL CYLINDER YELLOW/YELLOW Page 32...
Need help?
Do you have a question about the MAXICUT 260 Series and is the answer not in the manual?
Questions and answers