
Subscribe to Our Youtube Channel
Related Manuals for DALBO TRIMAX Plus 300


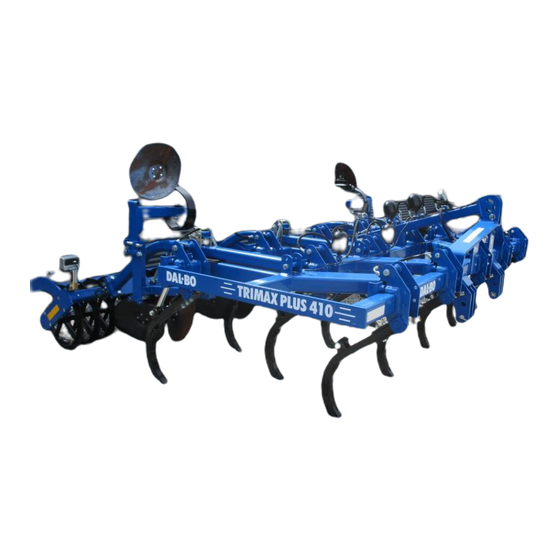
Summary of Contents for DALBO TRIMAX Plus 300
- Page 1 TRIMAX Plus 300 cm fixed – 77124 410 cm fixed – 77125 410 cm retractable – 77134...
- Page 3 Congratulations on the purchase of a new TRIMAX Plus. For safety reasons and to achieve optimum service from the product, please read the User Guide before use. © Copyright 2011. All rights reserved, DALBO A/S TRIMAX Plus features: Type no.: Serial no.:...
-
Page 5: Table Of Contents
Table of Contents SAFETY ........................6 ......................... 6 ENERAL ........................6 YDRAULICS ........................7 SSEMBLY ....................7 AINTENANCE AND REPAIR ......................7 OAD TRANSPORT ........................8 ORRECT USE TECHNICAL DATA ..................... 9 ......................... 9 ELIVERY HOW TO USE THIS MANUAL ................... 10 USES ........................ -
Page 6: Safety
TRIMAX Plus Safety This symbol appears in the instruction manual each time there is a safety warning concerning your safety, the safety of others or functionality of the machine. All safety instructions must be observed and made available to all users of the machine. -
Page 7: Assembly
TRIMAX Plus • Clean hydraulic connections thoroughly before reconnecting. When con- necting hydraulic hoses to tractor hydraulics, ensure they are not under pressure. • Bleed the hydraulic system thoroughly after any repairs. • Check hydraulic hoses regularly for defects such as cracks, splits, crimps, wear or breaks. -
Page 8: Correct Use
TRIMAX Plus • When transporting, ensure permitted total weight for tractor is not ex- ceeded and that loading on tractor front axle is not less than 20% of trac- tor net weight. If this is the case, use weights on tractor front. Correct use •... -
Page 9: Technical Data
TRIMAX Plus Technical data TRIMAX Plus Size (cm) HP (recommended) Gross weight kg: 2050 3000 Number of tines Number of plates Accessories Bogie packs Delivery TRIMAX Plus is delivered complete on a trailer. The machine can be partially disassembled if exported. If lifting TRIMAX Plus, we recommend attaching straps to the centre section to keep the machine balanced. -
Page 10: How To Use This Manual
TRIMAX Plus How to use this manual The sequence of subject matter in this manual can seem illogical. Please re- fer to the table of contents for page numbers for individual items. The manual is divided into main sections: • Safety •... -
Page 11: Uses
TRIMAX Plus Uses TRIMAX Plus is a heavy duty grubber used to breakdown stubble and plant residue. Because of the high clearance and wide tine spacing, large amounts of plant waste can be broken down. Fig. 1 TRIMAX Plus is designed to achieve full surface penetration, to disrupt the growth of crops and weeds. - Page 12 TRIMAX Plus TRIMAX Plus is ideal for working the upper soil layer where plant residue decomposition is great- est. That's why TRIMAX Plus is an effective element of a strategy for reduced soil working, as it can give full penetration of the soil surface with uniform mixing of plant residue and soil microor- ganisms in a single pass.
-
Page 13: Connecting And Disconnecting
TRIMAX Plus Connecting and disconnecting Connecting Fig. 2 Attach lift arms first, followed by top bar. Adjust top bar until the frame is horizontal. • Remember to secure with a split pin. Hydraulics Depending on TRIMAX Plus model, different hydraulic outlets on the tractor are used. -
Page 14: Disconnection
TRIMAX Plus Disconnection Fig. 3 TRIMAX Plus must be disconnect- ed when fully extended. Remember to depressurise hoses before disconnecting them. Check the cock for the hydraulic stone removers is closed (see fig. 8). Place machine on a firm, level surface. Detach top bar and lift arms. Page 14... -
Page 15: Setting Up
TRIMAX Plus Setting up The machine is supplied with factory settings, but fine adjustment will always be required before use. Numerous adjustment options make the machine more flexible and ensure maximum use. Depth Working depth is controlled by the rear trailing bar with T-rings. Tine depth can be adjusted using pins the bars (A). - Page 16 TRIMAX Plus Fig. 5 Move trailing bar arms to holes (A) for a very deep setting. Always lower the machine to the ground and support the trailing bar before detaching. Shallow/surface setting Move the pins down for a shallow/surface setting. This raises the soil frame, positioning the tines for a shallower depth.
-
Page 17: Hydraulic Stone Protector
TRIMAX Plus Hydraulic stone protector Fig. 7 Adjust pressure to approx. 70 bar. Pressure can be checked on the manometer (A). Close ball cock (B) after adjustment, and disconnect the hydraulic hose from the tractor. Failure to close the ball cock will mean that the oil will slowly seep back to the tractor, draining pres- sure from the system if the tractor... -
Page 18: Operation
TRIMAX Plus Operation Correct operation is vital for optimum use. This applies to working in the field and for safety. Always ensure you are fully familiar with all safety as- pects of the machine. We recommend running at a slight angle to sowing direction for the best re- sult. -
Page 19: Operating Speed
TRIMAX Plus Operating speed A speed of between 8 and 12 kph is required for optimal soil cultivation. But always operate according to the conditions! Please note that wear increases significantly at higher speeds. There is a risk of loss and damage if operating at excessive speeds in unfavourable condi- tions. -
Page 20: Accessories
TRIMAX Plus Accessories TRIMAX Plus can be fitted with a range of accessories to suit requirements. Bogie T-ring Fig. 9 The bogie T-ring compacter (A) is fitted instead of a single-T-ring compacter for extra soil cultivation. The compacter is designed as a bo- gie roller with a diameter of 600 mm on each row. -
Page 21: Maintenance
TRIMAX Plus Maintenance Good maintenance ensures long service life and optimum use. Grease nip- ples are fitted where wear is heaviest. Tighten all screw connections after first working day. Check all split pins and bolts to avoid mechanical failure. Check hydraulic system for leaks. Never perform maintenance unless the machine is lowered onto the ground, the tractor brake is applied, the engine switched off and ignition key removed to prevent accidental start and injury. -
Page 22: Hydraulics
TRIMAX Plus Hydraulics Check all hydraulic hoses for wear or cracks. Check all hoses for crimping. Lubricate exposed rams with oil or pressure-resistant grease to avoid rust forming when storing for long periods. Remember to remove before use. Plate hubs Tighten plate hubs once annually or as required. -
Page 23: Replacement Andrepairs
TRIMAX Plus Replacement andrepairs Safety is vital for all repair work on the machine. Always observe the follow- ing points, plus those under Safety First in the instruction manual. Never perform maintenance unless the machine is lowered onto the ground, the tractor brake is applied, the engine switched off and ignition key removed to prevent accidental start and injury. - Page 24 TRIMAX Plus 2. Remove split pins and pins. Cylinder will now be free. 3. Fit new or repaired cylinder. Check pin locks into place, secure pins with split pins. 4. Connect hoses. Check there is no danger of hoses being ripped or crimped after fitting.
- Page 25 TRIMAX Plus 4. Fit collar shoe (pos. 2) and screw on lock nut, secure with Loctite. Ensure that thread is absolutely clean and free of oil or other impurities before applying Loctite. Do not fill with oil for 12 hours after use of Loctite. 5.
-
Page 26: Replacing Shaft, Bearings And T-Rings
TRIMAX Plus Replacing gasket set for hydraulic stone protector Fig. 15 1. Drain oil from cylinder by moving ram carefully backwards and forwards. 2. Extend ram to centre position. Unscrew upper part (pos. 3) from cylinder tube (pos. 1). Use special tool to remove upper part. If upper part is stuck, heat front of sleeve. -
Page 27: Replacing Wear Parts
TRIMAX Plus Fig. 16 1 Remove bearing bolts. 2 Roll T-ring shaft away from frame. 3 Remove castle nut on shaft end and bearing screws. 4 Pull T-ring off shaft. 5 Reverse order to reassemb- 6 Apply Loctite to bearing screws. -
Page 28: Scrapping
TRIMAX Plus Scrapping Depressurise hydraulic system. Beware of the weight of any given part when removing or disassembling. All parts must be supported or lifted to avoid danger of falling. Disconnect hydraulic hoses and cylinders and drain oil. Collect oil in contain- er to avoid pollution. -
Page 29: Spare Parts
TRIMAX Plus Spare parts Page 29...
Need help?
Do you have a question about the TRIMAX Plus 300 and is the answer not in the manual?
Questions and answers