
Related Manuals for Avigilon VMA-AIA1-CG1


Summary of Contents for Avigilon VMA-AIA1-CG1
- Page 1 User Guide Avigilon Artificial Intelligence Appliance VMA-AIA1-CG1 and VMA-AIA1-CG2 (ACC 6.10 and later with firmware releases 3.2 and later)
- Page 2 (2) is responsible for your use of, or reliance on, the information. Avigilon Corporation shall not be responsible for any losses or damages (including consequential damages) caused by reliance on the information presented herein.
-
Page 3: Table Of Contents
Table of Contents Introduction Before You Start Overview Front View Back View System Recommendations Uninterruptible Power Supply Camera Frame Rate Web Browser Networking Passwords Certificate Management Setting Up the AI Appliance Package Contents Install the Sliding Rack Rails and Cable Management Arm Install the Bezel Connecting Cables Starting the AI Appliance for the First Time... - Page 4 Providing Device Logs for Support LED Indicators Diagnostic Indicators Power Status Indicators Restore the AI Appliance to Factory Default Settings Troubleshooting Accessing the Server Management page from a Web Browser Cannot Discover the Device Network Configuration Monitoring System Health For More Information...
-
Page 5: Introduction
Search™ on existing multi-megapixel IP cameras that are not already analytic-enabled when paired with the Avigilon Control Center software (ACC). The AI Appliance features: Avigilon's self-learning video analytics with no manual calibration, as available on Avigilon analytic cameras. Pre-integrated with Avigilon Control Center High Definition Network Video Management System for simple setup. -
Page 6: Overview
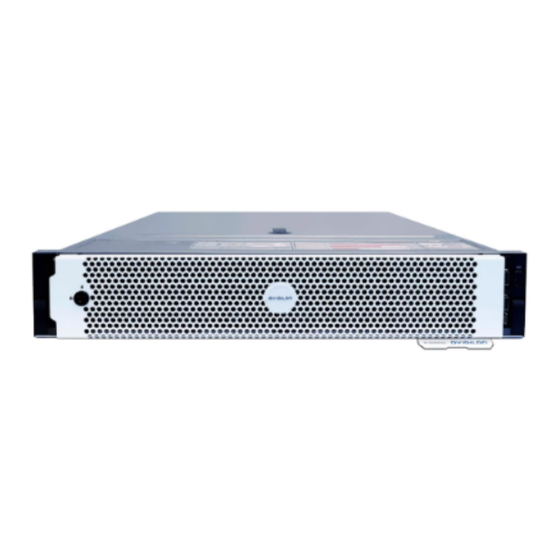
Overview Front View 1. Diagnostic indicators Provides information about system operations. For more information, see LED Indicators on page 22. 2. Bezel Must be installed on site. 3. Bezel Lock Protects against unauthorized physical access. 4. Power button Controls the power supply to the appliance. 5. -
Page 7: Back View
Back View 1. Out-of-Band Management (OOBM) connector Accepts an OOBM RJ-45 connection. 2. Serial connector Accepts connections to serial devices. 3. Video connector Accepts a VGA monitor connection.Accepts a VGA monitor connection. Usable for interacting with the BIOS/iDRAC firmware only while the appliance is powering on. 4. - Page 8 the AI Appliance. Supported web browsers for Windows®, Mac or mobile devices include: Mozilla Firefox® Google Chrome™ Microsoft Edge™ Safari® Chrome on Android™ Safari on Apple® iOS Note: Your web browser must be configured to accept cookies or the Server Management page will not function correctly.
-
Page 9: Networking
Networking When locating where to install the AI Appliance in a multi-server deployment, consider the following items: Before connecting the AI Appliance, install the latest ACC Client software on the ACC Client PC. At initial setup time, the AI Appliance must be on the same network as the ACC Client workstation used to used to set it up. -
Page 10: Setting Up The Ai Appliance
Setting Up the AI Appliance Package Contents Ensure the package contains the following: AI Appliance Rack sliding rail assembly kit Cable management arm assembly kit Bezel and key Power cables (may be provided in a separate box) Install the Sliding Rack Rails and Cable Management Arm If the AI Appliance will be mounted in a server rack, install the Sliding Rack Rails and the Cable Management Arm (CMA) provided in the appliance package. - Page 11 1. Connect an Ethernet port on the AI Appliance to your local network. Note: It is recommended that the AI Appliance follow a similar network configuration to the site NVRs. You can connect up to 4 Ethernet cables. 2. Connect a power cable to each power supply at the back of the AI Appliance. Connecting Cables...
-
Page 12: Starting The Ai Appliance For The First Time
Starting the AI Appliance for the First Time If you are adding the AI Appliance to an existing site and you use DHCP to automatically assign IP addresses to all the devices in your security network, you can use the ACC Client software on a workstation with network connectivity to the AI Appliance to discover it. -
Page 13: Connect To The Ai Appliance (Using Static Ip)
Connect to the AI Appliance (using Static IP) You must use this procedure if static IP addresses are assigned to all the devices in your security network. After powering on the AI Appliance: 1. Discover the appliance. Use File Explorer on a Windows computer or Finder® on a Macintosh computer. -
Page 14: Configuring The Ai Appliance For The First Time
Trusted certificates are used by the device to authenticate other servers and clients to which it needs to connect, and to secure those connections. Avigilon provides a self-signed Web Certificate to secure the connection to Server Management and to the WebEndpoint service, and a set of system-level signed certificates from well-known trusted Certificate Authorities (CAs) to ensure secure connections to any needed servers. -
Page 15: Replace The Web Certificate
The Debian Project. The certificates allow SSL-based applications to check for the authenticity of SSL connections. Avigilon can neither confirm nor deny whether the certificate authorities whose certificates are included with this appliance have in any way been audited for trustworthiness or RFC 3647 compliance. Full responsibility to assess them belongs to the local system administrator. -
Page 16: Upload A Trusted Ca Certificate
a. Open Server Management, click Device in the navigation bar, and scroll down to the Certificates pane. b. On the Web Certificate tab, click the Certificate Signing Request button. c. Fill in the standard CSR form with the information defined by the PKI you are using and click Generate. -
Page 17: Upgrade The Firmware
Refer to the procedure for upgrading servers in a site in the Help files provided with Avigilon Cloud Services. You can use Remote Site Upgrade from an ACC Client connected to all of the AI Appliances in a site at the same time. - Page 18 1. Navigate to the Device panel. If necessary, scroll to show the Upgrade Firmware pane. 2. In the Upgrade Firmware pane, click on Drop '.fp' file here or click to upload and navigate to the location where the firmware package (.fp) file was saved. 3.
-
Page 19: Adding The Ai Appliance To A Site
Adding the AI Appliance to a Site After starting the AI Appliance for the first time, use the ACC Client software to add the AI Appliance to the site that is connected to the non-analytics cameras for whose feeds you want the appliance to provide analytics processing. -
Page 20: Using Server Management
For more information on backing up the site and server configurations, see the Help files provided with the ACC Client software, or the Avigilon ACC Client User Guide available from the Avigilon website. -
Page 21: Manage Acc Services
Use the Logs panel to view the Server Logs and System Logs panes and prepare log files requested by Avigilon Technical Support to help resolve an issue. Typically, Avigilon Technical Support assists you to access and filter the logs on this panel to isolate the logs Manage ACC Services... -
Page 22: Manage Device Settings
You then copy and paste the logs into a text file, save it and send it to Avigilon Technical Support. By default, a log pane displays 100 warning messages from the logs. You can filter the logs to display the information that you need: 1. -
Page 23: Change The Ai Appliance Administrator Password
To... On the Setting Device panel card... Password Change the password for the Change the AI Appliance Administrator Password AI Appliance administrator. below. Upgrade Install the latest version of the Upgrade the Firmware on page 13. Firmware firmware on your device. Certificates See Manage the certificates used Manage Certificates on page 10. -
Page 24: Connect The Device To Cameras And Acc Client Users
DHCP to automatically use the existing NTP servers in the network. Manual to enter the address of NTP servers in the Servers list. Controls to add and delete addresses in the list, and reorder them are activated. Off if you do not use an NTP server. Note: The default set of NTP servers is always present in the Servers list. -
Page 25: Providing Device Logs For Support
Typically, Avigilon Technical Support assists you to access and filter the logs on this panel to isolate the logs that they require. You then copy and paste the logs into a text file, save it and send it to Avigilon Technical Support. -
Page 26: Led Indicators
LED Indicators The following tables describe what the LEDs on the AI Appliance indicate. Diagnostic Indicators The diagnostic indicators on the front panel highlight system issues during system startup. Note: The diagnostic indicators only light-up when the appliance is powered. LED Indicator Description Not used. - Page 27 Additional information about the power supply is provided by the power status indicator on the power supplies at the back. The following table describes what the LEDs indicate: Figure 1: (1) The power status indicator. LED Indicator Description Power is not connected. Green Power is supplied.
-
Page 28: Restore The Ai Appliance To Factory Default Settings
2. Press the power button on the front of the appliance to powercycle the appliance and start the reboot process. The Avigilon logo and a progress bar appear on the monitor while the BIOS is loading. 3. When the progress bar indicates the BIOS loading is nearly complete, press and hold down the f key on the keyboard. -
Page 29: Troubleshooting
Troubleshooting Accessing the Server Management page from a Web Browser There may be cases where you want to access the Server Management page without using the ACC Client. You can access the Server Management page from any Windows®, Apple, or mobile device using most popular web browsers. -
Page 30: Network Configuration
You can monitor the health of the system components in the Site Health in the ACC Client software. See the Help files provided with the ACC Client software, or the Avigilon ACC Client User Guide available from the Avigilon website for more information. -
Page 31: For More Information
For More Information For additional product documentation and software and firmware upgrades, visit avigilon.com/support. Technical Support Contact Avigilon Technical Support at avigilon.com/contact. For More Information...
Need help?
Do you have a question about the VMA-AIA1-CG1 and is the answer not in the manual?
Questions and answers