
Related Manuals for Avigilon ACC VMA-ENVR1-8P4


Summary of Contents for Avigilon ACC VMA-ENVR1-8P4
- Page 1 User Guide Avigilon ACC™ ES 8 Port Appliance VMA-ENVR1-8P4 VMA-ENVR1-8P8 VMA-ENVR1-8P8B...
- Page 2 Do not block ventilation openings located on the device enclosure as they are designed to keep the system cool while running. Install or place this product in an area where there is ample air circulation. Do not insert anything into the device ventilation openings. Use only accessories recommended by Avigilon. Keep these safety instructions.
- Page 3 The battery isn't user replaceable or service replaceable. Changes or modifications made to this equipment not expressly approved by Avigilon Corporation or parties authorized by Avigilon Corporation could void the warranty and affect the user’s ability to operate this equipment.
- Page 4 Disposal and Recycling Information When this product has reached the end of its useful life, please dispose of it according to your local environmental laws and guidelines. Risk of fire, explosion, and burns. Do not disassemble, crush, heat above 100 °C (212 °F), or incinerate. European Union: This symbol means that according to local laws and regulations your product should be disposed of separately from household waste.
- Page 5 The absence of the symbols ™ and ® in proximity to each trademark in this document or at all is not a disclaimer of ownership of the related trademark. Avigilon Corporation protects its innovations with patents issued in the United States of America and other jurisdictions worldwide (see avigilon.com/patents).
-
Page 6: Table Of Contents
Connect the Device to Cameras and ACC Client Users Assigning a PoE Power Budget Providing Device Logs for Support Installing the ACC Client Activate the ACC Software and Connect to Avigilon Cloud Services Activate ACC Software and Feature Licenses Connect to Avigilon Cloud Services Activating a License... - Page 7 Offline Activation Reactivating a License Starting Up and Shutting Down the ACC Client Software Connecting to External Devices LED Indicators Front Panel LEDs Back Panel LEDs Budgeting PoE Power Manage Certificates Replace the Web Certificate Upload a Trusted CA Certificate Upgrade the Firmware Using the Reset Button Restarting the System Restoring Factory Default Settings...
-
Page 8: Introduction
Local video content storage that can be accessed remotely. The ACC ES 8 Port Appliance factory default settings allow you to use the recorder immediately after installation, but if you have special requirements, you can use the Avigilon Control Center software or the web interface to customize your settings. -
Page 9: Overview
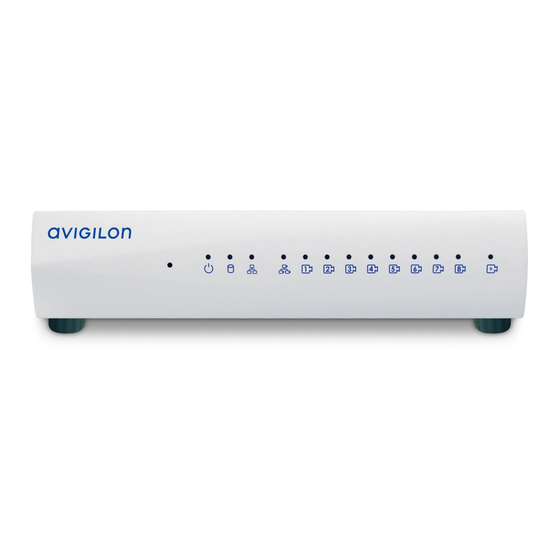
Overview Front View 1. Reset button Use this button to physically restart the appliance or perform a factory reset. 2. Status LED Provides information about daily operations. For more information, see LED Indicators on page 25. Rear View 1. I/O connector Provides connections to external input/output devices. For more information, see Connecting to External Devices on page 23. -
Page 10: System Requirements
video. 5. Power connector Accepts power to the appliance. System Requirements Administrative settings for the appliance are managed through a web interface, accessed from any Windows, Mac or mobile device using any of the following web browsers: Mozilla Firefox browser version 3.6 or later Google Chrome browser 8.0 or later Microsoft Edge browser 25 or later Safari 5.0 or later... -
Page 11: Supported Network Configurations
Supported Network Configurations Note: The Camera Uplink Port does not support dynamically switching DHCP servers. Network Supported IP Configurations Camera Web Connections Interface Notes Corporate LAN Camera LAN Access Uplink Uplink Corporate Static or DHCP Unconnected Camera LAN Uplink and LAN Uplink assigned (leave as DHCP) -
Page 12: Installing And Connecting The Hardware
Installing and Connecting the Hardware Install the ACC ES 8 Port Appliance in a location free of dust and particles, vibration, and within the specified operating temperature range. Otherwise any issues that arise will not be covered by the warranty. The ACC ES 8 Port Appliance can be installed as a stand-alone device, mounted on a wall using the supplied mounting brackets, or kept in a server rack using the optional Rack Mount Shelf With Sliding Rails accessory kit. -
Page 13: Starting The Acc Es 8 Port Appliance Forthe First Time
Starting the ACC ES 8 Port Appliance forthe First Time After powering on the ACC ES 8 Port Appliance, complete the following procedure: 1. Connect a port on the appliance to the local network with an Ethernet cable. 2. Check that the appliance LED indicators display the correct status. See LED Indicators on page 25 more information. - Page 14 6. When you are prompted by the Server Management page, enter a new password for the administrator username. The Strength meter measures the complexity of your password: Red is too simple, yellow is reasonably complex, and green is complex. Complexity measures the difficulty to discover your password, not how secure your password is.
-
Page 15: Troubleshooting
Troubleshooting Accessing the Server Management page from a Web Browser There may be cases where you want to access the Server Management page without using the ACC Client. You can access the Server Management page from any Windows®, Apple, or mobile device using most popular web browsers. -
Page 16: Network Configuration
You can monitor the health of the system components in the Site Health in the ACC Client software. See the Help files provided with the ACC Client software, or the Avigilon ACC Client User Guide available from the Avigilon website for more information. -
Page 17: Using Server Management
For more information on backing up the site and server configurations, see the Help files provided with the ACC Client software, or the Avigilon ACC Client User Guide available from the Avigilon website. -
Page 18: Viewing Poe Port Status
a. Open a web browser from a network workstation with network access to the device. b. Enter its IP address or hostname into the web browser to open the device sign-in page: https://<Device IP address >|<Device hostname>/ For example: https://169.254.100.100/ where 169.254.100.100 is the IP address configured in the Device panel. -
Page 19: Manage Acc Services
Manage ACC Services On the Server panel use the: General pane: To... Do this... Shut down all the services before you shut Click Stop. down the device. Start up all the services after they have been Click Start. shut down. Reset the ACC ES 8 Port Appliance Click Reset Format the storage drive. -
Page 20: Provide Server Logs And System Logs For Support
Typically, Avigilon Technical Support assists you to access and filter the logs on this panel to isolate the logs that they require. You then copy and paste the logs into a text file, save it and send it to Avigilon Technical Support. -
Page 21: Change The Acc Es 8 Port Appliance Administrator Password
To... On the Setting Device panel card... Hostname Replace the default server name Change the Hostname. The default hostname is the same as the server with a user-friendly hostname name. The server name is in the form <Model>- <Serial Number>. Time Set the time zone Specify the Time Zone and identify the time source... -
Page 22: Manage Storage
2. Select whether you want to keep synchronized time through a Network Time Protocol (NTP) server (recommended) in the NTP field. Tip: To synchronize time with ONVIF devices (that is, non-Avigilon cameras), you can connect to port 123 on the ACC ES 8 Port Appliance to use it as an NTP server. -
Page 23: Connect The Device To Cameras And Acc Client Users
Connect the Device to Cameras and ACC Client Users On the Network panel, you can change network connections of the device. Two network connections are supported: one for a corporate network and one for a camera network. Note: The corporate network and the camera network must be on different IP subnets. The corporate network is the network that typically provides users with access to the device. - Page 24 Tip: If you are using a midspan PoE power injector for cameras that require high power PoE, you should set that PoE port to Off. To open the PoE panel, either: Click on the PoE status panel on Server Management launch page. Click PoE from the Dashboard navigation bar.
-
Page 25: Providing Device Logs For Support
Typically, Avigilon Technical Support assists you to access and filter the logs on this panel to isolate the logs that they require. You then copy and paste the logs into a text file, save it and send it to Avigilon Technical Support. -
Page 26: Installing The Acc Client
Installing the ACC Client If you are installing the first Avigilon appliance in your security network, you can install the ACC Client software on a network workstation or on the computer you are using to access the Server Management page. Otherwise, add the appliance as a new site in your security network, or merge it into an existing site, using the ACC Client software on a network workstation. -
Page 27: Connect To Avigilon Cloud Services
You can start to back up the system settings for your new site in the ACC Client software after it is configured. These settings include the ACC password, and the settings for the camera connections. For more information on backing up the site and server configurations, see the Avigilon ACC Client User Guide. Activating a License Once your license is activated, you can immediately use the new licensed features. -
Page 28: Offline Activation
3. Click Upload. A capabilityResponse.bin file should download automatically. If not, allow the download to occur when you are prompted. 4. Complete the product registration page to receive product updates from Avigilon. 5. Copy the .bin file to a computer running the ACC Client software. -
Page 29: Starting Up And Shutting Down The Acc Client Software
To open the ACC Client software: Double-click the desktop shortcut icon In the Start menu, select All Programs or All Apps > Avigilon > Avigilon Control Center Client. To close the ACC Client software: 1. In the top-right corner, click 2. -
Page 30: Connecting To External Devices
Connecting to External Devices External devices are connected to the appliance through the I/O terminal. The pinout for the I/O terminal is shown in the following diagram: Figure 1: ACC ES 8 Port Appliance I/O pins are numbered as shown in the image above. Figure 2: The diagram above shows the pinouts for the I/O terminal. - Page 31 Function Description Alarm Inputs — Active-Low inputs. To activate, connect the Input to the Ground pin (GND). To deactivate, leave disconnected. OUT1 Relay Outputs — Form-A dry contact outputs. When active, terminals are connected. When inactive, terminals are disconnected. OUT2 Maximum load is 30 V, 0.5 A. OUT3 OUT4 Connecting to External Devices...
-
Page 32: Led Indicators
LED Indicators The following list describes what the LEDs on the ACC ES 8 Port Appliance indicate. Front Panel LEDs Icons LED Status Description Green Device is powered and running. Orange Device is restarting. Orange - blinking Factory restore button pressed. Green Hard disk drive is connected. Hard disk drive connection has an error. -
Page 33: Budgeting Poe Power
Budgeting PoE Power Advanced users can manually adjust the PoE power budget for each port to consistently accommodate the cameras needed. If you choose to manually adjust the PoE budget at each port, be aware that you must also account for potential power loss in the cable. -
Page 34: Manage Certificates
Trusted certificates are used by the device to authenticate other servers and clients to which it needs to connect, and to secure those connections. Avigilon provides a self-signed Web Certificate to secure the connection to Server Management and to the WebEndpoint service, and a set of system-level signed certificates from well-known trusted Certificate Authorities (CAs) to ensure secure connections to any needed servers. - Page 35 Important: When you reset the device to its factory settings (also known as a factory reset), you need to reload your custom certificate. Obtaining a new Web Certificate is a three-step process: 1. Send the certificate issuer used by your organization a Certificate Signing Request (CSR) and the issuer will return you a new certificate file and private key file (typically by email).
-
Page 36: Upload A Trusted Ca Certificate
4. On the Web Certificate tab, click on the name of the uploaded certificate to enable it. This also disables the previous certificate. Upload a Trusted CA Certificate Manage signed certificates from internal CAs deployed in your organization's internal servers from the User Certificate Authorities tab of the Certificates. -
Page 37: Upgrade The Firmware
Refer to the procedure for upgrading servers in a site in the Help files provided with Avigilon Cloud Services. You can use Remote Site Upgrade from an ACC Client connected to all of the ACC ES 8 Port Appliances in a site at the same time. - Page 38 Important: You can cancel a firmware upgrade that is in progress only during the upload and verification phase. Click Cancel upload before the file has uploaded. After the file is verified, the firmware upgrade automatically starts. The device will reboot several times during the upgrade.
-
Page 39: Using The Reset Button
Using the Reset Button The reset button is located at the front of the appliance and is the small unlabeled circle to the left of the System Status LED. For more information, see Front View on page 2 The reset button provides two functions: Restart the system —... - Page 40 1. Using a straightened paperclip or similar tool, gently press and hold the reset button. CAUTION — Do not apply excessive force. Inserting the tool too far will damage the recorder and void the warranty. 2. Do not release the button until the LED is orange and starts to blink.
-
Page 41: For More Information
For More Information For additional product documentation and software and firmware upgrades, visit avigilon.com/support. Technical Support Contact Avigilon Technical Support at avigilon.com/contact. For More Information... - Page 42 Limited Warranty Avigilon warranty terms for this product are provided at avigilon.com/warranty. For More Information...
Need help?
Do you have a question about the ACC VMA-ENVR1-8P4 and is the answer not in the manual?
Questions and answers