
Subscribe to Our Youtube Channel
Related Manuals for Avigilon VMA-AS1-16P


Summary of Contents for Avigilon VMA-AS1-16P
- Page 1 User Guide Avigilon™ HD Video Appliance Models: VMA-AS1-8P, VMA-AS1-16P and VMA-AS1-24P...
- Page 2 United States of America and other jurisdictions worldwide: avigilon.com/patents. Unless stated explicitly and in writing, no license is granted with respect to any copyright, industrial design, trademark, patent or other intellectual property rights of Avigilon Corporation or its licensors.
-
Page 3: Table Of Contents
Configuring a No DHCP Network Configuring an External DHCP Network Configuring the Avigilon Control Center Software Starting Up and Shutting Down the Avigilon Control Center Client Software Starting Up the Client Software Shutting Down the Client Software Logging Into and Out of a Site... -
Page 4: Introduction
A network switch to connect and power IP cameras. Built-in server and storage to run the Avigilon Control Center™ Server and retain recorded video content. Video ports to display live video and allow users to operate the Avigilon Control Center Client software directly from the appliance. -
Page 5: Configuring Windows Embedded Standard 7 Software
9. Select the network mode for the appliance. The recommended option is Work Network. Next, the Windows software restarts and applies your settings. Once restarted, you will need to license your Avigilon Control Center system. Configuring Windows Embedded Standard 7 Software... -
Page 6: Licensing The Avigilon Control Center (Acc)™ System
After the appliance restarts, the first screen you see is the Avigilon Control Center software license wizard. Other parts of the ACC system may start while you perform this procedure, but you will not be able to use any of the features until after license activation is complete. -
Page 7: Adding Licenses
If you choose to upgrade your existing license to a different edition, you will need to perform the licensing procedure again. In this case, you can access the Add License wizard from the Avigilon Control Center Server Admin Tool software. -
Page 8: Configuring The Network
Configuring the Network Depending on how you intend to use the HD Video Appliance, you may choose to configure the network switch component of the appliance differently. The three most typical network configurations are: 1. No DHCP server — the HD Video Appliance and the connected cameras will run as a self contained system without a DHCP server. -
Page 9: Configuring An External Dhcp Network
Example of no DHCP network connections on an 8 port HD Video Appliance. Avigilon cameras are able to assign IP addresses to themselves when a DHCP server is not available through Zero Configuration Networking (Zeroconf). The Avigilon Control Center software should automatically detect all connected cameras through the 169.254.1.0/16 subnet. - Page 10 Tip: If you are only going to connect Avigilon cameras to the appliance, you do not need to set up a DHCP server. For more information, see Configuring a No DHCP Network on page 5.
- Page 11 The default IP address of the switch component is 192.168.50.1. Do not assign this address for the appliance. You can use 192.168.50.2 or higher. It is recommended that you only change the last digit. Figure 5: The Internet Protocol Properties dialog box a.
- Page 12 NOTE: The U1 port on the HD Video Appliance is not part of this DHCP setting. Only the PoE camera ports broadcast DHCP. 8. Connect Avigilon cameras and other network devices to the numbered ports. Each connected device is automatically assigned an IP address by the appliance.
- Page 13 U2 port. The U2 port is separate from the numbered camera ports, so it will not interfere with video recording. After you've made the required network and camera connections, you can configure the Avigilon Control Center system. See Configuring the Avigilon Control Center Software on page 11.
-
Page 14: Configuring The Avigilon Control Center Software
After you set up and license the HD Video ApplianceNVR WorkstationRemote Monitoring Workstation, it is recommended that you complete the following steps to configure the ACC system. For more information about any of the following procedures, see the help files provided with the Avigilon Control Center Client software. -
Page 15: Shutting Down The Client Software
Shutting Down the Client Software 1. In the top-right corner of the Client software, select > Exit. 2. When the confirmation dialog box appears, click Yes. Logging Into and Out of a Site After you start the Client software, you are immediately asked to log in to a site. By default, the HD Video ApplianceACC ES Analytics ApplianceNVR Workstation is automatically added to the system as a server within a site of the same name. -
Page 16: Changing The Administrator Password
To avoid this issue, it is highly recommended that you create at least one other administrator level user as a backup. Connecting Cameras to the Avigilon Control Center System After all the cameras in your system have been physically connected to the HD Video ApplianceACC ES Analytics Appliance, you need to connect the cameras to the ACC system so that video can be recorded and indexed for search. -
Page 17: Setting The Recording Schedule
The License Priority: setting decides the order that devices are connected to the server. The server will try to connect cameras with a higher priority before cameras with lower priority. If the server does not have enough camera channel licenses, low priority devices may not be connected. A camera channel license is only used when the device actually connects to the server. -
Page 18: Setting Up A Weekly Recording Schedule
1. In the server Setup tab, click . The Recording Schedule dialog box is displayed. 2. Click Add Template below the Templates: list. 3. Enter a name for the New Template. 4. Click the Set Area button, then click or drag the cursor across the Recording Mode: timeline to set the types of events that the cameras will record throughout the day. - Page 19 For JPEG2000 or JPEG compression cameras, data aging is available at three rates: High Bandwidth keeps recordings at their original quality. Half Image Rate discards half of the recorded data to make room for new recordings. Quarter Image Rate keeps 1/4 of the original recorded data so that you can still see older video. For H.264 cameras that support data aging, data aging is available at two rates: High Bandwidth keeps the original high quality video and the secondary stream of low resolution video.
-
Page 20: Adding Users And Groups
Adding Users and Groups If there will be other people using the system, you may want to add them as separate users rather than giving them access through the default administrator account. Before you can add individual users, you will need to add permission groups that define what users have access to. -
Page 21: Adding Users
Repeat this procedure to add all the users that are required. Advanced Settings After you've set up all the required settings in the Avigilon Control Center Client software, the system can start running. In the following list are some advanced settings you can use to further customize your system. See the application Help files for details about how to configure each setting. - Page 22 If the Gateway software is not set up, you cannot access video outside of your local network. Install the Avigilon Control Center Mobile app on your mobile device so that you can monitor live and recorded video anywhere.
-
Page 23: Led Indicators
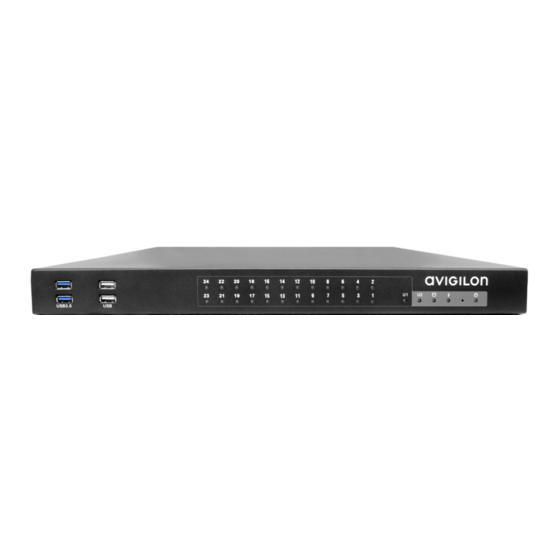
LED Indicators The following list describes what the LEDs on the front of each HD Video Appliance indicate. Appliance Status — The LED is on if the appliance is powered and running. 1 to 8/16/24 — The connection status of each camera that is connected to the appliance. Orange —... -
Page 24: Restarting The Operating System
Restarting the Operating System If the operating system ever freezes or displays a fatal system error, you can restart the operating system by using the reset switch on the front of the appliance. NOTE: When you use the reset switch, the appliance must be powered. The operating system reset will not affect the switch component or the connected cameras. -
Page 25: Replacing A Hard Drive
Replacing a Hard Drive NOTE: 16 and 24 port models only. This procedure is for replacing the storage drives. If you experience an operating drive failure or any drive issue with the 8 port model, contact Avigilon Technical Support immediately for assistance. - Page 26 4. Standing before the front of the appliance, pull the appliance cover towards you until it slides off. Figure 10: Pull the cover off the HD Video Appliance from the front. Once the cover has been removed, you will see the four hard drives at the front. The hard drives are numbered Disk 1 to 4 from left to right.
- Page 27 Important: While the RAID is being rebuilt, do not reconnect cameras, open other applications or allow other network instances of the Avigilon Control Center Client software to connect to the appliance. If you try to resume normal operations while the RAID rebuilds, you may lose recorded data and cause further issues in the appliance.
-
Page 28: Limited Warranty And Technical Support
Limited Warranty and Technical Support Avigilon warranty terms for this product is provided at avigilon.com/warranty. Warranty service and technical support can be obtained by contacting Avigilon Technical Support: avigilon.com/contact-us/. Limited Warranty and Technical Support...
Need help?
Do you have a question about the VMA-AS1-16P and is the answer not in the manual?
Questions and answers