
Subscribe to Our Youtube Channel
Related Manuals for Avigilon HD-NVR4-PRM-64TB


Summary of Contents for Avigilon HD-NVR4-PRM-64TB
- Page 1 User Manual Avigilon HD Network Video Recorder HD-NVR4-PRM-64TB, HD-NVR4-PRM-96TB, HD-NVR4-PRM- 128TB and HD-NVR4-PRM-157TB...
- Page 2 Avigilon Corporation protects its innovations with patents issued in the United States of America and other jurisdictions worldwide (see avigilon.com/patents). Unless stated explicitly and in writing, no license is granted with respect to any copyright, industrial design, trademark, patent or other intellectual property rights of Avigilon Corporation or its licensors.
-
Page 3: Table Of Contents
Logging In to and Out of a Site Logging In Logging Out Changing the Site Administrator Password Connecting Cameras to the Avigilon Control Center Software Setting the Recording Schedule Creating a Recording Template Setting Up a Weekly Recording Schedule Setting Data Aging... - Page 4 Checking System Health Replacing a Hard Drive Blank Replacing Hard Drives Replacing Front or Back Hard Drives Replacing Center Hard Drives LED Indicators Diagnostic Indicators Power Status Indicators Network Link Status Indicators Hard Drive RAID Status Indicators Specifications...
-
Page 5: Introduction
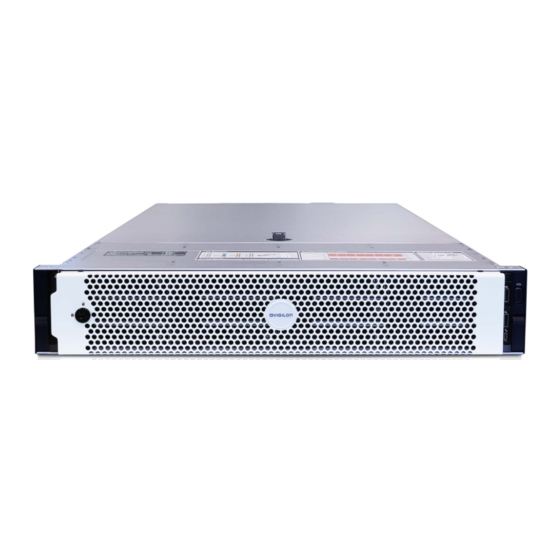
Introduction The Avigilon HD Network Video Recorder is preloaded with the Avigilon Control Center software and is configured for maximum performance and reliability. The HD Network Video Recorder can be easily integrated into any existing Avigilon surveillance system, or act as the base of a new site. -
Page 6: Back View
6. Information tag Provides the product service details and support information. Back View 1. Out-of-Band Management (OOBM) connector Accepts an OOBM RJ-45 connection. 2. Serial connector Accepts connections to serial devices. 3. Video connector Accepts a VGA monitor connection. 4. USB connectors Accepts USB connections to external devices. -
Page 7: Installation
Installation Package Contents Ensure the package contains the following: Avigilon HD Network Video Recorder Rack sliding rail assembly kit Cable management arm assembly kit Bezel and key Power cables (may be provided in a separate box) Installing the Rack Rails and Cable Management Arm If the recorder will be kept in a server rack, install the Rack Sliding Rails and the Cable Management Arm provided in the recorder package. -
Page 8: Logging Into Windows Server For The First Time
1. Align and insert the right end of the bezel until it clicks into place. 2. Push the left end of the bezel into the front of the unit until it clicks into place. 3. Use the provided key to lock the bezel. Logging into Windows Server for the First Time After the recorder powers up, you will need to configure the Windows operating system for the first time Logging into Windows Server for the First Time... - Page 9 NOTE: User must click Accept after reviewing the terms otherwise the system will not be configured properly. 9. The Avigilon Control Center Software will start running automatically and the NVR Analytics Kit will be configured. 10. Once the setup procedure is complete, the system will restart.
-
Page 10: Activating The Avigilon Control Center™ License
Proceed to activate the license for the Avigilon Control Center software on your HD Network Video Recorder. Activating the Avigilon Control Center™ License Downgrading to the ACC 5 Software: The ACC 6 software is pre-installed on the HD Network Video Recorder. -
Page 11: Modifying Licenses
ACC 5 Client ACC 5 Player ACC 5 Gateway 5. To activate your license, see the Avigilon Control Center Server User Guide for the ACC 5 software, available on http://avigilon.com. Troubleshooting Installation—Networking By default, the HD Network Video Recorder acquires an IP address on the network through DHCP. If you need to set up the recorder to use a static IP address or any specific network configuration, see the Windows Help and Support files for more information. -
Page 12: Configuring The Avigilon Control Center Software
Starting Up the Client Software Perform one of the following: In the Start menu, select All Programs or All Apps > Avigilon > Avigilon Control Center Client. Double-click desktop shortcut icon. When you are prompted, log in to your site. You can only access cameras and video after you log in. -
Page 13: Logging In
Logging In 1. Open the Site Login tab. The Site Login tab is automatically displayed if you are launching the Client software for the first time. To manually access the Site Login tab, do one of the following: From the top-right corner of the window, select >... -
Page 14: Changing The Site Administrator Password
To avoid this issue, it is highly recommended that you create at least one other site administrator level user as a backup. Connecting Cameras to the Avigilon Control Center Software After all the cameras in your system have been physically connected to the network, you need to connect the cameras to the ACC software so that video can be recorded and indexed for search. -
Page 15: Setting The Recording Schedule
4. If you are connecting a third-party device, you may choose to connect the device by its native driver. In the Device Type: drop-down list, select the device's brand name. If there is only one option in the drop- down list, the system only supports one type of driver from the device. 5. -
Page 16: Setting Up A Weekly Recording Schedule
1. In the server Setup tab, click . The Recording Schedule dialog box is displayed. 2. Click Add Template below the Templates: list. 3. Enter a name for the New Template. 4. Click the Set Area button, then click or drag the cursor across the Recording Mode: timeline to set the types of events that the cameras will record throughout the day. - Page 17 The amount of data aging that is available depends on the camera you have connected to your system: For JPEG2000 or JPEG compression cameras, data aging is available at three rates: High Bandwidth keeps recordings at their original quality. Half Image Rate discards half of the recorded data to make room for new recordings. Quarter Image Rate keeps 1/4 of the original recorded data so that you can still see older video.
-
Page 18: Adding Users And Groups
Adding Users and Groups If there will be other people using the system, you may want to add them as separate users rather than giving them access through the default administrator account. Before you can add individual users, you will need to add permission groups that define what users have access to. -
Page 19: Adding Users
5. In the Login Timeout area, select the Enable login timeout check box to set the maximum amount of time the Avigilon Control Center Client software can be idle before the user is automatically logged out of the application. -
Page 20: Advanced Settings
7. In the Password area, complete the following fields: Password: — enter a password for the user. Confirm Password: — re-enter the password. Strength: — indicates the strength of the password. The strength is defined by the group the user is assigned to. - Page 21 Alarms tab and in the ACC Mobile App. Self-Learning Video Analytics If you have an Avigilon self-learning video analytics device, use the Analytic Events dialog box to configure classified object motion detection or UMD. Once configured, you can receive events, trigger alarms, define rules, and record video when classified object motion requires your attention.
-
Page 22: Advanced Features
Advanced Features Checking System Health The Server Administrator software is pre-installed on the recorder. The software provides information about the recorder’s system operation status, and gives you remote access to the recorder for recovery operations. If one of the LED indicators on the recorder is flashing an error warning, the Server Administrator will display details about the problem. - Page 23 If one or two hard drives fail, there is enough information on the other hard drives for the recorder to continue recording video. Depending on the recorder model, there may be hard drive blanks at the front of the recorder. You can replace the blanks with hard drives as required.
-
Page 24: Replacing Hard Drives
Replacing Hard Drives The operating system and the Avigilon Control Center software are mirrored on two hard drives at the back of the recorder. If one of the hard drives fail, you can replace the failed drive while the recorder continues to run from the other. -
Page 25: Replacing Front Or Back Hard Drives
Replacing Front or Back Hard Drives 1. Locate the failed hard drive at the front or back of the recorder. 2. Press the release button on the front left of the hard drive. 3. When the handle is released, pull the hard drive out of the recorder. 4. - Page 26 1. At the top of the recorder, unlock the latch release then lift and rotate the latch towards the back of the recorder. The cover slides back and is released from the recorder body. 2. Hold the cover from both sides and lift it off the recorder. 3.
- Page 27 10. Place the new hard drive into the tray and push the handle down until the hard drive clicks into place. 11. Fold down the handles on the hard drive tray. Close and lock the recorder cover. 12. Reconnect all the cables to the recorder and power it. After the operating system starts up, the recorder immediately starts rebuilding the hard drive.
-
Page 28: Led Indicators
LED Indicators Diagnostic Indicators The diagnostic indicators on the front panel highlight system issues during system startup. LED Indicator Description Blinks orange — the hard drive is experiencing an error. Hard drive Blinks orange — there is a thermal error. Errors include: temperature out of range fan failure... -
Page 29: Network Link Status Indicators
Figure 3: (1) The power status indicator. LED Indicator Description Power is not connected. Green Power is supplied. Flashing green The firmware update is being applied to the power supply unit. The redundant power supply is mismatched. This only occurs if Flashing green then turns off you have a secondary redundant power supply installed. -
Page 30: Hard Drive Raid Status Indicators
Hard Drive RAID Status Indicators Each hard drive has its own set of LED indicators to show its activity and status. Figure 5: (1) Status LED. (2) Activity LED. The Activity LED flashes green when the hard drives are working. The following table describes what the Status LEDs indicate: LED Indicator Description... -
Page 31: Specifications
Specifications System Avigilon Control Center Software Enterprise, Standard and Core Operating System Microsoft Windows Server 2016 Hard Disk Drive Configuration Near-line SAS, hot swappable, RAID 6 Mechanical Dimensions with bezel (LxWxH) 714.6 mm (28.13") x 482 mm (18.97") x 86.8 mm (3.41") Weight 44.5 kg (98.1 lbs) when fully populated with hard drives... - Page 32 EN 55024:2010+A1:2015/CISPR 24:2010 + A1:2015 Energy Commission Regulation (EU) No. 617/2013 ROHS EN 50581:2012 Limited Warranty and Technical Support Avigilon warranty terms for this product are provided at avigilon.com/warranty. Warranty service and technical support can be obtained by contacting Avigilon Technical Support: avigilon.com/contact-us/. Specifications...
Need help?
Do you have a question about the HD-NVR4-PRM-64TB and is the answer not in the manual?
Questions and answers