Table of Contents
Advertisement
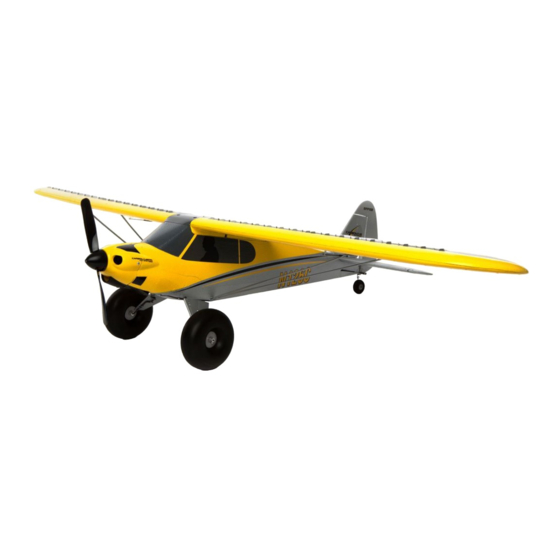
Carbon Cub S 2 1.3m
Instruction Manual | Bedienungsanleitung
Manuel d'utilisation | Manuale di Istruzioni
Scan the QR code and select the Manuals and Support quick links from the product
page for the most up-to-date manual information.
Scannen Sie den QR-Code und wählen Sie auf der Produktseite die Quicklinks
Handbücher und Unterstützung, um die aktuellsten Informationen zu Handbücher.
Scannez le code QR et sélectionnez les liens rapides Manuals and Support sur la page
du produit pour obtenir les informations les plus récentes sur le manuel.
Scannerizzare il codice QR e selezionare i Link veloci Manuali e Supporto dalla
pagina del prodotto per le informazioni manuali più aggiornate.
HBZ320001
HBZ32500
Advertisement
Table of Contents
Troubleshooting

Related Manuals for Horizon Hobby hobbyzone Carbon Cub S 2


Summary of Contents for Horizon Hobby hobbyzone Carbon Cub S 2
- Page 1 Carbon Cub S 2 1.3m Scan the QR code and select the Manuals and Support quick links from the product page for the most up-to-date manual information. Scannen Sie den QR-Code und wählen Sie auf der Produktseite die Quicklinks Handbücher und Unterstützung, um die aktuellsten Informationen zu Handbücher. Scannez le code QR et sélectionnez les liens rapides Manuals and Support sur la page du produit pour obtenir les informations les plus récentes sur le manuel.
- Page 2 NOTICE All instructions, warranties and other collateral documents are subject to change at the sole discretion of Horizon Hobby, LLC. For up-to-date product literature, visit horizonhobby.com or towerhobbies.com and click on the support or resources tab for this product. Meaning of Special Language:...
-
Page 3: Table Of Contents
Registration Specifications Wingspan 51" (1300mm) Register your product today to join our mailing list Length 34" (865mm) and keep up to date with product updates, offers and Without Battery: 2.3lbs (1075g) Hobby Zone news. ® Weight With Recommended 3s 2200mAh Flight Battery 2.8lb (1285g) Included Equipment Transmitter... -
Page 4: Aircraft Components
Aircraft Components Typical Control Components Control Horn Servo Arm Retaining Sleeve Pushrod Servo Clevis Aileron Vortex Generator Aileron Servo Flap Electronic Speed Control (ESC) Elevator Horizontal Stabilizer Receiver Flight Battery Elevator Servo Spinner Rudder Servo LED Indicator Motor Propeller Flight Controller Main Landing Gear Aileron Servo Rudder... -
Page 5: Assembly
Assembly We recommend reading each section of this manual before proceeding with assembly per the steps outlined. We also recommend watching the entire assembly video by oltip scanning this QR code or using this URL: www.horizonhobby.cc/CarbonCubS2assembly. Assembly Video Install the Main Landing Gear The hardware for the landing gear installation is in bag A. - Page 6 Wing Installation Fin Side View We recommend watching the “Wing Installation” Front Round Corner chapter/section of the assembly video by scanning this QR code or using this URL: www.horizonhobby.cc/CarbonCubS2assembly. Assembly Video Assembly 1. Install the vortex generators in the channels on the top of the wing by installing the double-sided tape into the channels.
- Page 7 Installation The hardware for the wing installation is in bag C. 1. Connect the left aileron servo connector to the servo extension labeled 3 X 12mm (4) “AIL-L” and the right aileron servo connector to the servo extension labeled “AIL-R”. 2.
-
Page 8: Spektrum Dxs Transmitter
Spektrum DXS Transmitter Install the Transmitter Batteries 1. Remove the battery cover. 2. Install the included four AA batteries, noting proper polarity. 3. Reinstall the battery cover. Low Battery Alarm When the transmitter battery voltage drops below 4.7 volts, an alarm sounds and the voltage LEDs flash. -
Page 9: Install The Flight Battery
Flight Battery Voltage Indicator The included DXS transmitter is equipped with a flight battery voltage indicator feature that works with compatible Smart technology-equipped receivers, flight controllers and telemetry-capable ESCs. This Smart technology feature gives a visual representation of the approximate flight battery voltage/power remaining via the four LED indicators on the transmitter. -
Page 10: Center Of Gravity (Cg)
Center of Gravity (CG) We recommend watching the “Center of Gravity” chapter/section of the assembly video by scanning this QR code or using this URL: www.horizonhobby.cc/CarbonCubS2assembly. Assembly Video CAUTION: Never fly the aircraft without ensuring the center of gravity is within the acceptable range. Failure to properly balance the aircraft can result in loss of control and possible damage. -
Page 11: Control Direction Test
Rudder Stick If the control surfaces do not respond as shown, DO NOT FLY. Refer to the Troubleshooting Guide for more information. If you need more assistance, contact the appropriate Horizon Hobby Product Support department. 1. Power on the transmitter. Transmitter Control Surface Response 2. -
Page 12: Before Your First Flight
30 paces. If control issues exist, do not attempt to fly. Refer to the Warranty and Service Contact Information table at the end of the this manual to contact Horizon Hobby product support. CAUTION: Due to reduced output power of the transmitter, NEVER 7. -
Page 13: Flight Control
Flight Control IMPORTANT: Even though SAFE technology is a very helpful tool, the aircraft still needs to be flown manually. If incorrect input is given at lower altitudes or at slower speeds, the aircraft can crash. Study these control inputs and the Elevator/ Throttle/ aircraft response to each carefully before attempting your first flight. -
Page 14: Sensor Assisted Flight Envelope (Safe) Technology Flight Modes
Sensor Assisted Flight Envelope (SAFE) Technology Flight Modes At any time during a flight you can switch between Beginner, Intermediate Flight Mode Switch and Experienced flight modes or use panic recovery to get your aircraft to a (switch B) safe flying attitude. Change between flight modes by changing the flight mode switch position. -
Page 15: Flying
Flying This aircraft is relatively easy to fly and helps you apply beginner skills to flying; Scan the QR code for a link to a video with tips to help however, we recommend you get help from a qualified flight instructor for your successfully fly the aircraft. - Page 16 Landing 1. Reduce the throttle to around 50% to slow the airspeed. 2. Fly the aircraft downwind past the end of the runway. 3. Turn the aircraft into the wind and line the aircraft up with the runway center line. 4.
-
Page 17: Trimming The Aircraft
Trimming the Aircraft Adjusting Trim in Flight Aircraft Drift Trim Required The SAFE flight mode switch should be set to Experienced mode (position 2) before adjusting the trims. Trimming is best done in calm wind conditions. If your aircraft does not fly straight and level at half throttle with the sticks at neutral, Elevator Trim fly into the wind and adjust the trim sliders as indicated in the table until the aircraft maintains a reasonably straight and level flight path. -
Page 18: Transmitter And Receiver Binding
Transmitter and Receiver Binding Binding is the process of programming the aircraft receiver with the Binding Procedure identification code of the transmitter so the receiver will only connect to that 1. Power off the transmitter. specific transmitter. 2. Make sure the transmitter controls are neutral, the throttle is at the lowest The included transmitter was bound to the aircraft at the factory. -
Page 19: Bnf Basic Transmitter Setup
BNF Basic Transmitter Setup To use a Spektrum transmitter other than the DXS included with the RTF Basic NX Series Transmitter Setup version aircraft, use the setup table which corresponds to your transmitter 1. Power ON your transmitter, click on scroll wheel, roll to System Setup and series, DX, NX or iX series, to program the transmitter. -
Page 20: Installing Optional Flaps
Smart Technology Electronic Speed Control (ESC) The Carbon Cub S 2 is equipped with an exclusive Smart technology electronic speed control that can provide a variety of real-time power system related telemetry data while you fly, including motor RPM, current, battery voltage and RPM: more to compatible Spektrum AirWare ™... -
Page 21: Flight Training
Flight Training To the new pilot: This aircraft is easy to fly and helps you apply beginner skills to flying; however, we recommend you get help from a qualified flight instructor for your Trainer Button first radio controlled flights. Some model flying clubs provide flight training at their flying fields. -
Page 22: Flying With The Optional Float Set
Flying With the Optional Float Set Install the optional Float Set (HBZ7390, sold separately) to fly this aircraft from water. Aileron • Float struts, strut brackets and four screws are included with the aircraft. • Rear bracket screws are included with the floats. Follow the instructions included with the optional float set for correct installation to the aircraft. -
Page 23: Optional Landing Assist Sensor (Las) Upgrade
Optional Landing Assist Sensor (LAS) Upgrade The Carbon Cub S 2 is upgradable with the addition of the optional LAS module (SPMA3180, not included). This allows the advanced SAFE features to be combined with a Landing Assist Sensor (LAS) for smooth, gentle landings. IMPORTANT: For best results when using the LAS, land on grass or a light colored surface, (e.g., light colored concrete). -
Page 24: Optional Safe Plus Gps Module
Optional SAFE Plus GPS Module The included Carbon Cub S 2 flight controller includes SAFE technology out of IMPORTANT: Read the information covering the SAFE Plus GPS module the box. The flight controller is upgradable with the addition of the optional GPS features, and learn the use of Holding Pattern and AutoLand modes before module (SPMA3173, not included) which enables advanced SAFE Plus features. - Page 25 Compass Calibration The aircraft will automatically enter compass calibration on the first power up after the GPS module is installed, after binding. IMPORTANT: The aircraft must be outside and must acquire a GPS lock in order to begin compass calibration. The aircraft will not enter compass calibration mode until the GPS lock is established.
- Page 26 Powering ON, GPS Initialization and Establishing Home Location Airfield Virtual Fence CAUTION: Keep aircraft away from magnetic sources such as cameras, Setting the home location and aircraft heading camera mounts, speakers etc. These may interfere with the GPS system and loss of control may result. 1.
- Page 27 Virtual Fence Mode and GPS Virtual Fence Mode Transmitter Stick Position Virtual Fence OFF CAUTION: Keep aircraft away from magnetic sources such as cameras, camera mounts, speakers etc. These may interfere with • Low throttle the GPS system and loss of control may result. •...
- Page 28 Holding Pattern (HP) Mode Holding Pattern Mode IMPORTANT: As a safety precaution, Holding Pattern mode will not function when your aircraft is below an altitude of approximately 20 ft (6m). Anytime the aircraft seems too far away, press and release the HP/AL (Bind) button on the transmitter.
- Page 29 AutoLand Mode IMPORTANT: As a safety precaution, AutoLand mode will not function when your aircraft is below an altitude of approximately 20 ft (6m). To activate AutoLand mode, press and hold the HP/AL button (button A) for three seconds. Hold for 3 seconds Wind •...
-
Page 30: Service And Repairs
Service and Repairs NOTICE: After any impact or replacement always ensure the flight controller Repairs to the foam can be made using virtually any adhesive (hot glue, regular is secure in the fuselage. If replaced, the flight controller must be installed CA [cyanoacrylate adhesive], epoxy, etc). -
Page 31: Troubleshooting Guide
Troubleshooting Guide Problem Possible Cause Solution There is no link between the transmitter and receiver Re-Bind the system following directions in this manual No GPS lock (or operating indoor without disabling GPS) Move to outside and power on aircraft or disable GPS in the aircraft Transmitter AA batteries are depleted or installed incorrectly as indicated by a dim or unlit LED on the Check polarity installation or replace with fresh AA batteries... -
Page 32: Optional Safe Plus Gps Upgrade Troubleshooting Guide
Optional SAFE Plus GPS Upgrade Troubleshooting Guide Problem Possible Cause Solution Deactivate AutoLand by pressing the AL/HP button or AutoLand was not deactivated after landing changing flight modes and lower throttle Aircraft will not respond to throttle but Home location has not been set Set the home location responds to other controls Direction of Airfield fence has not been set... -
Page 33: Replacement Parts
Replacement Parts Optional Parts Part # Description Part # Description EFL310017 LAS Cover: Apprentice STS DYN1405 LiPo Charge Protection Bag, Large EFLA1030FB 30-Amp Telemetry Capable ESC EFL1090 DSV130 3-Wire Digital Srvo MT G EFLM480BL 480 BL Outrunner Motor; 960Kv EFLA250 Park Flyer Tool Asst, 5 pc EFLP09060 Prop P-51 BL 9 x 6;... -
Page 34: Glossary Of Important Terms
Glossary of Important Terms Aileron: Control surface found on the trailing edge of each wing. Giving right value creates a softer control feel around neutral, thus making the aircraft aileron control causes the right aileron to deflect up and the left aileron to less sensitive to control inputs. -
Page 35: Important Federal Aviation Administration (Faa) Information
Limited Warranty What this Warranty Covers WARRANTY IS THE PURCHASER’S SOLE AND EXCLUSIVE REMEDY. Horizon Hobby, LLC, (Horizon) warrants to the original purchaser that the Limitation of Liability product purchased (the “Product”) will be free from defects in materials and HORIZON SHALL NOT BE LIABLE FOR SPECIAL, INDIRECT, INCIDENTAL workmanship at the date of purchase. -
Page 36: Contact Information
Horizon Technischer Service service@horizonhobby.eu Hanskampring 9 European Union D 22885 Barsbüttel, Germany Sales: Horizon Hobby GmbH +49 (0) 4121 2655 100 FCC Information Contains FCC ID: BRWKATY1T FCC ID: BRWSRLRR2 This equipment complies with FCC and IC radiation exposure limits set forth for in a residential installation. -
Page 37: Ic Information
Hanskampring 9 Please follow local regulations. 22885 Barsbüttel Germany HBZ Carbon Cub S 2 BNF Basic (HBZ32500): Hereby, Horizon Hobby, WEEE NOTICE: LLC declares that the device is in compliance with the following: EU Radio This appliance is labeled in accordance with European Directive Equipment Directive 2014/53/EU;... - Page 38 HobbyZone, the HobbyZone logo, SAFE, the SAFE logo, DSM, DSM2, DSMX, IC3, Bind-N-Fly, the BNF logo, the Smart Technology logo, and the Horizon Hobby logo are trademarks or registered trademarks of Horizon Hobby, LLC. The Spektrum trademark is used with permission of Bachmann Industries, Inc.
Need help?
Do you have a question about the hobbyzone Carbon Cub S 2 and is the answer not in the manual?
Questions and answers
instructions for adding gps as an add-on