Table of Contents
Troubleshooting

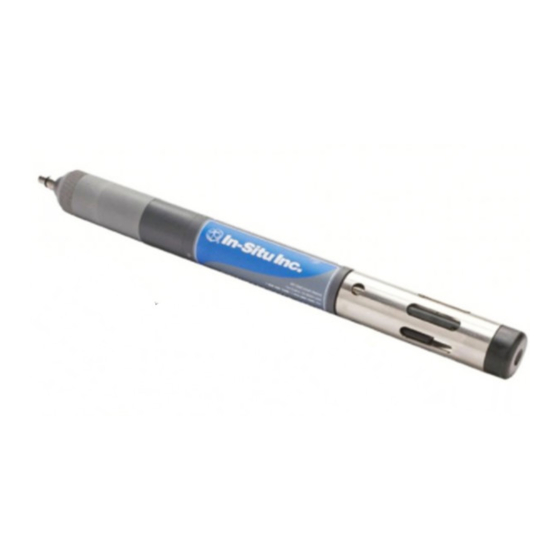
Related Manuals for In-situ TROLL 9500


Summary of Contents for In-situ TROLL 9500
- Page 1 Multi-Parameter ® Water Quality TROLL Multi-Parameter TROLL 9500 OPERATOR’S MANUAL For Sales & Service Contact 2650 E. 40th Ave. • Denver, CO 80205 Phone 303-320-4764 • Fax 303-322-7242 1-800-833-7958 www.geotechenv.com January 2009...
- Page 2 In-Situ Inc. makes no warranty of any kind with regard to this material, including, but not limited to, its fitness for a particular application. In-Situ will not be liable for errors contained herein or for incidental or consequential damages in connection with the furnishing, performance, or use of this material.
-
Page 3: Table Of Contents
® Water Quality TROLL Contents 1 INTRODUCTION ..........1 Establish Communication with the MP TROLL 9500 ......16 General Description of the MP TROLL 9500 ........1 Set the Real-Time Clock ..............16 How to Use This Manual ..............1 Quick-Cal the Basic Water-Quality Sensors ........ - Page 4 4. Level Reference ..............49 Why Measure pH? ..............66 Reference Time ............... 49 The pH Sensor ................. 66 Quick Summary of Pressure Setup ..........50 Sensor Installation ................67 Installation for Pressure/Level Measurement ........51 0095110 rev. 007 01/09 TROLL 9500 Operator’s Manual...
- Page 5 Calibration Solutions ..............68 Fill the Membrane Module ............79 Recommended Calibration Frequency ........68 Install the Sensor in the MP TROLL 9500 ........ 80 pH Quick Cal ................68 Condition a Newly Installed Sensor ........80 Traditional pH Calibration Procedure ........68 Calibration ..................
- Page 6 Units and Calculated Measurements ..........128 Sensor Installation ..............110 Usage Recommendations and Cautions ........128 Calibration ..................111 Common Interferences ............128 Overview .................111 Profiling Turbidity ................128 Calibration Solutions ...............111 Logging Turbidity Data ..............128 0095110 rev. 007 01/09 TROLL 9500 Operator’s Manual...
- Page 7 Electronic Drift and Device Recalibration ........145 Start the Software ................136 Determining Density ............... 145 Launch the Flow-Sense Wizard ............136 GLOSSARY ............147 Verify Unit Preferences ............136 Flow-Sense Wizard Input ............137 0095110 rev. 007 01/09 TROLL 9500 Operator’s Manual...
-
Page 8: Introduction
Section 8: Temperature The MP TROLL 9500 logs data from up to 7 water-level and Section 9: Barometric Pressure water-quality sensors, as well as built-in temperature and baro- Section 10: An overview of monitoring water quality with the MP metric pressure sensors. -
Page 9: Conventions
Notify In-Situ and file a claim with the carrier if there is any such dam- Whether you are gathering information about your body of water for age;... -
Page 10: What We Provide
The MP TROLL 9500 complies with all applicable directives per the 1. Call or e-mail In-Situ Technical Support (support@in-situ.com). CE and FCC and was tested to the EN 61326 / FCC specifications Have the product model and serial number handy. -
Page 11: Cleaning Guidelines
• We recommend a good cleaning solution, such as Alconox ® or in the opinion of our Service Representatives glassware cleaning product available from In-Situ (Catalog No. presents a potential health or biological hazard, 0029810) and laboratory supply houses. we reserve the right to withhold service until •... -
Page 12: Components & Features
Description optional featUres • Profiler and Professional feature sets, both available in XP with The Multi-Parameter TROLL 9500 is a compact, modular system with extended parameter capability a range of components to customize the instrument to various ap- plications and operational modes. Components include the instrument •... -
Page 13: Cables
Section 2: componentS & FeatureS cables Several basic cable types are used in the MP TROLL 9500 system: • RuggedCable™, TPU-jacketed (Thermoplastic PolyUrethane) mP troll 9500 • vented or non-vented • Halogen-Free vented or non-vented (LSZH-rated, low smoke zero halide) Vented cable is recommended for applications where accurate barometric pressure measurement is required—for... -
Page 14: Cable Desiccants
Catalog No. external PoWer Small desiccant (3) ..............0052230 A single MP TROLL 9500 can run exclusively on power supplied from Large desiccant, plastic connector ......... 0053550 a 9 -12 VDC line power supply connected to a 90-264 VAC input. -
Page 15: Water Quality Accessories
Wiper pad replacement kit ............0044530 Nitrate: 1 each 14, 140, 1400 ppm, DI water ......0032130 Lithium battery kit (2 “D” cells, 3.6V ea.) ........ 0048230 Low Nitrate: 2 each 14, 140 ppm ..........0032650 TROLL 9500 Operator’s Manual 0095110 rev. 007 01/09... -
Page 16: Installation Accessories
2003 or later, with a serial communications port for connection to the data; no venting, no communication capabilities TROLL 9500, and at least 16 megabyte capacity for data storage (SD • Cable Extender: connects two lengths of RuggedCable card, CF card, or the device’s built-in non-volatile memory). -
Page 17: Product Specifications
Non-vented, regular & HF: 16 kg/300 m Operating Temp. -5°C to 50°C (23°F to 122°F) (35.6 lb/1000 ft) Vented Tefzel : 23kg/300m (52 lb/1000 ft) ® * Base unit = MP TROLL 9500 & factory-installed sensors TROLL 9500 Operator’s Manual 0095110 rev. 007 01/09... - Page 18 Pressure, temperature, baro, turbidity, pH/ORP, conductivity, RDO, DO 85 days Pressure, temperature, baro, turbidity, pH/ORP, conductivity, RDO 90 days 2 lithium D-cells Pressure, temperature, baro, pH/ORP, conductivity, RDO, turbidity, no wiper 270 days TROLL 9500 Operator’s Manual 0095110 rev. 007 01/09...
-
Page 19: Getting Started
3 GettinG starteD This section provides a quick overview of the initial steps necessary to 2. Insert two D-size batteries negative side first, positive side up. get the Multi-Parameter TROLL 9500 ready to take measurements. You will need— • Power •... -
Page 20: Install Sensors
End view with the RDO cable End view with the RDO direct con- or nitrate connect sensor plugged into ports nect sensor plugged into ports 3 and 1 or 3 covering ports 2 and 5. TROLL 9500 Operator’s Manual 0095110 rev. 007 01/09... -
Page 21: Install The Software
Win-situ 4 troll 9500 to troll Com Install Win-Situ 4 from the In-Situ software CD or the In-Situ website: Connect the TROLL 9500 to the appropriate TROLL Com as shown. • Connect a Direct Connect model simply by pressing onto the con- •... -
Page 22: Twist-Lock Cable Connections
RuggedCable mates to the TROLL 9500 and to Cable Connect TROLL Coms with a bayonet-type Twist-Lock connector. 1. Remove the soft protective caps from the TROLL 9500 and the cable. 5. Slide the sleeve on the cable toward the body until the pin on the body pops into the round hole in the slot on the cable. -
Page 23: Establish Communication With The Mp Troll 9500
Section 4, Control Software. What do I do if the MP TROLL 9500 does not appear in the Navigation tree? First try double-clicking the connection. If the device still does not appear, there may be a com mu nication problem. -
Page 24: Quick-Cal The Basic Water-Quality Sensors
RDO cable, and use the RDO restrictor as a support during calibration. • If your MP TROLL 9500 includes a turbidity wiper, insure the pad does not absorb Quick Cal solution. Either carefully remove the wiper head (see Wiper Maintenance in Section 18), or soak the front end of the TROLL in water before calibrating;... - Page 25 D.O. sensor is installed. in the solution for several minutes prior to calibration, the accuracy achieved by accepting a nominal value may be very similar to that obtained by waiting for complete stability. TROLL 9500 Operator’s Manual 0095110 rev. 007 01/09...
- Page 26 Do one of the following in this screen: • If the TROLL 9500 is on vented cable now and will take mea- surements using vented cable, click No — and you may want to check the “Don’t ask me this again”...
-
Page 27: Calibrate The Extended Sensors
1. With the MP TROLL 9500 connected to a host PC, select the pres- sure parameter in the Navigation tree. -
Page 28: Set Up To Log Data (Set Up A Test)
Protect the “uphole” end of the cable with the cable dust cap or desic- mation on setting up tests. cant. 1. With the MP TROLL 9500 connected to a host PC, click or tap The cable dust cap is not waterproof. Be sure it is Tests in the Navigation tree. -
Page 29: Control Software
• to set up data collection schedules (“tests”) installation. • to take direct “manual” readings • Select Win-Situ 4 from the In-Situ Inc program group on the Win- • to take continuous real-time readings (Profiling) dows Start menu. • to transfer data from the Multi-Parameter TROLL 9500 to the host computer •... -
Page 30: The User Interface
This is followed by one or more connections (COM ports), and then one or more devices (Multi-Parameter TROLLs or other In-Situ instruments) accessible through each COM port. The Device node is further expandable to show the parameters the device can measure and the tests contained in the device’s memory. -
Page 31: Software Functions
Replace the batteries before continuing. disPlaying deviCe inFormation When you select the MP TROLL 9500 in the Navigation tree, the soft- ware first retrieves information about the device, then automatically detects the installed sensors and displays them in the tree. -
Page 32: Upgrading Firmware And Features
Navigation tree. If you have purchased a features upgrade for your Firmware upgrade MP TROLL 9500, press Upgrade and key in the upgrade code issued New software releases may include a new version of firmware for the by In-Situ Inc. Follow the instructions in the Upgrade Wizard. -
Page 33: Editing The Device Properties
Navigation tree and in the header of test data files. 1. With the MP TROLL 9500 connected to a host PC and selected in 1. With the MP TROLL 9500 connected to a host PC and selected in the Navigation tree, press Edit.. -
Page 34: Choosing Measurement Units And Other Preferences
2. In the top of the Units window, select a parameter whose unit you wish to change. 3. Select OK to close the window and apply the settings. TIP: Preferences are saved with the site (on the PC), not in the device. TROLL 9500 Operator’s Manual 0095110 rev. 007 01/09... -
Page 35: Choosing Pressure Display & Conversion Options
1. With the MP TROLL 9500 connected to a host PC and selected in standard. the Navigation tree, expand the Parameters node and select the A detailed, step-by-step description of each water quality calibra- pressure parameter. -
Page 36: Logging Data (Adding A Test)
“manual” readings Logging data with the MP TROLL 9500 is called “running a test.” To The MP TROLL 9500 collects data in “tests” but you can get a quick tell the instrument how to run the test—which parameters to measure, “manual”... -
Page 37: Extracting And Viewing Data
1. Tap the Home site in the Naviga- To extract a test: tion tree... 1. With the MP TROLL 9500 connected to a host PC and selected in the Navigation tree, expand the Tests node to display all the tests 2. then tap Exit in the command in the device. -
Page 38: Profiling
Measurement Units and Other Preferences in Section 4. and click OK. 1. Connect the MP TROLL 9500 to a host PC and establish communi- • To avoid this question each time cation in Win-Situ 4 or Pocket-Situ 4. you start the Profiler, check the option box and click OK. -
Page 39: Graphing Profiler Data
Subsequent readings do not require a warmup. displayed in graphical format. If a turbidity wiper accessory is installed in the TROLL 9500, it performs an initial wipe of the sensor optics—this takes about 15 seconds—then displays the first turbidity reading. If the profiling rate is longer than 15 seconds, this 15 second wipe will happen before each reading. - Page 40 Auto-scales the Y axis for the Select the channel to graph selected range (available for some channels) Return to the Profiler’s Close the Profiler and return channel display to the Parameter view TROLL 9500 Operator’s Manual 0095110 rev. 007 01/09...
-
Page 41: Customizing The Profiler
Yes, so long as your preferred unit for DO is mg/L. Select When you are ready to exit the Profiler, click Close. The Parameters Dissolved Oxygen for one window, and Dissolved Oxygen view will return to the screen. % Saturation for another window. TROLL 9500 Operator’s Manual 0095110 rev. 007 01/09... -
Page 42: Logging Data
Wizard starts automatically to help you enter the required information. After it has “run,” the completed test consists of a data file that was 1. With the MP TROLL 9500 connected to a host PC and selected in logged following the instructions above. -
Page 43: Test Setup Parameters
Barometric pressure is important in converting mea- salinity compensation. The sensor does not react to changes in salinity. surement of D.O. concentration to percent saturation. If the TROLL 9500 To compensate for the lower solubility of oxygen in salty water, a salinity cable is vented, an accurate barometric pressure value can be read from value stored in the sensor can be applied. -
Page 44: Measurement Interval
Manual. A manual test can be started at any time while the MP TROLL 9500 is connected to a PC by pressing the Start button. MORE ON MEASUREMENT SCHEDULES This mode is useful when you want to synchronize the start of data collection with an external event like starting a pump. -
Page 45: Linear Average
file since they both represent measurements of the same physical property (pressure, temperature, conductivity, etc.). Event Test Setup Linear Average Test Setup Measurement Interval Event channel “Delta” value Default storage 0095110 rev. 007 01/09 TROLL 9500 Operator’s Manual... -
Page 46: Other Test Operations
Extract—copies the selected test data from the instrument to the (came to an ABnormal END, e.g., by losing power or host computer. A copy of the data remains in the instrument. filling the memory) 0095110 rev. 007 01/09 TROLL 9500 Operator’s Manual... -
Page 47: Starting A Manual Start Test
STARTING A MANUAL START TEST Where do my extracted data files go? 1. With the MP TROLL 9500 connected to a host C, select a pending Win-Situ 4 extracts tests to a folder named “Data” in the folder manual test in the Navigation tree. -
Page 48: Deleting Tests
1. With the MP TROLL 9500 connected to a host PC and selected in 1. With the MP TROLL 9500 connected to a host PC and selected in the Navigation tree, click or tap Tests. -
Page 49: Transferring Files From A Pda To A Desktop Pc
We recommend placing the files in the following locations to ensure that they will be displayed properly in the Data Folder branch of the Win-Situ Navigation tree. The In-Situ synchronization utility, if used, will put the files in the proper locations automatically. -
Page 50: Viewing Logged Data
Click the beside the the serial number of After data files have been extracted from the MP TROLL 9500 to the the unit whose data you want to view. Data Folder, the node can be expanded to show device type, serial number, and extracted data files. -
Page 51: Graphing Data
Here are some things you may wish to try: go to the Graph menu and select a different Number of Graphs Graph menu, select a Primary channel and a Secondary Channel Graph menu, choose All Channels Selected 0095110 rev. 007 01/09 TROLL 9500 Operator’s Manual... -
Page 52: Changing The Data Display
Select channels, change units Switch to text view and other preferences This graph was created with the following controls: Number of Graphs: One Graph, All channels selected, Zoomed in on 11-22 minutes, Vertical grid. 0095110 rev. 007 01/09 TROLL 9500 Operator’s Manual... -
Page 53: Monitoring Pressure (Water Level)
If your MP tant in the design of wells and well fields for various purposes. TROLL 9500 was ordered without a pressure or turbidity sensor, there In the design of a remediation system, the proper placement of wells will be a permanently installed plug in the pressure sensor slot. -
Page 54: Operating Principle
If your MP TROLL 9500 includes a pressure sensor, it is either abso- lute or gauged. The pressure sensor type is not software-selectable. However, psia measurements from absolute pressure sensors can be readily compensated for atmospheric pressure in the software due to the presence of the MP TROLL 9500’s onboard barometric pressure... -
Page 55: Setting Up Pressure Measurements: The Parameter Wizard
For a level mode, Remember that all these settings can be changed quite easily when you view the data after the test. you will be prompted to enter a level reference. 0095110 rev. 007 01/09 TROLL 9500 Operator’s Manual... -
Page 56: Converting Pressure To Depth Or Level
0.996783 commodation for other variables (such as salinity) that can affect 0.999902 0.998774 0.996512 your actual water conditions. Alternatively, you could compute the 0.999849 0.998595 0.996232 0.999781 0.998405 0.995944 0.999700 0.998203 0.995646 0095110 rev. 007 01/09 TROLL 9500 Operator’s Manual... -
Page 57: Quick Summary Of Pressure Setup
After setting the pressure mode, select the UNITS you want: LEVEL/DEPTH, select unit, click OK Pocket-Situ: Tap Home at top of screen, tap Setup at bottom of screen, scroll down to LEVEL/DEPTH, select unit, click OK 0095110 rev. 007 01/09 TROLL 9500 Operator’s Manual... -
Page 58: Installation For Pressure/Level Measurement
Lower the MP TROLL 9500 gently to the desired depth. ric pressure changes are not crucial. -
Page 59: Correcting Absolute Pressure Readings For Barometric Pressure
Set the clock in the Absolute MP TROLL 9500. Add a test and run it as ments from a submerged absolute (psia) pressure sensor. In this usual. -
Page 60: Recalibration Recommendations
file from which barometric pressure corrections will be Calculations of the accuracy drift of the MP TROLL 9500 over time are derived. If the time stamps in the files do not overlap completely, contained in the Appendix of this manual. -
Page 61: Monitoring Temperature
THE TEMPERATURE SENSOR Artificially high temperatures are often referred to as “thermal pol- All models of the Multi-Parameter TROLL 9500 include a permanently lution,” which may result from discharge of municipal or industrial installed, factory-calibrated sensor for measuring solution tempera- ture. -
Page 62: Role Of The Sensor In Calibration
Units TIP: To change unit preferences: In Win-Situ, select Preferences on the Options menu. In Pocket-Situ, select the Home site, then tap Setup in the command bar. 0095110 rev. 007 01/09 TROLL 9500 Operator’s Manual... -
Page 63: Monitoring Barometric Pressure
A submerged Multi-Parameter TROLL on non-vented cable cannot accurately report barometric pressure. If your MP TROLL 9500 is used with a non-vented backshell and/or non-vented cable, a software correction can substitute for barometric pressure venting. See the procedure in this section. -
Page 64: Pressure Vs. Elevation
16,500 5029.2 15.89 403.5 7.81 0.538 Conversions bars 29.530 = inches of mercury psi 2.036 = inches of mercury atmosphere 101325 = Pascals psi 6.894757 10 = Pascals bars 14.50337 = psi 0095110 rev. 007 01/09 TROLL 9500 Operator’s Manual... -
Page 65: 10 Monitoring Water Quality: Overview
The Basic sensors can be factory-calibrated and pre-installed in the be required by Federal, state, or local regulations. Digital records of MP TROLL 9500. They are ready for use right out of the box with a monitoring can document compliance with guidelines and standards brief Quick Cal. -
Page 66: Installing Sensors
The diagram below represents a head-on view of the “sensor block” to update the display. in the front end of the MP TROLL 9500. There are four sensor ports, plus permanently installed pressure and/or turbidity and temperature 2. Remove the cap or storage bottle from the sensor. Retain the cap sensors. -
Page 67: Removing Sensors
Suitable calibration solutions are supplied in In-Situ’s CALIBRATION OVERVIEW individual calibration kits. The MP TROLL 9500 and its control software provide several options for calibration of the water-quality sensors. Select the method that suits the time you have at your disposal and the degree of accuracy you want to achieve when measuring water-quality parameters. -
Page 68: Quick Calibration
The temperature sensor should always be immersed in at dure in Section 12 below. When attaching the Cal Cup to the front end of the MP TROLL 9500, align carefully and thread the Cal Cup onto the body until seated TIP: When using Pocket-Situ to perform calibrations, do not against the o-ring, then back off slightly to avoid overtightening. -
Page 69: Effect Of Temperature On Calibration
The stirrer is powered by two alkaline D- Motor com- front end of the MP TROLL 9500, and the installed sensors prior to cells (installed). To start the motor, tighten partment beginning calibration. This will remove trace contaminants or solutions the end cap. -
Page 70: Calibration History
An index in html format is also C. with Cal Cup and stirrer, for stirring calibrations created and updated each time a calibration is performed. D. with Restrictor and stirrer, for monitoring water quality in stagnant water 0095110 rev. 007 01/09 TROLL 9500 Operator’s Manual... -
Page 71: How Often To Calibrate
SN32072 2006-08-14 134200 QuickCal.html pH, ORP, and conductivity. Refer to the values printed on the SN32072 2006-11-25 121530 PH.html label. SN32072 2007-01-11 154322 Cond.html MP TROLL 9500 Cal Date Cal Time Parameter serial number (hhmmss) 0095110 rev. 007 01/09 TROLL 9500 Operator’s Manual... -
Page 72: When To Replace A Sensor
The stirrer accessory is easily installed on the MP TROLL 9000. See illustration D earlier in this section. 1. Remove the nose cone from the MP TROLL 9500. Leave the restrictor attached to the instrument. Water Quality Sensor Pressure Ratings 2. -
Page 73: What Is Ph
Nernst equation: Distilled water + (2.3 RT/nF) log [H Most natural waters Safe for freshwater fish where Properly chlorinated is the potential from the pH electrode, swimming pool 7.2 - 7.6 0095110 rev. 007 01/09 TROLL 9500 Operator’s Manual... -
Page 74: Sensor Installation
8. Press the sensor into the port until you feel it dock with the port con- The MP TROLL 9500 may be shipped with a pH or combination pH/ nector. When properly inserted a small gap (the width of the sensor ORP sensor installed. -
Page 75: Nominal Vs. Stable
1. With a pH or pH/ORP sensor installed and plugs or sensors in the early value is accepted, the calibration point will be designated “USER other ports, rinse the front end of the MP TROLL 9500 in tap water, SET” in the calibration report. If the calibration report indicates that then again in deionized water. - Page 76 SECTION 1 1: PH 5. Select the MP TROLL 9500 in the Navigation tree. 10. In the next screen, select Run to begin the stabilization. The software will automatically detect and display the installed sen- sors. If one or more sensors is installed in the wrong port, an error message will be displayed.
-
Page 77: Resetting Default Coefficients
50-100 mL of tap water to the Cal Cup. Return the probe to the Cal same temperature as the expected sample temperature. Cup for transport to the field site. ence. Contact In-Situ for more information. 0095110 rev. 007 01/09 TROLL 9500 Operator’s Manual... -
Page 78: Sensor Care And Handling
STORAGE possibly the junction. Short-Term Storage (several days) Note: The following maintenance instructions apply to In-Situ’s new- Store in the Cal Cup in tap water. est pH sensor (cat. no. 0059510). Older sensors (cat. no. 0032000, now discontinued) are not user-serviceable. -
Page 79: 12 Conductivity
50 to 300 μS/cm conductivity cell from the KCl reference solutions in Surface water 100 to 10,000 μS/cm High other sensors. Sea water 40,000 to 55,000 μS/cm Great Salt Lake 158,000 μS/cm 0095110 rev. 007 01/09 TROLL 9500 Operator’s Manual... -
Page 80: Sensor Installation
4. SET” in the calibration report. If the calibration report indicates that 1. Remove the restrictor from the front end of the MP TROLL 9500. calibration was performed through to stability then the instrument will This allows access to the sensor block shown in the drawing below. -
Page 81: Conductivity Quick Cal
Or invert the Cal Cup a couple of times. For a custom solution, select Other and enter the Specific Conduc- 4. Connect the MP TROLL 9500 to a PC and establish a connection in Win-Situ 4 or Pocket-Situ 4. Win-Situ screens are illustrated 9. - Page 82 The calibration proceeds Options for storing sensors: automatically to the next screen. installed in the MP TROLL 9500. The conductivity sensor does not tion. require any special storage conditions, but other sensors do. Refer to the relevant sections of this manual for storage recommenda- tions for other installed sensors.
-
Page 83: Using A Conductivity Meter As A Secondary Standard
Units: microSiemens per centimeter (μS/cm SC) TIP: To change unit preferences: In Win-Situ, select Preferences on the Options menu. In Pocket-Situ, select the Home site, then tap Setup in the command bar. 0095110 rev. 007 01/09 TROLL 9500 Operator’s Manual... -
Page 84: Total Dissolved Solids (Tds)
North America from Guildline Instruments Inc. in Lake Mary, Florida. to compare data. When the temperature of a sample and its conduc- tivity at that temperature are known, the software can extrapolate the 0095110 rev. 007 01/09 TROLL 9500 Operator’s Manual... -
Page 85: 13 Dissolved Oxygen
Organic waste can enter surface water from sewage treatment facilities, runoff from agricultural feed * representative of solute concentration lots or domestic areas and from industrial discharge. Organic wastes 0095110 rev. 007 01/09 TROLL 9500 Operator’s Manual... -
Page 86: Polarographic Measurement Of Dissolved Oxygen
The resulting current is proportional to the oxygen crossing the membrane. The electric potential is carefully selected so that only the The MP TROLL 9500 may be shipped with a polarographic D.O. sen- dissolved oxygen is reduced. sor installed in port 2. When the sensor is shipped in the instrument, it is pre-conditioned and ready for calibration. -
Page 87: Install The Sensor In The Mp Troll 9500
1. Fill and install the sensor as described above. when installed in port 2. 2. Connect the MP TROLL 9500 to a PC and establish a connection 1. Remove the restrictor or Cal Cup from the front end of the MP in Win-Situ 4 or Pocket-Situ 4. -
Page 88: Nominal Vs. Stable
This procedure is not provided for in Quick Cal. In addi- tion, the traditional calibration provides for a 0% (0 ppm, 0 mg/L) Prepare the MP TROLL 9500 for water or air calibration as described calibration, which is recommended when measuring very low in Steps 1-6 on the following page. - Page 89 TIP: Tap water is fine, unless it is high in salinity. It is easier to achieve 100% oxygen saturation in low-salinity water. 3. Rinse the empty Cal Cup and attach it to the MP TROLL 9500. Distilled water is readily available and works well.
- Page 90 SECTION 13: DISSOLVED OXYGEN—POLAROGRAPHIC 7. If not already connected, connect the MP TROLL 9500 to a PC, After dealing with barometric pressure the D.O. Calibration Wizard launch the software, and “find” the device. Win-Situ screens are displays a screen like the one below: illustrated here.
- Page 91 This enables you to follow the progress of the stabilization, and repeat the calibration. but the deviation from the previous reading is not necessarily the best indicator of stability as the software is looking at longer-term trends. 0095110 rev. 007 01/09 TROLL 9500 Operator’s Manual...
- Page 92 % saturation output is automatically corrected using the TROLL 9500’s temperature, conductivity, and barometric pressure values (from a baro sensor on vented cable or from a user-entered input). If no conductivity If these conditions are met, the sensor response should stabi- sensor is present, salinity is assumed to be zero.
-
Page 93: Usage Recommendations And Cautions
If the water (or the person holding the instrument) is mov- During tests that include the D.O. channel, the MP TROLL 9500 ing at all, you can probably safely skip the stirring. Any water... -
Page 94: Sensor Care And Handling
Store assembled with membrane immersed in water. A suitable stor- The surface of the anode should appear age bottle is included in the sensor box. uniform, but not necessarily mirror-like. o-rings 0095110 rev. 007 01/09 TROLL 9500 Operator’s Manual... -
Page 95: References
2005. Section 4500-O G, Oxygen (Dissolved), Membrane Electrode Method. EPA, Methods for Chemical Analysis of Water and Wastes, EPA/600/4-79-020, revised March 1983. Method 360.1, Oxygen, Dissolved, Membrane Electrode. Approved at 40 CFR Part 136. 0095110 rev. 007 01/09 TROLL 9500 Operator’s Manual... -
Page 96: Optical Measurement Of Dissolved Oxygen
TROLL 9500. new instrument, or is available with the download of new software at www.in-situ.com shipped on a CD with a new TROLL 9500 instrument, or is avail- COMPARISON TO POLAROGRAPHIC D.O. SENSOR able at www.in-situ.com. The RDO optical dissolved oxygen sensor offers several advantages over the more traditional electrochemical cell. -
Page 97: Unpack The Rdo Direct Connect Sensor
MSDS packed with the batteries. The soft Cal Cup insert enables calibration of the basic sensors when 2. Remove the standard restrictor or Cal Cup from the TROLL 9500 the RDO sensor is installed. It contains instrument (if attached). This allows access to the sensor block. -
Page 98: Calibration
Install promptly. Make sure that o-ring grooves are dry and the o-ring is not rolled or pinched inside the cap. the same side of the adapter plate as the TROLL 9500 sensor block (refer to the drawing below). -
Page 99: Calibration Solutions
0% DO calibration is performed in an oxygen-depleted solution. So- 2. Connect the TROLL 9500 to a PC and establish a connection in dium sulfite (Na , Catalog No. 0017670) is available from In-Situ Win-Situ 4 or Pocket-Situ 4. -
Page 100: Zero Oxygen Point
11. Immerse the RDO sensor in an oxygen-depleted medium: ) solution is generally reliable, if somewhat messy. Use a laboratory beaker or In-Situ’s special zero-point cal cup. Be sure the small well in front of the sensing foil is filled with solution. -
Page 101: Finalize The Calibration
TIP: Sodium sulfite consumes oxygen aggressively. If for a valid calibration point. performing the oxygen saturation point next, be sure to rinse the TROLL 9500 and RDO sensor thoroughly to avoid NOMINAL indicates the deviation meets early stabilization criteria. cross-contamination. -
Page 102: Clean-Up
SECTION 13: DISSOLVED OXYGEN—OPTICAL The values will be written to the sensor and you will be asked if During tests that include the RDO channel, the TROLL 9500 instru- you want to see the calibration report. ment automatically measures barometric pressure and temperature for compensation of DO readings. -
Page 103: Cleaning The Sensor Cap
Replacing the Sensor Cap pinched or rolled between the cap and sensor. The sensor cap has a 1-year life after the TROLL 9500 instrument 7. Perform a 2-point calibration. No conditioning is required prior to takes its first RDO sensor reading. Replacement caps are available use. -
Page 104: 14 Oxidation-Reduction Potential
ORP (mV) where Salt water aquarium ~ 350 is the potential from the ORP electrode, is related to the potential of the reference electrode, Properly chlorinated R is the Gas Law constant, 0095110 rev. 007 01/09 TROLL 9500 Operator’s Manual... -
Page 105: Sensor Installation
CALIBRATION SENSOR INSTALLATION OVERVIEW The MP TROLL 9500 may be shipped with a pH/ORP sensor installed. If installation is necessary, unpack and install the sensor in A one-point calibration in a solution with a known potential at a given port 1 of the MP TROLL 9500 as follows. -
Page 106: Recommended Calibration Order For Ph And Orp
The display will continuously update as readings are taken and compared against the stabilization criteria. 4. Connect the MP TROLL 9500 to a PC and establish a connection in Win-Situ 4 or Pocket-Situ 4. Indicators during Calibration 5. -
Page 107: Resetting Default Coefficients
Since the standard hydrogen electrode is extremely fragile, used to rinse the next time you calibrate with the same solution. it is impractical to use in the field. In-Situ’s sensor uses a silver/silver-chlo- Options for storing sensors: ride reference electrode in place of the standard hydrogen electrode. -
Page 108: Usage Recommendations And Cautions
filling solution, or the junction. Short-Term Storage (several days) Note: The following maintenance instructions apply to In-Situ’s newest pH/ORP sensor (cat. no. 0059520). Older sensors (cat. no. 0032010 Store in the Cal Cup in tap water. -
Page 109: 15 Ammonium
), is not. Both may be grouped together as THE AMMONIUM SENSOR “total ammonia.” The In-Situ sensor is an ion-selective electrode (ISE) that is selective The ammonia/ammonium equilibrium in water is closely related to pH for the ammonium ion (NH ). -
Page 110: Sensor Installation
Unpack the ammonium sensor, hydrate it as above, and install in port connector at the bottom. When properly inserted a tool 1, 2, or 3 in the sensor block at the front end of the MP TROLL 9500 small gap (width of the sensor removal tool) remains as follows. -
Page 111: Recommended Calibration Frequency
“Stirring” in Section 10. AMMONIUM CALIBRATION PROCEDURE 1. Rinse the Cal Cup and front end of the MP TROLL 9500 in clean water. Shake to dry. For best results, follow this with a rinse in a portion of the selected calibration solution. - Page 112 When Nominal is accepted or Stable is indicated for cal point 3, the final screen is displayed. NOMINAL indicates the sensor deviation meets early stabiliza- tion criteria. 0095110 rev. 007 01/09 TROLL 9500 Operator’s Manual...
-
Page 113: Sensor Slope And Offset
1.6 pH 2.6 pH 3.6 UNITS AND CALCULATED MEASUREMENTS 270,000 27,000 2700 35,000 3500 Ammonium ion concentration is reported in ppm (equivalent to mg/L). 11,100 1,100 No calculated measurements are currently available. 0095110 rev. 007 01/09 TROLL 9500 Operator’s Manual... -
Page 114: Sensor Care And Handling
The electrode is not customer-refillable. STORAGE Store the sensor immersed in 14 or 140 ppm N solution, depending on usage requirements, rather than dry or in DI water. 0095110 rev. 007 01/09 TROLL 9500 Operator’s Manual... -
Page 115: The Chloride Sensor
Vegetation is also sensitive to the amount of chloride in the soil. Agriculturally productive soils can be turned into unproductive 1. Remove the restrictor from the front end of the MP TROLL 9500. wastelands over a period of time by irrigating with water containing This allows access to the sensor block depicted in the drawing high amounts of chloride. -
Page 116: Calibration
CALIBRATION SOLUTIONS Sodium chloride (NaCl) solutions certified to N.I.S.T. standards are 5. Check lubrication of the sensor o-rings. supplied in the In-Situ Chloride Calibration Kits: TIP: The sensor o-rings require generous lubrication before – 35.5 ppm Cl installation. -
Page 117: Chloride Calibration Procedure
CHLORIDE CALIBRATION PROCEDURE (S/N) and recent calibration information is displayed. 1. Rinse the Cal Cup and front end of the MP TROLL 9500 in clean water. Rinse very thoroughly if the chloride sensor has recently been exposed to pH buffers during a pH calibration. Shake to dry. - Page 118 10 and waits for you to situate the probe in the next calibration solution and click Run. 17. Select Finish to program the sensor with the newly calculated calibration coefficients. 1 13 0095110 rev. 007 01/09 TROLL 9500 Operator’s Manual...
-
Page 119: Sensor Slope And Offset
Outside this range, a change in pH may cause a signifi- cant change in the measured mV. POTENTIAL INTERFERENCES The table on this page lists possible interfering ions that cause 10% – error at various levels of Cl 1 14 0095110 rev. 007 01/09 TROLL 9500 Operator’s Manual... -
Page 120: 17 Nitrate
THE NITRATE SENSOR produce large quantities of manure that can be changed into nitrate upon decay. The In-Situ sensor is an ion-selective electrode (ISE) that is selective – for the nitrate ion (NO ). It is a double-junction combination ISE with... -
Page 121: Sensor Preparation
Unpack the nitrate sensor, hydrate it as above, and install in port 1, sensor into the port until you feel it dock with the insertion 2, or 3 in the sensor block at the front end of the MP TROLL 9500 as connector at the bottom. When properly inserted a tool follows. -
Page 122: Calibration Solutions
4. Connect the MP TROLL 9500 to a PC and establish a connection in Win-Situ 4 or Pocket-Situ 4. Win-Situ screens are illustrated here. The Pocket-Situ interface is similar, with the Navigation tree at the top of the screen and the Information pane below it. - Page 123 For a multi-point calibration, the Wizard returns to the screen shown at step 10 and waits for you to situate the probe in the next 9. Select Next to continue. calibration solution and click Run. 1 18 0095110 rev. 007 01/09 TROLL 9500 Operator’s Manual...
-
Page 124: Sensor Slope And Offset
Do not submerge the nitrate sensor deeper than 46 ft (14 m). TEMPERATURE The higher the temperature, the shorter the lifetime of the electrode. bithermal calibration is performed. 1 19 0095110 rev. 007 01/09 TROLL 9500 Operator’s Manual... -
Page 125: Potential Interferences
Eventually some of the components will leach out, and this will affect the response (detection limit and scope), but this can be compensated through calibration. 0095110 rev. 007 01/09 TROLL 9500 Operator’s Manual... -
Page 126: 18 Turbidity
The Secchi disk method used in limnological studies Optional wiper involves submerging a weighted, black-and-white painted metal plate until the pattern can no longer 0095110 rev. 007 01/09 TROLL 9500 Operator’s Manual... -
Page 127: The Turbidity Sensor
THE TURBIDITY SENSOR The wiper installs in port 3 of the MP TROLL 9500 like other remove- able sensors. A positional brace aligns it with respect to the turbidity The optional turbidity sensor of the Multi-Parameter TROLL 9500 is sensor and keeps it stable in moving waters. -
Page 128: Wiper Installation
360 1. Remove the restrictor from the front end of the MP TROLL 9500. degree sweep to clean the optics. This allows access to the sensor block depicted in the drawing Wiping is not needed when the instrument is hand-held for below. -
Page 129: Manual Wipe
To wipe the turbidity sensor optics manually: The turbidity sensor has been factory-calibrated to achieve a sensor 1. With the wiper installed in port 3, connect the MP TROLL 9500 to a accuracy of ± 5% or 2 NTU (whichever is greater). The sensor is PC and establish a connection in Win-Situ 4 or Pocket-Situ 4. -
Page 130: Recommended Calibration Frequency
NTU value should exceed the readings you expect in the field. 1. Rinse the front end of the MP TROLL 9500 with clean water. Shake “primary standards”, they become “secondary standards.” well to remove the rinse water; dry external surfaces (not the opti- cal windows) with a clean tissue. - Page 131 SECTION 18: TURBIDITY 3. Connect the MP TROLL 9500 to a PC and establish a connection Next and go to step 12. in Win-Situ 4 or Pocket-Situ 4. Win-Situ screens are illustrated here. The Pocket-Situ interface is similar, with the Navigation tree 8.
- Page 132 15. Discard the first solution, rinse the beaker and the front end of the instrument thoroughly, wipe off excess water, refill the beaker with the second solution, and insert the MP TROLL 9500 as before. 16. Select Run to begin the stabilization for the second calibration point.
-
Page 133: Resetting Default Coefficients
4. In the final screen, click Finish to restore the sensor’s factory is “a snapshot of averages,” Field measurements can be an excellent calibration coefficients. indicator of in-situ turbidity; final determination for reporting purposes SENSOR SLOPE AND OFFSET should be conducted in a laboratory. -
Page 134: Wiper Maintenance
3. REFERENCES Replacement pads and wiper heads ASTM method D1889-88(A) are available from In-Situ Inc. or your Eaton, A.D., L.S. Clesceri, E.W. Rice, and A.E. Greenberg, eds., distributor. Standard Methods for the Examination of Water and Wastewater, Removing the Wiper Head 21st edition, Washington, D.C.: American Public Health Associa-... -
Page 135: 19 Sdi-12 Operation
Minimum voltage supplied per the SDI-12 specification (9.6V) is Data loggers that support SDI-12 Version 1.3 can usually send the sufficient to power a TROLL 9500 on 170 ft (52 m) of RuggedCable. Version 1.3 commands to an SDI-12 “sensor” like the MP TROLL Cables as long as 300 ft (91 m) may be used, depending on power automatically. -
Page 136: Sensor Identification
This process is repeated, progressing through the value of “n”, until SENSOR VERIFICATION the “aMn!” command responds with less than 9 measurements. In response to the Verification command, the MP TROLL 9500 will When parameters are read back over the SDI-12 bus via one of the respond as follows: “aDn!”... -
Page 137: Redundant Logging (Win-Situ 4 And Sdi-12)
SDI-12 network; however Win-Situ cannot communicate with the If the expected number of “Ix” pairs is not returned in response to the MP TROLL 9500 while it is trans mitting SDI-12 data, and conversely, “aXPR0!” command, additional “aXPRx!” commands will be issued the instrument cannot receive or respond to SDI-12 commands while until all pairs are received. -
Page 138: Sdi-12 V 1.3 Command Set
19 per command. If the expected number of “Ix” pairs is not returned in response to the “aXPR0!” command, additional “aXPRx!” commands will be issued until all pairs are received ttt Time (seconds) until measurement is ready n, nn Number of measurement values 0095110 rev. 007 01/09 TROLL 9500 Operator’s Manual... - Page 139 SDI-12 Data Re- corder (customer- supplied) Adapter to another SDI-12 device up to 300 ft (91 m) RuggedCable; see Table 19-1 for power requirements of cables longer than 170 ft (52 m) TROLL 9500 0095110 rev. 007 01/09 TROLL 9500 Operator’s Manual...
-
Page 140: 20 Low -Flow Monitoring
PREPARE THE FLOW CELL Connect valves and tubing to flow cell body. Attach spike or base Flow cell for sub-4” TROLL 9500 plate. Insert the calibrated TROLL 9500 into the flow cell. Turn on the pump. Flow cell for sub-2” TROLL 9500 0095110 rev. -
Page 141: Start The Software
F On your next ActiveSync connection, In-Situ’s synchronization utility Win- A Connect the TROLL 9500 you will use in the field to your desktop PC. The Situ Sync will prompt you for Low Flow templates you wish to transfer to device can be in air since the sampled data are not important. -
Page 142: Flow-Sense Wizard Input
(flow cell) and tubing, less the displacement of installed sensors. Click or tap Next to continue. To specify a different volume, clear the “Auto” check box, and enter the new volume (mL). 0095110 rev. 007 01/09 TROLL 9500 Operator’s Manual... -
Page 143: Saving The Low-Flow Data Or Template
You can enter absolute values in parameter units or Additional functions are available through Win-Situ 4. percentage values graphical report output is available if you export to Excel. 0095110 rev. 007 01/09 TROLL 9500 Operator’s Manual... -
Page 144: Output
4. If desired, save the report as an .xls file. The graph can show up to 10 sets of readings. Change is recalculated with each reading. Graph view of stabilized change 0095110 rev. 007 01/09 TROLL 9500 Operator’s Manual... - Page 145 SECTION 20: LOW -FLOW MONITORING Sample of a Low-Flow output report using the Export to Excel function and the In-Situ template InSituLowFlow. xlt. Normalized data = change in indicator parameters mapped from 0 to 1. A graph may be generated using Win-Situ 4 and inserted manually into the report, if desired.
-
Page 146: 21 Care & Maintenance
Note: Due to the voltage supplied by two lithium D cells, the software create a waterproof seal. When properly assembled, the o-rings will not be vsible. may report that the TROLL 9500 is operating on external power. 6. At your next software connection in Win-Situ 4 or Pocket-Situ 4, To replace batteries: edit the device to update the battery information. -
Page 147: Replacement
Air-dry or wipe with a lint-free tissue. Ultrasonic cleaning is not recommended. STORAGE Store the TROLL 9500 clean and dry. Place the protective red dustcap on the cable end, or store with cable attached to protect the connector pins and o-ring. -
Page 148: 22 Troubleshooting
® 22 TROUBLESHOOTING TROUBLESHOOTING CONNECTIONS The MP TROLL 9500 rolled out of the back of my truck Problem: Win-Situ or Pocket-Situ cannot “find” (connect to) the MP and hit the ground pretty hard. It still talks. Is it OK to use? TROLL 9500. -
Page 149: Troubleshooting Sensors
Refer to diagrams in section 3 or specific sensor section of this manual. Remove sensor and re-install in correct port, if necessary, then refresh device information in the software. 0095110 rev. 007 01/09 TROLL 9500 Operator’s Manual... -
Page 150: Appendix
Using this information, the maximum drift over time is shown in the table on this page. TIP: The recommended frequency of factory recalibration of the MP TROLL 9500 depends upon the amount of drift a DETERMINING DENSITY user is willing to tolerate. For example, if a drift of 0.025% is acceptable, then the recalibration period is 6 months;... - Page 151 2. Secure the transducer at a fixed depth using the cable at the top of the well casing. Wait an hour or so for the system to equilibrate. 0095110 rev. 007 01/09 TROLL 9500 Operator’s Manual...
-
Page 152: Glossary
Calibration cup: Clear PVC vessel that attaches to the front end of the chloride calibration standards. MP TROLL 9500 in place of the restrictor and holds the recom- mended amount of calibration solution during calibration of the Anion: Negatively charged ion (e.g., Cl –... - Page 153 Connection node: Node in the Win-Situ or Pocket-Situ Navigation tree, representing the COM port on the host PC. Extract: Copy test data from the MP TROLL 9500 memory to a host PC. Initiated by the Extract button when a test is selected in the Data folder: Node in the Win-Situ or Pocket-Situ Navigation tree, Navigation tree.
- Page 154 GLOSSARY Host PC: Desktop computer running Win-Situ, or PDA running Pocket- LSZH: Low smoke zero halide Situ, connected to the MP TROLL 9500 via TROLL Com or other μM, μmol/L: micro Molar, unit of dissolved oxygen concentration; to communication interface.
- Page 155 Parameters node: Node in the Win-Situ or Pocket-Situ Navigation tree, providing a view of all parameters the device can measure. Profiler XP: MP TROLL 9500 model with features of the Profiler and in addition allows use of the Extended sensor set.
- Page 156 Slug test: Aquifer characterization test that involves “slugging” a well Restrictor: Perforated stainless steel area of the MP TROLL 9500 with a known volume of fluid or solid and measuring the time of between the nose cone and the body;...
- Page 157 (measured in milliVolts) used to calibrate ORP. such as salts or minerals, in water remaining after evaporating the water and weighing the residue. Calculated from conductivity. TPU: Thermoplastic Polyurethane, a cable jacket option. 0095110 rev. 007 01/09 TROLL 9500 Operator’s Manual...
- Page 158 Barometric pressure, 56 frequency, 64 storage, 114 compensating pressure readings for, 47, 52 history, 63–64 Dissolved oxygen sensor, Clark D.O. sensor. in dissolved oxygen measurements, 36, 86 polarographic kits, 61 nitrate, 116–118 0095110 rev. 007 01/09 TROLL 9500 Operator’s Manual...
- Page 159 PDA, 42 cleaning, 87 measurement interval, 138 Data folder, 23, 34, 40, 42 conditioning, 17, 79, 80 output files, 139 viewing data in, 43–44 filling, 79 preparation, 135 reports, 139 installing, 79 0095110 rev. 007 01/09 TROLL 9500 Operator’s Manual...
- Page 160 49 Pressure about, 97 Logging data, 35–41. See also Tests conversion to depth or level, 49 calibration, 98 overview, 29 measuring, 46, 47 Quick Cal, 17 135–139 Pressure head mode, 48 0095110 rev. 007 01/09 TROLL 9500 Operator’s Manual...
- Page 161 Navigation tree, 39 Refresh button, 24, 25 Settings options, 27 stopping, 37, 40 Removing sensors, 60 Show Calibration Report button, 64 viewing, 30, 43 Repair service, 3 Slug tests, 46 Test setup, 35 0095110 rev. 007 01/09 TROLL 9500 Operator’s Manual...
- Page 162 23 maintenance, 129 launching, 22 “manual” wipe, 124 system requirements, 9 Twist-Lock connectors, 15 Win-Situ Software Manager, 14 Twist-Lock hanger, 9, 51 Win-Situ Sync, 14, 42 Units, selecting, 27 Upgrading features, 25 0095110 rev. 007 01/09 TROLL 9500 Operator’s Manual...
- Page 163 Model: WQP-100 Product Description: The Multi-Parameter Troll 9500 provides real-time readings for and logs up to 9 water- level and water-quality parameters 7 of which are multi-configurable in addition to the built-in temperature and barometric pressure parameters. is in compliance with the following Directive...
- Page 164 Declaration of Conformity Manufacturer: In-Situ, Inc. 221 East Lincoln Avenue Fort Collins, CO 80524 Declares that the following product: Product name: TROLL Com Model: USB TROLL Com Product Description: RS485 to USB converter is in compliance with the following Directive...
Need help?
Do you have a question about the TROLL 9500 and is the answer not in the manual?
Questions and answers