Table of Contents
Advertisement
Quick Links
USER GUIDE
6.3.1 | March 2021 | 3725-46211-014A
Poly VVX Business Media Phones
Getting Help
For more information about installing, configuring, and
administering Poly/Polycom products or services, go to
Polycom Support.
Plantronics, Inc. (Poly — formerly Plantronics and Polycom)
345 Encinal Street
Santa Cruz, California
95060
©
2021 Plantronics, Inc. All rights reserved. Poly, the propeller
design, and the Poly logo are trademarks of Plantronics, Inc.
All other trademarks are the property of their respective
owners.
Advertisement
Table of Contents

Related Manuals for Poly VVX 300 Series


Summary of Contents for Poly VVX 300 Series
- Page 1 Plantronics, Inc. (Poly — formerly Plantronics and Polycom) 345 Encinal Street Santa Cruz, California 95060 © 2021 Plantronics, Inc. All rights reserved. Poly, the propeller design, and the Poly logo are trademarks of Plantronics, Inc. All other trademarks are the property of their respective owners.
-
Page 2: Table Of Contents
VVX 500 Series and VVX 600 Series Hardware............ 18 VVX 1500 Hardware....................20 Securing Your Phone with the Security Slot............23 Navigating Poly VVX Phones....................23 Accessing Screens on Your Poly VVX Phone............23 Switch Phone Screens................... 26 Icons and Status Indicators..................27 Entering Information in Data Fields...................31 Entering Information Using the Dialpad..............31... - Page 3 Contents Audio Calls......................41 Placing and Answering Audio Calls.................. 41 Placing Audio Calls....................41 Redial a Number....................46 Redial a Contact when the Contact is Available.............47 Choosing a Protocol for Audio Calls...............47 Answering Audio Calls................... 48 Use the Handset, Headset, or Speakerphone..............50 Mute and Unmute Audio....................
- Page 4 Contents Reject Anonymous Calls..................62 Redirecting Incoming Calls....................62 Forwarding Incoming Calls to a Contact..............62 Divert Calls to a Contact..................63 Call Precedence and Preemption..................64 Conference Calls....................65 Audio Conference Calls....................65 Initiate a Conference Call..................65 Join Calls to Create a Conference Call..............66 End a Conference Call...................
- Page 5 Stop Playing a Recording....................81 Rename a Recording......................81 Delete a Recording......................82 Video Calls on Poly VVX.................. 83 Tips for Video Calls......................83 Using a USB Camera with Your Phone................84 Use the Privacy Shutter on the Camera to Stop Sending Video......84 USBCamera Status Indicators and Messages............
- Page 6 Contents View Recent Calls....................93 Sort Recent Call Entries..................94 Sort Entries by Call Type..................94 View Call Details.....................94 Edit a Recent Call Entry..................94 Delete a Recent Call Entry..................94 Save a Recent Call Entry..................95 Contact Directory......................95 Search for a Contact in the Contact Directory............95 Add a Contact to the Contact Directory..............95 View Contact Information..................
- Page 7 Contents Viewing BroadSoft UC-One Contacts and Favorites..........109 View Aggregated Self-Presence for BroadSoft Lines........... 110 Filter BroadSoft UC-One Favorites...............110 Search for BroadSoft UC-One Contacts...............110 Accessing, Sending, and Broadcasting Messages........112 Accessing Voicemail......................112 Access Voicemail Messages................112 Remove the Message Alert.................. 113 Instant Messaging......................113 Send Instant Messages..................
- Page 8 Contents Navigate the Launch Pad..................127 Display the Launch Pad's Main Screen..............127 Enable My Info Portal................... 127 Poly VVX Phone Settings................128 Password Required to Access Basic Settings..............128 Choose a Theme for Your Phone..................128 Set the System Language....................129 Disable Call Waiting......................129 Time and Date Display....................
- Page 9 Contents View the Security Classification for Your Phone...........141 Modify Security Classification Level..............141 Clear Call Logs and Contacts..................142 Restrict Call Log and Contact Uploads................142 Plantronics Headset Settings..................142 Set the Answering Call Alert.................143 Set the Mute On or Off Alert.................143 Set the Mute Reminder..................
- Page 10 Contents Connecting Polycom VVX Expansion Modules to Your Phone....155 VVX Expansion Module Hardware Features..............155 VVX Color Expansion Module Hardware Features............157 Connect VVX Expansion Modules.................. 158 Connect Additional VVX Expansion Modules..............159 Assigning Contacts and Favorites to VVX Expansion Modules........159 Assign Favorites to Expansion Modules..............
- Page 11 Contents Updating the Phone Software..................176 Update the Phone Software................. 177 Update the Software Later................... 177 Postpone Software Updates.................177 Ignore Software Updates..................177 Exit the Software Update Notification..............178 CSTA Lines........................178 Troubleshooting..................... 179 Speakerphone.........................179 USB Port......................... 179 Check the Status of the Calendar................... 180 Ribbon Communications Address Book................180 View the Status of the Personal Address Book............180 Polycom Desktop Connector...................180...
-
Page 12: Before You Begin
Create an account to access Poly support personnel and participate in developer and support forums. You can find the latest information on hardware, software, and partner solutions topics, share ideas, and solve problems with your colleagues. - Page 13 Before You Begin • Poly Services help your business succeed and get the most out of your investment through the benefits of collaboration.
-
Page 14: Getting Started
Topics: • Overview of Phone Hardware and Keys • Navigating Poly VVX Phones • Entering Information in Data Fields Before you use your phone, familiarize yourself with its features and user interface. Note: As you read this guide, remember that your system administrator configures certain features or your network environment may determine them. -
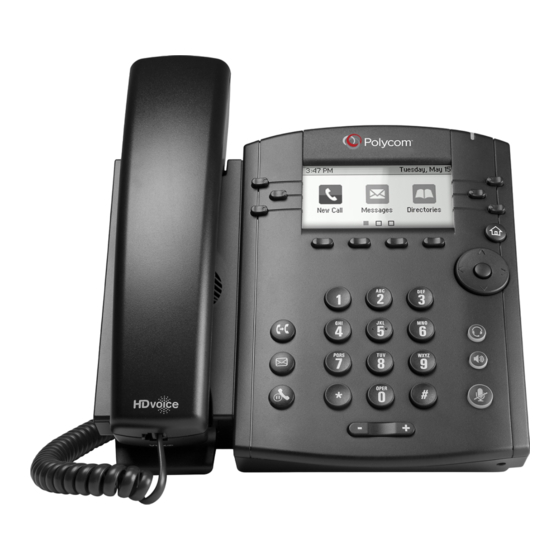
Page 15: Vvx 300 Series Hardware
VVX 101 phones don’t have a backlight. Message Waiting Indicator Flashes red to indicate when you have new messages. VVX 300 Series Hardware The following figure displays the hardware features on the VVX 300, 301, 310, and 311 business media phones. - Page 16 Getting Started Figure 2: VVX 300 series hardware features VVX 300 Series Hardware Feature Descriptions Reference Feature Feature Description Number Security slot (on Enables you to attach a universal security cable lock to your phone so you top) can secure it to a desktop.
-
Page 17: Vvx 400 Series Hardware
Getting Started Reference Feature Feature Description Number Mute key Mutes local audio during calls and conferences. The key glows red when activated. Speakerphone Enables you to place and receive calls using the speakerphone. The key glows green when activated. Headset key Enables you to place and receive calls through a headset. - Page 18 Getting Started Figure 3: VVX 400 series hardware features VVX 400 Series Hardware Feature Descriptions Reference Feature Feature Description Number Security slot Enables you to attach a universal security cable lock to your phone so you can (on back) secure it to a desktop. Reversible tab Secures the handset in the cradle when you position your phone stand at a high angle.
-
Page 19: Vvx 500 Series And Vvx 600 Series Hardware
Getting Started Reference Feature Feature Description Number Dialpad Enables you to enter numbers, letters, and special characters. You can also use the dialpad keys to select menu items that have index numbers. Messages key Enables you to access and manage instant and voice messages. Hold key Holds an active call or resumes a held call. - Page 20 Getting Started Figure 4: VVX 500 series and VVX 600 series hardware features VVX 500 Series and 600 Series Hardware Feature Descriptions Reference Feature Feature Description Number Security slot (on Enables you to attach a universal security cable lock to your phone so you back) can secure it to a desktop.
-
Page 21: Vvx 1500 Hardware
Getting Started Reference Feature Feature Description Number Speakerphone key Enables you to place and receive calls using the speakerphone. The key glows green when activated. Headset key Enables you to place and receive calls through a headset. The key glows green when an analog headset is activated, and blue when a USB or Bluetooth headset is activated. - Page 22 Getting Started Figure 5: VVX 1500 hardware features VVX 1500 Hardware Feature Descriptions Reference Feature Feature Description Number Camera Provides near-site video. The camera barrel is located directly behind the camera lens. The camera barrel adjusts the camera angle. Touchscreen Enables you to select items and navigate menus on the touch-sensitive screen.
- Page 23 Getting Started Reference Feature Feature Description Number Dialpad keys Enable you to enter numbers, letters, and special characters. You can also use the dialpad keys to select menu items that have index numbers. Security slot (on Enables you to attach a universal security cable lock to your phone so you side) can secure it to a desktop.
-
Page 24: Securing Your Phone With The Security Slot
Your phone has icons, status indicators, and user screens to help you navigate and understand important information on the state of your phone. Accessing Screens on Your Poly VVX Phone You can access the following screens on your phone: •... - Page 25 Getting Started Procedure » Press Access the Calls Screen You can access the Calls screen when you have one held call or an active and held call in progress on your phone. The Calls screen displays when you have an active call and one or more held calls on your phone. Your line displays the total number of calls.
- Page 26 Getting Started Figure 8: Phone line, favorites, and soft keys on the Lines screen On VVX 500 and 600 series phones, you can also view active call and incoming call information in the status bar on the Lines screen, if enabled by your administrator, as shown next. Procedure »...
-
Page 27: Switch Phone Screens
Getting Started Figure 9: Active Call screen on VVX 500 series phones Procedure » Do one of the following: • Place a call. • When you're in a call, press the Home key or select the Calls soft key. • In the status bar, select Return to Calls. -
Page 28: Icons And Status Indicators
Presence status (Offline) Do Not Disturb enabled Presence status (Unknown) Icons and Status Indicators on VVX 300 Series Business Media Phones The following table displays the phone icons and status indicators that display on VVX 300 series business media phones. Icon Description... - Page 29 Getting Started Icon Description Icon Description Placing a call Shared line Active call using Polycom HD Voice Shared line with a held call Held Call Call forwarding enabled Incoming call New message Active conference Presence status (Available) Placed call Presence status (Busy or In a Call) Received call Presence status (Away) Missed call...
- Page 30 Getting Started Icon Description Icon Description Favorite Presence status (Offline) Do Not Disturb enabled Presence status (Unknown) Icons and Status Indicators on VVX 500 Series and 600 Series Business Media Phones The following table displays the phone icons and status indicators that display on VVX 500 series and VVX 600 series business media phones.
- Page 31 Getting Started Icons and Status Indicators on VVX 1500 Business Media Phones The following table displays the phone icons and status indicators that display on the VVX 1500 business media phones. Icon Description Icon Description Line (registered, private) Audio-only call Line (registered, shared) Audio call with Polycom HD Voice Line (unregistered)
-
Page 32: Entering Information In Data Fields
Getting Started Entering Information in Data Fields You can enter information and edit fields using the dialpad keys on the phone console or the onscreen keyboard on supported phones. Before you enter information into fields, choose how to enter the information using the following softkeys: •... -
Page 33: Enter Information Using The Onscreen Keyboard
Getting Started Task Action Enter a character Press a dial pad key repeatedly to view the character options and stop when the character you want to enter displays in the field. Wait one second, and enter the next character. Enter a number Select Encoding or Mode, and select 123 or press a dialpad key repeatedly to enter the number that displays on that key. -
Page 34: Entering Chinese Characters With Pinyin
Getting Started Task Action Enter text Select Abc and select the characters you want. Enter uppercase characters Select ABC and select the characters you want. Enter lowercase characters Select abc and select the characters you want. Enter numbers Select 123 and select the numbers you want. Enter special characters Select ASCII and select the characters you want. - Page 35 Getting Started Enter Chinese Characters with the Onscreen Keyboard You can use the onscreen keyboard and the PinYin input widget to enter Chinese characters on supported VVX phones. Procedure 1. Select the keyboard icon 2. Select the globe icon to verify that PinYin is the default input mode. A list of language options display.
-
Page 36: Logging In To And Locking Your Phone
Poly phone before you can use one. By default, Poly devices don’t require you to log in before you can use them. If you don’t log in, you see the default profile. When you log in, you have full access to your personal settings and your directory. -
Page 37: Log Out Of The Phone
Your system administrator provides you with login credentials that you can use to log in to a visitor desk phone. By default, Poly phones do not require you to log in before you can use them. However, if you do not log in, you see only the phone's default profile. -
Page 38: Log Out Of A Visitor Desk Phone
Logging In to and Locking Your Phone Log Out of a Visitor Desk Phone After you use a phone, make sure you log out to prevent access to your personal settings. Procedure » Select the Log out soft key or navigate to Settings > Features > Visitor Desk Phone > Visitor Log out. -
Page 39: Log In To A Guest Automatic Call Distribution Phone
Logging In to and Locking Your Phone Log In to a Guest Automatic Call Distribution Phone Log in to your Automatic Call Distribution (ACD) account after you log in as a guest on a host phone. Your system administrator enables Flexible Seating with the ACD on your phone. Note: When you log in to a host phone as a guest user, the Use Host softkey isn’t available. -
Page 40: Locking Your Phone
Logging In to and Locking Your Phone Locking Your Phone Your system administrator provides you with a user password that you can use to unlock the phone. Locking your phone prevents unauthorized people from placing or answering calls. It also prevents anyone from viewing or modifying phone information, such as your directory, call lists, or favorites. -
Page 41: Unlock The Phone
Logging In to and Locking Your Phone Unlock the Phone You can unlock the phone with your . Procedure 1. Select Unlock. 2. Enter your user password (or guest PIN if signed in as a guest on a host phone) and select Unlock. -
Page 42: Audio Calls
VVX 101 and 201 phones can manage a maximum of eight active, incoming, and held audio calls at a time. VVX 300 series, 400 series, 500 series, 600 series, 1500 phones can manage a maximum of 24 active, incoming, and held audio calls at a time. - Page 43 Audio Calls Pausing When Dialling a Phone Number When you insert a pause in a phone number, the dial process pauses for a few seconds before dialing the next sequence of numbers in a phone number. Stacking these characters creates longer pauses. Insert a dial pause to bypass an automated phone menu or use pause characters to dial multiple phone numbers in one dial string.
- Page 44 Audio Calls 4. Do one of the following: • Dial the number. • Save the number to a contact. 5. When you dial the number and your dial string reaches the ; character, select OK to continue dialing the rest of the number. Call Charges for Outgoing Calls If your service provider charges for outgoing calls, a notification displays on your phone informing you of the potential charges of an outgoing call.
- Page 45 Audio Calls Place a Call from Recent Calls You can place calls from the Recent Calls list, which contains calls that you recently placed, answered, or missed. Procedure 1. Navigate to Directories and select Recent or Recent Calls. 2. From the Calls List screen, select a contact and select Dial. Calling Favorites Call favorite contacts from the Favorites list or from your Home or Lines screen.
- Page 46 Audio Calls • Go to New Call > Directory. • Go to Place a Call > Directory. 2. Choose a directory. 3. From your directory, select or search for a contact. 4. Select the contact's phone number. On VVX 500/501 and 600/601 phones, the phone automatically places the call. 5.
-
Page 47: Redial A Number
Audio Calls The phone plays a tone and the contact’s phone answers the call automatically. 4. After your contact answers the call, speak your message and select End Call. Place an Intercom Call During a Call You can place an intercom call to another contact during an active call. Procedure 1. -
Page 48: Redial A Contact When The Contact Is Available
Audio Calls Redial a Contact when the Contact is Available When you place a call to a contact and the contact’s line is unavailable due to an unregistered line or a service outage, a notification displays on your phone when the contact’s line is available again, and you can choose to call the contact from the notification. -
Page 49: Answering Audio Calls
Audio Calls However, when you add a new contact to your contact directory, you can specify which protocol the phone uses for calls placed that contact. Doing so ensures that your phone automatically uses the correct protocol when you dial the contact. Procedure 1. - Page 50 Audio Calls Answer Calls Automatically You can set up your phone to automatically answer calls using Auto Answer. When enabled, the phone automatically answers all incoming calls using the speakerphone. Your system administrator sets how many times the phone rings before it automatically answers the call. The phone doesn’t automatically answer a call until you place your current call on hold or end it.
-
Page 51: Use The Handset, Headset, Or Speakerphone
Audio Calls Use the Handset, Headset, or Speakerphone You can place and answer calls on your phone using the handset, headset, or speakerphone, and you can alternate among the three modes during calls, if available. When using the speakerphone, the Speakerphone key glows green. -
Page 52: Resume A Call
Audio Calls Resume a Call View and resume a held call. Procedure » Do one of the following: • Select Resume. • From the Calls screen, select the call and select Resume. Resume a Call on an Expansion Module You can resume calls placed on hold by other contacts from your expansion module connected to supported VVX. -
Page 53: Choose A Default Transfer Type
Audio Calls • Consultative transfer - Enables you to speak with the other party before completing the transfer. Choose a Default Transfer Type Your phone is preconfigured to use consultative as the transfer type, but you can choose a default transfer type to use for all calls on your phone. -
Page 54: Parking And Retrieving Calls On The Broadsoft Broadworks Server
Audio Calls Parking and Retrieving Calls on the BroadSoft BroadWorks Server When your phone is registered with a BroadSoft BroadWorks server, you can use Call Park to park a call directly to a contact's line. Call Park is different from call hold in that the call is parked on another contact's line, which enables you to continue using your phone to place other calls. -
Page 55: Retrieve A Parked Broadsoft Call On Another Phone
Audio Calls Retrieve a Parked BroadSoft Call on Another Phone You can retrieve a parked call from any phone within your network. When a parked call is retrieved by a contact monitoring your line, the Call Park icon and status message is removed from the line. -
Page 56: Display Calls From The Lines Screen
Audio Calls Display Calls from the Lines Screen You can display the calls for each line from the Lines screen. When you select a phone line that has a held call, the first held call on that line is automatically resumed, even if you already have an active call on a different line. -
Page 57: View A List Of Calls
Audio Calls displayed and a list of held calls is displayed above the soft keys, as shown next. If you have only held calls on your line, the Active Call screen does not display. Figure 11: Active and held calls on a VVX 1500 phone A green bar on the line key indicates the line has an active call, and a flashing red bar indicates the line has one or more held calls. -
Page 58: Managing Calls Remotely With Broadworks Server
Audio Calls Managing Calls Remotely with Broadworks Server Manage calls to your line remotely using the BroadWorks Anywhere or Remote Office features. When you register your phone with a BroadWorks server and sign in to BroadSoft UC-One, you can manage calls to your line remotely. You can handle any incoming calls to your office phone on other phones or mobile devices. -
Page 59: Managing Calls With Broadsoft Uc-One Remote Office
Audio Calls Edit BroadWorks Anywhere Locations After you enable BroadWorks Anywhere and add locations on phone, you can edit the added locations. Procedure 1. Do one of the following: • Select UC-One on the Home screen. • Go to Settings > Features > UC-One Call Settings. 2. -
Page 60: Ignoring Or Rejecting Incoming Calls
Audio Calls For more information on using Remote Office, contact your system administrator or service provider. Add a Remote Office Number You can add one number only as your remote office number. Procedure 1. Do one of the following: • Select UC-One on the Home screen. -
Page 61: Ignore Or Silence An Incoming Call
Audio Calls Note: You cannot reject calls on shared lines. You can only silence the ringer. Ignore or Silence an Incoming Call Ignore or silence a call to mute the ringer without rejecting the call. When you ignore a silence a call, the incoming call notification continues to display. Procedure »... - Page 62 Audio Calls • The message Do Not Disturb displays in the status bar on all phones. • The DND icon on the Home screen changes from DND Disabled to DND Enabled For VVX 101 and 201 phones, the line icon changes to Note: When you set your presence status to Do Not Disturb and enable DND on your phone, a message reflecting your Do Not Disturb status scrolls under the time display.
-
Page 63: Reject Anonymous Calls
Audio Calls Disable Do Not Disturb When you’re ready to receive calls, disable DND. Tip: To quickly disable DND on VVX 600/601 phones, tap in the status bar. Procedure » Select DND. On VVX 1500 phones, press the DND key. Reject Anonymous Calls When your phone is registered with a BroadWorks server and you are signed into the phone with your BroadSoft UC-One credentials, you can use the Anonymous Call Reject (ACR) feature to automatically... -
Page 64: Divert Calls To A Contact
Audio Calls Forward an Incoming Call to a Contact You can forward an incoming call directly to a contact without answering the call. Note: On shared lines, you must answer a call before forwarding it to a contact. Procedure 1. On the Incoming Call screen, select Forward. 2. -
Page 65: Call Precedence And Preemption
Audio Calls 4. From the Edit Contact screen, select Divert Contact, and enter a contact's number. 5. Select Auto Divert > Enabled. 6. Select Save. Call Precedence and Preemption If your administrator has enabled call precedence and preemption, your outgoing calls are assigned a precedence level. -
Page 66: Conference Calls
Conference Calls Topics: • Audio Conference Calls When you initiate a conference call, you can manage conference participants, join calls into a conference, or split your conference into individual calls. Audio Conference Calls Start a conference call with two contacts on hold. You can also split, hold, or resume conference calls. VVX 101 and 201 phones manage a maximum of four active or held conference calls at a time. -
Page 67: Join Calls To Create A Conference Call
Conference Calls Join Calls to Create a Conference Call You can join one active call and one held call into a conference call. Procedure » Do one of the following: • When you have an active call and a held call, select the Join soft key. •... - Page 68 Conference Calls • Mute a participant. • Hold a participant. • Remove a participant from the conference. • List information about a participant. Participant information includes name, number, and call details. Call details include whether the call is muted, held, or is video-enabled. This feature isn’t available for VVX 101 and 201 phones.
-
Page 69: Shared Lines
Shared Lines Topics: • Shared Line Limitations • Answering Calls on Shared Lines • Missed and Received Calls on Shared Lines • Hold a Call Privately on a Shared Line • Barge In on Calls for Busy Lamp Field Lines •... -
Page 70: Hold A Call Privately On A Shared Line
Shared Lines Hold a Call Privately on a Shared Line You can hold a call privately on a shared line. Using Private Hold places the call on hold and displays the line as busy on the other phones on the shared line. By default, when you hold a call on a shared line, all of the phones registered with that line display the call's held status. -
Page 71: Access The Call Actions For Broadworks Dynamic Busy Lamp Field (Blf)
Shared Lines Access the Call Actions for BroadWorks Dynamic Busy Lamp Field (BLF) You can access the call actions settings on the phone and modify the settings from the Attendant Call Action menu when dynamic BLF is configured on the phone. You can one touch the following BLF actions on the phone: •... -
Page 72: Barge In On An Active Call
Shared Lines Any MADN member can respond to an incoming call to the shared line. When a MADN member answers an incoming call, the LED indicator on the line key for all phones changes to a steady red light to indicate the call was answered. - Page 73 Shared Lines The following are three types of privacy codes that you can use to enable and disable privacy on a shared line: • Privacy Access (PRV) code—Enables privacy for an active call on a public line. • Privacy Release Activation (PRLA) code—Disables privacy for an active call on a private shared line.
-
Page 74: Broadsoft Uc-One Simultaneous Ring
Shared Lines BroadSoft UC-One Simultaneous Ring When your phone is registered with a BroadWorks server and you are signed into the phone with your BroadSoft UC-One credentials, you can use the Simultaneous Ring feature to add a list of up to 10 extensions and phone numbers that will ring simultaneously when you receive an incoming call on your line. -
Page 75: Delete Numbers From The Simultaneous Ring List
Shared Lines Delete Numbers from the Simultaneous Ring List You can delete a number added to your Simultaneous Ring list at any time. Procedure 1. Do one of the following: • Select UC-One on the Home screen. • Go to Settings > Features > UC-One Call Settings. 2. -
Page 76: Assistant Options
Shared Lines Set a Filter Criteria for Filtered Calls Executives can determine which types of calls are filtered to an assistant by choosing whether to filter all calls, internal calls, external calls, or calls as specified in an extended filter, which executives can create and edit in the BroadSoft BroadCloud portal. - Page 77 Shared Lines Place a Call on Behalf of an Executive As an assistant, you can make calls on behalf of any of your assigned executives. When a call is made on behalf of an executive, a solid red bar displays on the executive’s line key, if the executive’s line is a shared line.
-
Page 78: Pick Up A Held Executive Call On A Shared Line
Shared Lines Pick Up a Held Executive Call on a Shared Line Executives and assistants can both pick up held calls on shared or private executive lines. On shared lines, the executive and assistant can view the status of calls on both phones and choose which call to pick up. -
Page 79: Recording Audio Calls
Recording Audio Calls Topics: • Guidelines When Recording Calls • Record a Call • Manage a Call while Recording • Pause a Recording • Resume a Recording • Stop Recording • Record a Conference Call • Browse Recorded Calls • Play a Recorded Call •... -
Page 80: Record A Call
Recording Audio Calls Record a Call The phone allows you to record an active audio call. Make sure to inform your contacts on the call before you begin recording. Some things to note about recording: • You can’t record when there are no connected calls, when you place a new call to transfer a call or initiate a conference, or when you have an incoming call. -
Page 81: Stop Recording
Recording Audio Calls Stop Recording You can stop recording a call before the call ends. The recording also stops when the active call ends, no matter who ended the call. Caution: Don’t remove the USB flash drive while recording. Doing so may corrupt the file, preventing you from playing it back later. -
Page 82: Pause And Resume Played Recordings
Recording Audio Calls Note: You can’t open and play recordings when you are in an active call or if you’re recording a call. If you try to, the phone cancels the action. Place the call on hold before playing recordings. The recording stops playing when you resume the call. -
Page 83: Delete A Recording
Recording Audio Calls Delete a Recording When you’ve played a recording or need additional space on your USB drive, delete recordings from the phone. Procedure 1. Go to Settings > Features > Removable Storage Media > Browse Recordings. A list of recordings displays. 2. -
Page 84: Video Calls On Poly Vvx
Video Calls on Poly VVX Topics: • Tips for Video Calls • Using a USB Camera with Your Phone • Video Call Settings • Place a Video Call • Swap Video • Display Video Calls in Full Screen • Exit Full Screen View •... -
Page 85: Using A Usb Camera With Your Phone
Video Calls on Poly VVX • Avoid wearing bright colors, all-light or all-dark clothing, or busy patterns, such as small checks or narrow stripes. Pastels and muted colors look best on the screen. • Use natural gestures and speak in a natural tone without shouting. - Page 86 Video Calls on Poly VVX LED State Phone State Flashes green Incoming video call Green Video call is connected Amber One of the following: • Incoming call (no video or audio-only) • Outgoing call • Audio call is connected •...
-
Page 87: Video Call Settings
Video Calls on Poly VVX Video Call Settings Update video settings to change the way video calls display on your video-enabled phone. If you update settings during a call, the phone does not apply them until the next call. Note: Some of the features described in this section require access to the Basic settings menu. If your phone requires a password to access the Basic settings menu, contact your system administrator for assistance. -
Page 88: Changing The Video Call And Picture-In-Picture (Pip) Displays
Video Calls on Poly VVX • Brightness Level—Sets how brightly your video displays. You can set a level between 0 (dimmest) and 6 (brightest). The default level is 3. • Saturation Level—Sets how much color your video displays. You can set a level between 0 (lowest) and 6 (highest). - Page 89 Video Calls on Poly VVX Note: Depending on the phone or system that is sending video, black bars might appear on the top, bottom, or sides of the video. Black bars appear when aspect ratio of the video received doesn’t match the display area on your phone.
-
Page 90: Place A Video Call
Video Calls on Poly VVX 3. Select Save. Display All Video Calls in Full Screen Mode By default, the far-side video always displays in the Active Call screen. You can enable your phone to display all incoming videos on the full screen. -
Page 91: Exit Full Screen View
Video Calls on Poly VVX Figure 13: Full screen mode Procedure » Do one of the following: • Tap Video > Full Screen. • • Tap the video area to view video on the full screen. Exit Full Screen View You can exit full screen view and video in your default video display. -
Page 92: No Video From The Far Side
Video Calls on Poly VVX No Video from the Far Side If the far side stops sending video, a No Video icon is displayed on your phone. If the far side is unable to send video, a thunderbolt icon is displayed next to the No Video icon. -
Page 93: Managing Video Calls Without A Usb Camera
Video Calls on Poly VVX Managing Video Calls without a USB Camera A video-enabled VVX 500/501 or 600/601 phone can receive video even if you don’t attach a USB camera. Placing a video call on hold stops the video stream. The phone replaces the video with a placeholder image. -
Page 94: Call Lists And Directories
Call Lists and Directories Topics: • Recent Calls • Contact Directory • Corporate Directory • BroadSoft Directories • Managing the Ribbon Communications Address Books All VVX phones support a Recent Calls list, a Contact Directory, and a Corporate Directory. The phones can also support a BroadSoft Directory and the Ribbon Communications Address Books depending on your server and if enabled by your system administrator. -
Page 95: Sort Recent Call Entries
Call Lists and Directories Sort Recent Call Entries You can sort the Recent Calls list to view calls by call type, time, and call name. When you sort calls by the time of the call, you can order them in ascending (oldest call first) or descending (most recent call first) order. -
Page 96: Save A Recent Call Entry
Call Lists and Directories Procedure 1. Select Info next to a call record. 2. Select Delete or tap Delete Save a Recent Call Entry You can save a recent call entry to the Contact Directory. Procedure 1. Select Info next to a call record. 2. -
Page 97: View Contact Information
Call Lists and Directories • Favorite Index—An index number that displays in your Favorites list • Label—A label or title for your contact • Outgoing Line—The line that speed dial calls will use for your contact Note: If your phone doesn’t display all of these contact fields, contact your system administrator. The only required field in the contact directory is the Contact field, which includes the contact’s phone number. -
Page 98: Corporate Directory
Call Lists and Directories 2. In the Contact Directory, select a contact. 3. On the Contact Information screen, select Delete A confirmation message displays. 4. Select Yes to delete the contact. Corporate Directory Your system administrator can set up your phone so that you can access a corporate directory, which lists contacts and groups within your company. -
Page 99: Add Corporate Directory Contacts To The Local Directory
Call Lists and Directories Each time you view the Corporate Directory, your last search results automatically display. Clear Corporate Directory Search Results After you search for a contact, you can clear your search results and start a new search. Procedure »... -
Page 100: Searching The Broadsoft Directory
Call Lists and Directories • Enterprise Directory • Enterprise Common Directory • Group Directory • Group Common Directory • Personal Directory Searching the BroadSoft Directory You can access and search the BroadSoft directory on the phone, and you can choose to perform a simple or advanced search for contacts. -
Page 101: Add Broadsoft Contacts To The Local Directory
Call Lists and Directories Add BroadSoft Contacts to the Local Directory After you find your BroadSoft contact, you can add the contact to the Contact Directory. Procedure » On the contact details screen, select Save. The first and last name and phone number of the contact save to the contact directory. You can go to the contact directory to see if the contact saved correctly and to add additional contact information. -
Page 102: Managing The Ribbon Communications Address Books
Call Lists and Directories Managing the Ribbon Communications Address Books When your phone is registers with the Ribbon Communications server, you can access your Global Address Book and Personal Address Book on your phone. Check with your system administrator to find out if this feature is available on your phone. Using the Global Address Book Ribbon Communications Global Address Book (GAB) is a read-only directory similar to the Corporate Directory, which is a company directory enabled and populated with contacts by your system... -
Page 103: Using The Personal Address Book
Call Lists and Directories The contact is saved to the Contact Directory or your Personal Address Book. Save Global Address Book Search Results For the GAB, you can also enable View Persistency, which lets you view your most recent search results in the GAB after you have left the Directory screen. - Page 104 Call Lists and Directories Procedure 1. In the Contact Directory, select Add or the Add icon. 2. Enter your contact's information, create a nickname for the contact, and select Save. The contact is added to the Contact Directory on your phone and to the PAB on the server. Delete Contacts from the Personal Address Book When you delete a contact, the contact is deleted from your PAB on your phone and the Ribbon Communications Personal Agent.
-
Page 105: Favorites And Contact Lists
Favorites and Contact Lists Topics: • Managing Favorites • Using Buddy Lists • Managing BroadSoft UC-One Favorites and Contacts On your VVX phone, you can add contacts as favorites, view and manage BroadSoft UC-One contacts, and watch contacts in your Buddy list. Note: Your phone may not support all of the features described in this section. -
Page 106: Viewing Favorites
Favorites and Contact Lists Viewing Favorites You can view favorites in the Favorites list in the Directory or the New Call screen. Favorites display consecutively according to their index number. The contact with the lowest number is displays first. View Favorites View favorites in the Favorites lists on the New Call screen. -
Page 107: Using Buddy Lists
Favorites and Contact Lists Tip: To quickly delete a contact, on the Lines screen, press and hold the favorite until the Contact Information screen is displayed. Select Delete or tap Delete . The contact remains in your directory, but is no longer a favorite. Using Buddy Lists A Buddy list is a list of users whose status or presence you can monitor. -
Page 108: View Your Watcher List
Favorites and Contact Lists • Press the Home key to go to the Lines screen. Buddies' Presence Information Your buddies display an icon next to their name to indicate their status. The following table shows the general icons and the status they represent. Buddy Status and Icons Buddy Status Icon... -
Page 109: View A List Of Blocked Contacts
Favorites and Contact Lists View a List of Blocked Contacts Contacts who cannot monitor your phone's status are added to the Blocked List. Procedure 1. Go to Settings > Features > Presence. A list of contacts that cannot monitor your status is displayed. 2. -
Page 110: Viewing Broadsoft Uc-One Contacts And Favorites
Favorites and Contact Lists Busy Unavailable Offline, Unknown Viewing BroadSoft UC-One Contacts and Favorites You can view UC-One contacts and favorites from your phone on the Home and Lines screen and in the Contacts list. You can also view BroadSoft UC-One groups and contacts in each group. You cannot mark UC-One contacts as favorites on your phone. -
Page 111: View Aggregated Self-Presence For Broadsoft Lines
Favorites and Contact Lists View Aggregated Self-Presence for BroadSoft Lines The home screen displays the aggregated self-presence received from the BroadSoft Messaging Server (UMS). Procedure » From the Home screen, press the Home key The following figure shows the user's aggregated presence state on a VVX 600 series business media phone. - Page 112 Favorites and Contact Lists Procedure 1. Select Directories > UC-One Contacts. 2. Select Search or tap 3. Enter your contact's first or last name. A list of search results display.
-
Page 113: Accessing, Sending, And Broadcasting Messages
Accessing, Sending, and Broadcasting Messages Topics: • Accessing Voicemail • Instant Messaging • Broadcasting Messages with Group Paging • Broadcasting Messages with Push to Talk You can access, send, and broadcast a variety of message types. Note: Your phone may not support all of the features described in this section. Check with your system administrator to find out which features are available on your phone. -
Page 114: Remove The Message Alert
Accessing, Sending, and Broadcasting Messages Remove the Message Alert If you are not ready to listen to your messages when you receive new messages, you can temporarily remove the message alert. Procedure 1. Go to Messages. 2. Select Message Center. 3. -
Page 115: Reply To Instant Messages
Accessing, Sending, and Broadcasting Messages Reply to Instant Messages After you read an instant message on your phone, you can send a reply to the message. Procedure 1. Go to Messages. 2. Select Instant Messages. 3. From the Instant Messages screen, select a message and select Reply. 4. -
Page 116: Receiving Pages
Accessing, Sending, and Broadcasting Messages Procedure 1. From the Lines screen, select the Paging soft key. 2. From the Paging Groups screen, select a paging group. 3. To begin a page, select Page. Just before the page starts, you'll hear an alert tone, and then the page begins. 4. -
Page 117: Group Paging Settings
Accessing, Sending, and Broadcasting Messages Group Paging Settings You can change your default paging group, update page group subscriptions, and enable pages to play during active calls on your phone. Note: The features described in this section require access to the Basic settings menu on the phone. If your phone requires a password to access the Basic settings menu, contact your system administrator for assistance customizing your phone. -
Page 118: Broadcasting Messages With Push To Talk
Accessing, Sending, and Broadcasting Messages Broadcasting Messages with Push to Talk The Push to Talk (PTT) feature enables you to transmit messages and listen to replies much like a walkie- talkie. Your system administrator sets up the feature, defines up to 25 channels for PTT mode, and assigns a label to each channel that easily identifies the channel, such as All, HR Dept, Shipping Staff, or Executives. -
Page 119: Receiving Ptt Broadcasts
Accessing, Sending, and Broadcasting Messages others a chance to reply. At any time during the waiting period, you can resume your broadcast by pressing and holding Talk. If no one broadcasts during the waiting period, the channel closes and the broadcast ends. •... -
Page 120: End Ptt Broadcasts
Accessing, Sending, and Broadcasting Messages The broadcast is sent to all people listening on the channel. 3. When you finish talking, release Talk. The broadcast enters another waiting period until someone broadcasts again. If no activity occurs within the waiting period, the channel closes and no more broadcasts can take place. End PTT Broadcasts After you end a broadcast, the channel remains open so others can respond. - Page 121 Accessing, Sending, and Broadcasting Messages 3. From the Channel Subscriptions screen, select the channel you want to subscribe to and select Yes. Enable PTT Broadcasts to Play During Active Calls The Accept While Busy setting determines what happens when you are in a call and receive a PTT broadcast.
-
Page 122: Phone Applications
• Using the Launch Pad Poly phones can support optional applications configured by your system administrator. Ask your system administrator if your phone supports any of the applications discussed in this section. Note: Some of the features described in this section require access to the Basic settings menu. If your phone requires a password to access the Basic settings menu, contact your system administrator for assistance. -
Page 123: Navigate To Other Views
Phone Applications • To view an upcoming day, tap Navigate to Other Views From Day view, you can also access Month and Meeting view. Month view is not available on VVX 201 phones. Procedure » Do one of the following: •... -
Page 124: Return To Day View
Phone Applications Return to Day View Day view is the default Calendar view. You can return to Day view from Month or Meeting view. Procedure » Select Exit or select Back Meeting Reminders When you have a scheduled meeting on the calendar, a meeting reminder displays and an alert tone plays 5 to 15 minutes before a meeting starts. -
Page 125: Joining Calendar Meetings
Phone Applications 2. Select Calendar Settings > Reminder Settings. 3. Select Reminder Type and choose a meeting reminder type. Choose a Meeting Alert Tone Choose the alert tone that plays for meeting reminders. Procedure 1. Go to Settings > Basic > Preferences. 2. -
Page 126: Navigating The Web And Idle Browsers
Phone Applications Navigating the Web and Idle Browsers The phone supports the following browsers: • Idle Browser—Displays noninteractive web content. The Idle Browser displays noninteractive web content on the Lines screen when no calls are in progress. Your system administrator determines what displays on the Idle Browser for your phone. •... -
Page 127: Using The Launch Pad
Phone Applications Icon Action Returns to the browser's home page. Displays the toolbar permanently so it does not hide every three seconds. Enables the toolbar to hide every three seconds. To display a hidden toolbar, you have to press the touchscreen until the toolbar displays. (VVX 1500, 500/501, and 600/601 phones) Exits the Web Browser and returns to the phone's Home screen. -
Page 128: Navigate The Launch Pad
Phone Applications • Select the Picture Frame icon. • Select the My Info Portal icon and select the feed you want to view. • Select an additional application to launch. Navigate the Launch Pad When you are using the Launch Pad application, a group of soft keys display to help you navigate the Launch Pad. -
Page 129: Poly Vvx Phone Settings
Poly VVX Phone Settings Topics: • Password Required to Access Basic Settings • Choose a Theme for Your Phone • Set the System Language • Disable Call Waiting • Time and Date Display • Backlight Intensity and Timeout • Changing Your Background •... -
Page 130: Set The System Language
4. Select Yes to reboot your phone and apply the changes. Set the System Language Poly phones support several languages that you can choose to display on the phone. Check with your system administrator to find out which languages your phone supports. -
Page 131: Time And Date Display
Poly VVX Phone Settings Time and Date Display The time and date display in the status bar. When the phone can’t obtain a time and date, the time and date display flashes. If this happens, or if the time and date are incorrect, contact your system administrator. -
Page 132: Set The Backlight Intensity
Poly VVX Phone Settings Set the Backlight Intensity The screen's backlight intensity settings adjust how bright the screen illuminates while on and while idle. Set the Backlight On intensity and the Backlight Idle intensity separately. Choose an intensity level or turn off the backlight entirely. -
Page 133: Adding Personal Photos As Your Background
Progressive or multiscan JPEG images are not supported. • The phone screen sizes vary by phone: ◦ VVX 300 series and 400 series phone screens are 220 × 108 pixels. ◦ VVX 500 series phone screens are 320 × 240 pixels. ◦... -
Page 134: Reset Your Background
Poly VVX Phone Settings Use a USB Flash Drive to Add a Background You can add personal photos as your background using a USB drive. Before you can set a photo on your USB flash drive as the background picture, make sure the photo is on a USB flash drive and is not in a folder on the drive. -
Page 135: Customize The Columns On The Lines Screen
Poly VVX Phone Settings Customize the Columns on the Lines Screen When you add contacts or favorites to line keys on the Lines screen, the contacts display in columns. You can control how many columns of line keys display on the Lines screen on your VVX 500/501 and 600/601 phone. -
Page 136: Enable Screen Savers
Poly VVX Phone Settings Enable Screen Savers When you enable the screen saver, you can choose to have your phone display default photos stored on the phone or photos stored on a connected USB flash drive. The screen saver automatically starts when your phone is idle for a specified amount of time. You can stop the screen saver at any time by touching the screen. -
Page 137: Disable The Screen Saver
Poly VVX Phone Settings On VVX 1500 business media phones, go to Menu > Settings > Basic > Preferences. 8. Select Screen Saver > Screen Saver screen and select Enabled. 9. Select Wait Time and enter the number of minutes the phone should wait after no activity before displaying the screen saver. -
Page 138: Picture Frame Icons
Power Saving Mode By default, Poly phones enter power saving mode and turn off the screen after being idle for a certain period of time to conserve energy. You can determine the period of time that the phone is idle before the screen turns off, and you can set different idle timeouts for office hours and off hours, such as evenings and weekends. -
Page 139: Change Your Office Hours For Power Saving Mode
Poly VVX Phone Settings Change Your Office Hours for Power Saving Mode When you update your office hours, you specify when you start and how long you work each day. After your work hours, the phone is idle and goes into power saving mode. -
Page 140: Changing Audio Settings
Poly VVX Phone Settings Changing Audio Settings You control certain audio settings on your phone, including the ringtone for incoming calls from all contacts or a specific contact, where call notifications play, and the volume of the ringtone or call audio. -
Page 141: Enable Acoustic Fence
2. Select Acoustic Fence and select Enable. Updating Your Buddy Status Poly phones enable you to sign into and update your presence status on your phone to let contacts know when you are busy or available. You can update your status to one of the following: •... -
Page 142: Automatically Update Your Buddy Status
Poly VVX Phone Settings Automatically Update Your Buddy Status You can enable your phone to automatically set your status to Away when your phone is idle for a certain length of time. After you touch the screen or press a key on your phone, your status changes to Available again. -
Page 143: Clear Call Logs And Contacts
1. On the phone, go to Settings > Basic > Preferences > Restrict Calls/Directory Upload. 2. Select Enable. Plantronics Headset Settings Poly UC software supports the following Plantronics headsets and the PLT Hub software on VVX 401, 411, 501 and 601 business media phones: •... -
Page 144: Set The Answering Call Alert
Poly VVX Phone Settings Set the Answering Call Alert You can configure the headset to alert you on incoming calls to the phone. Procedure 1. Do one of the following: • Go to Settings > Basic > PLT Hub > General. -
Page 145: Set The Mute Reminder Interval
Poly VVX Phone Settings Set the Mute Reminder Interval You can set the headset to notify at set intervals when you are on mute. You must set Mute Reminder to Audible Reminder to use the mute reminder interval option. Procedure 1. -
Page 146: View Voice Visual Feedback
Poly VVX Phone Settings View Voice Visual Feedback You can speak to view the graphical representation of the audio from your VVX phone. Procedure 1. Do one of the following: • Go to Settings > Basic > PLT Hub > Audio Tuning. -
Page 147: Set The Dial Tone
Poly VVX Phone Settings Set the Dial Tone You can set the dial tone of the softphone to alert for an outgoing call. Procedure 1. Do one of the following: • Go to Settings > Basic > PLT Hub > Softphone. -
Page 148: Restore Default Settings
Poly VVX Phone Settings • Go to Settings > Basic > PLT Hub > Advanced. • Go to PLT Hub > Advanced. 2. Select Hours on Phone Per Day. 3. Select the number of desired hours. Restore Default Settings You can restore the headset default settings from your VVX phone. -
Page 149: Font Size Customization
Poly VVX Phone Settings Font Size Customization Polycom UC Software enables you to customize the font size on VVX 250, 350, and 450 business IP phones. The following font size options are available: • Normal • Large Note: This feature is only applicable for English (default) language. -
Page 150: Using Bluetooth Devices On Vvx 600 Series Phones
Using Bluetooth Devices on VVX 600 Series Phones Topics: • Using Bluetooth Headsets • Pairing a Smartphone to Your Phone • Disconnect and Remove Your Bluetooth Device • Edit Your Phone's Bluetooth Device Name • Disable Bluetooth Device Discovery • DTMF Dialing Connect a Bluetooth device such as a smartphone or headset to handle audio calls. -
Page 151: Managing Calls With Your Bluetooth Headset
Using Bluetooth Devices on VVX 600 Series Phones The Bluetooth icon displays in the status bar. After the icon displays, you can pair and connect your Bluetooth-enabled device. 3. Turn your Bluetooth device on and place the device in Discovery mode. Refer to your Bluetooth device's documentation for information on how to place your device in discovery mode. -
Page 152: Managing Calls With Your Smartphone
Using Bluetooth Devices on VVX 600 Series Phones The Bluetooth icon displays in the status bar. After the icon displays, you can pair and connect your Bluetooth-enabled device. 3. Turn your Bluetooth device on and place the device in Discovery mode. Refer to your Bluetooth device's documentation for information on how to place your device in discovery mode. -
Page 153: Edit Your Phone's Bluetooth Device Name
Using Bluetooth Devices on VVX 600 Series Phones Tip: You can quickly disconnect your Bluetooth device by turning off the device or turning off Bluetooth on the phone. When you turn your device back on, it automatically reconnects to your phone. Procedure 1. -
Page 154: Connecting To A Wireless Network
• Remove a Wireless Network You can connect to a wireless network from your USB-enabled VVX phone using the Poly Wi-Fi wireless network adapter to access all phone services over the wireless network. You cannot use a wireless network and Ethernet simultaneously to connect VVX phones to your network. -
Page 155: Connect To A Secured Wireless Network
Connecting to a Wireless Network The phone scans for wireless networks and lists any that are available. If the phone does not automatically scan, select Scan to manually initiate a Wi-Fi network scan. Note: The administrator can configure the regulatory domain for your location and radio frequency bands on which the wireless network operates. -
Page 156: Connecting Polycom Vvx Expansion Modules To Your Phone
Connecting Polycom VVX Expansion Modules to Your Phone Topics: • VVX Expansion Module Hardware Features • VVX Color Expansion Module Hardware Features • Connect VVX Expansion Modules • Connect Additional VVX Expansion Modules • Assigning Contacts and Favorites to VVX Expansion Modules •... - Page 157 Connecting Polycom VVX Expansion Modules to Your Phone Figure 18: VVX Expansion Module with paper display features VVX Expansion Module Hardware Feature Descriptions Reference Feature Feature Description Number Line key Selects available line key contacts, functions, and assignments. LED Indicators Indicates a line or busy lamp field contact's status.
-
Page 158: Vvx Color Expansion Module Hardware Features
Connecting Polycom VVX Expansion Modules to Your Phone VVX Color Expansion Module Hardware Features The following features are available on the VVX Color Expansion Modules: • VVX Color Expansion Modules feature an easy-to-navigate 480x272 LCD display. • Each color expansion module provides you with 28 line keys and three display pages, supporting a total of 84 lines that you can set up as registrations, favorites, or busy lamp field contacts. -
Page 159: Connect Vvx Expansion Modules
Connecting Polycom VVX Expansion Modules to Your Phone Reference Feature Feature Description Number Line key LED indicators Indicates a line or busy lamp field contact's status. The following lists the LED Indicator behaviors shown on the expansion modules: • Solid Green—Indicates an active call in progress. •... -
Page 160: Connect Additional Vvx Expansion Modules
The following table lists the maximum number of display spaces available on VVX phones. Maximum Number of VVX Phone Display Spaces Supported Phone Model Maximum Display Spaces Supported VVX 300 series VVX 400 series VVX 500 series VVX 600 series Note: After you fill all the display spaces on your phone and assign functions to all the lines on your expansion module, you can find additional favorites and contacts in the Contact Directory. -
Page 161: Identify Line Key Assignments
Connecting Polycom VVX Expansion Modules to Your Phone assigned to the next available line key on the expansion module regardless of the index number. You can reorder your favorites once they are created by changing the value of their index number. Procedure 1. -
Page 162: Insert The Directory Card On The Vvx Expansion Module
Connecting Polycom VVX Expansion Modules to Your Phone The directory card is displayed. Insert the Directory Card on the VVX Expansion Module After you download the directory card, you can print and insert the directory card on your VVX Expansion Module. - Page 163 Connecting Polycom VVX Expansion Modules to Your Phone • If you have two expansion modules connected to your VVX phone, the pages are ordered non- sequentially. As shown in the next figure, the pages display on the two expansion modules in the following order: ◦...
-
Page 164: Alternate Paging
Connecting Polycom VVX Expansion Modules to Your Phone Alternate Paging When Smart Paging is disabled, the ordering of the pages on the expansion modules is not affected by the number of expansion modules connected to your VVX phone. With Alternate Paging, the expansion modules' pages are ordered sequentially. -
Page 165: Phone Accessories And Computer Applications
Phone Accessories and Computer Applications Topics: • Using a Headset with Your Phone • Controlling Your Phone with Polycom Desktop Connector VVX phones support accessories and computer applications that you can use to extend your phone's capabilities. Your phone may not support all of the accessories or applications described in this section. Check with your system administrator to find out which of these applications or accessories are available on your phone. -
Page 166: Use Your Headset For All Calls
Phone Accessories and Computer Applications After you connect a headset to your phone, you can set up your phone to use the headset automatically when answering and placing calls. For setup information on how to connect a headset to your phone, see the Quick Start Guide for your phone on the Polycom Voice Support page. - Page 167 Phone Accessories and Computer Applications Setting the Headset Base Unit Options Before you connect your headset to your phone and use EHS, you need to set the following options for your specific headset model: • For Jabra headsets, change the headset mode to DHSG on the headset base unit. For details, refer to your headset documentation or contact Jabra support.
-
Page 168: Disconnect Your Headset
Phone Accessories and Computer Applications When you are in an active call and you receive an incoming call, you cannot use the hookswitch control on your headset to place the active call on hold and answer the incoming call. Pressing the hookswitch control on the headset ends the active call and answers the incoming call. - Page 169 Phone Accessories and Computer Applications 2. On your phone, go to Settings > Basic > PDC Configuration. 3. On the PDC Configuration screen, set the Status field to Enabled and select Save. Your settings are saved and the Basic screen is displayed. 4.
-
Page 170: Using The Polycom Desktop Connector
Phone Accessories and Computer Applications 8. Select Yes. A dialog box is displayed on your computer asking if you wish to allow remote control of your phone. 9. Select OK to complete the setup process. The PDC icon turns red, indicating that you successfully enabled the PDC program. Disable the Polycom Desktop Connector If you disable the PDC, you can no longer use your mouse and keyboard to control and enter information on your phone. - Page 171 Phone Accessories and Computer Applications • Use the Home and End keys on your keyboard to position your cursor at the beginning or the end of fields on your phone. • Enter numeric information such as phone numbers using the number keys on your keyboard. •...
-
Page 172: Accessibility Features
Users with Limited Mobility • Users Who Are Blind, Have Low Vision, or Have Limited Vision Poly products include a number of features to accommodate hearing, vision, mobility, or cognitively impaired users. Users Who Are Deaf or Hard of Hearing Your phone includes accessibility features for users who are deaf or hard of hearing to use the phone. -
Page 173: Users With Limited Mobility
Accessibility Features Accessibility Feature Description Hearing aid compatible (HAC) handsets All phones are hearing aid compatible (HAC) and have telecoils that magnetically couple to most forms of wearable hearing aids per 47 CFR 68.317 & the Telecommunications Telephone Terminal Equipment Magnetic Field and Acoustic Gain Requirements of ANSI/TIA/EIA 504A Feb 1998. -
Page 174: Users Who Are Blind, Have Low Vision, Or Have Limited Vision
Accessibility Features Users Who Are Blind, Have Low Vision, or Have Limited Vision Your phone includes accessibility features for users who are blind, have low vision, or have limited vision to use the phone. The following table lists the accessibility features for users who are blind, have low vision, or have limited vision. -
Page 175: Maintaining Your Phone
Maintaining Your Phone Topics: • Investigate Warnings • Remove Warnings • Restart Your Phone • Update the Phone’s Configuration • Test the Hardware • Clean the Touchscreen • View Software Details • Updating the Phone Software • CSTA Lines When the phone isn’t operating properly, investigate or troubleshoot issues along with any other tasks your administrator may ask you to perform. -
Page 176: Restart Your Phone
Maintaining Your Phone Restart Your Phone To assist with troubleshooting, your system administrator may ask you to restart your phone. Caution: Before you restart the phone, contact your system administrator. If the phone is malfunctioning, you may be able to restore normal operation without restarting it. Additionally, your system administrator may want to troubleshoot the phone before you restart it. -
Page 177: Clean The Touchscreen
Maintaining Your Phone • Audio Diagnostics • Display Diagnostics • Touch Screen Diagnostics • Brightness Diagnostics • LED Diagnostics • Keypad Diagnostics Clean the Touchscreen The phone screens require minor maintenance, but you may need to clean the screen periodically. Before you clean the screen, disable it so you don’t activate phone functions while you wipe the touchscreen. -
Page 178: Update The Phone Software
Maintaining Your Phone Update the Phone Software When the software update notification is displays your phone, you can choose to update your phone's software at that time. Procedure » When prompted to update your software, select Update. The phone reboots and the software updates. Update the Software Later If you exit the software update, you can press the SWUpdate soft key to update your phone's software at any time after you exit the software update notification. -
Page 179: Exit The Software Update Notification
Maintaining Your Phone • Select Ignore until next Reboot/Sync to ignore software upgrades until the next time you reboot the phone or the next sync event. Exit the Software Update Notification When the software update notification displays, you also have the option to exit the notification without choosing to update or postpone the software. -
Page 180: Troubleshooting
Reset the Phone to Factory Defaults • Using an Approved Power Source If you’re having issues with your Poly phone, you can try the troubleshooting options and solutions in the following topics to resolve certain issues. Speakerphone If your speakerphone doesn't work, your system administrator may have disabled it. If this is the case, a message displays after you press the speakerphone key informing you that Handsfree mode is disabled. -
Page 181: Check The Status Of The Calendar
Troubleshooting Check the Status of the Calendar Issues with the phone’s connection to the Microsoft server may cause calendar problems. Without a functioning connection, you may not see the Calendar icon on the Home screen or you may not receive meeting reminders. -
Page 182: Troubleshoot Audio And Echo Issues
Troubleshooting Issue Corrective Action I can't enter information in a phone field using my Check to see if the phone field has a flashing cursor. computer keyboard. You can use PDC only to enter information in a phone field if the field has a flashing cursor. I can't place a call. -
Page 183: Recording Issues And Solutions
Polycom Phones on Polycom Support for a list of USB devices supported on Poly phones. Reset the Phone to Factory Defaults Access the phone reset option without having to enter an administrator password. After the administrator configures this feature on the phone, you can reset the phone to factory default settings. -
Page 184: Using An Approved Power Source
Troubleshooting Using an Approved Power Source Symptom: If your phone is having the following issues, check your power supply: • The phone cannot connect to the network. • The phone does not start up properly or continues to restart. Problem: If you connect the wrong power supply to your phone, such as the power supply for a different or older phone, it could damage the phone, the phone will not function as expected, and it can void your warranty.
Need help?
Do you have a question about the VVX 300 Series and is the answer not in the manual?
Questions and answers