
Related Manuals for Bodyworx JTC200


Summary of Contents for Bodyworx JTC200
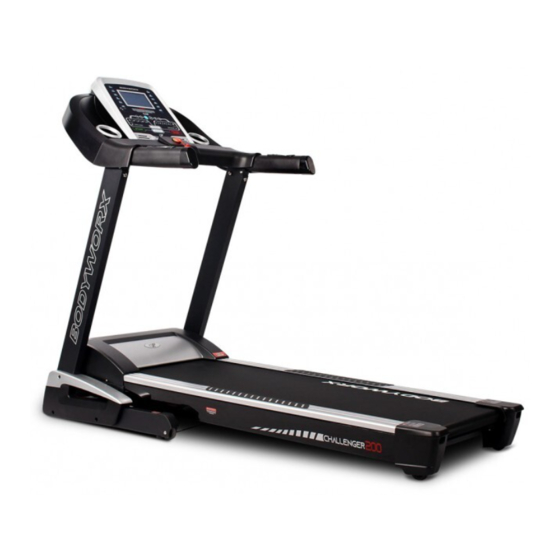
- Page 1 JTC200 TREADMILL Model No: JTC200 WARNING THE BELT COMES PRE-LUBRICATED NO LUBRICATION REQUIRED Retain this owner’s manual for future reference. Read and follow all instructions in this owner’s manual.
-
Page 2: Table Of Contents
CONTENT PAGE WARRANTY REGISTRATION FORM IMPORTANT SAFETY INSTRUCTIONS SAFETY GUIDELINES THE MAIN TECHNICAL PARAMETERS PRODUCT OVERVIEW ASSEMBLY INSTRUCTIONS FOLDING INSTRUCTIONS GROUNDING METHODS CONSOLE INSTRUCTIONS 12-17 GETTING STARTED GUIDE SAFETY EXERCISE EXERCISE INSTRUCTION 20-21 BELT ADJUSTMENT EXPLODED DIAGRAM PARTS LIST 24-25 ERROR CODE AND SIGNIFICANCE... -
Page 3: Warranty Registration Form
GPI Sport & Fitness Warranty Registration Form Congratulations on purchasing your product, we at GPI believe that our product range is of the highest quality and represents great value for money. We back our product range up with our industry leading warranty. Please see below for the step by step instructions on how to register your product warranty on- line. -
Page 4: Important Safety Instructions
IMPORTANT SAFETY INSTRUCTIONS Before beginning any fitness program, you should obtain a complete physical examination from your physician. This exercise equipment is designed and built for optimum safety for home use. However, certain precautions always apply whenever you operate any exercise equipment. Be sure to read the entire manual before assembly and operation of this machine. -
Page 5: Safety Guidelines
SAFETY GUIDELINES Successful fitness training programs have one prominent feature in common...safety. Fitness training has some inherent dangers, as do all physical activities. The chance of injury can be greatly reduced or completely removed by using correct techniques, proper breathing, maintaining equipment in good working condition, and by wearing the appropriate clothing. -
Page 6: The Main Technical Parameters
THE MAIN TECHNICAL PARAMETERS The main technical parameters Working temperature: 0-40 ℃ Input supply voltage: 240V Incline range:15 level motor incline Speed range: 0.8-18 KM/H Distance display range: 0.00-99.9km Max. user weight: 125kg Calories display range: 000-999 Time display range: 00:00-99:59 (min:sec) Heart rate range: 50-200 (time/min) Running surface: 480*1400mm Folding size: 1150*810*1 6 00mm... -
Page 7: Assembly Instructions
ASSEMBLY INSTRUCTIONS WHEN YOU OPEN THE CARTON, YOU WILL FIND THE BELOW SPARE PARTS: Main frame 1 set D21 Flat washer M10 Round bolt C13 safety key 1 set 8 pcs M10*15 4 pcs D2 Allen wrench 6mm, B18 Silicon oil 1 pc D1 Screw driver 1 pc D12 Round hex bolt 1 pc... - Page 8 STEP 3: According to the picture, tighten the bottom frame with bolt M10*55 (D12) and flat washer. Then lock the console frame with M10*15 (D8) and flat washer (D21). Step 4: Attach the left/right side covers (B11L) and (B11R) to the base frame with bolt ST4.2*19 (D48) as picture.
- Page 9 Step 5: Put on the safety key (C13) on the console. Step 6: To check if the running belt runs correctly, placing treadmill in folding position and tightening all the bolts. Then set speed under 3km/h and see if running belt runs without problem. ATTENTION: Must confirm complete assembly as the required above and lock all bolts.
-
Page 10: Folding Instructions
FOLDING INSTRUCTIONS FOLDING INSTRUCTION Lift up the machine and force to pull up until you heard "click" that made by safety casing stuck the Lift up the machine and force to pneumatic cylinder. pull up until you heard "click" that made by safety casing stuck the pneumatic cylinder. -
Page 11: Grounding Methods
GROUNDING METHODS This product must be grounded. If it should malfunction or breakdown, grounding provides a path of least resistance for electric current to reduce the risk of electric shock. This product is equipped with a cord having an equipment-grounding conductor and a grounding plug. The plug must be plugged into an appropriate outlet that is properly installed and grounded in accordance with all local codes and ordinances. -
Page 12: Console Instructions
CONSOLE INSTRUCTIONS Operation Guide JTC200 CHALLENGER 200 OVERLAY 1.1 WINDOW DISPLAY Operation Guide 1.1 WINDOW DISPLAY 1.2. START Normal start after 5 seconds countdown. 1.3 PROGRAM 1 manual mode, 15 re-set programs, 1 body fat program, 3 countdown function and 3 users. - Page 13 1.5.3 “MODE” BUTTON When the treadmill is not running, press this button to choose countdown modes:”H-1”,”H-2”,”H-3”. ”H-1” is the time countdown mode, and “H-2” is the distance countdown mode,“H-3” is the calorie countdown mode; press the “SPEED+/-” or “INCLINE+/-“ button to adjust the data. After that, press the “START” button to start this treadmill. 1.5.4 “SPEED +/-“BUTTON SPEED +/–...
- Page 14 CALORIES: 0.0 – 999 (C) SPEED: 0.8-18.0 (km/h) PULSE: 50 – 200 (BPM) INCLINE:0 – 15 1.7 PULSE FUNCTION When the treadmill is running, hold the hand pulse about 5 seconds, it will display pulse data. The pulse data range is 50-200 times/minute. It has heart-shaped graphics when testing pulse. This data is only for reference, can not be used as medical data.
- Page 15 1.9 Manual model operation 1.9.1 Press start key, time count down 5 seconds, then treadmill will start to work with initial speed 1km/h. 1.9.2 Press speed +/-, you can adjust the speed. 1.9.3 Press incline +/-, you can adjust the incline. 1.9.4 Press stop, you can stop treadmill working.
- Page 16 1.12 User Program Besides 12 pre-set programs, there have 3 user-defined programs: U1, U2 and U3 Each user program has 10 segments. The user can set the desired speed and incline. Press "PROGRAM" button to choose U1 ,U2 or U3, press "MODE" button to enter setting condition, then set the time of the first segment. Press "SPEED+" and "SPEED-"...
- Page 17 1.12.4 During the operating of HRC, speed and incline will adjust as below: (1) If Target heart rate <THR-15, then the speed and incline will adjust automatically every 15 second, the SPEED will increase 0.8km/h and incline add 1 section until they reach the max. data. (2) If THR-5>Target heart rate >=THR-15, then the speed and incline will adjust automatically every 15 second, the SPEED will increase 0.4km/h and incline add 1 section until they reach the max.
-
Page 18: Getting Started Guide
GETTING STARTED GUIDE Getting started guide PREPARE If you are around 35 years old, or have health problem, even this is your first time to do fitness exercise, please consult doctor or professional before use. Before you exercise, please stand on the side to learn how to operate, such as start, stop and speed adjustment. -
Page 19: Safety Exercise
SAFETY EXERCISE Please consult professional staff before you exercise. They can help recommend exercise rate/intensity and time according to your age and health condition. When running, if you feel chest tightness or chest pain, irregular heartbeats, short of breath, dizziness or feel unwell, please stop immediately! Consult a professional before you continue to exercise. -
Page 20: Exercise Instruction
EXERCISE INSTRUCTIONS Using your exerciser will provide you with several benefits, it will improve your physical fitness, tone muscle and in conjunction with a calorie controlled diet help you lose weight. 1. THE WARM UP PHASE This stage helps get the blood flowing around the body and the muscles working properly. It will also reduce the risk of cramp and muscle injury. - Page 21 EXERCISE INSTRUCTIONS 3. THE COOL DOWN PHASE This stage is to let your Cardio Vascular System and muscles wind down. This is a repeat of the warm up exercise e.g. reduce your tempo, continue for approximately 5 minutes. The stretching exercises should now be repeated, again remembering not to force or jerk your muscles into the stretch.
-
Page 22: Belt Adjustment
BELT ADJUSTMENT Place treadmill on a level surface. Make treadmill run at approximately 6-8 km/h, observe the running belt deviation condition. f the belt has drifted to the right, unplug the safety lock and power switch, and turn the right adjusting bolt 1/4 turn clockwise, then insert the power switch and safety lock, make the treadmill running, observe the running belt deviation condition. -
Page 23: Exploded Diagram
EXPLODED DIAGRAM... -
Page 24: Parts List
PARTS LIST Parts list A. Welding parts Description Description Base frame Incline frame Main frame Filter supporting frame Left upright Reinforcing tube Right upright Motor bracket Handrail bracket B. Plastic parts Description Description Console set B16L Left end cap B1-1 Overlay B16R Right end cap... - Page 25 Power switch Inductor Controller Filter Handle pulse left keyboard Single cord (black) 300 Handle pulse right keyboard Photoelectric sensor Incline motor Single line(CE sets) D. Hardware parts Description Description Screw driver 13-15-17 Hex round head bolt M8*20 Allen wrench T6 Hex round head bolt M8*55 Round hex bolt M10*65 Hex round head bolt M8*60...
-
Page 26: Error Code And Significance
ERROR CODE & ERROR CODE & SIGNIFICANCE SIGNIFICANCE Error Code Fault Description Solutions 1. Check if computer is connected to controller with correct wires, Failure communication check connector, check if wire is damaged, or unplug and re- between controller and connect computer 2. - Page 27 JTC200 TREADMILL Model No: JTC200 To register your warranty, please go to www.gpisports.com.au DISTRIBUTED EXCLUSIVELY BY 275 Wellington Road Mulgrave, VIC, 3170 Australia...
Need help?
Do you have a question about the JTC200 and is the answer not in the manual?
Questions and answers