Advertisement
Available languages
Available languages
Quick Links
H-10053
DOWNTOWN COLLECTION –
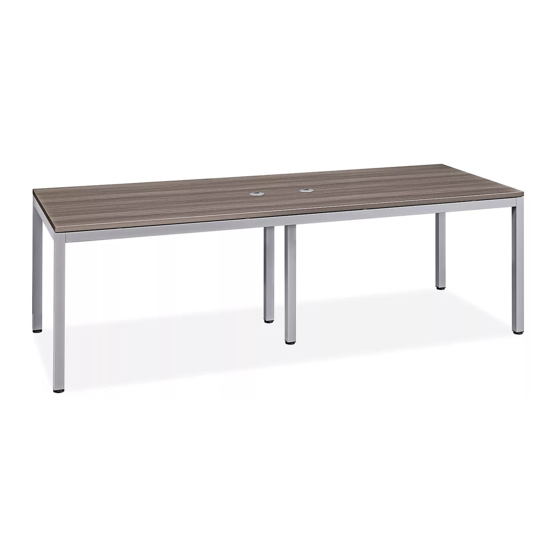
96 x 36" TABLE
TOOL NEEDED
Allen Wrench
(Included)
M6 x 65 mm Bolt x 14
Figure 1
Side Rail
Center Leg
PAGE 1 OF 9
Two Person Assembly
Recommended
M6 x 12 mm Bolt x 24
M6 x 12 mm Bolt
1-800-295-5510
uline.com
PARTS
Adjustable Glide x 6
ASSEMBLY
NOTE: Assemble unit on a smooth, non-marring
surface to prevent scratching. Check that all
parts are included.
1. Position center leg between side rails. Align holes
in center leg with side rail and attach using four
M6 x 12 mm bolts. Repeat for other side rail.
(See Figure 1)
NOTE: Ensure holes for tabletops are facing
upwards.
Para Español, vea páginas 4-6.
Pour le français, consulter les pages 7-9.
Black Grommet x 2
Silver Grommet x 2
0422 IH-10053
Advertisement

Subscribe to Our Youtube Channel
Related Manuals for U-Line DOWNTOWN H-10053


Summary of Contents for U-Line DOWNTOWN H-10053
- Page 1 Para Español, vea páginas 4-6. Pour le français, consulter les pages 7-9. H-10053 1-800-295-5510 uline.com DOWNTOWN COLLECTION – 96 x 36" TABLE TOOL NEEDED Two Person Assembly Recommended Allen Wrench (Included) PARTS M6 x 65 mm Bolt x 14 M6 x 12 mm Bolt x 24 Adjustable Glide x 6 Black Grommet x 2 Silver Grommet x 2...
- Page 2 ASSEMBLY CONTINUED 2. Attach end legs to side rails using eight Figure 2 M6 x 12 mm bolts on each side. (See Figure 2) NOTE: Do not fully tighten screws until top is End Leg attached to frame. M6 x 12 mm Bolt 3.
- Page 3 ASSEMBLY CONTINUED 4. Insert one adjustable glide into each leg. Figure 4 Adjustable (See Figure 4) Glide 5. With second person, carefully flip assembled table Figure 5 onto feet. Insert grommets. (See Figure 5) Grommet 1-800-295-5510 uline.com PAGE 3 OF 9 0422 IH-10053...
-
Page 4: Herramienta Necesaria
H-10053 800-295-5510 uline.mx COLECCIÓN URBANA – MESA DE 96 x 36" HERRAMIENTA NECESARIA Se Recomienda Armar Entre Dos Personas Llave Allen (Incluida) PARTES 14 Pernos M6 x 65 mm 24 Pernos M6 x 12 mm 6 Tapas Niveladoras 2 Ojales Negros 2 Ojales Plateados ENSAMBLE NOTA: Ensamble la unidad sobre una... - Page 5 CONTINUACIÓN DE ENSAMBLE 2. Fije las patas de los extremos a los rieles laterales Diagrama 2 utilizando ocho pernos M6 x 12 mm en cada lado. (Vea Diagrama 2) Pata del Extremo NOTA: No apriete los tornillos por completo hasta que fije las cubiertas al armazón. Perno M6 x 12 mm 3.
- Page 6 CONTINUACIÓN DE ENSAMBLE 4. Inserte una tapa niveladora en cada pata. Diagrama 4 Tapa (Vea Diagrama 4) Niveladora 5. Con ayuda de otra persona, voltee con cuidado Diagrama 5 la mesa ensamblada y póngala de pie. Inserte los ojales. (Vea Diagrama 5) Ojal 800-295-5510 uline.mx...
-
Page 7: Montage
H-10053 1-800-295-5510 uline.ca COLLECTION DOWNTOWN – TABLE – 96 x 36 PO OUTIL REQUIS Montage à deux personnes recommandé Clé Allen (inclus) PIÈCES Boulon M6 x 65 mm x 14 Boulon M6 x 12 mm x 24 Patin réglable x 6 Passe-fil noir x 2 Passe-fil argenté... - Page 8 MONTAGE SUITE 2. Fixez les pieds d'extrémité aux rails latéraux Figure 2 avec huit boulons M6 x 12 mm de chaque côté. (Voir Figure 2) Pied d'extrémité REMARQUE : Attendez d'avoir fixé la surface au cadre pour serrer complètement les vis. Boulon M6 x 12 mm 3.
- Page 9 MONTAGE SUITE 4. Insérez un patin réglable dans chacun des pieds. Figure 4 Patin réglable (Voir Figure 4) 5. À deux, placez avec soin la table assemblée sur ses Figure 5 pieds. Insérez les passe-fils. (Voir Figure 5) Passe-fil 1-800-295-5510 uline.ca PAGE 9 OF 9 0422 IH-10053...
Need help?
Do you have a question about the DOWNTOWN H-10053 and is the answer not in the manual?
Questions and answers