Table of Contents
Advertisement
Available languages
Available languages
Quick Links
H-10089, H-11107
DOWNTOWN COLLECTION
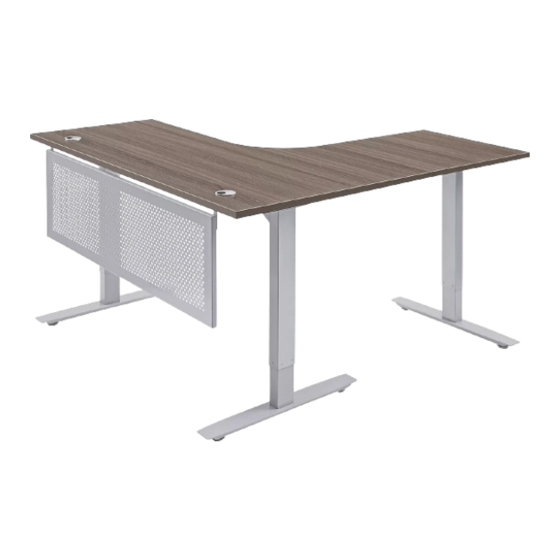
ADJUSTABLE HEIGHT L-DESK
TOOLS NEEDED
4 mm Hex Wrench
Drill
(Included)
Return Top x 1
Desktop x 1
Foot with Leveling
Glides x 3
Cable
Power Cord x 1
Management
Tray x 3
M5 x 20 mm
M6 x 15 mm Machine
Wood Screw x 15
Screw with Lock
Washer and Flat
Washer x 24
M4 x 20 mm
Wood Screw x 12
M5 x 45 mm
Wood Screw x 2
PAGE 1 OF 23
5 mm Hex Wrench
(Included)
Adjustable Table Frame
with Lifting Columns x 1
Top Support
Control Box x 1
Bracket x 3
M6 x 33 mm
Machine Screw x 6
M6 x 12 mm Machine
Screw with Lock
Washer and Flat
Washer x 2
Metal Modesty Panel x 1
1-800-295-5510
uline.com
Two Person Assembly
Recommended
PARTS
Adjustable Return Frame
with Lifting Column x 1
Programmable
Handset x 1
Wire Clip x 2
Mounting
Plate x 2
MODESTY PANEL HARDWARE
Modesty Panel
Bracket x 2
Para Español, vea páginas 8-15.
Pour le français, consulter les pages 16-23.
#
DESCRIPTION
1
Desktop
2
Return Top
Adjustable Table Frame with
3
Lifting Columns
Adjustable Return Frame with
4
Lifting Column
5
Foot with Leveling Glides
6
Top Support Bracket
7
Control Box
8
Programmable Handset
9
Cable Management Tray
10
Power Cord
11
M6 x 33 mm Machine Screw
M6 x 15 mm Machine Screw with
12
Lock Washer and Flat Washer
13
M5 x 20 mm Wood Screw
M6 x 12 mm Machine Screw with
14
Lock Washer and Flat Washer
15
Wire Clip
16
4 mm Hex Wrench
17
5 mm Hex Wrench
18
M4 x 20 mm Wood Screw
19
Mounting Plate
20
Metal Modesty Panel
21
Modesty Panel Bracket
22
M6 x 12 mm Machine Screw
23
M5 x 45 mm Wood Screw
M6 x 12 mm
M5 x 20 mm
Machine Screw x 4
Wood Screw x 4
QTY.
1
1
1
1
3
3
1
1
3
1
6
24
19
2
2
1
1
12
2
1
2
4
2
1223 IH-10089
Advertisement
Table of Contents

Related Manuals for U-Line DOWNTOWN H-11107


Summary of Contents for U-Line DOWNTOWN H-11107
- Page 1 Para Español, vea páginas 8-15. Pour le français, consulter les pages 16-23. H-10089, H-11107 1-800-295-5510 uline.com DOWNTOWN COLLECTION ADJUSTABLE HEIGHT L-DESK TOOLS NEEDED 4 mm Hex Wrench 5 mm Hex Wrench Two Person Assembly Drill (Included) (Included) Recommended PARTS DESCRIPTION QTY.
- Page 2 ASSEMBLY NOTE: Count and inspect all pieces before 4. Insert two M6 x 33 mm machine screws (11) into disposing of cartons or packing materials. holes on end of adjustable table frame to secure top support bracket (6). Lightly tighten using 5 mm CAUTION! Adjustable table frame is heavy and hex wrench (17).
- Page 3 ASSEMBLY CONTINUED 6. Place adjustable return frame with lifting column (4) 10. Attach foot (5) to lifting column using four M6 x 15 mm on a clean, smooth, non-marring surface to prevent machine screws (12). Tighten using 4 mm hex scratching.
- Page 4 ASSEMBLY CONTINUED 13. Place desktop (1) and return top (2) upside down 16. Place programmable handset (8) in desired location on a smooth, non-marring surface to prevent on front edge of desktop (1). Attach using a drill and scratching. Grommets should be facing down. two M5 x 20 mm wood screws (13).
- Page 5 ASSEMBLY CONTINUED 18. Position loose cords underneath the cable Figure 12 management trays (9). Attach the cable management trays to the adjustable table frame (3) and adjustable return frame (4) using twelve M6 x 15 mm machine screws (12) and 4 mm hex wrench (16).
-
Page 6: Operation
OPERATION CONTROLS 24.5 USB Charger Down Setting Display Four Preset Button Button Button Position Buttons PROGRAMMING PRESET HEIGHT NOTE: The desk must be initialized prior to first use. • Use up and down buttons to move desk to the • To initialize, press and hold the down button on the desired position. -
Page 7: Troubleshooting
OPERATION CONTINUED PROGRAMMING ANTI-COLLISION SENSITIVITY • Press the setting button to confirm the selection. LOCKING OPERATION OF DESK NOTE: Desk is equipped with a gyroscope with an anti-collision feature. This feature allows for NOTE: Desk is equipped with a locking feature various levels of sensitivity to prevent collisions to prevent operation. -
Page 8: Herramientas Necesarias
H-10089, H-11107 800-295-5510 uline.mx COLECCIÓN URBANA ESCRITORIO EN L DE ALTURA AJUSTABLE HERRAMIENTAS NECESARIAS 1 Llave Hexagonal 1 Llave Hexagonal Se Recomienda Armar Taladro de 4 mm (Incluida) de 5 mm (Incluida) Entre Dos Personas PARTES DESCRIPCIÓN CANT. Cubierta Cubierta de Retorno Armazón Ajustable de la Mesa con Columnas de Elevación 1 Cubierta... - Page 9 ENSAMBLE NOTA: Cuente e inspeccione todas las piezas 4. Inserte dos tornillos para máquina M6 x 33 mm (11) en los orificios del extremo del armazón ajustable antes de desechar cajas o material de empaque. para mesa para asegurar el soporte superior (6). Apriete ligeramente con la llave hexagonal de ¡PRECAUCIÓN! El armazón ajustable de la 5 mm (17).
- Page 10 CONTINUACIÓN DEL ENSAMBLE 6. Coloque el armazón ajustable del retorno con 10. Fije la pata (5) a la columna de elevación con columna de elevación (4) sobre una superficie cuatro tornillos para máquina M6 x 15 mm (12). limpia, lisa y que no deje marcas para evitar Apriete con la llave hexagonal de 4 mm (16).
- Page 11 CONTINUACIÓN DEL ENSAMBLE 13. Coloque la cubierta del escritorio (1) y del Diagrama 9 retorno (2) al revés sobre una superficie lisa y que no deje marcas para evitar rayones. Los ojales deben estar hacia abajo. 14. Coloque el armazón ajustable de la mesa (3) y el armazón ajustable del retorno (4) encima de la cubierta de escritorio (1) y del retorno (2).
- Page 12 CONTINUACIÓN DEL ENSAMBLE 18. Coloque los cables sueltos debajo de la Diagrama 12 charola para manejo de cables (9). Instale las bandejas para organizar cables al armazón ajustable de la mesa (3) y al armazón ajustable del retorno (4) con doce tornillos para máquina M6 x 15 mm (12) y la llave hexagonal...
- Page 13 FUNCIONAMIENTO CONTROLES 24.5 Cargador USB Botón Botón Botón de Pantalla Cuatro Botones de Posiciones Arriba Abajo Ajuste Preprogramadas PROGRAMACIÓN DE LA ALTURA PREESTABLECIDA NOTA: El escritorio debe iniciarse antes de su primer uso. • Utilice los botones Arriba y Abajo para mover el •...
-
Page 14: Solución De Problemas
CONTINUACIÓN DE FUNCIONAMIENTO PROGRAMACIÓN DE LA SENSIBILIDAD BLOQUEO DE FUNCIONAMIENTO DE ANTICOLISIÓN DEL ESCRITORIO NOTA: El escritorio está equipado con un NOTA: El escritorio está equipado con giroscopio con una medida anticolisión. una medida de bloqueo para evitar su Esta característica permite varios niveles de funcionamiento. - Page 15 CONTINUACIÓN DEL SOLUCIÓN DE PROBLEMAS El escritorio es El escritorio tiene patas de dos etapas que producen ruido cuando una se inusualmente ruidoso. extiende sobre la otra. Para reducir el ruido, aplique lubricante de silicón en las patas. aparece en el control El escritorio se sobrecalienta.
-
Page 16: Outils Requis
H-10089, H-11107 1-800-295-5510 uline.ca COLLECTION DOWNTOWN BUREAU EN L À HAUTEUR RÉGLABLE OUTILS REQUIS Clé hexagonale Clé hexagonale Montage à deux Perceuse de 4 mm (inclus) de 5 mm (inclus) personnes recommandé PIÈCES DESCRIPTION QTÉ Surface de bureau Surface de retour Cadre de table réglable avec colonnes de levage Surface de... -
Page 17: Montage
MONTAGE REMARQUE : Comptez et vérifiez toutes les 4. Insérez deux vis à métaux M6 x 33 mm (11) dans les pièces avant de jeter le matériel d'emballage trous à l'extrémité du cadre de table réglable pour y fixer la ferrure de support de la surface (6). Vissez ou le carton. - Page 18 MONTAGE SUITE 6. Afin de prévenir les égratignures, placez le cadre de 10. Fixez la patte (5) à la colonne de levage en utilisant retour réglable avec colonne de levage (4) sur une quatre vis à métaux M6 x 15 mm (12). Vissez à l'aide surface propre et lisse qui ne marque pas.
- Page 19 MONTAGE SUITE 13. Afin de prévenir les égratignures, placez la surface Figure 9 de bureau (1) et la surface de retour (2) à l'envers sur une surface lisse qui ne marque pas. Les passe-fils doivent être orientés vers le bas. 14.
- Page 20 MONTAGE SUITE 18. Placez le surplus des Figure 12 cordons sous les plateaux de gestion des câbles (9). Fixez les plateaux de gestion des câbles au cadre de table réglable (3) et au cadre de retour réglable (4) en utilisant douze vis à...
- Page 21 FONCTIONNEMENT COMMANDES 24.5 Chargeur USB Touche Touche Bouton de Affichage Quatre touches de haut réglage position préréglée PROGRAMMER LA HAUTEUR PRÉRÉGLÉE REMARQUE : Le bureau doit être initialisé avant la première utilisation. • Utilisez les touches haut et bas pour faire bouger le •...
-
Page 22: Dépannage
FONCTIONNEMENT SUITE ALTERNER ENTRE LES POUCES ET LES CENTIMÈTRES • Appuyez sur les touches haut et bas pour alterner les niveaux de sensibilité. Les niveaux vont de 1 à 8 • Appuyez sur le bouton de réglage pendant sept en prenant en compte que les niveaux plus élevés secondes jusqu'à... - Page 23 DÉPANNAGE SUITE Le bureau est Le bureau possède des pieds à deux niveaux qui deviennent bruyants lorsqu'une particulièrement bruyant. partie s’engage dans l'autre. Pour réduire le bruit, appliquez un lubrifiant au silicone sur les pieds. s'affiche sur la Le bureau est en surchauffe. Cessez l'utilisation du réglage de la hauteur pendant commande.
Need help?
Do you have a question about the DOWNTOWN H-11107 and is the answer not in the manual?
Questions and answers