Table of Contents
Advertisement
Advertisement
Table of Contents

Related Manuals for HIKVISION DS-K1T642M


Summary of Contents for HIKVISION DS-K1T642M
- Page 1 Face Recognition Terminal User Manual...
- Page 2 WITHOUT LIMITATION, MERCHANTABILITY, SATISFACTORY QUALITY, OR FITNESS FOR A PARTICULAR PURPOSE. THE USE OF THE PRODUCT BY YOU IS AT YOUR OWN RISK. IN NO EVENT WILL HIKVISION BE LIABLE TO YOU FOR ANY SPECIAL, CONSEQUENTIAL, INCIDENTAL, OR INDIRECT DAMAGES,...
- Page 3 During the use of device, personal data will be collected, stored and processed. To protect data, the development of Hikvision devices incorporates privacy by design principles. For example, for device with facial recognition features, biometrics data is stored in your device with encryption method;...
- Page 4 Face Recognition Terminal User Manual Symbol Conventions The symbols that may be found in this document are defined as follows. Symbol Description Indicates a hazardous situation which, if not avoided, will or could Danger result in death or serious injury. Indicates a potentially hazardous situation which, if not avoided, could Caution result in equipment damage, data loss, performance degradation, or...
- Page 5 Face Recognition Terminal User Manual Regulatory Information FCC Information Please take attention that changes or modification not expressly approved by the party responsible for compliance could void the user’s authority to operate the equipment. FCC compliance: This equipment has been tested and found to comply with the limits for a Class B digital device, pursuant to part 15 of the FCC Rules.
- Page 6 Face Recognition Terminal User Manual under the EMC Directive 2014/30/EU, RE Directive 2014/53/EU,the RoHS Directive 2011/65/EU 2012/19/EU (WEEE directive): Products marked with this symbol cannot be disposed of as unsorted municipal waste in the European Union. For proper recycling, return this product to your local supplier upon the purchase of equivalent new equipment, or dispose of it at designated collection points.
- Page 7 Face Recognition Terminal User Manual Safety Instruction These instructions are intended to ensure that user can use the product correctly to avoid danger or property loss. The precaution measure is divided into Dangers and Cautions: Dangers: Neglecting any of the warnings may cause serious injury or death. Cautions: Neglecting any of the cautions may cause injury or equipment damage.
- Page 8 Face Recognition Terminal User Manual Cautions: Do not drop the device or subject it to physical shock, and do not expose it to high ● electromagnetism radiation. Avoid the equipment installation on vibrations surface or places subject to shock (ignorance can cause equipment damage). Do not place the device in extremely hot (refer to the specification of the device for the detailed ●...
- Page 9 Face Recognition Terminal User Manual Available Models Product Name Model Face Recognition Terminal DS-K1T642M DS-K1T642MF DS-K1T642E DS-K1T642EF DS-K1T642MW DS-K1T642MFW DS-K1T642EW DS-K1T642EFW Use only power supplies listed in the user instructions: Model Manufacturer Standard ADS-26FSG-12 12024EPG Shenzhen Honor Electronic Co.,Ltd MSA-C2000IC12.0-24P-DE MOSO Technology Co.,Ltd...
-
Page 10: Table Of Contents
Face Recognition Terminal User Manual Contents Chapter 1 Overview ........................1 1.1 Overview ..........................1 1.2 Features ..........................1 Chapter 2 Appearance ........................ 2 Chapter 3 Installation ......................... 4 3.1 Installation Environment ......................4 3.2 Wall Mounting ........................4 3.3 Base Mounting (Optional) ...................... 8 Chapter 4 Wiring ........................ - Page 11 Face Recognition Terminal User Manual 6.6 Privacy Settings ........................27 6.7 Set Administrator ......................... 27 Chapter 7 Basic Operation ......................30 7.1 Login ............................ 30 7.1.1 Login by Administrator ....................30 7.1.2 Login by Activation Password ..................31 7.2 Communication Settings ...................... 32 7.2.1 Set Wired Network Parameters ..................
- Page 12 Face Recognition Terminal User Manual 7.8 Set Access Control Parameters .................... 51 7.9 Time and Attendance Status Settings .................. 53 7.9.1 Disable Attendance Mode via Device ................. 53 7.9.2 Set Manual Attendance via Device ................54 7.9.3 Set Auto Attendance via Device .................. 55 7.9.4 Set Manual and Auto Attendance via Device ..............
- Page 13 Face Recognition Terminal User Manual 8.5.10 Change Administrator's Password ................72 8.5.11 View Device Arming/Disarming Information ............72 8.5.12 Network Settings ....................... 72 8.5.13 Set Video and Audio Parameters ................76 8.5.14 Customize Audio Content ..................77 8.5.15 Set Image Parameters ....................79 8.5.16 Set Supplement Light Brightness ................
- Page 14 Face Recognition Terminal User Manual 9.4.6 Collect Face via Access Control Device ..............113 9.4.7 Collect Fingerprint via Client ..................114 9.4.8 Collect Fingerprint via Access Control Device ............115 9.4.9 Configure Access Control Information ..............116 9.4.10 Customize Person Information ................117 9.4.11 Configure Resident Information ................
- Page 15 Face Recognition Terminal User Manual 9.7.6 Configure Card Reader Authentication Mode and Schedule ........140 9.7.7 Configure First Person In ................... 142 9.7.8 Configure Anti-Passback ................... 143 9.7.9 Configure Device Parameters ..................144 9.8 Configure Linkage Actions for Access Control ..............150 9.8.1 Configure Client Actions for Access Event ..............
- Page 16 Face Recognition Terminal User Manual 9.12.5 Set File Saving Path ....................187 9.12.6 Set Email Parameters ....................187 9.13 Operation and Maintenance .................... 188 Appendix A. Tips for Scanning Fingerprint ................189 Appendix B. Tips When Collecting/Comparing Face Picture ............ 191 Appendix C.
-
Page 17: Chapter 1 Overview
Face Recognition Terminal User Manual Chapter 1 Overview 1.1 Overview Face recognition terminal is a kind of access control device for face recognition, which is mainly applied in security access control systems, such as logistic centers, airports, university campuses, alarm centrals, dwellings, etc. 1.2 Features 4.3-inch touch screen ●... -
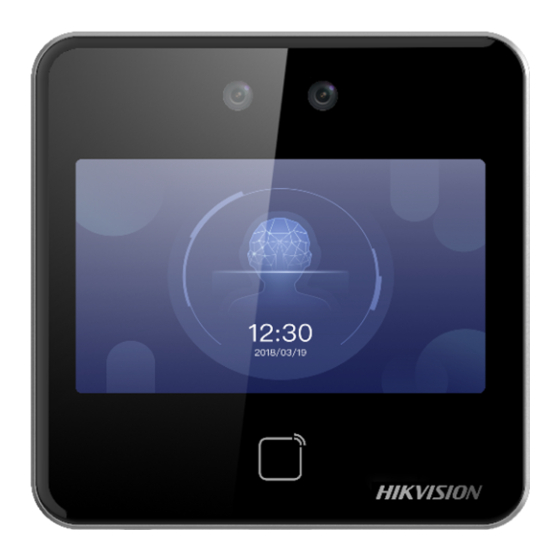
Page 18: Chapter 2 Appearance
Face Recognition Terminal User Manual Chapter 2 Appearance Refer to the following contents for detailed information of the face recognition terminal: Note The appearance of the device vary according to different models. Refers to the actual device. Here takes face recognition terminal as example. Figure 2-1 Face Recognition Terminal Diagram Table 2-1 Description of Face Recognition Terminal Description... - Page 19 Face Recognition Terminal User Manual Description Camera Camera IR Light Display Screen Fingerprint Module Note Supported by parts of the device modules. Card Presenting Area TAMPER Wiring Terminal Debugging Port Network Interface : This sticker means "Hot parts! Burned fingers when handling the parts. Wait one-half hour after switching off before handling parts."...
-
Page 20: Chapter 3 Installation
Face Recognition Terminal User Manual Chapter 3 Installation 3.1 Installation Environment Avoid backlight, direct sunlight, and indirect sunlight. ● For better recognition, there should be light source in or near the installation environment. ● The minimum bearing weight of the wall or other places should be 3 times heavier than the ●... - Page 21 Face Recognition Terminal User Manual Figure 3-1 Mounting Template 2. Drill holes on the wall or other surface according to the instructions on the mounting template. 3. Align the holes to the mounting plate and secure the mounting plate on the wall with the 4 supplied screws.
- Page 22 Face Recognition Terminal User Manual Figure 3-2 Install Mounting Plate 4. Route the cable through the cable hole of the mounting plate, and connect to corresponding external devices' cables. 5. Align the device with the mounting plate and hang the device on the mounting plate.
- Page 23 Face Recognition Terminal User Manual Figure 3-3 Hang Device 6. Use one supplied screw to secure the device and the mounting plate.
-
Page 24: Base Mounting (Optional)
Face Recognition Terminal User Manual Figure 3-4 Secure Device 3.3 Base Mounting (Optional) Steps 1. Align the hole of the mounting bracket with the device interfaces on the back. Note The bracket is optional. - Page 25 Face Recognition Terminal User Manual Figure 3-5 Align Bracket and Device 2. Push the bracket from bottom to top. Make sure the device is buckled with the bracket. Figure 3-6 Buckle...
- Page 26 Face Recognition Terminal User Manual 3. Route the cable through the cable hole of the mounting plate, and connect to corresponding external devices' cables. 4. Insert two non-slip silicone pads. 5. Put the mounted device on the desk or other surface.
-
Page 27: Chapter 4 Wiring
Face Recognition Terminal User Manual Chapter 4 Wiring You can connect the RS-485 terminal with the RS-485 card reader, connect the NC and COM terminal with the door lock, connect the SENSOR terminal with the door contact, the BTN/GND terminal with the exit button, and connect the Wiegand terminal with the Wiegand card reader or the access controller. -
Page 28: Wire Normal Device
Face Recognition Terminal User Manual Group Function Color Name Description White/Yellow Common White/Red Lock Wiring (NO) Yellow/Green SENSOR Door Contact Black Ground Yellow/Gray BUTTON Exit Door Wiring Yellow/Black Ground 4.2 Wire Normal Device You can connect the terminal with normal peripherals. Figure 4-1 Device Wiring... -
Page 29: Wire Secure Door Control Unit
Face Recognition Terminal User Manual Note You should set the face recognition terminal's Wiegand direction as Input to connect to a ● Wiegand card reader. If connects to an access controller, you should set the Wiegand direction as Output to transmit authentication information to the access controller. For details about Wiegand direction settings, see Set Wiegand Parameters . - Page 30 Face Recognition Terminal User Manual Type 1 Note The fire system controls the power supply of the access control system. Figure 4-3 Wire Device Figure 4-4 Wire Secure Door Control Unit Type 2 Note The fire system (NO and COM, normally open when powering off) is connected with the lock and the power supply in series.
-
Page 31: Wiring Diagram Of Door Locked When Powering Off
Face Recognition Terminal User Manual Figure 4-5 Wiring Device Figure 4-6 Wiring Secure Door Control Unit 4.4.2 Wiring Diagram of Door Locked When Powering Off Lock Type: Cathode Lock, Electric Lock, and Electric Bolt (NC) Security Type: Door Locked When Powering Off Scenario: Installed in Entrance/Exit with Fire Linkage... - Page 32 Face Recognition Terminal User Manual Note The Uninterpretable Power Supply (UPS) is required. ● The fire system (NC and COM, normally closed when powering off) is connected with the lock ● and the power supply in series. When an fire alarm is triggered, the door remains open. In normal times, NC and COM are open.
-
Page 33: Chapter 5 Activation
Face Recognition Terminal User Manual Chapter 5 Activation You should activate the device before the first login. After powering on the device, the system will switch to Device Activation page. Activation via the device, SADP tool and the client software are supported. The default values of the device are as follows: The default IP address: 192.0.0.64 ●... -
Page 34: Activate Via Web Browser
Face Recognition Terminal User Manual three kinds of following categories: upper case letters, lower case letters, numbers, and special characters) in order to increase the security of your product. And we recommend you change your password regularly, especially in the high security system, changing the password monthly or weekly can better protect your product. -
Page 35: Activate Via Sadp
Get the SADP software from the supplied disk or the official website http:// ● www.hikvision.com/en/ , and install the SADP according to the prompts. The device and the PC that runs the SADP tool should be within the same subnet. -
Page 36: Activate Device Via Client Software
Face Recognition Terminal User Manual Status of the device becomes Active after successful activation. 5. Modify IP address of the device. 1) Select the device. 2) Change the device IP address to the same subnet as your computer by either modifying the IP address manually or checking Enable DHCP. - Page 37 Face Recognition Terminal User Manual Caution The password strength of the device can be automatically checked. We highly recommend you change the password of your own choosing (using a minimum of 8 characters, including at least three kinds of following categories: upper case letters, lower case letters, numbers, and special characters) in order to increase the security of your product.
-
Page 38: Chapter 6 Quick Operation
Face Recognition Terminal User Manual Chapter 6 Quick Operation 6.1 Select Language You can select a language for the device system. After the device activation, you can select a language for the device system. Figure 6-1 Select System Language By default, the system language is English. Note After you change the system language, the device will reboot automatically. -
Page 39: Set Application Mode
Face Recognition Terminal User Manual Figure 6-2 Password Change Page Change via Security Questions If you need to change password via security questions, you can tap Change to Security Questions on the right corner. Select the security questions and enter the answers. Click Next. Note You can only select one type to change password. -
Page 40: Set Network Parameters
Face Recognition Terminal User Manual Figure 6-3 Welcome Page 2. Tap OK to save. Note You can also change the settings in System Settings. ● If you install the device indoors near the window or the face recognition function is not ●... -
Page 41: Access To Platform
Face Recognition Terminal User Manual Figure 6-4 Select Network Note Disconnect the wired network before connecting a Wi-Fi. 2. Tap Next. Wired Network Note Make sure the device has connected to a network. If enable DHCP, the system will assign the IP address and other parameters automatically. If disable DHCP, you should set the IP address, the subnet mask, and the gateway. - Page 42 Face Recognition Terminal User Manual Steps 1. Enable Access to Hik-Connect, and set the server IP and verification code. Figure 6-5 Access to Hik-Connect 2. Tap Next. 3. Optional: Tap Skip to skip the step. 4. Optional: Tap Previous to go to the previous page. Note If you tap Previous to return to the Wi-Fi configuration page, you need to tap the connected Wi- Fi or connect another Wi-Fi to enter the platform page again.
-
Page 43: Privacy Settings
Face Recognition Terminal User Manual 6.6 Privacy Settings After activation, selecting application mode, and selecting network, you should set the privacy parameters, including the picture uploading and storage. Select parameters according to your actual needs. Upload Captured Pic. When Auth. (Upload Captured Picture When Authenticating) Upload the pictures captured when authenticating to the platform automatically. - Page 44 Face Recognition Terminal User Manual Figure 6-6 Add Administrator Page 3. Select a credential to add. Note Up to one credential should be added. : Face forward at the camera. Make sure the face is in the face recognition area. Click capture and click to confirm.
- Page 45 Face Recognition Terminal User Manual Shortcut Keys Description Note You can configure those shortcut keys displayed on the screen. For details, see Basic Settings . Scan QR code to authenticate. Note The QR code can be obtained from the visitor terminal. Enter the device room No.
-
Page 46: Chapter 7 Basic Operation
Face Recognition Terminal User Manual Chapter 7 Basic Operation 7.1 Login Login the device to set the device basic parameters. 7.1.1 Login by Administrator If you have added an administrator for the device, only the administrator can login the device for device operation. -
Page 47: Login By Activation Password
Face Recognition Terminal User Manual Figure 7-2 Home Page Note The device will be locked for 30 minutes after 5 failed fingerprint or card attempts. 3. Optional: Tap and you can enter the device activation password for login. 4. Optional: Tap and you can exit the admin login page. -
Page 48: Communication Settings
Face Recognition Terminal User Manual Figure 7-3 Home Page 7.2 Communication Settings You can set the network parameters, the Wi-Fi parameter, the RS-485 parameters, and the Wiegand parameters on the communication settings page. 7.2.1 Set Wired Network Parameters You can set the device wired network parameters, including the IP address, the subnet mask, the gateway, and DNS parameters. - Page 49 Face Recognition Terminal User Manual Figure 7-4 Wired Network Settings 3. Set IP Address, Subnet Mask, and Gateway. - Enable DHCP, and the system will assign IP address, subnet mask, and gateway automatically. - Disable DHCP, and you should set the IP address, subnet mask, and gateway manually. Note The device's IP address and the computer IP address should be in the same IP segment.
-
Page 50: Set Wi-Fi Parameters
Face Recognition Terminal User Manual 7.2.2 Set Wi-Fi Parameters You can enable the Wi-Fi function and set the Wi-Fi related parameters. Steps Note The function should be supported by the device. 1. Tap Comm. (Communication Settings) on the Home page to enter the Communication Settings page. - Page 51 Face Recognition Terminal User Manual Figure 7-5 Wi-Fi Settings 3. Enable the Wi-Fi function. 4. Configure the Wi-Fi parameters. - Select a Wi-Fi from the list, and enter the Wi-Fi's password. Tap OK. - If the target Wi-Fi is not in the list,tap Add Wi-Fi. Enter the Wi-Fi's name and password. And tap OK.
-
Page 52: Set Rs-485 Parameters
Face Recognition Terminal User Manual - If disable DHCP, you should enter the IP address, the subnet mask, and the gateway manually. 6. Tap OK to save the settings and go back to the Wi-Fi tab. 7. Tap to save the network parameters. 7.2.3 Set RS-485 Parameters The face recognition terminal can connect external access controller, secure door control unit or card reader via the RS-485 terminal. -
Page 53: Set Wiegand Parameters
Face Recognition Terminal User Manual 7.2.4 Set Wiegand Parameters You can set the Wiegand transmission direction. Steps 1. Tap Comm. (Communication Settings) on the Home page to enter the Communication Settings page. 2. On the Communication Settings page, tap Wiegand to enter the Wiegand tab. Figure 7-7 Wiegand Settings 3. - Page 54 Face Recognition Terminal User Manual 3. Edit the employee ID. Note The employee ID should be less than 32 characters. And it can be a combination of lower ● letters, upper letters, and numbers. The employee ID should not be duplicated. ●...
-
Page 55: Add Face Picture
Face Recognition Terminal User Manual Note For details about setting the authentication type, see Set Authentication Mode . 7. Enable the Administrator Permission function. Enable Administrator Permission The user is the administrator. Except for the normal attendance function, the user can also enter the Home page to operate after authenticating the permission. - Page 56 Face Recognition Terminal User Manual Figure 7-8 Add Face Picture 6. Look at the camera. Note Make sure your face picture is in the face picture outline when adding the face picture. ● Make sure the captured face picture is in good quality and is accurate. ●...
-
Page 57: Add Fingerprint
Face Recognition Terminal User Manual 7.3.3 Add Fingerprint Add a fingerprint for the user and the user can authenticate via the added fingerprint. Steps Note The function should be supported by the device. ● Up to 5,000 fingerprints can be added. ●... -
Page 58: Add Card
Face Recognition Terminal User Manual 7.3.4 Add Card Add a card for the user and the user can authenticate via the added card. Steps Note Up to 10,000 cards can be added. 1. Long tap on the initial page for 3 s and slide to the left/right by following the gesture and log in the backend. -
Page 59: View Password
Face Recognition Terminal User Manual 10. Tap to save the settings. 7.3.5 View Password Add a password for the user and the user can authenticate via the password. Steps 1. Long tap on the initial page for 3 s and slide to the left/right by following the gesture and log in the backend. -
Page 60: Search And Edit User
Face Recognition Terminal User Manual Steps 1. Long tap on the initial page for 3 s and slide to the left/right by following the gesture and log in the backend. 2. Tap User → Add User/Edit User → Authentication Mode . 3. -
Page 61: Import Data
Face Recognition Terminal User Manual 7.4.2 Import Data Steps 1. Plug a USB flash drive in the device. 2. On the Home page, tap Data → Import Data . 3. Tap User Data or Face Data. 4. Enter the created password when you exported the data. If you do not create a password when you exported the data, leave a blank in the input box and tap OK immediately. -
Page 62: Identity Authentication
Face Recognition Terminal User Manual 7.5 Identity Authentication After network configuration, system parameters configuration and user configuration, you can go back to the initial page for identity authentication. The system will authenticate person according to the configured authentication mode. You can authenticate identity via 1:1 matching or 1:N matching. 1:N Matching Compare the captured face picture with all face pictures stored in the device. -
Page 63: Authenticate Via Multiple Credential
Face Recognition Terminal User Manual 7.5.2 Authenticate via Multiple Credential Before You Start Set the user authentication type before authentication. For details, see Set Authentication Mode . Steps 1. If the authentication mode is Card and Face, Password and Face, Card and Password, Card and Face and Fingerprint, authenticate any credential according to the instructions on the live view page. - Page 64 Face Recognition Terminal User Manual Figure 7-9 Basic Settings Page shortcut key, voice, time, language, supplement light, community No., building No., and Unit No. Shortcut Key Choose the shortcut key that displayed on the authentication page, including the QR code function, the call function, call type, and the password entering function.
-
Page 65: Set Biometric Parameters
Face Recognition Terminal User Manual You should set a room No. When you tap the call button on the authentication page, you can call the configured room directly without dialing. Voice Settings You can enable/disable the voice prompt function and adjust the voice volume. Note You can set the voice volume between 0 and 10. - Page 66 Face Recognition Terminal User Manual Table 7-1 Face Picture Parameters Parameter Description Application Mode Select either others or indoor according to actual environment. Face Liveness Level After enabling face anti- s poofing function, you can set the matching security level when performing live face authentication. Face Recognition Set the valid distance between the user and the camera when Distance...
-
Page 67: Set Access Control Parameters
Face Recognition Terminal User Manual Parameter Description Set the matching threshold when authenticating via ECO mode 1:N matching mode. The larger the value, the smaller the false accept rate and the larger the false rejection rate Hard Hat Detection After enabling the hard hat detection, you can set the strategy. Reminder of Wearing If the person do not wear a hard hat when authenticating, the device prompts a notification and the door will open. - Page 68 Face Recognition Terminal User Manual Figure 7-11 Access Control Parameters The available parameters descriptions are as follows: Table 7-2 Access Control Parameters Descriptions Parameter Description Terminal Auth. Mode (Terminal Select the face recognition terminal's authentication mode. You Authentication Mode) can also customize the authentication mode. Note Only the device with the fingerprint module supports the ●...
-
Page 69: Time And Attendance Status Settings
Face Recognition Terminal User Manual Parameter Description Door Contact You can select "Open (Remain Open)" or "Close (Remian Closed)" according to your actual needs. By default, it is Close (Remian Closed). Open Duration Set the door unlocking duration. If the door is not opened for the set time, the door will be locked. -
Page 70: Set Manual Attendance Via Device
Face Recognition Terminal User Manual Figure 7-12 Disable Attendance Mode Set the Attendance Mode as Disable. You will not view or configure the attendance status on the initial page. And the system will follow the attendance rule that configured on the platform. 7.9.2 Set Manual Attendance via Device Set the attendance mode as manual, and you should select a status manually when you take attendance. -
Page 71: Set Auto Attendance Via Device
Face Recognition Terminal User Manual Figure 7-13 Manual Attendance Mode 3. Enable the Attendance Status Required. 4. Enable a group of attendance status. Note The Attendance Property will not be changed. 5. Optional: Select an status and change its name if required. The name will be displayed on the T &... - Page 72 Face Recognition Terminal User Manual Steps 1. Tap T&A Status to enter the T&A Status page. 2. Set the Attendance Mode as Auto. Figure 7-14 Auto Attendance Mode 3. Enable the Attendance Status function. 4. Enable a group of attendance status. Note The Attendance Property will not be changed.
-
Page 73: Set Manual And Auto Attendance Via Device
Face Recognition Terminal User Manual Result When you authenticate on the initial page, the authentication will be marked as the configured attendance status according to the configured schedule. Example If set the Break Out as Monday 11:00, and Break In as Monday 12:00, the valid user's authentication from Monday 11:00 to 12:00 will be marked as break. -
Page 74: System Maintenance
Face Recognition Terminal User Manual Note The Attendance Property will not be changed. 5. Optional: Select an status and change its name if required. The name will be displayed on the T & A Status page and the authentication result page. 6. - Page 75 Face Recognition Terminal User Manual Figure 7-16 Maintenance Page System Information You can view the device model, serial No., versions, address, production data, QR code, and open source code license. Note The page may vary according to different device models. Refers to the actual page for details. Capacity You can view the number of, user, face picture, card, event and fingerprint.
-
Page 76: Video Intercom
Face Recognition Terminal User Manual All parameters, except for the communication settings, remotely imported user information, will be restored to the default settings. The system will reboot to take effect. Restore to Factory Settings All parameters will be restored to the factory settings. The system will reboot to take effect. Reboot Reboot the device. -
Page 77: Call Device From Client Software
Face Recognition Terminal User Manual 2. Run the client software and the control panel of the software pops up. 3. Click Device Management to enter the Device Management interface. 4. Add the main station and the device to the client software. Note For details about adding device, see Add Device. -
Page 78: Call Room From Device
Face Recognition Terminal User Manual 7.11.4 Call Room from Device Steps 1. Get the client software from the supplied disk or the official website, and install the software according to the prompts. 2. Run the client software and the control panel of the software pops up. 3. -
Page 79: Chapter 8 Operation Via Web Browser
Face Recognition Terminal User Manual Chapter 8 Operation via Web Browser 8.1 Login You can login via the web browser or the remote configuration of the client software. Note Make sure the device is activated. For detailed information about activation, see Activation . Login via Web Browser Enter the device IP address in the address bar of the web browser and press Enter to enter the login page. -
Page 80: Person Management
Face Recognition Terminal User Manual Reserved function. You can zoom in the live view image. Unlock the linked door. Start or stop live view. Start or stop video recording. Select the streaming type when starting live view. You can select from the main stream and the sub stream. -
Page 81: Search Event
Face Recognition Terminal User Manual Set Permission Time Click User → Add to enter the Add Person page. Set Start Time and End Time. Click OK to save the settings. Set Access Control Click User → Add to enter the Add Person page. After check Adminstrator in Access Control, the added person can log in by authenticating face. -
Page 82: Configuration
Face Recognition Terminal User Manual Figure 8-1 Search Page Enter the search conditions, including the employee ID, the name, the card No., the start time, and the end time, and click Search. The results will be displayed on the right panel. 8.5 Configuration 8.5.1 Set Local Parameters Set the live view parameters, record file saving path, and captured pictures saving path. -
Page 83: View Device Information
Face Recognition Terminal User Manual Set Record File Saving Path Click Configuration → Local to enter the Local page. Select a record file size and select a saving path from your local computer and click Save. You can also click Open to open the file folder to view details. Set Captured Pictures Saving Path Click Configuration →... -
Page 84: Set Dst
Face Recognition Terminal User Manual By default, the device time should be synchronized manually. You can set the device time manually or check Sync. with Computer Time to synchronize the device time with the computer's time. 8.5.4 Set DST Steps 1. - Page 85 Face Recognition Terminal User Manual Figure 8-4 Upgrade and Maintenance Page Click Reboot to start reboot the device. Restore Parameters Click Configuration → System → Maintenance → Upgrade & Maintenance . Restore All All parameters will be restored to the factory settings. You should activate the device before usage.
-
Page 86: Log Query
Face Recognition Terminal User Manual Upgrade Click Configuration → System → Maintenance → Upgrade & Maintenance . Select an upgrade type from the drop-down list. Click and select the upgrade file from your local PC. Click Upgrade to start upgrading. Note Do not power off during the upgrading. -
Page 87: Certificate Management
Face Recognition Terminal User Manual 8.5.9 Certificate Management It helps to manage the server/client certificates and CA certificate. Note The function is only supported by certain device models. Create and Install Self-signed Certificate Steps 1. Go to Configuration → System → Security → Certificate Management . 2. -
Page 88: Change Administrator's Password
Face Recognition Terminal User Manual Steps 1. Go to Configuration → System → Security → Certificate Management . 2. Create an ID in the Inport CA Certificate area. Note The input certificate ID cannot be the same as the existing ones. 3. - Page 89 Face Recognition Terminal User Manual Note Some device models do not support Wi-Fi settings. Refer to the actual products when configuration. Set Basic Network Parameters Click Configuration → Network → Basic Settings → TCP/IP . Figure 8-5 TCP/IP Settings Page Set the parameters and click Save to save the settings.
- Page 90 Face Recognition Terminal User Manual It refers to the port of real-time streaming protocol. HTTPS Set the HTTPS for accessing the browser. Certificate is required when accessing. Server It refers to the port through which the client adds the device. Set Wi-Fi Parameters Set the Wi-Fi parameters for device wireless connection.
- Page 91 Face Recognition Terminal User Manual Report Strategy Settings You can set the center group for uploading the log via the ISUP protocol. Go to Configuration → Network → Basic Settings → Report Strategy . You can set the center group and the system will transfer logs via ISUP protocol. Click Save to save the settings.
-
Page 92: Set Video And Audio Parameters
Face Recognition Terminal User Manual Note Hik-Connect is an application for mobile devices. With the App, you can view live image of the device, receive alarm notification and so on. 4. Create a Stream Encryption/Encryption Key for the device. Note 6 to 12 letters (a to z, A to Z) or numbers (0 to 9), case sensitive. -
Page 93: Customize Audio Content
Face Recognition Terminal User Manual Figure 8-7 Video Settings Page Set the stream type, the video type, the bitrate type, the frame rate, the Max. bitrate, and the video encoding. Click Save to save the settings after the configuration. Set Audio Parameters Click Configuration →... - Page 94 Face Recognition Terminal User Manual Figure 8-8 Customize Audio Content 2. Enable the function. 3. Set the time duration when authentication succeeded. 1) Click Add. 2) Set the time duration and the language. Note If authentication is succeeded in the configured time duration, the device will broadcast the configured content.
-
Page 95: Set Image Parameters
Face Recognition Terminal User Manual 4) Optional: Repeat substep 1 to 3. 5) Optional: Click to delete the configured time duration. 5. Click Save to save the settings. 8.5.15 Set Image Parameters Set the video standard, WDR, brightness, contrast, saturation, and sharpness. Steps 1. -
Page 96: Set Supplement Light Brightness
Face Recognition Terminal User Manual When there are both very bright and very dark areas simultaneously in the view, WDR balances the brightness level of the whole image and provide clear images with details. Brightness/Contrast/Saturation/Sharpness Drag the block or enter the value to adjust the live video's brightness, contrast, saturation, and sharpness. - Page 97 Face Recognition Terminal User Manual Steps 1. Click Configuration → Attendance to enter the settings page. 2. Set the Attendance Mode as Disable. Result You will not view or configure the attendance status on the initial page. And the system will follow the attendance rule that configured on the platform.
- Page 98 Face Recognition Terminal User Manual Note If you do not select a status, the authentication will be failed and it will not be marked as a valid attendance. Set Auto Attendance via Web Set the attendance mode as auto, and you can set the attendance status and its available schedule. The system will automatically change the attendance status according to the configured schedule.
-
Page 99: Set Video Intercom Parameters
Face Recognition Terminal User Manual Result On the initial page and authenticate. The authentication will be marked as the configured attendance status according to the schedule. If you tap the edit icon on the result tab, you can select a status to take attendance manually, the authentication will be marked as the edited attendance status. -
Page 100: Access Control Settings
Face Recognition Terminal User Manual Unit No. Set the device installed unit No. Floor No. Set the device installed floor No. Door Station No. Set the device installed floor No. Note If you change the No., you should reboot the device. Community No. - Page 101 Face Recognition Terminal User Manual Main Card Reader You can configure the device card reader's parameters. Sub Card Reader You can configure the connected peripheral card reader's parameters. If select Main Card Reader: Card Reader Type/Card Reader Description Get card reader type and description. They are read-only. Enable Card Reader Enable the card reader's function.
- Page 102 Face Recognition Terminal User Manual Recognition Interval If the interval between card presenting of the same card is less than the configured value, the card presenting is invalid. Authentication Interval You can set the authentication interval of the same person when authenticating. The same person can only authenticate once in the configured interval.
- Page 103 Face Recognition Terminal User Manual Name You can create a name for the door. Open Duration Set the door unlocking duration. If the door is not opened for the set time, the door will be locked. Door Open Timeout Alarm An alarm will be triggered if the door has not been closed within the configured time duration.
- Page 104 Face Recognition Terminal User Manual In order to prevent the mobile phone from getting the data of the access control, you can enable NFC card to increase the security level of the data. Enable M1 Card Enable M1 card and authenticating by presenting M1 card is available. M1 Card Encryption Sector M1 card encryption can improve the security level of authentication.
- Page 105 Face Recognition Terminal User Manual Select a peripheral from the drop-down list according the actual situation. You can select from Card Reader, Extension Module, Access Controller, or Disable. Note After the peripheral is changed and saved, the device will reboot automatically. RS-485 Address Set the RS-485 Address according to your actual needs.
- Page 106 Face Recognition Terminal User Manual Figure 8-13 Wiegand Page 2. Check Wiegand to enable the Wiegand function. 3. Set a transmission direction. Input The device can connect a Wiegand card reader. Output The can connect an external access controller. And the two devices will transmit the card No. via Wiegand 26 or 34.
- Page 107 Face Recognition Terminal User Manual Event Storage Settings Select a method to delete the event. You can select from Delete Old Events Periodically, Delete Old Events by Specified Time, or Overwriting. Delete Old Events Periodically Drag the block or enter number to set the period for event deleting. All events will be deleted according to the configured time duration.
-
Page 108: Set Biometric Parameters
Face Recognition Terminal User Manual Go to Configuration → Access Control → Card Authentication Settings . Select a card authentication mode and click Save. Full Card No. All card No. will be read. Wiegand 26 (3 bytes) The device will read card via Wiegand 26 protocol (read 3 bytes). Wiegand 34 (4 bytes) The device will read card via Wiegand 34 protocol (read 4 bytes). - Page 109 Face Recognition Terminal User Manual The device can recognize a much wider people range than the normal mode. This mode is applicable to a more complicated environment. Continuous Face Recognition Interval Set the time interval between two continuous face recognitions when authenticating. Pitch Angle The maximum pitch angle when starting face authentication.
-
Page 110: Set Notice Publication
Face Recognition Terminal User Manual If the person do not wear the hard hat when authenticating, the device will pop up a prompt and the door will open. Must Wear Hard Hat If the person do not wear the hard hat when authenticating, the device will pop up a prompt and the door will keep closed. - Page 111 Face Recognition Terminal User Manual Figure 8-14 Notice Page Sleep Enable Sleep and the device will enter the sleep mode when no operation within the configured sleep time. Theme Management You can click + in the frame and upload the screen saver pictures from the local PC. Note By now, there is only one theme can be added.
-
Page 112: Chapter 9 Client Software Configuration
Face Recognition Terminal User Manual Chapter 9 Client Software Configuration 9.1 Configuration Flow of Client Software Follow the flow diagram below to configure on the client software. Figure 9-1 Flow Diagram of Configuration on Client Software 9.2 Device Management The client supports managing access control devices and video intercom devices. -
Page 113: Add Device
Face Recognition Terminal User Manual Example You can control entrance & exit and manage attendance after adding access control devices to the client; you can perform video intercom with the indoor stations and door stations. 9.2.1 Add Device The client provides three device adding modes including by IP/domain, IP segment, and ISUP protocol. - Page 114 Face Recognition Terminal User Manual 3. In the Online Device area, check one or more online device(s), and click Add to open the device adding window. Figure 9-3 Add Single Online Device Figure 9-4 Add Multiple Online Devices 4. Enter the required information.
- Page 115 Face Recognition Terminal User Manual Name Enter a descriptive name for the device. IP Address Enter the device's IP address. The IP address of the device is obtained automatically in this adding mode. Port You can customize the port number. The port number of the device is obtained automatically in this adding mode.
- Page 116 Face Recognition Terminal User Manual Add Multiple Detected Online Devices For detected online devices sharing the same user name and password, you can add them to the client in a batch. Before You Start Make sure the to-be-added devices are online. Steps 1.
- Page 117 Face Recognition Terminal User Manual 9. Click Add to add the devices. Add Device by IP Address or Domain Name If you know the IP address or domain name of the device to add, you can add devices to the client by specifying the IP address (or domain name), user name, password, etc.
- Page 118 Face Recognition Terminal User Manual Note This function should be supported by the device. ● If you have enabled Certificate Verification, you should click Open Certificate Directory to ● open the default folder, and copy the certificate file exported from the device to this default directory to strengthen the security.
- Page 119 Face Recognition Terminal User Manual Enter the device password. Caution The password strength of the device can be automatically checked. We highly recommend you change the password of your own choosing (using a minimum of 8 characters, including at least three kinds of following categories: upper case letters, lower case letters, numbers, and special characters) in order to increase the security of your product.
- Page 120 Face Recognition Terminal User Manual Device Account Enter the account name registered on ISUP protocol. ISUP Key For ISUP 5.0 devices, enter the ISUP key if you have set it when configuring network center parameter for the device. Note This function should be supported by the device. 5.
-
Page 121: Reset Device Password
Face Recognition Terminal User Manual Adding Mode Enter 0 or 1 or 2. Address Edit the address of the device. Port Enter the device port number. The default port number is 8000. User Name Enter the device user name. By default, the user name is admin. Password Enter the device password. -
Page 122: Group Management
Face Recognition Terminal User Manual Note For the following operations for resetting the password, contact our technical support. Caution The password strength of the device can be automatically checked. We highly recommend you change the password of your own choosing (using a minimum of 8 characters, including at least three kinds of following categories: upper case letters, lower case letters, numbers, and special characters) in order to increase the security of your product. -
Page 123: Import Resources To Group
Face Recognition Terminal User Manual 9.3.2 Import Resources to Group You can import the device resources (such as alarm inputs/outputs, access points, etc.) to the added group in a batch. Before You Start Add a group for managing devices. Refer to Add Group . Steps 1. -
Page 124: Person Management
Face Recognition Terminal User Manual Steps 1. Enter the Device Management module. 2. Click Device Management → Group to enter the group management page. All the added groups are displayed on the left. 3. Click a group to show the resources added to this group. 4. -
Page 125: Configure Basic Information
Face Recognition Terminal User Manual 9.4.2 Configure Basic Information You can add person to the client one by one and configure the person's basic information such as name, email, phone number, etc. Steps 1. Enter Person module. Note For the first time you enter Person module, a window pops up, and you can set the rules to generate person ID (letters and numbers supported) when adding person. - Page 126 Face Recognition Terminal User Manual Figure 9-5 Issue a Card by Local Mode 6. Set other related parameters. Card Enrollment Station Select the model of the connected card enrollment station. Note Currently, the supported card enrollment station models include DS-K1F100-D8, DS-K1F100- M, DS-K1F100-D8E, and DS-K1F180-D8E.
-
Page 127: Upload A Face Photo From Local Pc
Face Recognition Terminal User Manual Enable or disable the buzzing when the card number is read successfully. Card No. Type Select the type of the card number according to actual needs. M1 Card Encryption This field is only available when the model is DS-K1F100-D8, DS-K1F100-D8E, or DS-K1F180- D8E. -
Page 128: Take A Photo Via Client
Face Recognition Terminal User Manual 9.4.5 Take a Photo via Client When adding a person, you can take a photo of the her/him via the client and set this photo as the person's profile. Before You Start Make sure PC running the client has a camera or you have connected other USB camera to the PC. Steps 1. -
Page 129: Collect Face Via Access Control Device
Face Recognition Terminal User Manual Figure 9-6 Take a Photo via Client 7. Confirm to add the person. - Click Add to add the person and close the Add Person window. - Click Add and New to add the person and continue to add other persons. 9.4.6 Collect Face via Access Control Device When adding person, you can collect the person's face via access control device added to the client which supports facial recognition function. -
Page 130: Collect Fingerprint Via Client
Face Recognition Terminal User Manual Note If you select the enrollment station, you should click Login to set related parameters of the device including IP address, port No., user name, and password. Also, you can check Face Anti- Spoofing and select the liveness level as Low, Medium, or High. Face Anti-Spoofing If you check this function, then the device can detect whether the face to be collected is an authentic one. -
Page 131: Collect Fingerprint Via Access Control Device
Face Recognition Terminal User Manual 3) Click Add to save the recorded fingerprint. 7. Confirm to add the person. - Click Add to add the person and close the Add Person window. - Click Add and New to add the person and continue to add other persons. Note Once the fingerprint is added, the fingerprint type cannot be changed. -
Page 132: Configure Access Control Information
Face Recognition Terminal User Manual 9.4.9 Configure Access Control Information When adding a person, you can set her/his access control information, such as binding an access control group with the person, configuring PIN code, setting the person as a visitor, a blocklist person, or a super user, etc. -
Page 133: Customize Person Information
Face Recognition Terminal User Manual Extended Door Open Time Use this function for persons with reduced mobility. When accessing the door, the person will have more time than others to pass through doors. For details about setting the door's open duration, refer to Configure Parameters for Door/ Elevator . -
Page 134: Configure Resident Information
Face Recognition Terminal User Manual 1) Select an organization in the organization list to add the person and click Add. Note Enter the person's basic information first. For details about configuring person's basic information, refer to Configure Basic Information . 2) In the Custom Information panel, enter the person information. -
Page 135: Import And Export Person Identify Information
Face Recognition Terminal User Manual Note Enter the person's basic information first. For details about configuring person's basic information, refer to Configure Basic Information . 3. In the Additional Information panel, enter the additional information of the person, including person's ID type, ID No., job title, etc., according to actual needs. 4. -
Page 136: Import Person Pictures
Face Recognition Terminal User Manual 9.4.15 Import Person Pictures After importing face pictures for the added persons to the client, the persons in the pictures can be identified by an added face recognition terminal. You can either import person pictures one by one, or import multiple pictures at a time according to your need. -
Page 137: Export Person Pictures
Face Recognition Terminal User Manual 9.4.17 Export Person Pictures You can export face picture file of the added persons and save in your PC. Before You Start Make sure you have added persons and their face pictures to an organization. Steps 1. -
Page 138: Move Persons To Another Organization
Face Recognition Terminal User Manual Steps Note If the person name stored in the device is empty, the person name will be filled with the issued ● card No. after importing to the client. If the card number or person ID (employee ID) stored on the device already exists in the client ●... -
Page 139: Issue Cards To Persons In Batch
Face Recognition Terminal User Manual 9.4.21 Issue Cards to Persons in Batch The client provides a convenient way to issue cards to multiple persons in a batch. Steps 1. Enter Person module. 2. Click Batch Issue Cards. All the added persons with no card issued will be displayed in the right panel. 3. -
Page 140: Configure Schedule And Template
Face Recognition Terminal User Manual PC running the client by USB interface or COM, and place the card on the card enrollment to read the card number. If not, you can also swipe the card on the card reader of the added access control device to get the card number. -
Page 141: Add Holiday
Face Recognition Terminal User Manual 9.5.1 Add Holiday You can create holidays and set the days in the holidays, including start date, end date, and holiday duration in one day. Steps Note You can add up to 64 holidays in the software system. 1. - Page 142 Face Recognition Terminal User Manual Steps Note You can add up to 255 templates in the software system. 1. Click Access Control → Schedule → Template to enter the Template page. Note There are two default templates: All-Day Authorized and All-Day Denied, and they cannot be edited or deleted.
-
Page 143: Set Access Group To Assign Access Authorization To Persons
Face Recognition Terminal User Manual 4) Optional: Select a selected holiday in the right list and click to remove the selected one, or click Clear to clear all the selected holiday(s) in the right list. 7. Click Save to save the settings and finish adding the template. 9.6 Set Access Group to Assign Access Authorization to Persons After adding the person and configuring the person's credentials, you can create the access groups to define which person(s) can get access to which door(s) and then apply the access group to the... - Page 144 Face Recognition Terminal User Manual Figure 9-8 Display the Selected Person(s) and Access Point(s) 8. After adding the access groups, you need to apply them to the access control device to take effect. 1) Select the access group(s) to apply to the access control device. 2) Click Apply All to Devices start applying all the selected access group(s) to the access control device or door station.
-
Page 145: Configure Advanced Functions
Face Recognition Terminal User Manual Note If you change the persons' access information or other related information, you will view the promptAccess Group to Be Applied on the right corner of the client. You can click the prompt to apply the changed data to the device. You can select either Apply Now or Apply Later. - Page 146 Face Recognition Terminal User Manual Configure Parameters for Access Control Device After adding the access control device, you can configure its parameters, including overlaying user information on picture, uploading pictures after capturing, saving captured pictures, etc. Steps 1. Click Access Control → Advanced Function → Device Parameter . Note If you can find Device Parameter in the Advanced Function list, Hover the cursor on the Advanced Function, and then Click...
- Page 147 Face Recognition Terminal User Manual If enable the function, the device can recognize the EM card. You can present EM card on the device. Note If the peripheral card reader supports presenting EM card, the function is also supported to enable/disable the EM card function.
- Page 148 Face Recognition Terminal User Manual The alarm can be triggered if the door has not been closed in a configured time period. If it is set as 0, no alarm will be triggered. Duress Code The door can open by inputting the duress code when there is duress. At the same time, the client can report the duress event.
- Page 149 Face Recognition Terminal User Manual If the interval between card swiping of the same card is less than the set value, the card swiping is invalid. You can set it as 0 to 255. Alarm of Max. Failed Attempts Enable to report alarm when the card reading attempts reach the set value. Card Reader Type/Card Reader Description Get card reader type and description.
-
Page 150: Configure Remaining Open/Closed
Face Recognition Terminal User Manual Face 1:1 Matching Threshold Set the matching threshold when authenticating via 1:1 matching mode. The larger the value, the smaller the false accept rate and the larger the false rejection rate when authentication. Application Mode You can select indoor or others application modes according to actual environment. -
Page 151: Configure Multi-Factor Authentication
Face Recognition Terminal User Manual Move the cursor to the time duration and drag the time duration on the timeline bar to the ● desired position when the cursor turns to Click the time duration and directly edit the start/end time in the appeared dialog. ●... - Page 152 Face Recognition Terminal User Manual Before You Start Set access group and apply the access group to the access control device. For details, refer to Set Access Group to Assign Access Authorization to Persons . Perform this task when you want to set authentications for multiple cards of one access control point (door).
- Page 153 Face Recognition Terminal User Manual Figure 9-10 Remotely Open Door Note You can check Offline Authentication to enable the super password authentication when the access control device is disconnected with the client. Local Authentication and Super Password Authentication by the access control device and by the super password. 4) Select the added person/card group in the left list below and it will be added to the Selected list on the right as the authentication group.
-
Page 154: Configure Custom Wiegand Rule
Face Recognition Terminal User Manual 9.7.4 Configure Custom Wiegand Rule Based on the knowledge of uploading rule for the third party Wiegand, you can set multiple customized Wiegand rules to communicate between the device and the third party card readers. Before You Start Wire the third party card readers to the device. -
Page 155: Configure Person Authentication Mode
Face Recognition Terminal User Manual Figure 9-11 Set Output Transformation Rule 2) Select rules on the left list. The selected rules will be added to the right list. 3) Optional: Drag the rules to change the rule order. 4) Click OK. 5) In the Custom Wiegand tab, set the rule's start bit, length, and the decimal digit. -
Page 156: Configure Card Reader Authentication Mode And Schedule
Face Recognition Terminal User Manual Steps 1. Click Access Control → Advanced Function → Authentication . 2. Select an access control device (support the function of person authentication) on the left panel to enter the person Authentication Mode page. 3. Click Add to enter the Add window. 4. - Page 157 Face Recognition Terminal User Manual Figure 9-13 Select Card Reader Authentication Mode Note PIN refers to the PIN code set to open the door. Refer to Configure Access Control Information . 2) Check the modes in the Available Mode list and they will be added to the selected modes list. 3) Click OK.
-
Page 158: Configure First Person In
Face Recognition Terminal User Manual Figure 9-14 Set Authentication Modes for Card Readers 6. Optional: Select a configured day and click Copy to Week to copy the same settings to the whole week. 7. Optional: Click Copy to to copy the settings to other card readers. 8. -
Page 159: Configure Anti-Passback
Face Recognition Terminal User Manual The door remains open for the configured time duration after the first person is authorized until the remain open duration ends. If you select this mode, you should set the remain open duration. Note The remain open duration should be between 0 and 1440 minutes. By default, the remain open duration is 10 minutes. -
Page 160: Configure Device Parameters
Face Recognition Terminal User Manual 4. Click of the selected first card reader in the Card Reader Afterward column to open the select card reader dialog. 5. Select the afterward card readers for the first card reader. Note Up to four afterward card readers can be added as afterward card readers for one card reader. 6. - Page 161 Face Recognition Terminal User Manual The maximum transmission unit (MTU) of the network interface. 6. Click Save. Set Network Parameters After adding the access control device, you can set the device log uploading mode, and create ISUP account via wired network. Set Log Uploading Mode You can set the mode for the device to upload logs via ISUP protocol.
- Page 162 Face Recognition Terminal User Manual Note The port number of the wireless network and wired network should be consistent with the port number of ISUP. 8. Select the Protocol Type as ISUP. 9. Set an account name for the network center. 10.
- Page 163 Face Recognition Terminal User Manual 7. Click Save. Set Manual Capture Parameters In Status Monitoring module, you can capture a picture manually the access control device's camera by clicking a button. Before that, you need to set the parameters for the capture such as picture quality.
- Page 164 Face Recognition Terminal User Manual Algorithm Select Deep Learning as the face picture database. Save Authentication Picture If enabled, the captured face picture when authenticating will be saved on the device. ECO Mode After enabling the ECO mode, the device can authenticate faces in the low light or dark environment.
- Page 165 Face Recognition Terminal User Manual Set Wiegand Parameters You can set the access control device's Wiegand channel and the communication mode. After setting the Wiegand parameters, the device can connect to Wiegand card reader via Wiegand communication. Steps Note This function should be supported by the device. 1.
-
Page 166: Configure Linkage Actions For Access Control
Face Recognition Terminal User Manual Note The sector ID ranges from 1 to 100. ● By default, Sector 13 is encrypted. It is recommended to encrypt sector 13. ● 6. Click Save to save the settings. 9.8 Configure Linkage Actions for Access Control You can configure different linkage actions for the event detected by the access control device. -
Page 167: Configure Device Actions For Access Event
Face Recognition Terminal User Manual Note For details about setting the alarm sound, refer to Set Alarm Sound in the user manual of the client software. Send Email Send an email notification about the event to one or more receivers. For details about setting email parameters, refer to Set Email Parameters in the user manual of the client software. -
Page 168: Configure Device Actions For Card Swiping
Face Recognition Terminal User Manual 8. Optional: After adding the device linkage, you can do one or more of the following: Edit Linkage Select the configured linkage settings in the device list and you can edit its Settings event source parameters, including event source and linkage target. Delete Linkage Select the configured linkage settings in the device list and click Delete to Settings... -
Page 169: Configure Device Actions For Person Id
Face Recognition Terminal User Manual 9.8.4 Configure Device Actions for Person ID You can set the access control device's linkage actions for the specified person ID. When access control device detects the specified person ID, it can trigger buzzer on card reader, and other actions. -
Page 170: Control Door Status
Face Recognition Terminal User Manual 9.9 Control Door Status You can control the status for the door(s), including unlock door, locking door, remaining the door unlock, remaining the door locked, remain all unlocked, etc. Before You Start Add person and assign access authorization to designed person, and person will have the access ●... -
Page 171: Event Center
Face Recognition Terminal User Manual All doors in the group will be closed and locked. No person can access the doors even if he/she has the authorized credentials, except the super users. Capture Capture a picture manually. Note The Capture button is available when the device supports capture function. The picture is saved in the PC running the client. -
Page 172: View Real-Time Events
Face Recognition Terminal User Manual Figure 9-15 Arm Device After turned on, the device(s) will be armed. And notifications about the events triggered by the armed device(s) will be automatically sent to the client software in real-time. 9.10.2 View Real-Time Events The real-time event information received by the client of the connected resources are displayed. - Page 173 Face Recognition Terminal User Manual Filter by Device Type and (or) Select device type(s) and (or) priorities to filter Priority events. Filter by Keywords Enter the keywords to filter the events. 3. Optional: Right-click the table header of the event list to customize the event related items to be displayed in the event list.
-
Page 174: Search Historical Events
Face Recognition Terminal User Manual 9.10.3 Search Historical Events You can search and view historical events by setting search conditions such as time, device type, and priority in the client. For the searched events, you can handle and export them. Before You Start Enable receiving events from devices before the client can receive event information from the device,see Enable Receiving Event from Devices for details. - Page 175 Face Recognition Terminal User Manual Enter a key word (supports fuzzy search) to quickly search the target historical event(s). For example, you can enter a person's name to search the events related with this person. 3. Click Search to search the events according the conditions you set. Figure 9-16 Search Historical Events Note If you have selected Access Control as device type in Step 2, you can view extra information such...
- Page 176 Face Recognition Terminal User Manual Figure 9-17 Search Historical Event 4. Optional: Right click the table header of the event list to customize the event related items to be displayed in the event list. 5. Select an event in the event list to view the event details. 6.
-
Page 177: Time And Attendance
Face Recognition Terminal User Manual Auto-Play Video Check Auto-Play Video to automatically play video when displaying event details. Enlarge Video or Double click the video image to view video in a larger window. ● Picture Put the cursor on the picture, and click to view picture in a larger ●... - Page 178 Face Recognition Terminal User Manual Steps Note The parameters configured here will be set as default for the newly added time period. It will not affect the existed one(s). 1. Enter Time & Attendance module. 2. Click Attendance Settings → General Rule . 3.
- Page 179 Face Recognition Terminal User Manual By default, all card readers of the added access control devices are set as start/end-work check points. If you need to edit check point function of card reader(s), you can perform the following operations. Steps 1.
- Page 180 Face Recognition Terminal User Manual Add Regular Holiday You can configure a holiday which will take effect annually on regular days during the effective period, such as New Year's Day, Independence Day, Christmas Day, etc. Steps 1. Enter the Time & Attendance module. 2.
- Page 181 Face Recognition Terminal User Manual 10. Click OK. The added holiday will display in the holiday list and calendar. If the date is selected as different holidays, it will be recorded as the first-added holiday. 11. Optional: After adding the holiday, perform one of the following operations. Edit Holiday Click to edit the holiday information.
- Page 182 Face Recognition Terminal User Manual Note If you select MySQL, you should import the configuration file (libmysql.dll) from local PC. 5. Set the other required parameters of the third-party database, including server IP address, port No., database name, user name and password. Note The default port No.
- Page 183 Face Recognition Terminal User Manual Must Check The break duration will be calculated and excluded from work hours according to actual check-in and check-out time. Return from Break Early for The actual check-in and check-out time does not exceed the break time, and can be marked as normal work or work overtime.
-
Page 184: Add General Timetable
Face Recognition Terminal User Manual Enter the mark and select the color. The related fields of attendance status in the report will display with the mark and color. Weekend Mark Enter the mark and select the color. The weekend fields in the report will display with the mark and color. - Page 185 Face Recognition Terminal User Manual Figure 9-18 Add Timetable 3. Create a name for the timetable. Note You can click the color icon beside the name to customize the color for the valid timetable on the time bar in the Configuration Result area. 4.
- Page 186 Face Recognition Terminal User Manual You need to set Valid Authentication Interval for this calculation method. For example, if the interval between card swiping of the same card is less than the set value, the card swiping is invalid. 6. Optional: Set Enable T&A Status switch to on to calculate according to attendance status of the device.
-
Page 187: Add Shift
Face Recognition Terminal User Manual Delete Timetable Select a timetable from the list and click Delete to delete it. 9.11.3 Add Shift You can add shift for employees including setting shift period (day, week, month) and the effective attendance time. According to the actual requirements, you can adding multiple timetables in one shift for employees, which requires them to check in and check out for each timetable. - Page 188 Face Recognition Terminal User Manual Figure 9-19 Add Shift Note You can select more than one timetables. The start and end work time and the valid check-in and out time in different time tables can not be overlapped.
- Page 189 Face Recognition Terminal User Manual Figure 9-20 Add Multiple Timetables 6. Click Save. The added shift lists on the left panel of the page. At most 64 shifts can be added. 7. Optional: Assign the shift to organization or person for a quick shift schedule. 1) Click Assign.
-
Page 190: Manage Shift Schedule
Face Recognition Terminal User Manual On the holidays, this schedule is still effective and the persons needs to go to work according to the schedule. Effective for Overtime The persons' overtime will be recorded for this schedule. 5) Click Save to save the quick shift schedule. 9.11.4 Manage Shift Schedule Shift work is an employment practice designed to make use of all 24 hours of the clock each day of the week. - Page 191 Face Recognition Terminal User Manual If the multiple shift schedules contains three timetables: 00:00 to 07:00, 08:00 to 15:00 and 16:00 to 23:00. The attendance of the person adopting this multiple shift schedules will be effective in any of the three timetables. If the person checks in at 07:50, it will apply the nearest timetable 08:00 to 15:00 to the person's attendance.
- Page 192 Face Recognition Terminal User Manual Note This is only available for shift with only one timetable. Multiple Shift Schedules It contains more than one timetables. The person can check in/out in any of the timetables and the attendance will be effective. If the multiple shift schedules contains three timetables: 00:00 to 07:00, 08:00 to 15:00 and 16:00 to 23:00.
-
Page 193: Manually Correct Check-In/Out Record
Face Recognition Terminal User Manual 4. Click one date or click and drag to select multiple dates for the temporary schedule. 5. Select Workday or Non-Workday from drop-down list. If Non-Workday is selected, you need to set the following parameters. Calculated as Select normal or overtime level to mark the attendance status for temporary schedule. -
Page 194: Add Leave And Business Trip
Face Recognition Terminal User Manual Before You Start You should add organizations and persons in Person module. For details, refer to Person ● Management . The person's attendance status is incorrect. ● Steps 1. Click Time & Attendance → Attendance Handling to enter attendance handling page. 2. -
Page 195: Calculate Attendance Data
Face Recognition Terminal User Manual Before You Start You should add organizations and persons in the Person module. For details, refer to Person Management . Steps 1. Click Time & Attendance → Attendance Handling to enter attendance handling page. 2. Click Apply for Leave/Business Trip to enter adding the leave/business trip page. 3. - Page 196 Face Recognition Terminal User Manual Automatically Calculate Attendance Data You can set a schedule so that the client can automatically calculate attendance data of the previous day at the time you configured every day. Steps Note 1. Enter the Time & Attendance module. 2.
-
Page 197: Attendance Statistics
Face Recognition Terminal User Manual Note The report items will be displayed in the sequence you have set. Export Report Click Export to export attendance data (CSV file) to local PC. Note The report items will be displayed in the sequence you have set. 9.11.8 Attendance Statistics You can check the original attendance record, generate and export the attendance report based on the calculated attendance data. - Page 198 Face Recognition Terminal User Manual Note There are two methods for getting attendance events from the device, including Online and Import File. For more details about operations, refer to Get Events from Device in the user manual of the client software. 7.
- Page 199 Face Recognition Terminal User Manual Send Report Regularly The client supports multiple report types and you can pre-define the report content and it can send the report automatically to the email address you configured. Steps 1. Enter the Time & Attendance module. 2.
-
Page 200: System Configuration
Face Recognition Terminal User Manual Note Up to 5 email addresses can be added. You can click + to add a new email address. 5) Optional: Click Preview to view the email details. 6. Click OK. 7. Optional: After adding the custom report, you can do one or more of the followings: Edit Report Select one added report and click Edit to edit its settings. -
Page 201: Set Picture Storage
Face Recognition Terminal User Manual Save Event for Set the event deleting cycle to delete the old event. Detect New Software Version After enabled, the client can automatically detect the new software version and remind the user to upgrade the software. Automatic Time Synchronization Automatically synchronize the time of the added devices with the time of the PC running the client at a specified time point. -
Page 202: Set Alarm Sound
Face Recognition Terminal User Manual Note The default saving path is: Disk/iVMS-4200alarmPicture 5. Click Save. 9.12.3 Set Alarm Sound When the event is triggered, the client can give an audible warning to notify the security personnel. You can set the sound of the audible warning in this section. Steps 1. -
Page 203: Set File Saving Path
Face Recognition Terminal User Manual Specify the seconds that the call with indoor station will last for at most. The maximum speaking duration between indoor station and the client can be set from 120s to 600s. Max. Speaking Duration with Door Station Specify the seconds that the call with door station will last for at most. -
Page 204: Operation And Maintenance
Face Recognition Terminal User Manual Security Certificate (Optional) If your email server requires authentication, check this checkbox to use authentication to log into the server and enter the login user name and password of your email account. User Name Enter the user name of the sender email address if Server Authentication is checked. Password Enter the password of the sender Email address if Server Authentication is checked. -
Page 205: Appendix A. Tips For Scanning Fingerprint
Face Recognition Terminal User Manual Appendix A. Tips for Scanning Fingerprint Recommended Finger Forefinger, middle finger or the third finger. Correct Scanning The figure displayed below is the correct way to scan your finger: You should press your finger on the scanner horizontally. The center of your scanned finger should align with the scanner center. - Page 206 Face Recognition Terminal User Manual Environment The scanner should avoid direct sun light, high temperature, humid conditions and rain. When it is dry, the scanner may not recognize your fingerprint successfully. You can blow your finger and scan again. Others If your fingerprint is shallow, or it is hard to scan your fingerprint, we recommend you to use other authentication methods.
-
Page 207: Appendix B. Tips When Collecting/Comparing Face Picture
Face Recognition Terminal User Manual Appendix B. Tips When Collecting/Comparing Face Picture The position when collecting or comparing face picture is as below: Positions (Recommended Distance: 0.5 m) Expression Keep your expression naturally when collecting or comparing face pictures, just like the ●... - Page 208 Face Recognition Terminal User Manual Size Make sure your face is in the middle of the collecting window.
-
Page 209: Appendix C. Tips For Installation Environment
Face Recognition Terminal User Manual Appendix C. Tips for Installation Environment 1. Light Source Illumination Reference Value Candle: 10Lux Bulb: 100~850Lux Sunlight: More than 1200Lux 2. Install the device at least 2 meters away from the light, and at least 3 meters away from the window or door. -
Page 210: Appendix D. Dimension
Face Recognition Terminal User Manual Appendix D. Dimension Figure D-1 Dimension... -
Page 211: Appendix E. Communication Matrix And Device Command
Device Command Scan the following QR code to get the device common serial port commands. Note that the command list contains all commonly used serial ports commands for all Hikvision access control and video intercom devices. Figure E-2 Device Command... - Page 212 UD17697B-C...
Need help?
Do you have a question about the DS-K1T642M and is the answer not in the manual?
Questions and answers