Table of Contents
Advertisement
Quick Links
Download this manual
See also:
User Manual
Advertisement
Table of Contents

Related Manuals for HIKVISION DS-K1T604M


Summary of Contents for HIKVISION DS-K1T604M
- Page 1 Face Recognition Terminal Quick Start Guide...
- Page 2 This Manual is subject to domestic and international copyright protection. Hangzhou Hikvision Digital Technology Co., Ltd. (“Hikvision”) reserves all rights to this manual. This manual cannot be reproduced, changed, translated, or distributed, partially or wholly, by any means, without the prior written permission of Hikvision.
- Page 3 Face Recognition Terminal Quick Start Guide Regulatory Information FCC Information Please take attention that changes or modification not expressly approved by the party responsible for compliance could void the user’s authority to operate the equipment. FCC compliance: This equipment has been tested and found to comply with the limits for a Class B digital device, pursuant to part 15 of the FCC Rules.
- Page 4 Face Recognition Terminal Quick Start Guide documentation for specific battery information. The battery is marked with this symbol, which may include lettering to indicate cadmium (Cd), lead (Pb), or mercury (Hg). For proper recycling, return the battery to your supplier or to a designated collection point. For more information see: www.recyclethis.info This device is intended for mainly home use (Class B) and may be used in all areas.
- Page 5 Face Recognition Terminal Quick Start Guide If the product does not work properly, please contact your dealer or the nearest service center. Never attempt to disassemble the device yourself. (We shall not assume any responsibility for problems caused by unauthorized repair or maintenance.) Cautions ...
-
Page 6: Table Of Contents
Face Recognition Terminal Quick Start Guide Table of Contents Chapter 1 Overview ......................... 7 Introduction ......................... 7 Main Features ........................7 Chapter 2 Appearance ......................9 Chapter 3 Installation ......................11 Installing with Gang Box ..................... 11 Installing without Gang Box ....................12 Chapter 4 Terminal Connection .................... - Page 7 Face Recognition Terminal Quick Start Guide Appendix B Tips for Scanning Fingerprint ................. 42 Appendix C Tips When Collecting/Comparing Face Picture............43 C.1 Positions (Recommended Distance:0.5m) ................43 C.2 Expression .......................... 43 C.3 Posture ..........................44 C.4 Size ............................ 44 Appendix D Tips for Installation Environment ................
-
Page 8: Chapter 1 Overview
Face Recognition Terminal Quick Start Guide Chapter 1 Overview Introduction DS-K1T604 series face recognition terminal is a kind of access control device for face recognition, which is mainly applied in security access control systems, such as logistic centers, airports, university campuses, alarm centrals, dwellings and so on. Main Features ... - Page 9 Face Recognition Terminal Quick Start Guide Imports data (face pictures and face templates) to the device via the USB flash drive or from the client software Exports data (face pictures, events, and captured pictures) from the device via the USB flash drive ...
-
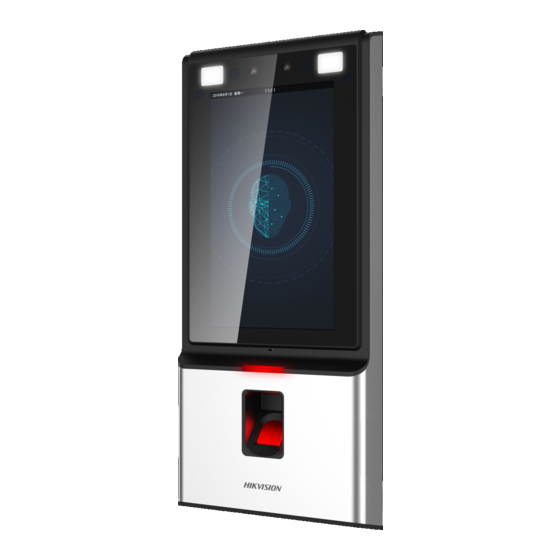
Page 10: Chapter 2 Appearance
Face Recognition Terminal Quick Start Guide Chapter 2 Appearance Refer to the following contents for detailed information of the face recognition terminal: Table 2-1 Description of Face Recognition Terminal Name Description Camera White light camera for recording or capturing white light (White Light) videos or pictures. - Page 11 Face Recognition Terminal Quick Start Guide Solid Green: Authentication completed. Flashing Green: Authenticating (combined). Fingerprint Scan fingerprint or swipe card. Module + Card Note: Only the device with the fingerprint scanning Swiping Area function contains this part. Swipe card within this area. Card Swiping Area Note: Only the device without the fingerprint scanning...
-
Page 12: Chapter 3 Installation
Face Recognition Terminal Quick Start Guide Chapter 3 Installation Installation Environment: If installing the device indoors, the device should be at least 2 meters away from the light, and at least 3 meters away from the window or the door. ... -
Page 13: Installing Without Gang Box
Face Recognition Terminal Quick Start Guide 2. Drill holes on the wall or other surface according to the mounting template and install the gang box (80mm×80mm). 3. Use two supplied screws to secure the mounting plate on the gang box. 4. - Page 14 Face Recognition Terminal Quick Start Guide 2. Drill 4 holes on the wall or other surface according to Hole 1 in the mounting template. 3. Insert the screw sockets of the setscrews in the drilled holes. 4. Align the 4 holes to the mounting plate with the drilled holes. 5.
- Page 15 Face Recognition Terminal Quick Start Guide 8. Use a hex wrench to fasten the screw at the bottom.
-
Page 16: Chapter 4 Terminal Connection
Face Recognition Terminal Quick Start Guide Chapter 4 Terminal Connection You can connect the RS-485 terminal with the RS-485 card reader, connect the NC and COM terminals with the door lock, connect the SENSOR terminal with the door magnetic sensor, connect the BUTTON/GND terminal with the exit button, connect the alarm output and input terminal with the alarm output/input devices, and connect the Wiegand terminal with the Wiegand card reader or the access controller. - Page 17 Face Recognition Terminal Quick Start Guide You can also connect the terminal with the seucure door control unit. The wiring diagram is as follows: Note: The secure door control unit should connect to an external power supply seperately.
-
Page 18: Chapter 5 Basic Operation
Face Recognition Terminal Quick Start Guide Chapter 5 Basic Operation Activate Device Purpose: You are required to activate the terminal first before using it. Activation via device, activation via SADP, and activation via client software are supported. The default values of the control terminal are as follows. ... - Page 19 Face Recognition Terminal Quick Start Guide 3. Create a password in the password field, and confirm the password. STRONG PASSWORD RECOMMENDED– We highly recommend you create a strong password of your own choosing (using a minimum of 8 characters, including upper case letters, lower case letters, numbers, and special characters) in order to increase the security of your product.
-
Page 20: Activating Via Client Software
Face Recognition Terminal Quick Start Guide 6. Input the password and click Modify to save the IP address. 5.1.3 Activating via Client Software Purpose: The client software is versatile video management software for multiple kinds of devices. Get the client software from the supplied disk or the official website, and install the software according to the prompts. - Page 21 Face Recognition Terminal Quick Start Guide 2. Click Device Management to enter the Device Management interface. 3. Check the device status from the device list, and select an inactive device. 4. Check the device status from the device list, and select an inactive device. 5.
-
Page 22: Login
Face Recognition Terminal Quick Start Guide 7. Click OK button to start activation. 8. Click the Modify Netinfor button to pop up the Network Parameter Modification interface. 9. Change the device IP address to the same network segment as your computer by modifying the IP address manually. -
Page 23: General Parameters Settings
Face Recognition Terminal Quick Start Guide Notes: The device will be locked for 30 minutes after 5 failed password attempts. For details about setting the administrator authentication mode, see 5.4.1 Adding User. General Parameters Settings 5.3.1 Communication Settings Purpose: You can set the network parameters, the RS-485 parameters, and the Wiegand parameters on the communication settings page. - Page 24 Face Recognition Terminal Quick Start Guide 2. Configure the network parameters, including IP Address, Subnet Mask, and Gateway. Notes: The device’s IP address and the computer IP address should be in the same LAN. To avoid IP addresses confliction, the IP address of Network Interface 1 and 2 should be different if you want to apply both of them.
-
Page 25: System Settings
Face Recognition Terminal Quick Start Guide Note: If you change the external device, and save the device parameters, the device will reboot automatically. Setting Wiegand Parameters Purpose: You can set the Wiegand transmission direction. Steps: 1. On the Communication Settings page, tap Wiegand to enter the Wiegand tab. 2. - Page 26 Face Recognition Terminal Quick Start Guide Parameter Description Building No. Set the device installed building No. Unit No. Set the device installed Unit No. Voice Prompt to disable or enable the voice promt. Voice Volume Adjust the voice volume. The larger the value, the louder the volume. Read CPU File If the device supports swiping CPU card, you can enable the function and the device can read the CPU card information.
- Page 27 Face Recognition Terminal Quick Start Guide the brightest. Setting Face Parameters Purpose: You can set the face 1:N match threshold, 1:1 match threshold, live face detection, liveness level, min. detection area (width), min. detection area (height), min. detection width (close to), margin (left), margin (top), margin (right), margin (bottom), pitch angle, yaw angle, pupillary distance, and score.
- Page 28 Face Recognition Terminal Quick Start Guide Parameter Description authentication. By default, the value is 75. Live Face Detection Enable or disable the live face detection function. If enabling the function, the device can recognize whether the person is a live one or not. Liveness Level (Liveness After enabling Live Face Detection function, you can set the Security Level)
- Page 29 Face Recognition Terminal Quick Start Guide Parameter Description distances, and angles should also meet their conditions. Margin (Bottom) The distance from the face bottom side to the bottom margin in the recognition area. The actual distance should be larger than the configured value when starting face authentication.
-
Page 30: Setting Time
Face Recognition Terminal Quick Start Guide The upgrading file name should be digicap.dav. 5.3.3 Setting Time Purpose: You can set the device time and the DST in this section. Steps: 1. Tap Time (Time Settings) on the Home page to enter the Time Settings page. 2. -
Page 31: Adding User
Notes: Up to 50000 users can be added. The device with the model of DS-K1T604M does not support the fingerprint related function. Steps: 1. On the User Management page, tap + to enter the Add User page. - Page 32 Face Recognition Terminal Quick Start Guide 3. Tap the Name field and input the user name on the soft keyboard. Notes: Numbers, upper case letters, lower case letters, and special characters are allowed in the user name. Up to 32 characters are allowed in the user name. 4.
-
Page 33: Managing User
Face Recognition Terminal Quick Start Guide 2) Tap Save to save the face picture. Or tap Try Again and adjust your face position to add the face picture again. Note: The maximum duration for adding a face picture is 15s. You can check the remaining time for adding a face picture on the left of the page. -
Page 34: Setting Access Control Parameters
Face Recognition Terminal Quick Start Guide Editing User Purpose: You can edit the added user information by following the steps in this section. Steps: 1. In the User Management page, tap the user that needs to be edited to enter the Edit User page. -
Page 35: Other Management
Face Recognition Terminal Quick Start Guide Parameter Description If you require a higher security level, do not use single authentication mode. Card Reader Select the card reader’s authentication mode. Authentication Mode Door Magnetic Sensor You can select Remain Open or Remain Closed according to your actual needs. -
Page 36: Managing Log Query
Face Recognition Terminal Quick Start Guide 2. Tap the button on the page to manage data. The available button descriptions are as follows: Parameter Description Delete All Events Delete all events stored in the device. Delete User Data Delete all user data in the device. Delete All Data: Delete all user data and events stored in the device. -
Page 37: Importing/Exporting Data
Face Recognition Terminal Quick Start Guide 2. Tap Card on the left of the page and select a search type from the drop-down list. 3. Tap the input box and input the employee ID, the card No., or the user name for search. 4. - Page 38 Face Recognition Terminal Quick Start Guide Exporting Data Steps: 1. Plug a USB flash drive in the device. 2. On the Transfer page, tap Export Att. Data, Export User Data, Export Face Pic., Export Access Control Param., or Export Captured Pic. 3.
-
Page 39: Viewing System Information
You can view the added user’s number, the face picture’s number, the card’s number, the password’s number, and the fingerprint’s number. Note: The device with the model of DS-K1T604M does not support displaying the fingerprint capacity. Tap Info. (System Information) -> Capacity on the Home page to enter the Capacity page. -
Page 40: Authenticating Via 1:1 Matching
Face Recognition Terminal Quick Start Guide fingerprint with the information stored in the card. 5.7.1 Authenticating via 1:1 Matching Steps: 1. If the authentication mode is Card and Face, Card and Face and Fingerprint, or Auto, swipe card in the card swiping area. Note: The card can be normal IC card, or encrypted card. -
Page 41: Two-Way Audio
Face Recognition Terminal Quick Start Guide last step (1:1 Matching). If authentication completed, a prompt “Authenticated” will pop up. Notes: For better face authentication, the user height should between 140 cm and 190 cm and the distance between the user and the device should be between 30 cm and 100 cm. ... -
Page 42: Calling Device From Ivms-4200 Client Software
Face Recognition Terminal Quick Start Guide 5.8.2 Calling Device from iVMS-4200 Client Software Steps: 1. Get the client software from the supplied disk or the official website, and install the software according to the prompts. 2. Run the client software and the control panel of the software pops up. 3. -
Page 43: Appendix B Tips For Scanning Fingerprint
Face Recognition Terminal Quick Start Guide Appendix B Tips for Scanning Fingerprint Recommended Finger Forefinger, middle finger or the third finger. Correct Scanning The figure displayed below is the correct way to scan your finger: You should press your finger on the scanner horizontally. The center of your scanned finger should align with the scanner center. -
Page 44: Appendix C Tips When Collecting/Comparing Face Picture
Face Recognition Terminal Quick Start Guide Appendix C Tips When Collecting/Comparing Face Picture Positions (Recommended Distance:0.5m) The position when collecting or comparing face picture is as below: Note: For details about the relationship among person height, device height, and the distance between the person and the device, see Appendix C. -
Page 45: Posture
Face Recognition Terminal Quick Start Guide Do not wear hat, sunglasses, or other accessories that can affect the facial recognition function. Do not make your hair cover your eyes, ears, etc. and heavy makeup is not allowed. Posture In order to get a good quality and accurate face picture, position your face looking at the camera when collecting or comparing face pictures. -
Page 46: Appendix D Tips For Installation Environment
Face Recognition Terminal Quick Start Guide Appendix D Tips for Installation Environment 1. Light Source Illumination Reference Value Candel: 10Lux Bulb: 100~850Lux Sunlight: More than 1200Lux 2. If the light source is 0.5 m away from the device, the illumination should be no less than 100 Lux. -
Page 47: Appendix E Dimension
Face Recognition Terminal Quick Start Guide Appendix E Dimension 010000001080420... - Page 48 Face Recognition Terminal Quick Start Guide UD09744B...
Need help?
Do you have a question about the DS-K1T604M and is the answer not in the manual?
Questions and answers