Table of Contents
Advertisement
Quick Links
Advertisement
Table of Contents

Related Manuals for Grundig GQN213FTX


Summary of Contents for Grundig GQN213FTX
- Page 1 Refrigerator User manual GQN213FTX-GQN213FTZ-GQN34220PZ EN / 58 5061 0000/AE...
-
Page 3: Table Of Contents
Contents 5. Operating the product 5.1Indicator panel .......20 1. Important instructions for Indicator panel ....26 safety and environment 5.3 Freezing fresh food ....29 General safety .....5 5.4 Recommendations for 1.1.1 HC warning......8 preserving the frozen food ..30 1.1.2 For products with a water 5.5Deep-freeze information ..30 dispenser ........9 5.6 Placing the food ....31... - Page 4 Please read these instructions first before using your appliance Thank you for choosing a Grundig appliance. Please take some time to read this user manual before using your appliance, to ensure you know how to safely operate the controls and functions.
-
Page 5: Important Instructions For
1. Important instructions for safety and environment This section contains safety instructions that will help protect from risk of personal injury or property damage. Failure to follow these instructions shall void any warranty. 1.1 General safety • This product can be used by children at and above 8 years old and by persons whose physical, sensory or mental capabilities were not fully developed or who lack experience and knowledge provided that they are supervised or trained on the safe usage... - Page 6 • Do not plug the refrigerator if the wall outlet is loose. • Never connect your refrigerator to electricity-saving systems. Such systems are harmful for the product. • Unplug the product during installation, maintenance, cleaning and repairing procedures. • Always have the installation and repairing procedures carried out by the Authorised Service Agent.
- Page 7 • Do not use mechanical devices or other methods to accelerate the defrosting process, other than those recommended by the manufacturer. • Never use the parts on your refrigerator such as the door and drawer as a means of support or step. This will cause the product to tip over or parts of it get damaged.
-
Page 8: Hc Warning
• Do not store products (vaccines, heat-sensitive medicines, scientific materials and etc.) that require a precise temperature control in the refrigerator. • If you will not operate the product for a long period of time, unplug and unload the food in it. • If the product is equipped with blue light, do not look at the blue light with optical tools. -
Page 9: For Products With A Water Dispenser
You can learn the gas used in production of your product on the rating plate located on the left inner part of it. WARNING: Never dispose the product in fire. 1.1.2 For products with a water dispenser • Pressure for cold water inlet shall be maximum 90 psi (8 bar). If your water pressure exceeds 6.2 psi (5.5 bar), use a pressure limiting valve in your mains system. -
Page 10: Compliance With The Weee Directive And Disposing Of The Waste Product
• Electrical products are dangerous for the children. Keep children away from the product when it is in use. • If the product's door is equipped with a lock, keep the keys away from reach of children. 1.4 Compliance with the WEEE Directive and Disposing of the Waste Product: This product complies with EU WEEE Directive (2012/19/EU). -
Page 11: Your Refrigerator
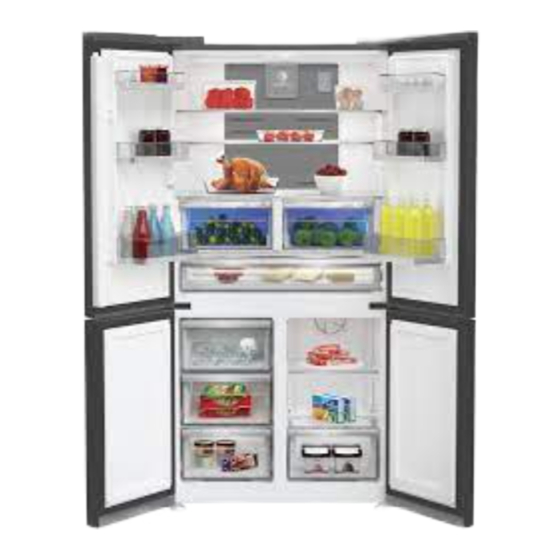
2 Your Refrigerator Control and indicator panel Chiller compartment Butter & Cheese section Icebox drawer 70 mm moving door shelf Wine cooler Fridge compartment glass Freezer compartment drawers shelf Inner Water Dispenser Fridge compartment crisper * OPTIONAL Large bottle storage Figures in this user manual are schematic and may not match the product exactly. - Page 12 Control and indicator panel Chiller compartment Butter & Cheese section Icebox drawer 70 mm moving door shelf Wine cooler Fridge compartment glass Freezer compartment drawers shelf Inner Water Dispenser Fridge compartment Water tank crisper * OPTIONAL Large bottle storage Figures in this user manual are schematic and may not match the product exactly.
-
Page 13: Appropriate Location For Installation
• Install the product at least 30 3.1 Appropriate location cm away from heat sources for installation such as hobs, heater cores and In order to prepare the product for stoves and at least 5 cm away use, refer the information in the user from electrical ovens. -
Page 14: Adjusting The Feet
Insert the 2 plastic wedges To adjust the doors vertically, onto the rear ventilation cover Loosen the fixing nut located at as illustrated in the figure. the bottom. Rotate the adjusting nut according to the position of the door (clockwise/counter-clockwise). Tighten the fixing nut in order to fix the position. -
Page 15: Electric Connection
3.4 Electric connection -Upper hinge group is fixed with 3 screws. -The hinge cover is attached after the WARNING: Do not sockets are installed. make connections via - Then the hinge cover is fixed with extension cables or two screws. multi-plugs. -
Page 16: Adjusting The Gap Between The Upper Door
3.5 Adjusting the gap between the upper door • You can adjust the gap between the fridge compartment doors as illustrated in the figures. Door shelves should be empty when adjusting the door height. Using a screwdriver, remove two screws of upper hinge cover of the door you want to adjust. -
Page 17: Preparation
to the needs to consume 4. Preparation minimum energy under these circumstances. 4.1 What to do for energy saving • Do not place the refrigerator in places subject to direct Connecting the product sunlight. Install the product to electric energy saving at least 30 cm away from heat systems is risky as it may cause damage on the... -
Page 18: Recommendations About The Fresh Food Compartment
• Airflow should not be blocked Inside of your refrigerator by placing foods in front of must be cleaned thoroughly. the freezer and the multizone If two coolers are to be compartment fans. Foods installed side by side, there should be loaded by leaving should be at least 4 cm minimum 5 cm space in front distance between them. -
Page 19: Initial Use
4.3 Initial use You will hear a noise when the compressor Before using the product, make starts up. The liquids and sure that all preparations have gases sealed within the been made in accordance with refrigeration system may the instructions given in the also give rise to noise, “Important instructions regarding even if the compressor... -
Page 20: Operating The Product
5. Operating the product 5.1Indicator panel Touch-controlled indicator panel allows you to set the temperature and control the other functions related to the refrigerator without opening the door of the product. Just press the relevant buttons for function settings. 10 11 Quick Cool Quick Freeze 3“... - Page 21 1. Quick cooling function indicator Please refer to "solutions recom- It turns on when the quick fridge mended for troubleshooting" sec- function is activated. tion on your manual if you observe that this indicator is illuminated. 2. Fridge compartment temperature indicator 6.
- Page 22 Use the quick freeze 16. OK button function when you want After navigating the functions to quickly freeze the using the FN button, the OK button food placed in freezer is used to select the functions compartment. If you want required.
- Page 23 22. Ice machine off icon OK button, the eco fuzzy function icon lights continuously and the Press the FN key (until it reaches Indicator continues to flash during the ice icon and the lower line) to this process. If you do not press switch off the ice machine.
- Page 24 key lock 26. Celsius indicator Press the button if It is a Celsius indicator. When the you want to prevent changing of Celsius indication is activated, the the temperature setting of the temperature set values are shown refrigerator. in Celsius and the relevant icon 31.Select button turns on.
- Page 25 Use quick cooling function when you want to quickly cool the food placed in the fridge compartment. If you want to cool large amounts of fresh food, activate this function before putting the food into the product. If you do not cancel it, quick cooling will cancel itself automatically after 1 hours at the...
-
Page 26: Indicator Panel
5.2 Indicator panel Touch-control indicator panel allows you to set the temperature and control the other functions related to the refrigerator. Just press the relevant buttons for function settings. 26 25 If you do not cancel it, 1-On/Off function Quick Freeze will cancel Press the On/Off button for 3 itself automatically seconds to turn off or turn on the... - Page 27 12. Power failure/High tempera- 4.Temperature Adjustment / ture / error warning Temperature Decrease This indicator illuminates during When pressed, decreases the power failure, high temperature temperature of the selected failures and error warnings. compartment. During long-term power failures, 5-Quick freeze Indicator the highest temperature value that This icon lits when the Quick freeze the freezer compartment reaches...
- Page 28 16. FN button you can understand whether the Using this key, you can switch eco fuzzy function will be activated between the functions that you or deactivated. When you press the want to select. Upon pressing OK button, the eco fuzzy function this key, the icon, whose function icon lights continuously during is required to be activated or...
-
Page 29: Freezing Fresh Food
5.3 Freezing fresh food Water flow from water tank will stop when this • In order to preserve the function is selected. quality of the food, it shall be However, ice made frozen as quickly as possible previously can be taken from the icematic. -
Page 30: Recommendations For Preserving The Frozen Food
Freezer Fridge Compartment Compartment Remarks Setting Setting This is the normal recommended -18°C 4°C setting. These settings are recommended -20, -22 or -24°C 4°C when the ambient temperature exceeds 30°C. Use when you wish to freeze your food in a short time. Your product Quick Freeze 4°C will return to its previous mode... -
Page 31: Placing The Food
You can keep the freshness of Vegetables and food for many months (at -18°C or Crisper fruits lower temperatures in the deep Delicatessen freeze). (breakfast food, Foods to be frozen should not be Fresh zone meat products allowed to come in contact with the compartment that shall be previously frozen items to prevent... -
Page 32: Crisper
Do not place pears, apricots, 5.8 Crisper peaches etc., especially those Crisper of the refrigerator is fruits that generate large amounts designed specially to keep the of ethylene, in the same crisper vegetables fresh without losing with other fruits and vegetables. their humidity. -
Page 33: Cool Control Storage Compartment
The feature of switching to a It must not be opened Fridge or Freezer compartment manually. It moves under the is provided by a cooling element guidance of the plastic part located in the closed section on the body while the door is (Compressor Compartment) closed. -
Page 34: Odour Filter
If you open the door of the dispensing system, and prepare refrigerator during the dark period the water filter for use. Additional of the VitaminCare+ technology, flushing may be required in some the refrigerator will automatically households. As air is cleared from detect this and enable the blue, the system, water may spurt out of green or red light to illuminate the... -
Page 35: Maintaining Water Dispenser
5.17 Maintaining water dispenser Before using your fridge first Quick Cool Quick Freeze 3 “ time and after replacing your Select 3 “ water filter, water dispenser may drip drops of water. To prevent water dripping or leaking from dispenser, please bleed the air from the system by dispensing 5-6 gallons (about 20 liter) -
Page 36: Icematic
5.18 Icematic 5.19 Icematic and ice storage container (in some models) To get ice from the icematic, (in some models) fill the water tank in the fridge Using the Icematic compartment with water up to the Fill the Icematic with water and maximum level. -
Page 37: Wine Cellar Compartment
5.20 Wine cellar compartment 1 – Fill your cellar compartment Wine cellar was built to contain up to 28 front bottles + 3 bottles accessible using a telescopic rack. These maximum quantities declared are given for information purpose only and correspond to tests carried out with a “Bordelaise 75cl”... - Page 38 3- Suggestions relating to the opening of a wine bottle before tasting: White wines About 10 minutes before serving Young red wines About10 minutes before serving Thick and mature red wines About 30 60 minutes before serving 4- How long can an open bottle be preserved? Unfinished bottles of wine must be recorked properly and can be preserved in a cold and dry place during the following periods:...
-
Page 39: Maintenance And Cleaning
6. Maintenance clean the outer surfaces and chromium coated parts of and cleaning the product. Chlorine causes corrosion on such metal Service life of the product extends surfaces and frequently faced problems decrease if cleaned at regular 6.1 Avoiding bad odors intervals. -
Page 40: Troubleshooting
7. Troubleshooting cooling system is not balanced, which triggers the compressor Check this list before contacting thermic safeguard. The product the service. Doing so will save you will restart after approximately 6 time and money. This list includes minutes. If the product does not frequent complaints that are not restart after this period, contact related to faulty workmanship... - Page 41 The food items kept in cooler recently plugged in or a new compartment drawers are frozen. food item is placed inside. This • is normal. The cooler compartment • Large quantities of hot food may temperature is set to a very have been recently placed into low degree.
- Page 42 • Any items placed on the product • The foods were placed in may cause noise. >>> Remove unsealed holders. >>> Keep the any items placed on the product. foods in sealed holders. Micro- The product is making noise of organisms may spread out of liquid flowing, spraying etc.
- Page 43 Grundig, and accordance with the following instructions will void the warranty of the product.
- Page 44 Repairs to the product required as a result of faulty materials, defective components or manufacturing defects. • Functional replacement parts to repair a product. • The costs of a Grundig Approved Engineer to carry out the repair. What is not covered? • Transit and delivery damage. •...
- Page 45 Repairs necessary as a direct or indirect result of: -Accidental damage, misuse or abuse of a product. -An attempted repair of a product by anyone other than a Grundig Approved Engineer (the “Engineer”). -Installation or use of a product where such installation or use fails to meet the requirements contained in this guarantee or the User Instructions Booklet.
- Page 46 Optional extras, where available (i.e. extendable feet) are supplied on a chargeable basis only. Does Grundig offer replacements? This is a repair-only guarantee. On occasion, the Manufacturer may at its sole discretion, replace your product with a new product instead of carrying out a repair.
- Page 47 Please take a few moments to complete the details below, as you will need this information when you call us, or to use our online services. When you call us you may be required to input your serial number into your telephone keypad. For help please visit grundig.co.uk/support/ model-finder •...
- Page 48 Model number Serial number Purchased from Date of purchase For service under guarantee or for product advice please call our Contact centre Before requesting service please check the troubleshooting guide in the Operating Instructions booklet, as a charge may be levied where no fault is found, and even though your product may still be under guarantee.
- Page 49 Send us a secure message through our online contact us form. Please visit our website, click Contact Us and choose a product support topic from the list of options. Complete the required details and click send message. Product registrations For UK and Republic of Ireland product registrations please visit grundig. co.uk/register.
- Page 50 Notes ......................................................................................................................................................................................................................................................................................................................................................................................................................................................................................................................................................................................................................................................................................................................................................................................................................................................................................................................................................................................................................................................................................................................................................................................................................................................................................................
- Page 51 Notes ......................................................................................................................................................................................................................................................................................................................................................................................................................................................................................................................................................................................................................................................................................................................................................................................................................................................................................................................................................................................................................................................................................................................................................................................................................................................................................................
Need help?
Do you have a question about the GQN213FTX and is the answer not in the manual?
Questions and answers