Table of Contents
Advertisement
Quick Links
Advertisement
Table of Contents

Related Manuals for Grundig GQN1232FX


Summary of Contents for Grundig GQN1232FX
- Page 1 Refrigerator User Manual GQN1232FX 58 0792 0000/AD...
-
Page 3: Table Of Contents
Contents 1. Safety and environment instructions 5. Operating the product 5.1 Indicator panel ......20 2. Your Freezer Indicator panel ......22 3. Installation 5.2 Zero degree compartment ...28 3.1 Right place for installation ...10 5.3 Vegetable bin .....28 3.2 Attaching the plastic wedges 10 5.4 Blue light .......28 3.3 Adjusting the stands .....10 5.5 Description and cleaning of... - Page 4 Please read this manual first! Dear Customer, We hope that your product, which has been produced in modern plants and checked under the most meticulous quality control procedures, will provide you an effective service For this, we recommend you to carefully read the entire manual of your product before using it and keep it at hand for future references.
-
Page 5: Safety And Environment Instructions
– farm houses and by clients Safety and environment in hotels, motels and other instructions residential type environments; This section provides the safety – bed and breakfast type instructions necessary to environments; prevent the risk of injury and – catering and similar non-retail material damage. - Page 6 • Do not use the product when • Do not touch frozen food with the compartment with circuit wet hands! It may adhere to cards located on the upper your hands! back part of the product • Do not place liquids in bottles (electrical card box cover) (1) and cans into the freezer is open.
- Page 7 your installation. Consult Professional plumbers if you are not sure that there is no water hammer effect in your installation. • Do not install on the hot water inlet. Take precautions against of the risk of freezing of the hoses. Water temperature operating interval shall be 33°F (0.6°C) 1.1.1 HC warning...
- Page 8 • Do not allow the children to 1.6. Package information play with the product. Packaging materials of the product • If the product’s door are manufactured from recyclable comprises a lock, keep the materials in accordance with our key out of children’s reach. National Environment Regulations.
-
Page 9: Your Freezer
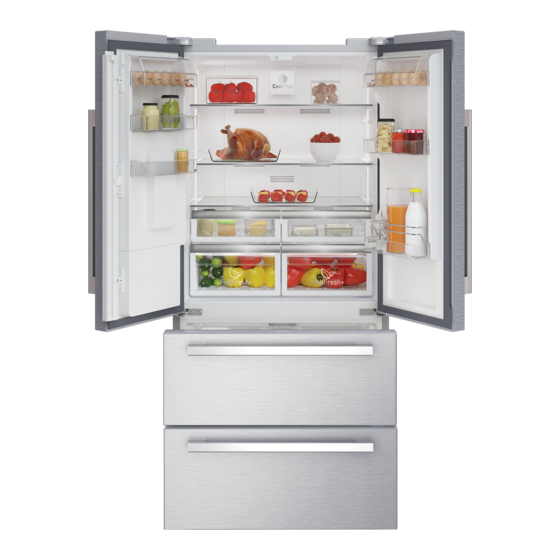
2. Your Freezer A- Cooler compartment Breakfast compartment B- Freezer compartment Odour filter Butter-cheese shelf Adjustable glass shelves Cooler compartment shelves Shelter wire *Optional Frozen food storing compart- ments Vegetable bins Figures in this user manual are schematic and may not match the product exactly. -
Page 10: Installation
3. Installation To attach the wedges, remove the screws on the product and use the screws provided with 3.1 Right place for installation the wedges. Contact the Authorized Service for the product's installation. To ready the product for installation, see the information in the user guide and make sure the electric and water utilities are as required. -
Page 11: Power Connection
• Connect the refrigerator to an earthed socket with 220- 240V/50 Hz voltage. The plug must comprise a 10-16A fuse. • Do not use multi-group plug with or without extension cable between the wall socket and the refrigerator. 3.5 Water connection (Optional) WARNING: Unplug the... -
Page 12: Connecting Water Hose To The Product
Connector (1 piece): Used to attach the water hose to the rear of the product. Hose clip (3 pieces): Used to fix the water hose on the wall. Water hose (1 piece, 5 meter diameter 1/4 inches): Used for the water connection. Faucet adapter (1 piece): Comprises a porous filter, used for connection to the cold water... -
Page 13: For Products Using Water Carboy
Detach the connector (1) from Attach the connector into the the faucet adaptor (2). faucet adaptor and tighten by hand / tool. Connect the faucet adaptor to To avoid damaging, shifting the water mains valve. or accidentally disconnecting the hose, use the clips provided to fix the water hose appropriately. -
Page 14: Water Filter
Connect one end of the water Once the connection is hose provided with the pump to established, plug in and start the product (see 3.6) and follow the water pump. the instructions below. Please wait 2-3 minutes after starting the pump to achieve the desired efficiency. - Page 15 Connector (1 piece): Used to Attach the water hose attach the water hose to the extending from the top of the rear of the product. filter to the product’s water connection adaptor, (see 3.6.) Faucet adapter (1 piece): Used for connection to the cold water mains.
-
Page 16: Internal Filter
3.9.2.Internal filter “Ice Off” indicator must be active while installing the filter. The internal filter provided with Switch the ON-OFF indicator the product is not installed using the “Ice” button on the upon delivery; please follow the screen. instructions below to install the filter. - Page 17 Push the “Ice” button on the Remove the water filter by- screen again to cancel the “Ice pass cover by pulling. Off” mode. A few drops of water may flow out after The water filter will clear removing the cover; certain foreign particles in this is normal.
-
Page 18: Preparation
4. Preparation minimum energy under these circumstances. • The baskets/drawers that 4.1 What to do for are provided with the chill energy saving compartment must always be in use for low energy consumption Connecting the product and for better storage to electric energy saving conditions. - Page 19 • Keep the product running with no food inside for 6 and do not open the door, unless absolutely necessary. A sound will be heard when the compressor is engaged. It is normal to hear sound even when the compressor is inactive, due to the compressed liquids and gasses in the cooling system.
-
Page 20: Operating The Product
5. Operating the product 5.1 Indicator panel Indicator panels may vary depending on the model of your product. Audial and visual functions of the indicator panel will assist in using the refrigerator. Cooler compartment indicator Error status indicator Temperature indicator Vacation function button Temperature adjustment but- Compartment selection but-... - Page 21 1. Cooler compartment indicator 6. Compartment selection button The cooler compartment light will Use the refrigerator compartment turn on when adjusting the cooler selection button to toggle compartment temperature. between the cooler and freezer compartments. ( ) 2. Error status indicator 7.
-
Page 22: Indicator Panel
Indicator panel This touch-control indicator panel allows you to set the temperature wit- hout opening the door of your refrigerator. Just touch the relevant button with your finger to set the temperature. 7.2 7.1 Economic use High temperature / fault alert Energy saving function (display off) Rapid cooling Vacation function... - Page 23 1. Economic use cooler compartment temperature This sign will light up when the fre- indicator will display the value ezer compartment is set to -18°C’, 1. Push the Rapid cool button the most economical setting. ( again to cancel this function. The ) Economic use indicator will turn Rapid cool indicator will turn off off when rapid cooling or rapid fre-...
- Page 24 the energy-saving function is The indicator will light up after 6 active, pressing any button or hours when the eco-fuzzy function opening the door will deactivate is active. the energy-saving function and 10. Freezer compartment tempe- the display signals will return to rature setting normal.
- Page 25 When the rapid freezing function is turned on, the rapid freeze indi- cator will light up and the freezer compartment temperature indica- tor will display the value -27. Press the Rapid freeze button ( ) again to cancel this function. The Rapid freeze indicator will turn off and return to normal setting.
- Page 26 1. Freezer compartment numbers on the indicator serve to temperature setting inform the service personnel about Pressing the button ( ) will the fault. enable the freezer compartment 5. Cooler compartment temperature to be set at -18,-19,- temperature setting 20,-21 ,-22,-23,-24,-18... After pressing the button ( ) , the 2.
- Page 27 13. Celcius/Fahrenheit Conversion replaced every 6 months. If you follow the instructions in the Temperature values can be convert section 5.2, the refrigerator between Celcius and Fahrenheit by will automatically calculate the pressing rapid freezing key( ) and remaining period and the filter rapid cooling key( ) 3 seconds.
-
Page 28: Zero Degree Compartment
5.2 Zero degree compartment 5.5 Description and cleaning of odour filter (for certain models) Use this compartment to keep delicatessen at lower Odor filter prevents unpleasant temperatures or meat products for odour build-up in your product. immediate consumption. Do not place fruits and vegetables in this •... -
Page 29: Telescopic Drawer
5.6 Telescopic drawer 5.7 Ionizer Pay attention not to squeeze any (for certain models) parts of your body such as hands, feet and etc. between the movable The ionizer system in the cooler parts while the drawer is in use in compartment’s air duct serves order to avoid any injury. -
Page 30: Movable Middle Section
5.9 Movable middle section Movable middle section is intended to prevent the cold air inside your refrigerator from escaping outside. Sealing is provided when the gas- kets on the door presses on the surface of the movable middle sec- tion while the cooler compartment doors are closed. -
Page 31: Ice Box
5.10 Ice box 5.12Humidity controlled crisper (This feature is optional) (Optional) Humidity rates of the vegetables and Please read the warnings carefully on the ice container. The ice con- fruit are kept under control with the tainer is used for ice collection po- feature of humidity-controlled cris- ured ice machine. -
Page 32: Freezing Fresh Food
5.13 Freezing fresh food 5.14 Deep freezer details • To preserve food quality, the As per the IEC 62552 standards, food items placed in the freezer the freezer must have the capacity compartment must be frozen to freeze 4,5 kg of food items at as quickly as possible, use the -18°C or lower temperatures in 24 rapid freezing for this. -
Page 33: Placing The Food
Freezer Cooler Compartment Compartment Descriptions Setting Setting This is the default, recommended -18°C 4°C setting. These settings are recommended -20,-22 or 4°C for ambient temperatures exceeding -24°C 30°C. Use this to freeze food items in a short time, the product will reset to Rapid Freeze 4°C previous settings when the process... -
Page 34: Door Open Alert
5.16 Door open alert (Optional) An audible alert will be heard if the product's door remains open for 1 minute. The audible alert will stop when the door is closed or any button on the display (if available) is pressed. 5.17 Interior light Interior light uses a LED type lamp. -
Page 35: Maintenance And Cleaning
6. Maintenance clean the outer surfaces and chromium coated parts of and cleaning the product. Chlorine causes corrosion on such metal Service life of the product extends surfaces and frequently faced problems decrease if cleaned at regular 6.1 Avoiding bad odours intervals. -
Page 36: Troubleshooting
• Troubleshooting Protective thermal of the compressor Please review this list before calling will blow out during sudden power the service. This will save you time and failures or plug-out plug-ins as the money. This list contains frequently refrigerant pressure in the cooling encountered problems that are not system of the refrigerator has not results of faulty workmanship or material... - Page 37 • • Your new product may be bigger No regular cleaning may have been than the previous one. Larger performed. Clean the inside of the refrigerators operate for a longer refrigerator with a sponge, lukewarm period of time. water or carbonated water. •...
- Page 38 • The floor may not be stable or level. The door cannot be closed. • >>>If the refrigerator shakes when Food packages may be preventing moved slightly, adjust the feed to the door from closing. >>> Re-locate balance it. Make sure that the floor the packages that are obstructing is level and capable of carrying the the door.
- Page 39 Notes ......................................................................................................................................................................................................................................................................................................................................................................................................................................................................................................................................................................................................................................................................................................................................................................................................................................................................................................................................................................................................................................................................................................................................................................................................................................................................................................
- Page 40 Notes ......................................................................................................................................................................................................................................................................................................................................................................................................................................................................................................................................................................................................................................................................................................................................................................................................................................................................................................................................................................................................................................................................................................................................................................................................................................................................................................
Need help?
Do you have a question about the GQN1232FX and is the answer not in the manual?
Questions and answers