
Related Manuals for Taurus Z9.9 Pro


Summary of Contents for Taurus Z9.9 Pro
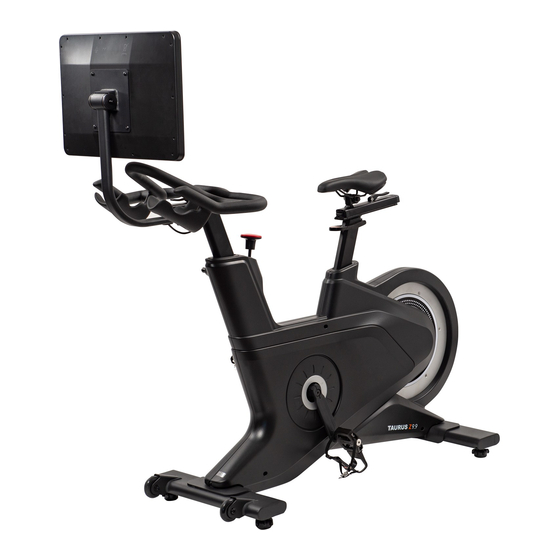
- Page 1 Assembly and Operating Instructions max. 150 kg ~ 60 Min. 64 kg L 153 | W 52 | H 158 TFZ99PRO15.01.04 Art. No. TF-Z99PRO-15 Taurus Smart Bike Z9.9 Pro...
- Page 2 Z9.9 Pro...
-
Page 3: Table Of Contents
Content GENERAL INFORMATION Technical Data Personal Safety Electrical Safety Set-Up Place ASSEMBLY General Instructions Scope of Delivery Assembly OPERATING INSTRUCTIONS Console Display Button Functions Further Functions Programmes 3.4.1 Quick-Start Programme/Target Programme 3.4.2 Pre-set Programmes 3.4.3 Interval Programme 3.4.4 Heart Rate Controlled Programmes 3.4.5 Watt Programme 3.4.6 Virtual Training Routes Multimedia and Software Updates... - Page 4 ORDERING SPARE PARTS Serial Number and Model Name Parts List Exploded Drawing WARRANTY CONTACT Z9.9 Pro...
- Page 5 With Taurus® fitness equipment, the focus is on what sport is all about: maximum performance! Therefore, the equipment is developed in close consultation with athletes and sports scientists.
- Page 6 This notice indicates potentially hazardous situations which, if not avoided, will result in death or serious injuries! NOTICE This notice indicates further useful information. Retain these instructions in a safe place for future reference, maintenance or when ordering replacement parts. Z9.9 Pro...
-
Page 7: General Information
GENERAL INFORMATION Check your TFT console regularly for possible software updates. If available, make sure to carry out the updates. Technical Data TFT Display of Speed in km/h Rotations per minute Training time in min Training distance Calorie consumption in kcal Heart rate (when using the chest strap) Watt Resistance system:... -
Page 8: Personal Safety
Make sure that nobody is within the range of motion of the equipment during training so as not to endanger you or other persons. ࣑ ATTENTION Do not insert any objects of any kind into the openings of the device. Z9.9 Pro... -
Page 9: Electrical Safety
Electrical Safety DANGER ⚠ In order to reduce the risk of an electric shock, always unplug the equipment from the mains socket immediately after your workout, before assembly or dismantling, and before maintenance or cleaning. Do not pull on the cable. ⚠... -
Page 10: Set-Up Place
(over 70%) like swimming pools. A floor protective mat/equipment underlay can help to protect high-quality floor coverings (parquet, laminate, cork, carpets) from dents and sweat and can help to level out slight unevenness. Z9.9 Pro... -
Page 11: Assembly
ASSEMBLY General Instructions ⚠ DANGER Do not leave any tools, packaging materials such as foils or small parts lying around, as otherwise there is a danger of suffocation for children. Keep children away from the equipment during assembly. ⚠ WARNING Pay attention to the instructions attached to the equipment in order to reduce the risk of injuries. -
Page 12: Scope Of Delivery
Q-5 Allen bolt M8*85L (1) Q-8 Flat washer Q-7 Allen bolt M8*40L (2) Q-4 Screw cover Φ8*Φ46 (2) Φ8*Φ16*2T (2) Q-9 Box spanner (1) Q-10 Screwdriver (1) (Pedal Wrench) Q-12 Allen key 6mm (1) Q-11 Allen key 3mm (1) Z9.9 Pro... - Page 13 Manual B-1 / E-1 C / O-1 D-1 / P-11 L-35L / L35R M / N L / R...
-
Page 14: Assembly
Assembly of the Front and Rear Stabilizer Mount the front stabilizer (M) and rear stabilizer (N) to the main frame (L) with two hex screws (Q-1) and two flat washers (Q-2) each. Tighten the screws with the tool. Z9.9 Pro... - Page 15 Step 2: Assembly of the Pedals Screw the right pedal (L-35R) into the thread of the pedal axis located on the right side of the main frame by turning it clockwise. Screw the left pedal (L-35L) into the thread of the pedal axis located on the left side of the main frame by turning it counter clockwise.
- Page 16 Assembly of the Seat Post and Seat Insert the seat post (O-1) into the main frame (L). Attach the seat (P-11) to the seat post (O-1). Tighten the pre-assembled screw connection on the underside of the seat (P-11) with the tool. Z9.9 Pro...
- Page 17 Step 4: Assembly of the Handlebar Loosen the pull pin (B-5) and slide out the upper slider (B-4). Attach the handlebar (B-1) to the upper slider (B-4) with two hex screws (Q-3) using the tool (fig. Remove the pre-assembled screw (C-2) and limit piece (C-5). Slide the handlebar into position as shown in fig.
- Page 18 Make sure not to pinch the cables during the following steps. Mount the holder tube (E-1) to the the handlebar post (C) with two allen bolts (Q-7) and two flat washers (Q-8). Tighten the bolts (Q-7) with the tool. Z9.9 Pro...
- Page 19 Step 6: Assembly of the Handlebar Post Connect the cables C-3 and L-12. ࣑ ATTENTION Make sure not to pinch the cables during the following steps. Attach the handlebar post (C) to the main frame (L). Fixate the handlebar post (C) by turning the lever clockwise on the right side of the main frame (L).
- Page 20 Assembly of the Console Support Mount the console support (D-1) to the top of the holder tube (E-1) with one allen bolt (Q-5), two screw covers (Q-4) and one nut (Q-6). Tighten the screw connection with the tools. Z9.9 Pro...
- Page 21 Step 8: Assembly of the Console Remove the pre-assembled screws from the rear side of the console (A-1). Connect the console cable to the cable of the console supporting bar. ATTENTION Be careful not to pinch the cables during the following step. Mount the console (A) to the console support (D-1) with the previously removed screws (A-1).
- Page 22 Plug the power plug into a wall outlet that complies with the instructions in the chapter on electrical safety. Connect the power supply (R) to the front of the main frame (L). Plug the power supply into a socket that complies with the specifications of the electrical safety chapter 1.3. Z9.9 Pro...
-
Page 23: Operating Instructions
OPERATING INSTRUCTIONS NOTICE Familiarise yourself with all the functions and setting options of the device before starting training. Have the proper use of this product explained to you by a specialist. Console Display Display of the training time TIME Display range 0:00 - 99:99 SPEED Display of the current speed Display of the training distance... -
Page 24: Button Functions
Display of the current revolutions per minute (RPM) Display range 0 - 999 Button Functions Start/Pause: Tap to start and/or pause the training Stop Tap to stop the training Tap to increase a value Down Tap to decrease a value Z9.9 Pro... -
Page 25: Further Functions
Further Functions Settings Here you will find all setting options. Volume Here you can adjust the volume. Brightness Here you can adjust the brightness. Timezone Here you can adjust the date or the current time zone. Wifi Here you can connect the console to a wifi network. Here you can connect the console to a Bluetooth chest Heart Rate strap. -
Page 26: Programmes
Programmes There are a variety of programmes available to you. These include Quick Start programme: Target programme: Pre-set programmes: Interval programme: Heart rate programmes: Watt programme: You can also set your own virtual training routes via Google Maps. Z9.9 Pro... -
Page 27: Quick-Start Programme/Target Programme
3.4.1 Quick-Start Programme/Target Programme Tap QUICK START in the main menu. Set the values for the desired distance, time and/or calories for your training. NOTICE You can set one or more parameters. The set values are counted down to 0, the others are counted up accordingly. -
Page 28: Pre-Set Programmes
To start the training, tap START. You can manually adjust the resistance during the training. To pause the training, tap PAUSE. To stop the training, tap STOP. → When the training is finished, a summary of the recorded training parameters is displayed. Z9.9 Pro... -
Page 29: Interval Programme
3.4.3 Interval Programme Tap INTERVAL in the main menu. Set the values for the desired number of cycles, time, resistance and revolutions per minute for your workout. To start the training, tap START. The workout starts with a 1-minute warm-up. You can manually adjust the resistance during the training. -
Page 30: Heart Rate Controlled Programmes
To start the training, tap START. The resistance is adjusted according to your heart rate. The resistance cannot be adjusted manually. NOTICE If the console does not receive a pulse signal for 30 seconds, the programme will automatically stop. Z9.9 Pro... - Page 31 To pause the training, tap PAUSE. To pause the training, tap STOP. → When the training is finished, a summary of the recorded training parameters is displayed.
-
Page 32: Watt Programme
The resistance level is automatically adjusted according to the wattage you set. To pause the training, tap the following icon To stop the training, tap the following icon → When the training is finished, a summary of the recorded training parameters is displayed. Z9.9 Pro... -
Page 33: Virtual Training Routes
3.4.6 Virtual Training Routes Tap MAP YOUR ROUTE in the main menu. After you have started this mode, you must determine your current position. To do this, tap the following icon To switch to the worldwide Google Maps view, tap the following icon NOTICE If you are within China, you can also select the default region by tapping the following icon Select your start position and tap until the following icon appears... - Page 34 Z9.9 Pro...
-
Page 36: Multimedia And Software Updates
To return to the main menu, tap the following icon To go back one page within the apps, tap the following icon To start the training, tap the following icon To stop the training, tap the following icon Z9.9 Pro... - Page 37 Example of an app Overview of apps and possible software updates...
-
Page 38: Storage And Transport
After that, you easily can move the equipment to a new position. For long transport distances the equipment should be disassembled and safely packed. Select the new location by following the instructions in the section 1.4 of this manual. Z9.9 Pro... -
Page 39: Troubleshooting, Care And Maintenance
TROUBLESHOOTING, CARE AND MAINTENANCE General Instructions ⚠ WARNING Do not make any improper changes to the equipment. CAUTION ⚠ Damaged or worn components may affect your safety and the life of the equipment. Therefore, immediately replace damaged or worn components. In such a case, contact the contract partner. -
Page 40: Error Codes And Troubleshooting
Error Codes and Troubleshooting The electronics of the equipment continuously carries out tests. In case of deviations, an error code appears on the display and normal operation is stopped for your safety. Please contact Sport-Tiedje for technical support. Z9.9 Pro... -
Page 41: Maintenance And Inspection Calendar
Maintenance and Inspection Calendar To avoid damage from body sweat, the equipment must be cleaned with a damp towel (no solvents!) after each training session. The following routine tasks must be performed at the specified intervals: Part Weekly Monthly Display console Plastic covers Screws and cable connections Check pedals for tightness... -
Page 42: Recommended Accessories
Of course, you can also contact our customer service: by telephone, e-mail, in one of our branches or via our social media channels. We will be happy to advise you! chest strap floor mat chest strap contact gel silicone spray towels Z9.9 Pro... - Page 43 The exact position of this sticker is shown in the following illustration. Enter the serial number in the appropriate field. Serial number: Brand / Category: Taurus / Indoor Bike Model Name: Smart Bike Z9.9 Pro 15 Article Number: TF-Z99PRO-15...
- Page 44 Limit block Idler lever E (E1~E3) Holder tube assembly for console Bearing Holder tube C-type Limit block for console Flat washer End plug for wire Hex. Screw F (F-1~F-6) Belt pulley assembly Hex. Nut Belt pulley Wave washer Z9.9 Pro...
- Page 45 Brake set L-13 Gear box Spring L-14 Screw Fixed spindle for brake L-15 Adjusting lever C-type L-16 Nylon nut Brake knob assembly L-17 Adjusting block for gear (K-1~K-14) Brake knob L-18 Holder sheet for adjusting lever Cover for brake knob L-19 Screw Brake bar...
- Page 46 Right pull pin for seat post O-14 Front pull pin for seat post O-15 Screw O-16 Nylon nut O-17 Screw P (P-1~P-10) Slider assembly for seat post Slider Upper cover for slider Hex. screw Pull bar Shaft for pull bar Set screw Z9.9 Pro...
- Page 47 Exploded Drawing...
- Page 48 Z9.9 Pro...
- Page 49 WARRANTY Training equipment from Taurus® is subject to strict quality control. However, if a fitness equipment purchased from us does not work perfectly, we take it very seriously and ask you to contact our customer service as indicated. We are happy to help you by phone via our service hotline.
- Page 50 For that reason, we also want to resolve your queries quickly and in a straightforward manner. Thus, please always keep your customer number and the serial number of the faulty equipment handy. Z9.9 Pro...
- Page 51 CONTACT TECHNIK TEKNIK OG SERVICE TECHNIQUE & SERVICE �� �� �� +49 4621 4210-900 80 90 16 50 +33 (0) 172 770033 +49 4621 4210-945 +49 4621 4210-933 �� +49 4621 4210-698 �� �� info@fitshop.dk service-france@fitshop.fr �� technik@sport-tiedje.de �� �� Åbningstider kan findes på...
- Page 52 The company employs numerous sports scientists, fitness trainers and competitive athletes. Visit us also on our social media platforms or our blog! Z9.9 Pro...
- Page 53 Notes...
- Page 54 Notes Z9.9 Pro...
- Page 56 Taurus Smart Bike Z9.9 Pro...
Need help?
Do you have a question about the Z9.9 Pro and is the answer not in the manual?
Questions and answers