Table of Contents
Advertisement
Quick Links
Advertisement
Table of Contents

Related Manuals for Elation KL PANEL XL IP


Summary of Contents for Elation KL PANEL XL IP
- Page 1 KL PANEL XL IP User Manual...
- Page 2 Elation Professional B.V. | Junostraat 2 | 6468 EW Kerkrade, The Netherlands +31 45 546 85 66 | +31 45 546 85 96 fax | www.elationlighting.eu | info@elationlighting.eu Elation Professional Mexico | AV Santa Ana 30 | Parque Industrial Lerma, Lerma, Mexico 52000 +52 (728) 282-7070...
-
Page 3: Specifications
C O N T E N T S General Information Limited Warranty Safety Guidelines Maintenance Guidelines Fixture Overview Fan Modes and Low Noise Operation Torque Screw Settings Installation Instructions Clamp Installation Junior Pin Installation Stand Mount Installation Barn Door Installation Intensifier Installation Power Cables Battery Connection... - Page 4 Barndoor Assembly (x1) Power Cable (x1) Barndoor Safety Cable (x1) CUSTOMER SUPPORT Contact ELATION Service for any product related service and support needs. Also visit forums.elationlighting.com with questions, comments, or suggestions. ELATION SERVICE USA - Monday - Friday 8:00am to 4:30pm PST 323-582-3322 | Fax 323-832-9142 | support@elationlighting.com...
-
Page 5: L I M I T E D Wa R R A N T Y ( U S A O N Ly )
It is the owner’s responsibility to establish the date and place of purchase by acceptable evidence, at the time service is sought. B. For warranty service, send the product only to the Elation Professional factory. All shipping charges must be pre-paid. If the requested repairs or service (including parts replacement) are within the terms of this warranty, Elation Professional will pay return shipping charges only to a designated point within the United States. -
Page 6: Safety Guidelines
This fixture is a sophisticated piece of electronic equipment. To guarantee smooth operation, it is important to follow all instructions and guidelines in this manual. Elation Professional is not responsible for injury and/or damages resulting from the misuse of this fixture due to the disregard of the information printed in this manual. - Page 7 S A F E T Y G U I D E L I N E S • DO NOT TOUCH the fixture housing during operation. • Turn OFF the power and allow approximately 15 minutes for the fixture to cool down before serving. • DO NOT shake fixture and avoid brute force when installing and/or operating fixture.
-
Page 8: Maintenance
Regular inspections are recommended to ensure proper function and extended life. There are no user serviceable parts inside this fixture. Please refer all service issues to an authorized Elation service technician. Should you need any spare parts, please order genuine parts from an authorized Elation dealer. -
Page 9: Fixture Overview
F I X T U R E O V E R V I E W... - Page 10 FA N M O D E S a n d LO W N O I S E O P E R AT I O N The KL Panel XL IP is a high-performance fixture suited for multiple applications. For noise critical environments such as Theater, Opera or Orchestra Halls, it offers various fan operation modes which remove any distraction for the audience and performers.
- Page 11 CAUTION! DO NOT OVER TORQUE SCREWS AS THIS CAN CAUSE LEAKAGE ISSUES! TO CONFIRM THE IP65 INTEGRITY AFTER A LAMP REPLACEMENT, TEST FIXTURE USING THE ELATION IP TESTER. CONTACT ELATION SERVICE FOR MORE DETAILS. CAUTION! THE USE OF PROTECTIVE GLOVES AND SAFETY GOGGLES IS...
-
Page 12: Installation Instructions
I N S TA L L AT I O N I N S T R U C T I O N S FLAMMABLE MATERIAL WARNING Keep fixture minimum 5.0 feet (1.5m) away from flammable materials and/or pyrotech- nics. ELECTRICAL CONNECTIONS A qualified electrician should be used for all electrical connections and/or installations. -
Page 13: Clamp Installation
I N S TA L L AT I O N I N S T R U C T I O N S CLAMP INSTALLATION A junior pin can be attached to the mounting surface on the fixture’s mounting yoke, and this junior pin can then be used as an attachment point for a mounting clamp. - Page 14 I N S TA L L AT I O N I N S T R U C T I O N S JUNIOR PIN INSTALLATION To install the junior pin to the mounting point on the yoke, orient the junior pin with the notched end facing the yoke mounting point.
- Page 15 I N S TA L L AT I O N I N S T R U C T I O N S STAND MOUNT INSTALLATION This device is capable of being stand mounted by following the steps below: 1. Install the Junior Pin, as detailed elsewhere in this section. 2.
-
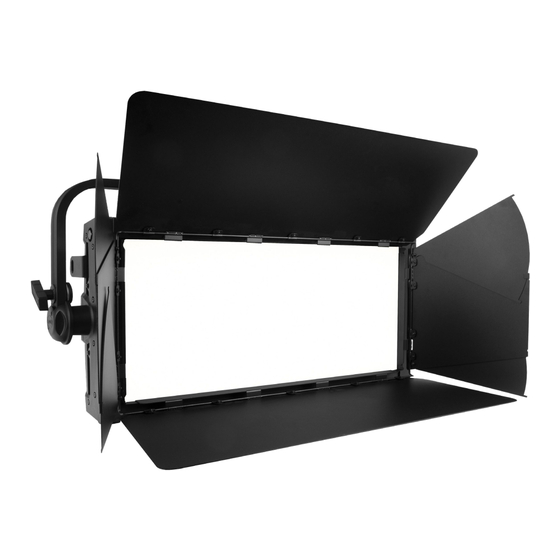
Page 16: Barn Door Installation
I N S TA L L AT I O N I N S T R U C T I O N S BARN DOOR INSTALLATION 1. Unlock both frame lock tabs using the latches located on each tab. Flip the top edge of the frame upward. - Page 17 I N S TA L L AT I O N I N S T R U C T I O N S INTENSIFIER LENS INSTALLATION 1. Unlock both frame lock tabs using the latches located on each tab (circled in the image below). Flip the top edge of the frame upward.
- Page 18 I N S TA L L AT I O N I N S T R U C T I O N S POWER CABLES ENSURE ALL CONNECTIONS AND ENDCAPS ARE PROPERLY SEALED WITH DIELECTRIC GREASE (AVAILABLE AT MOST ELECTRICAL SUPPLIERS) TO PREVENT WATER CORROSION AND/OR ELECTRICAL SHORT CIRCUIT.
- Page 19 LEDs. This issue is not specific only to ELATION lighting fixtures, it is a common issue with lighting fixtures from all manufacturers. Although there is no true way to fully prevent this issue from happening, the guidelines below can prevent any potential damage from occurring if followed.
-
Page 20: Battery Connection
B AT T E R Y C O N N E C T I O N This device is capable of receiving power from a battery pack. NOTICE: The user is responsible for ensuring compatibility between the device and the battery pack. -
Page 21: System Menu
(050), and select UPDATE SOFTWARE. A copy of the latest software can be obtained by contacting Elation Support. AN ELATION E-LOADER III CAN ALSO BE USED TO UPDATE THE FIXTURE TO THE LATEST SOFTWARE. To order this device, please contact Elation Support for further details. -
Page 22: Dmx Settings
S YS T E M M E N U ELATION KL Panel XL IP - System Menu HOME INTERFACE xx CH xxxx Displays currently SHOW ADDR: 001 selected DMX mode Select Disabled fixture control mode Select fixture Int CCT GRN... - Page 23 S YS T E M M E N U ELATION KL Panel XL IP - System Menu Primary On / Off Secondary On / Off DMX or E-Fly Select Signal E-Fly and DMX Out Standard Stage Dim Mode Architectural Theatre...
- Page 24 S YS T E M M E N U ELATION KL Panel XL IP - System Menu Total fixture Life Time xxxxxx hrs run time, not resettable Fixture run time, Last Run Time xxxxxx hrs resettable Reset Last Run Time Reset...
-
Page 25: Manual Mode
MANUAL MODE ENCODER KNOB DESIGNATIONS Knob 1 Knob 2 Knob 3 INT CCT GRN (INTENSITY, COLOR TEMPERATURE, GREEN SHIFT) Encoder Resolution/ Parameter Display Default Knob Steps Intensity Intensity 0 - 100% Color Temperature CCT 2000 - 10000K 100K 6000K Green Shift GRN -100% - +100% Neutral HSI (HUE, SATURATION, INTENSITY) - Page 26 D M X T R A I T S : C H A N N E L F U N C T I O N S & VA L U E S Features subject to change without notice MODE/CHANNEL 96CH 12CH 48CH 24CH...
- Page 27 D M X T R A I T S : C H A N N E L F U N C T I O N S & VA L U E S Features subject to change without notice MODE/CHANNEL 96CH 12CH 48CH 24CH...
- Page 28 D M X T R A I T S : C H A N N E L F U N C T I O N S & VA L U E S Features subject to change without notice MODE/CHANNEL 96CH 12CH 48CH 24CH...
- Page 29 D M X T R A I T S : C H A N N E L F U N C T I O N S & VA L U E S Features subject to change without notice MODE/CHANNEL 96CH 12CH 48CH 24CH...
- Page 30 D M X T R A I T S : F X TA B L E Type Slot Name FX Adjustment Notes/Steps Color Mix Onyx Bank 25 Fader 1 Red Blue Police Speed Ignore and 2 Red Blue Burst Speed Onyx Bank 25 Fader 3 Ignore Police...
- Page 31 D M X T R A I T S : F X TA B L E Type Slot Name FX Adjustment Notes/Steps Color Mix Campfire Speed Onyx Bank 25 Fader 8 Ignore Candle Speed Onyx Bank 25 Fader 9 Ignore Onyx Bank 25 Fader Windy Candle Speed...
- Page 32 D M X T R A I T S : F X TA B L E Type Slot Name FX Adjustment Notes/Steps Color Mix Paparazi 1 Speed Onyx Bank 26 Fader 5 Use Paparazi 2 Speed Onyx Bank 26 Fader 6 Use Paparazi 3 Speed Onyx Bank 26 Fader 7 Use...
-
Page 33: Color Temperature
C O LO R T E M P E R AT U R E DMX VALUE COLOR TEMPERATURE (K) DMX VALUE COLOR TEMPERATURE (K) 2000 6100 2100 6200 2200 6300 2300 6400 2400 6500 2500 6600 2600 6700 2700 6800 2800 6900 2900... - Page 34 V I R T U A L S WAT C H B O O K VALUE FILTER # COLOR VALUE FILTER # COLOR pale yellow Mauve straw Medium Purple gold tint Lavender spring yellow Palace Blue medium yellow Dark Blue yellow Medium Blue deep amber...
-
Page 35: R E M O T E D E V I C E M A N A G E M E N T ( R D M )
The following parameters are accessible in RDM on this device: ELATION KL PANEL XL IP RDM PARAMETERS PROXIED_DEVICE_COUNT SENSOR_DEFINITION,... -
Page 36: Error Codes
E R R O R C O D E S Error Codes subject to change without notice ERROR CODES DESCRIPTION Displays if fixture overheats. Temp Er R E F R E S H R AT E DMX Values Refresh Rate (Hz) DMX Values Refresh Rate (Hz) 1250... -
Page 37: D I M M E R M O D E S
D I M M E R M O D E S... - Page 38 P I X E L Z O N E S...
-
Page 39: Photometric Data
S P E C I F I C AT I O N S SOURCE 6-in-1 (Red, Green, Blue, White, Lime, Cyan) Full Spectrum LED Array 50,000 Hour Average LED Life* *Test lab conditions. May vary depending on several factors including but not limited to: Environmental Conditions, Power/Voltage, Usage Patterns (On-Off Cycling), Control, and Dimming. -
Page 40: Dimensional Drawings
D I M E N S I O N A L D R AW I N G S F I X T U R E O N LY BARN DOORS INSTALLED JUNIOR PIN INSTALLED... -
Page 41: Optional Accessories
O P T I O N A L A C C E S S O R I E S ORDER CODE ITEM KLP115 KL Panel XL IP (US SKU) 1237000263 KL Panel XL IP (EU SKU) KLP972 KL Panel XL IP Intensifier Lens...
Need help?
Do you have a question about the KL PANEL XL IP and is the answer not in the manual?
Questions and answers