Table of Contents
Advertisement
Quick Links
Advertisement
Table of Contents

Related Manuals for Elation KL FRESNEL 4 FC


Summary of Contents for Elation KL FRESNEL 4 FC
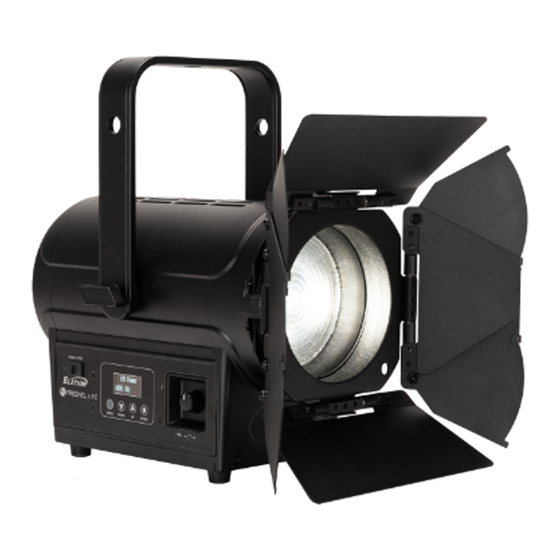
- Page 1 FRESNEL 4 FC User Manual...
- Page 2 +31 45 546 85 66 | +31 45 546 85 96 fax | www.elationlighting.eu info@elationlighting.eu Elation Professional Mexico | AV Santa Ana 30 | Parque Industrial Lerma, Lerma, Mexico 52000 +52 (728) 282-7070 DOCUMENT VERSION Due to additional product features and/or enhancements, an updated version of this document may be available online.
-
Page 3: Table Of Contents
C O N T E N T S General Information Limited Warranty (USA Only) Safety Guidelines Maintenance Guidelines Overview Installation Guidelines Accessory Installation Remote Device Management (RDM) System Menu Encoder Mode Fan Modes DMX Setup DMX Traits Color Macros Table Color Temperature Dimmer Modes and Dim Curves Software Updates... -
Page 4: General Information
Barn Door Gel Frame Power Cable CUSTOMER SUPPORT Contact ELATION Service for any product related service and support needs. Also visit forums.elationlighting.com with questions, comments or suggestions. ELATION SERVICE USA - Monday - Friday 8:00am to 4:30pm PST 323-582-3322 | support@elationlighting.com ELATION SERVICE EUROPE - Monday - Friday 08:30 to 17:00 CET +31 45 546 85 63 | Fax +31 45 546 85 96 | support@elationlighting.eu... -
Page 5: Limited Warranty (Usa Only)
It is the owner’s responsibility to establish the date and place of purchase by acceptable evidence, at the time service is sought. B. For warranty service, send the product only to the Elation Professional factory. All shipping charges must be pre-paid. If the requested repairs or service (including parts replacement) are within the terms of this warranty, Elation Professional will pay return shipping charges only to a designated point within the United States. -
Page 6: Safety Guidelines
This fixture is a sophisticated piece of electronic equipment. To guarantee a smooth operation, it is important to follow all instructions and guidelines in this manual. Elation Professional is not responsible for injury and/or damages resulting from the misuse of this fixture due to the disregard of the information printed in this manual. - Page 7 S A F E T Y G U I D E L I N E S DO NOT TOUCH the fixture housing during operation. Turn OFF the power and allow approximately 15 minutes for the fixture to cool down before serving. DO NOT shake fixture, avoid brute force when installing and/or operating fixture.
-
Page 8: Maintenance Guidelines
Regular inspections are recommended to insure proper function and extended life. There are no user serviceable parts inside this fixture, please refer all other service issues to an authorized Elation service technician. Should you need any spare parts, please order genuine parts from your local Elation dealer. -
Page 9: Overview
O V E R V I E W Bracket Adjustment Knob Mounting Bracket Fuse (2A) Bracket Adjustment Accessory Safety Knob Latch Cable Loop Service Port Zoom Knob MODE DOWN ENTER Direct Power Power Access Encoder Display Screen ENTER MODE DOWN Mode Down Enter... -
Page 10: Installation Guidelines
I N S TA L L AT I O N G U I D E L I N E S FLAMMABLE MATERIAL WARNING Keep fixture minimum 1.6 feet (0.5m) away from flammable materials and/or pyrotechnics. ELECTRICAL CONNECTIONS A qualified electrician should be used for all electrical connections and/or installations. - Page 11 LEDs. This issue is not specific only to ELATION lighting fixtures, it is a common issue with lighting fixtures from all manufacturers. Although there is no true way to fully prevent this issue from happening, the guidelines below can prevent any potential damage from occurring if followed.
- Page 12 I N S TA L L AT I O N G U I D E L I N E S CLAMP INSTALLATION (NOT INCLUDED) This fixture includes an adjustable mounting bracket with an attachment point for a mounting clamp located at the top of the bracket, as well as a safety cable loop located on the rear of the fixture.
- Page 13 I N S TA L L AT I O N G U I D E L I N E S RIGGING This fixture can be mounted suspended upside down from a truss, mounted to a vertical truss, or standing upright on a stable, level surface. Refer to the illustration below. Please note that if the fixture is fitted with the Barndoor accessory, then it must be installed with the accessory latch oriented upwards in order to ensure that the Barndoor does not fall even in the event of a latch failure.
-
Page 14: Accessory Installation
A C C E S S O R Y I N S TA L L AT I O N GEL FRAME AND BARN DOOR INSTALLATION The fixture has 2 slots on the front to hold the Gel Frame and the Barndoors. Follow the direc- tions below to install these accessories. -
Page 15: Remote Device Management (Rdm)
R E M O T E D E V I C E M A N A G E M E N T ( R D M ) NOTE: In order for RDM to work properly, RDM enabled equipment must be used through- out the entire system, including DMX data splitters and wireless systems. -
Page 16: System Menu
S YS T E M M E N U The fixture includes an easy to navigate system menu. The control panel (see image below) located on the side of the fixture provides access to the main system menu and is where all necessary system adjustments are made to the fixture. - Page 17 S YS T E M M E N U Disabled Run fixture in DMX mode Run fixture in dimmer Dimmer mode Run fixture in CCT mode Int CCT Grn ENCODER with encoder control MODE Run fixture in color mode Int Color Sat with encoder control Run fixture in manual Manual Control...
- Page 18 Highest Fidelity Color Tuning Balanced Output and Fidelity Highest Output Bright (Highest Output) Select output balance Output Balance setting Uniform (Elation Full Spectrum Match) Set LED power output LED Power Limit limit 100% Auto High Fan Mode Set fan mode setting...
- Page 19 S YS T E M M E N U Screen goes into standby 10s - 5min Screen Delay mode after selected Default = 1min period of inactivity Screen controls lock Screen Lock Off, 10s - 5min after selected period of inactivity Display Inverted display...
-
Page 20: Encoder Mode
E N C O D E R M O D E DIMMER MODE FUNCTION DISPLAY INCREMENTS DEFAULT Intensity Dimmer Intensity 0 - 100% INT CCT GRN MODE FUNCTION DISPLAY INCREMENTS DEFAULT Intensity Dimmer Intensity 0 - 100% Color Temperature CCT 2400 - 8500K 100K 6000K Green Shift... -
Page 21: Fan Modes
FA N M O D E S The KL Fresnel 4 FC is a high-performance fixture suited for multiple applications. For noise critical environments such as Theater, Opera or Orchestra Halls, it offers various fan operation modes which remove any distraction for the audience and performers. Fan Modes can be changed remotely via the DMX control channel, allowing the fixture to offer high output or whisper silent operation at a moment’s notice. -
Page 22: Dmx Setup
D M X S E T U P DMX-512: DMX is short for Digital Multiplex. This is a universal protocol used as a form of communication between intelligent fixtures and controllers. A DMX controller sends DMX data instructions from the controller to the fixture. DMX data is sent as serial data that travels from fixture to fixture via the DATA “IN”... - Page 23 D M X S E T U P Special Note: Line Termination. When longer runs of cable are used, you may need to use a terminator on the last unit to avoid erratic behavior. A terminator is a 110-120 ohm 1/4 watt resistor which is connected between pins 2 and 3 of a male XLR connector (DATA + and DATA -).
-
Page 24: Dmx Traits
D M X T R A I T S Function Snap Values Value Dimmer 0 - 255 Intensity 0 → 100% Dimmer Fine 0 - 255 Fine Intensity Control Shutter / Strobe 0 - 31 Shutter Closed 32 - 63 No Function (shutter open) 64 - 95 Strobe Effect, slow to fast... - Page 25 D M X T R A I T S Function Snap Values Value Yellow Fine 0 - 255 Fine Adjustment CCT Presets 0 - 23 Open 2400K → 8500K (see Color Temperature 24 - 85 Table section) 86 - 255 8500K Variable CCT 0 - 23 Open...
- Page 26 D M X T R A I T S Function Snap Values Value Dimmer Delay Time (continued) 0.5s 0.6s 0.7s 0.8s 0.9s 1.0s 1.5s 2.0s 3.0s 4.0s 5.0s 6.0s 7.0s 8.0s 9.0s 10.0s 142 - 149 Idle Dim to Warm 150 - 154 DTW On 155 - 159 DTW Off 160 - 255 Idle...
- Page 27 D M X T R A I T S Function Snap Values Value Refresh Rate (Hz) (continued) 1040 1050 1060 1070 1080 1090 1100 1110 1120 1130 1140 1150 1160 1170 1180 1190 1200 1210 1220 1230 1240 11 18 1250 1260 1270...
- Page 28 177 - 178 Balanced Output and Fidelity 179 - 180 Highest Output (Default) Output Balance 181 - 182 Bright (Highest Output) 183 - 184 Uniform (Elation Full Spectrum Match) 185 - 200 Idle Dimmer Curves 201 - 210 Linear 211 - 220 Square...
-
Page 29: Color Macros Table
C O LO R M A C R O S TA B L E Value Filter Number Name Value Filter Number Name Pale Yellow Medium Purple Straw Lavender Gold Tint Palace Blue Spring Yellow Dark Blue Medium Yellow Medium Blue Yellow Deep Blue Deep Amber... -
Page 30: Color Temperature
C O LO R T E M P E R AT U R E Colors shown are an approximate representation. COLOR TEMPERATURE COLOR TEMPERATURE DMX VALUE DMX VALUE 6300 2400 2500 6400 2600 6500 2700 6600 2800 6700 2900 6800 3000 6900 3100... -
Page 31: Dimmer Modes And Dim Curves
D I M M E R M O D E S A N D D I M C U R V E S 100% 100% 100% 100% DMX % DMX % DMX % DMX % LINEAR SQUARE INVERSE SQUARE S-CURVE... -
Page 32: Software Updates
9. Remove the USB flash drive and make necessary system menu setting adjustments. C-LOADER II Alternately, an Elation C-Loader II can be used to update the fixture to the latest software. Please visit the C-Loader II product page at the Elation web site and download the product manual for step by step instructions. -
Page 33: Specifications
S P E C I F I C AT I O N S SOURCE • 80W 6500K RGBMA LED Engine • 50,000 Hour Average LED Life* • *May vary depending on several factors including but not limited to: • Environmental Conditions, Power/Voltage, Usage Patterns (On-Off Cycling), Control and Dimming. PHOTOMETRIC DATA •... -
Page 34: Dimensional Drawings
D I M E N S I O N A L D R AW I N G S 10.1in (256mm) 10.2in (259mm) 6.1in (156mm) 9.5in (242mm) 1.4in (35.5mm) 4.8in (123mm) 8.2in (208mm) 6.8in (173mm) 12.3in (313mm) 10.1in (255mm) -
Page 35: Optional Accessories | Fcc Statement
O P T I O N A L A C C E S S O R I E S SKU NUMBER DESCRIPTION SIP139 IP65 Rated Twist Lock Power Cable, 10ft (3m)* TOU027 Tour Link 5pin 10ft Tour Grade DMX Data Cable TRIGGER CLAMP Heavy Duty Hook Style Clamp KLF135...
Need help?
Do you have a question about the KL FRESNEL 4 FC and is the answer not in the manual?
Questions and answers