Table of Contents
Advertisement
Quick Links
Advertisement
Table of Contents

Subscribe to Our Youtube Channel
Related Manuals for zortrax Inkspire 2


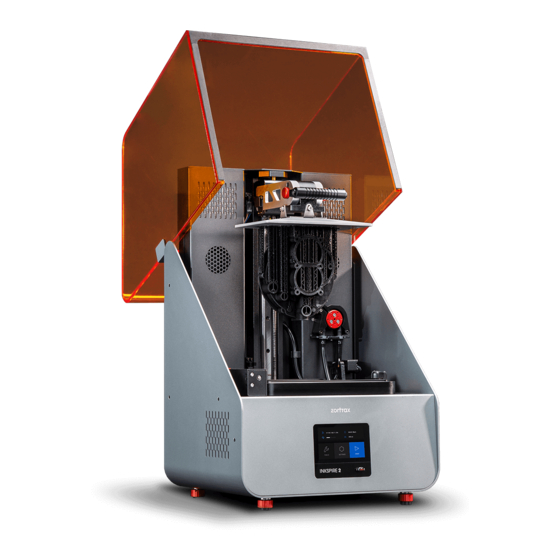
Summary of Contents for zortrax Inkspire 2
- Page 1 3D Printer User Guide Inkspire 2...
-
Page 2: Table Of Contents
Table of contents Introduction General Safety Information Learn More About the Zortrax Inkspire 2 How does the Zortrax Inkspire work? What’s in the Box Main Components Zortrax 3D Printing Technology Glossary First Use Preparation Connecting the printer to a network... -
Page 3: Introduction
Due to the size and specificity, the Zortrax Inkspire 2 is not intended for use by minors and by people with reduced manual, motor and psychomotor skills. The Manufacturer recommends providing assistance and guidance to people with disabilities and older adults who wish to operate the printer. - Page 4 Printing process with the Zortrax Inkspire 2 involves using synthetic resin which in a liquid form is toxic and may cause allergic reactions. Therefore, you must protect your skin and eyes when using the printer by wearing safety gloves and glasses.
- Page 5 All maintenance and repair work should be carried out while the device is off and unplugged. Modifications such as soldering of electronic subunits are forbidden. ©2022, Zortrax S.A. All rights reserved. All trade names, logos and trademarks mentioned in the following document are registered trademarks of Zortrax and are subject to legal protection.
- Page 6 Safe Storage and Transport Guidance Zortrax devices must be stored between 0 and 35° C [32 - 95° F]. The storage space should be free of moisture and other extreme conditions.
- Page 7 Electromagnetic Compatibility (EMC) The Zortrax printer complies with Part 15 of the FCC rules. Its operation is subject to the following two conditions: this device may not cause harmful interference, and this device must accept any interference received, including interference that may cause undesired operation.
-
Page 8: How Does The Zortrax Inkspire Work
The next step is to open the .stl file (or other) in Z-SUITE - the program created specifically for Zortrax devices. Z-SUITE prepares the model by slicing it into individual layers and saving it as a .zcodex file. Z-SUITE also allows you to choose the material type to be used for the model and to adjust the necessary print settings, such as layer thickness, layer exposure time, exposure off time or how many support structures should be generated. -
Page 9: What's In The Box
What’s in the Box ©2022, Zortrax S.A. All rights reserved. All trade names, logos and trademarks mentioned in the following document are registered trademarks of Zortrax and are subject to legal protection. -
Page 10: Main Components
Main Components 1. Back view ©2022, Zortrax S.A. All rights reserved. All trade names, logos and trademarks mentioned in the following document are registered trademarks of Zortrax and are subject to legal protection. - Page 11 2. Front view ©2022, Zortrax S.A. All rights reserved. All trade names, logos and trademarks mentioned in the following document are registered trademarks of Zortrax and are subject to legal protection.
-
Page 12: Zortrax 3D Printing Technology Glossary
Next, use the options from the menu to pump the resin out. ©2022, Zortrax S.A. All rights reserved. All trade names, logos and trademarks mentioned in the following document are registered trademarks of Zortrax and are subject to legal protection. - Page 13 UV light. It also helps to keep unpleasant smells of resin inside the printing chamber. ©2022, Zortrax S.A. All rights reserved. All trade names, logos and trademarks mentioned in the following document are registered trademarks of Zortrax and are subject to legal protection.
- Page 14 The last step is to transfer the file to the printer’s storage over Wi-Fi/Ethernet cable or by using a USB flash drive. ©2022, Zortrax S.A. All rights reserved. All trade names, logos and trademarks mentioned in the following document are registered trademarks of Zortrax and are subject to legal protection.
-
Page 15: First Use Preparation
1. Open the shipping box and remove the upper cushioning. 2. Remove the box with the printer from the shipping box. ©2022, Zortrax S.A. All rights reserved. All trade names, logos and trademarks mentioned in the following document are registered trademarks of Zortrax and are subject to legal protection. - Page 16 3. Unfasten the safety belt and separate it from the box. 4. Open the box. Next, remove the upper cushioning and foil. ©2022, Zortrax S.A. All rights reserved. All trade names, logos and trademarks mentioned in the following document are registered trademarks of Zortrax and are subject to legal protection.
- Page 17 6. Plug the power cable in (A), turn the printer on, and wait until the platform automatically moves up. Next, remove the box with the Starter Kit (B). ©2022, Zortrax S.A. All rights reserved. All trade names, logos and trademarks mentioned in the following document are registered trademarks of Zortrax and are subject to legal protection.
- Page 18 8. Place the printer on a flat and stable surface. Align the unit by tightening or loosening the printer’s legs manually as needed. Use a spirit level. ©2022, Zortrax S.A. All rights reserved. All trade names, logos and trademarks mentioned in the following document are registered trademarks of Zortrax and are subject to legal protection.
- Page 19 9. Loosen the release handle (A) and slide the lock to the right (B). Next, remove the resin vat (C). 10. Remove the sticker from the LCD screen. ©2022, Zortrax S.A. All rights reserved. All trade names, logos and trademarks mentioned in the following document are registered trademarks of Zortrax and are subject to legal protection.
- Page 20 (B). ©2022, Zortrax S.A. All rights reserved. All trade names, logos and trademarks mentioned in the following document are registered trademarks of Zortrax and are subject to legal protection.
- Page 21 14. Plug the bottle holder cable in and secure the holder to the back of the printer with the two screws. ©2022, Zortrax S.A. All rights reserved. All trade names, logos and trademarks mentioned in the following document are registered trademarks of Zortrax and are subject to legal protection.
-
Page 22: Connecting The Printer To A Network
Connecting the printer to a network The Zortrax Inkspire 2 can be connected to a local network in two ways: via Wi-Fi or an Ethernet cable. Both methods allow you to manage the printer directly from Z-SUITE and make it possible to remotely transfer .zcodex files from your computer to the printer. - Page 23 You can control the Ethernet connection settings in the main menu; select Settings and Ethernet. ©2022, Zortrax S.A. All rights reserved. All trade names, logos and trademarks mentioned in the following document are registered trademarks of Zortrax and are subject to legal protection.
- Page 24 You can also add a printer manually by typing its IP address. ©2022, Zortrax S.A. All rights reserved. All trade names, logos and trademarks mentioned in the following document are registered trademarks of Zortrax and are subject to legal protection.
- Page 25 In the 3D Printer Files tab, you can preview all .zcodex files that are stored on the printer’s USB flash drive. ©2022, Zortrax S.A. All rights reserved. All trade names, logos and trademarks mentioned in the following document are registered trademarks of Zortrax and are subject to legal protection.
-
Page 26: Firmware Update
You can also check if there is a newer firmware version available at any point of working with the Zortrax Inkspire 2 and update the firmware. Select Settings -> About Printer -> Check for updates. -
Page 27: Navigating Through The Menu
Maintenance - this tab displays all maintenance activities that have to be performed on the printer. ©2022, Zortrax S.A. All rights reserved. All trade names, logos and trademarks mentioned in the following document are registered trademarks of Zortrax and are subject to legal protection. - Page 28 Select Print to choose a model for printing and start the printing process. The printer will display all information concerning the process on the screen. ©2022, Zortrax S.A. All rights reserved. All trade names, logos and trademarks mentioned in the following document are registered trademarks of Zortrax and are subject to legal protection.
-
Page 29: Changing The Resin
If you haven’t filled the resin vat with resin yet or you have properly cleaned the vat before, you can skip this step. ©2022, Zortrax S.A. All rights reserved. All trade names, logos and trademarks mentioned in the following document are registered trademarks of Zortrax and are subject to legal protection. - Page 30 3. Next, carry out resin level sensor calibration. Follow the instructions provided on the screen. 4. Your device is ready to be used. ©2022, Zortrax S.A. All rights reserved. All trade names, logos and trademarks mentioned in the following document are registered trademarks of Zortrax and are subject to legal protection.
-
Page 31: Platform Calibration
2. Start the calibration with the options from the menu. Select Tools and then Calibration. Follow the instruc- tions provided on the screen. ©2022, Zortrax S.A. All rights reserved. All trade names, logos and trademarks mentioned in the following document are registered trademarks of Zortrax and are subject to legal protection. - Page 32 3. Your printer is ready to be used. ©2022, Zortrax S.A. All rights reserved. All trade names, logos and trademarks mentioned in the following document are registered trademarks of Zortrax and are subject to legal protection.
-
Page 33: Z-Suite Installation
Remember to update Z-SUITE regularly. All updates are available at: https://support. zortrax.com/downloads/. ©2022, Zortrax S.A. All rights reserved. All trade names, logos and trademarks mentioned in the following document are registered trademarks of Zortrax and are subject to legal protection. -
Page 34: How To Start, Remove And Post-Process A Print
3D prints should be found in the SDS delivered by the producer of the liquid. 1. Turn the printer on. ©2022, Zortrax S.A. All rights reserved. All trade names, logos and trademarks mentioned in the following document are registered trademarks of Zortrax and are subject to legal protection. - Page 35 3. Transfer the file to the printer (via Wi-Fi/Ethernet or using the USB drive) and start the printing process. ©2022, Zortrax S.A. All rights reserved. All trade names, logos and trademarks mentioned in the following document are registered trademarks of Zortrax and are subject to legal protection.
- Page 36 Be careful not to spill the liquid resin on the printer and its surroundings. Close the top cover. ©2022, Zortrax S.A. All rights reserved. All trade names, logos and trademarks mentioned in the following document are registered trademarks of Zortrax and are subject to legal protection.
- Page 37 Z-SUITE while exporting the .zcodex file or at: https://support.zortrax.com/. ©2022, Zortrax S.A. All rights reserved. All trade names, logos and trademarks mentioned in the following document are registered trademarks of Zortrax and are subject to legal protection.
- Page 38 9. Next, remove the model from the platform. Remove the raft and support structures from the model. ©2022, Zortrax S.A. All rights reserved. All trade names, logos and trademarks mentioned in the following document are registered trademarks of Zortrax and are subject to legal protection.
- Page 39 11. Place the model on the glass table in the Curing Station and start the curing process using options from the menu. ©2022, Zortrax S.A. All rights reserved. All trade names, logos and trademarks mentioned in the following document are registered trademarks of Zortrax and are subject to legal protection.
-
Page 40: Available Materials
When 3D printing with the Zortrax Inkspire 2, the Manufacturer recommends using Zortrax certified materials to acquire the best possible quality of prints. ©2022, Zortrax S.A. All rights reserved. All trade names, logos and trademarks mentioned in the following document are registered trademarks of Zortrax and are subject to legal protection. -
Page 41: Basic Maintenance And Service Work
Zortrax Inkspire 2, together with specific check points, necessary activities and their frequency. ©2022, Zortrax S.A. All rights reserved. All trade names, logos and trademarks mentioned in the following document are registered trademarks of Zortrax and are subject to legal protection. - Page 42 NOTE! Do not use IPA or chemi- cal detergents for that purpose. ©2022, Zortrax S.A. All rights reserved. All trade names, logos and trademarks mentioned in the following document are registered trademarks of Zortrax and are subject to legal protection.
- Page 43 -paper towels, bent, de- -IPA, formed, or -safety gloves perforated ©2022, Zortrax S.A. All rights reserved. All trade names, logos and trademarks mentioned in the following document are registered trademarks of Zortrax and are subject to legal protection.
- Page 44 ©2022, Zortrax S.A. All rights reserved. All trade names, logos and trademarks mentioned in the following document are registered trademarks of Zortrax and are subject to legal protection.
-
Page 45: Support And Troubleshooting
In order to ensure safety of every 3D printer’s user, the Manufacturer provides various support while identifying and solving technical problems independently. In case of difficulties with operating a Zortrax 3D printer, at first you should seek guidance in this User Guide, check the manuals available at: http://support.zortrax.com/, or consult our technical specialists through the Support Form available at: http://support.zortrax. - Page 46 Check if the FEP film is not bent, deformed, or perforated. Replace the FEP film if you notice such defects. Contact the Support Center at: http://support.zortrax.com/support-form. ©2022, Zortrax S.A. All rights reserved. All trade names, logos and trademarks mentioned in the following document are registered trademarks of Zortrax and are subject to legal protection.
-
Page 47: Error Messages
Contact Zortrax Support Center through cate with control board trol board the support form: https://support.zor- trax.com/support-form/ ©2022, Zortrax S.A. All rights reserved. All trade names, logos and trademarks mentioned in the following document are registered trademarks of Zortrax and are subject to legal protection. - Page 48 ©2022, Zortrax S.A. All rights reserved. All trade names, logos and trademarks mentioned in the following document are registered trademarks of Zortrax and are subject to legal protection.
- Page 49 More manuals and tips & tricks articles are available at our Support Center. www.zortrax.com ©2022, Zortrax S.A. All rights reserved. All trade names, logos and trademarks mentioned in the following document are registered trademarks of Zortrax and are subject to legal protection.
-
Page 50: Specification
Touchscreen 4’’ IPS 800 x 480’ External materials applicable Supported formats .zcodex2 ©2022, Zortrax S.A. All rights reserved. All trade names, logos and trademarks mentioned in the following document are registered trademarks of Zortrax and are subject to legal protection. - Page 51 All information contained in this User Guide and specication is subject to change without notice. ©2022, Zortrax S.A. All rights reserved. All trade names, logos and trademarks mentioned in the following document are registered trademarks of Zortrax and are subject to legal protection.
-
Page 52: Recycling
In case of questions and problems contact the Manufacturer through the support form: http://support.zortrax.com/support-form/. ©2022, Zortrax S.A. All rights reserved. All trade names, logos and trademarks mentioned in the following document are registered trademarks of Zortrax and are subject to legal protection. - Page 53 24.10.2022 ©2022 Zortrax S.A. All rights reserved.
Need help?
Do you have a question about the Inkspire 2 and is the answer not in the manual?
Questions and answers