
Related Manuals for EL-CELL PAT


Summary of Contents for EL-CELL PAT
- Page 1 © 2016 EL-CELL GmbH Appliance Manual Release 1.33 PAT-Tester Management and setup instructions © 2022 EL-Cell GmbH...
- Page 2 The information in this manual has been carefully checked and believed to be accurate; however, no responsibility is assumed for inaccuracies. EL-Cell GmbH maintains the right to make changes without further notice to products described in this manual to improve reliability, function, or design. EL -Cell GmbH does not assume any liability arising from the use or applicati on of this product.
-
Page 3: Table Of Contents
Explanation of Terms ........................5 Network Structure and Settings ....................6 Setting up the Appliance Hardware ..................... 8 Connecting the EL-Software Server to the PAT-Tester ............17 EL-Software Setup and Management ..................19 Installing the EL-Software Client .................... 19 Updating the EL-Software Client .................... 24 Removing the EL-Software Client................... -
Page 4: Appliance Setup Overview
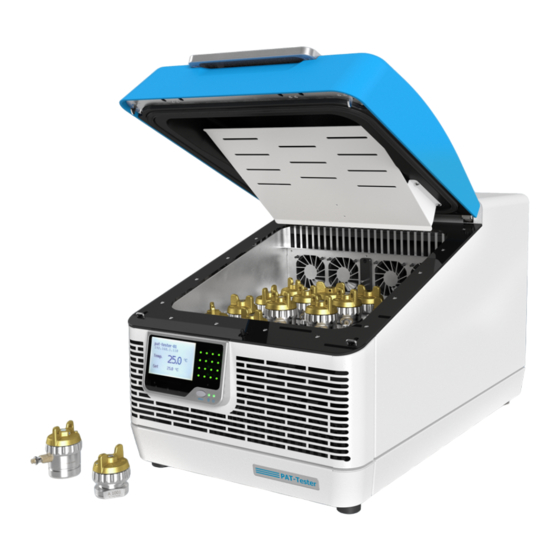
1.1 Scope of Delivery: 1. Router 2. Power supply with cable for router 3. Server PC 4. Power cable Server PC 5. PAT tester i-16 6. Power cable PAT-Tester 7. LAN cable (4 pcs.) Page 4 of 62 Release 1.33... -
Page 5: Explanation Of Terms
EL-Router: Network router that manages the PAT-Tester network and provides the interface to the customer's network (Client Network) Client Network: The customer's existing network infrastructure PAT-Tester Network or Tester Network: Network of the appliance setup delivered by EL- Cell. The PAT-Testers are operated in this network. Software components: EL-Software Client: Client component of EL-Software that provides the graphical user interface (GUI). -
Page 6: Network Structure And Settings
User name: admin Password: changeit Port settings Port 1: Client Network (DHCP) Note: Do not connect a PAT-Tester, Server, or EL-Software Client PC directly to port 1. Port 2-10: Internal PAT-Tester network. Server: Connect the EL-Server to Port 2. •... - Page 7 EL-Software Client: Connect the PC´s running the EL-Software Client from Port 10 • downwards. Note: PCs running the EL-Software Client can access the EL-Server from both the client and the PAT-Tester network. EL-Server (supplied server hardware): Access::https://elserver.el.lan:8006 Username: root Password: changeit SMB share for Microsoft Windows: \\elsoftware.el.lan\experiments...
-
Page 8: Setting Up The Appliance Hardware
PAT-Tester Appliance Manual 2 Setting up the Appliance Hardware Connecting the router to the server PC 1. Connect the yellow LAN cable to LAN port 2 of the router. 2. Connect the cable to the LAN port of the server PC. - Page 9 PAT-Tester Appliance Manual Connecting the router to the PAT-Tester-i-16 3. Schließen sie nun das rote LAN-Kabel an den LAN-Port 3 des Routers an. 4. Entfernen sie die Frontblende des PAT-Tester-i-16, um den LAN-Port freizulegen. Page 9 of 62 Release 1.33...
- Page 10 PAT-Tester Appliance Manual 5. Schließen sie dann das LAN-Kabel an den LAN-Port des Gerätes an. Connecting the router to the Client PC (connected to the tester network) 6. Connect the green LAN cable to the router. Use ports 4 to 10 of the router for this purpose.
- Page 11 PAT-Tester Appliance Manual 7. Connect the cable to the LAN port of the Client PC. Connecting the router to the Client Network (recommended) 8. Connect the white LAN cable (White) to port 1 of the router. Connect the other end to the Client Network.
- Page 12 PAT-Tester Appliance Manual Connecting the devices to the mains and commissioning 9. Connect the router to the power supply using the supplied power adapter. 10. The router now starts. It is ready for operation after approx —1 minute. A green LED will light up continuously if connected to the Client Network.
- Page 13 PAT-Tester Appliance Manual 11. Connect the server PC to the power supply via the cable. 12. Switch it on. The green power LED now lights up green. The server boots and is ready for operation after approx—1 minute. Page 13 of 62...
- Page 14 PAT-Tester Appliance Manual 13. A green LED will now light up on the router on the port connected to the server PC. 14. Now, connect the PAT-Tester-i-16 to the power supply. Here, too, the front panel must be removed beforehand.
- Page 15 PAT-Tester Appliance Manual 15. A green LED will now light up on the router on the port that is connected to the PAT-Tester-i-16. 16. „booting" is now shown on the display of the PAT-Tester-i-16. Page 15 of 62 Release 1.33...
- Page 16 PAT-Tester Appliance Manual The boot process is completed as soon as the PAT -Tester has received an IP address from the router. This is now shown on the display Optional: If the Client PC is connected to the tester network 17.
-
Page 17: Connecting The El-Software Server To The Pat-Tester
1. Start the EL-Software Client and select the "Devices" item in the tree structure. Click on "Connect new Device.“ 2. A popup shows the available PAT-Testers, in this example, a PAT-Tester-i-16. Select it and then click on "Create.“ This will connect the tester to the EL-Software Server. - Page 18 PAT-Tester Appliance Manual 3. The PAT-Tester-i-16 appears as an entry in the Devices list. It is now connected to the EL- Software Server and ready for use. Page 18 of 62 Release 1.33...
-
Page 19: El-Software Setup And Management
PAT-Tester Appliance Manual 3 EL-Software Setup and Management 3.1 Installing the EL-Software Client 3.1.1 Obtaining via the EL-Software Server The EL-Software Server contains an installation version of the EL-Software Client, which can be used for setup on any number of Client PCs. - Page 20 EL-Software Server and the EL-Software Client. 3.1.2.1 Preparing for installation Download the EL-Software Installer from the EL-Cell website. Extract the zip file and execute the included Windows Installer file "Setup-EL-Software-win10...". Page 20 of 62 Release 1.33...
- Page 21 PAT-Tester Appliance Manual 3.1.2.2 Performing the installation 1. Double-click the provided installer file. The installation wizard will open, guiding you through the installation process. Click “Next” to continue. 2. Select the client component. Click “Next” to continue. Page 21 of 62...
- Page 22 PAT-Tester Appliance Manual 3. If the Client PC is directly connected to the Tester Network: Enter the hostname of the server you want the client to connect to. The default server name is elsoftware. Use the Button “Test Connection” to check the connection to the server. Click “Next” to continue.
- Page 23 PAT-Tester Appliance Manual 5. Once the installation is complete, you must restart the computer before you can use EL-Software. The restart is executed only after the wizard is finished. 6. Press "Finish" to exit the wizard. Page 23 of 62...
-
Page 24: Updating The El-Software Client
3.3 Removing the EL-Software Client The EL-Software Client is uninstalled differently depending on the source it was obtained from (EL-Cell website or EL-Software Server). 3.3.1 If Installation has been performed via the EL-Software Server If the EL-Software Client was obtained and installed via the EL-Software Server, it has to be removed by deleting the installation folders. - Page 25 PAT-Tester Appliance Manual 4. A file explorer window opens with the EL-Software Client shortcut. Select it with the right mouse button and click on "Properties" in the context menu. 5. Now select "Open file path.“ A new file explorer window will open. Navigate one level higher by clicking on "Local" in the folder path of the explorer.
- Page 26 3.3.2 If the Installation was performed using the .msi Installer If you have installed the EL-Software Client via the .msi installation file, offered as a download on the EL-Cell website, you have to uninstall it via the system control panel. Follow the steps below. 1: 1.
-
Page 27: Installing The El-Software Server
The EL-Software Server installation file can be downloaded from the EL-Cell website. 3.4.1.1 Preparing for Installation Download the EL-Software installation file from the EL-Cell website. Extract the zip file and execute the included Windows Installer file (.msi) "Setup-EL-Software-win10...". 3.4.1.2 Installing the EL-Software Server 1. - Page 28 PAT-Tester Appliance Manual 2. Select the server components. If you want to use the EL-Software Client on this system at the same time, select it as well. Click “Next” to continue. 3. Select the storage locations for the databases. It is recommended to store each database on a separate physical hard drive.
- Page 29 PAT-Tester Appliance Manual 4. The software components are now installed. When the Microsoft Windows User Account Control (UAC) window appears, press "Yes" to allow the installation. 5. Once the installation is complete, you must restart the computer before you can use EL - Software.
-
Page 30: Updating The El-Software Server
PAT-Tester Appliance Manual 3.5 Updating the EL-Software Server 3.5.1 Update on Linux In case the EL-Software Server is installed on a Linux system, please follow these steps : 1. First, all running instances of the EL-Software Client must be closed. - Page 31 PAT-Tester Appliance Manual 3.5.1.1 Performing the automatic update: 8. Select "Check for new version" on the EL-Software Server webpage to determine the latest version. Check"Factory Reset" and click on "Update" to start the update process. Please note: All settings will be reset to the factory settings during the update .
- Page 32 PAT-Tester Appliance Manual 2. After the successful update, the page is reloaded, and the newly installed version of the EL-Software Server is displayed. 3.5.1.2 Performing the manual update: It is possible to perform a manual update. This can be useful if there is no direct Internet connection 1.
- Page 33 PAT-Tester Appliance Manual 2. Click on the tab "Manual update" on the EL-Software Server webpage to change the view. Select the previously downloaded Debian package in deb file format. Then check the "Factory Reset" box and click on "Update" to start the update process.
- Page 34 For the update, you need the current installation file of EL -Software, which you can obtain from the EL-CELL website. Follow the standard installation instructions as shown in the corresponding chapter. The existing installation of the EL-Software Server does not have to be uninstalled before the update.
-
Page 35: Performing The El-Software Controller Update
3.6 Performing the EL-Software Controller update The EL-Software Controller component of a PAT-Tester can be updated via the EL-Software Client. To do this, the PAT-Tester must be connected to the EL-Software Server (see chapter 2.1). Then follow the steps below. - Page 36 PAT-Tester Appliance Manual Click on "Update" in the main menu bar. 3. A popup appears. If you have changed the default password for the controller software, you must enter it here. Otherwise, the default password will be used automatically. During the update, all running experiments will be stopped. Check the box to continue.
- Page 37 PAT-Tester Appliance Manual The update will now be performed. The new version of the EL-Software Controller is displayed as soon as it has been completed. You can now close the window via the „Close“ button. Page 37 of 62 Release 1.33...
-
Page 38: For Advanced Users
PAT-Tester Appliance Manual 4 For advanced users The following chapters describe procedures and help for advanced users. They can be applied if problems cannot be solved via standard procedures. 4.1 Performing software updates via Linux (with an existing internet connection) 4.1.1 Updating the EL-Software Server... - Page 39 PAT-Tester Appliance Manual Accept the security risk 10. Choose elserver from the tree structure on the left side 5. Select the entry „100 (elsoftware)“. This is the virtual container on which the EL-Software Server is installed ist. Page 39 of 62...
- Page 40 PAT-Tester Appliance Manual 6. Click on "Console" in the container menu to open the input window . 7. Now enter the command sudo apt update in the input window. This checks all software components for up-to-date and downloads new versions if an Internet connection is available.
- Page 41 PAT-Tester Appliance Manual 8. Enter the command sudo apt upgrade. Confirm the prompt asking if you want to continue. Now the previously downloaded content will be installed. 9. The database must be reset because the installed updates can potentially contain changes to the structure, which can endanger the stability.
- Page 42 PAT-Tester Appliance Manual Update of the EL-Software Client after update of the EL-Software Server Start the EL-Software Client. It will automatically upgrade itself using the installer downloaded with the new EL-Software Server components. Page 42 of 62 Release 1.33...
- Page 43 Open the command prompt on the Client PC (e.g., by pressing the Windows key, entering cmd, and clicking on the command prompt. Enter the following line there: ssh controlleradmin@XXX.XXX.XX.XXX (Replace the X with the IP address of the respective PAT-Tester) Password: changeit Page 43 of 62...
- Page 44 The software components of the controller are now checked , and new versions are downloaded. 3. Start the update by entering the command sudo apt upgrade. The controller software will now be updated. The PAT-Tester will reboot and perform functional tests, such as confirming the ventilation flaps. Page 44 of 62...
- Page 45 PAT-Tester Appliance Manual The process can take several minutes. It is completed as soon as the prompt appears again in the console. 5. Restart the PAT-Tester. To do this, enter the command sudo reboot. Page 45 of 62 Release 1.33...
- Page 46 PAT-Tester Appliance Manual 6. The controller pc inside the PAT-Tester will restart, update the test channels' firmware and re-establish the connection to the channels. First, on display, all the LEDs of the channels will change from green to red and then turn off.
- Page 47 "Devices" item on the left-hand side of the tree structure. Then click on "Connect new Device.“ 8. A popup shows the available PAT-Testers, in this example, a PAT-Tester-i-16. Select it and then click on "Create.“ This will connect the tester to the EL-Software Server.
- Page 48 PAT-Tester Appliance Manual 9. The PAT-Tester-i-16 appears as an entry in the Devices list. It is now connected to the EL-Software Server and ready for use. Page 48 of 62 Release 1.33...
- Page 49 PAT-Tester Appliance Manual 4.1.3 Viewing the update progress via Linux console on the Client PC The firmware update process can be monitored on the Client PC. To do this, log in to the controller and then call the log file.
-
Page 50: Software Updates In The Tester Network Via Linux (Without Internet Connection)
Please note: Your PC must be connected to the tester network to access the controller. 4.2.1 Updating the EL-Software Server 1. Download the server Debian package (.deb file format) from the EL-Cell website. Transfer it to the Client PC. 2. Open the system command prompt on the Client PC (for example, by pressing the windows key, entering cmd, and clicking on the command prompt). - Page 51 PAT-Tester Appliance Manual 4. Enter the following line to transfer the Debian package file: scp YOUR_DEBIAN_PACKAGE.deb eladmin@192.168.10.20:/home/eladmin Enter the password: changeit 5. Now log in to the EL-Software Server with the following command: ssh eladmin@192.168.10.20 Enter the password: changeit Page 51 of 62...
- Page 52 PAT-Tester Appliance Manual 6. The Debian package can now be installed. Enter the following: sudo dpkg -i elsoftware.XXXXXXX.deb (Replace X with the filename of the transferred package) Enter the password: changeit 7. After the Debian package installation, a database reset is needed. This is done by entering the following command: sudo /urs/bin/elsoftware.serverd/scripts/reset.sh...
- Page 53 1. Enter the following in the command prompt of the Client PC: ssh controlleradmin@XXX.XXX.XX.XXX (Replace X with the IP address that appears on the PAT-Tester display). Enter the password: changeit 2. Since the controller wants to obtain software updates via the Internet by default, the search paths must be adapted.
- Page 54 PAT-Tester Appliance Manual 3. A list with the search paths appears. All entries not marked blue must be marked inactive by inserting three # signs. Please note: The list goes beyond the screen display. It must be edited completely .
- Page 55 5. Now you have to remove all files in the directory ect/apt that are not named "el -cell.list". To do this, enter cd sources.list.d/. Then display a list of the directory with the command ll. 6. All files, except the "el-cell.list", must be removed. Enter the following command: sudo rm XXXXX.list (Replace X with the file name) 7.
- Page 56 PAT-Tester Appliance Manual 8. Change the entry in the first line as follows : http://192.168.10.20:4711/repository/controller bionic main 9. Afterhed editing the list, save it by pressing CTRL+O. Press CTRL+X to close the file afterward. 10. Now, you can start the update of the controller. To do this, type in: sudo apt update.
- Page 57 PAT-Tester Appliance Manual 11. Enter the command sudo apt upgrade to perform the update. The controller PC in the PAT-Tester must then be rebooted. To do this, enter the following command: sudo reboot After the restart, the firmware of the individual test channels is updated , and then the connection to the channels is re-established.
- Page 58 Please note: This process can take up to 15 min per channel. In the end, all channels should light up green again. 12. After the update has been completed, the PAT-Tester must be reconnected to the EL-Software Server. Follow the instructions in chapter 2.1 Page 58 of 62 Release 1.33...
-
Page 59: Determining The Ip Address Of The El-Router
PAT-Tester Appliance Manual 4.3 Determining the IP address of the EL-Router Once the Client PC is connected to the Client Network, it can only access the tester network via the IP address of the EL router assigned by the Client Network. - Page 60 PAT-Tester Appliance Manual 2. Select the item "Console" in the second navigation column and click on "Start now . “ 3. The operating system of the Maintenance VM is now started. As soon as it is ready, the desktop environment will appear. All settings windows that appear can be closed. The VM is reset to the factory settings after it is closed, so any settings made here ar e not saved.
- Page 61 PAT-Tester Appliance Manual 4. Call up the target address http://192.168.10.1 in the browser. This will take you to the user interface of the EL-Router. Log in with the following user data: Login: admin Password: changeit 5. Switch to the "Quick Set" tab in the user interface. Under the item "IP Address ," you can now view the IP address the EL-Router received in the customer network.
- Page 62 PAT-Tester Appliance Manual You can close the Maintenance VM again via the "Shutdown" button . Page 62 of 62 Release 1.33...
Need help?
Do you have a question about the PAT and is the answer not in the manual?
Questions and answers