
Subscribe to Our Youtube Channel
Related Manuals for Maxcess TIDLAND D6X


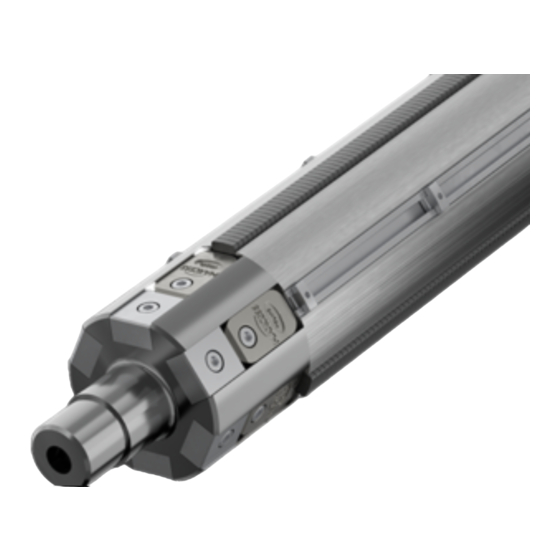
Summary of Contents for Maxcess TIDLAND D6X
- Page 1 TIDLAND WINDING SOLUTIONS D6X Differential Air Shaft Installation, Operation and Maintenance Manual 270044468 1...
-
Page 2: Table Of Contents
D6X Differential Air Shaft TABLE OF CONTENTS IMPORTANT SAFETY INSTRUCTIONS ................... 3 RECOMMENDED TOOLS ......................... 4 GENERAL SHAFT CARE ........................5 MAINTENANCE SCHEDULE ......................5 SHAFT CARE ............................. 5 POLYURETHANE BLADDERS ......................5 FOAM SPRINGS ..........................5 PART IDENTIFICATION ........................6 TENSION SEGMENT COMPONENTS................... -
Page 3: Important Safety Instructions
D6X Differential Air Shaft Important Safety Instructions When using this product, basic safety precautions should always be followed to reduce the risk of personal injury. When using this product with any other equipment or machinery, all safety requirements stipulated by that equipment or machinery manufacturer must be followed. -
Page 4: Recommended Tools
D6X Differential Air Shaft Recommended Tools 1) Clean, dry, non-lubricated air supply: 80-120 psi for proper operation. 2) Tidland Inflation Tool (Part No. 27L128052) 3) Tidland Air Release Tool (Part No. 27L111630) 4) Pincers for removing hose clamps, if installed. 5) Dow Corning Molykote 55 O-ring grease ®... -
Page 5: General Shaft Care
D6X Differential Air Shaft General Shaft Care Maintenance Schedule • During operation shifts, use compressed air to keep shaft free from dust and debris. • As needed, remove sticky residue. Use a soft cloth damp with a mild solvent, such as rubbing alcohol. -
Page 6: Part Identification
D6X Differential Air Shaft Part Identification TENSION SEGMENT COMPONENTS SOC HD Capscrew (2) 132582 Bladder 739338 End Clamp 270022857 Mushroom Barb Fitting Mushroom Head w/ O-ring Fitting 562024 516618 Journal Valve end Core Stop Journal Non-valve end Tray Assy CORE STOP TRAY COMPONENTS Core Stop Tray Assy. -
Page 7: Pressure Control Valve System
D6X Differential Air Shaft Pressure Control Valve System Successful operation of the Tidland Differential Shaft series depends upon proper internal air pressure Variable pressure is required in order to control the air pressure on the tension segments as the roll diameter increases. As the roll diameter grows, the required rate of pressure increase will diminish due to the weight of the roll and friction between the roll and shaft. - Page 8 D6X Differential Air Shaft As operating air pressure is applied to the shaft, the factory-set inlet valve causes a drop in pressure as air enters the bladder. The exhaust bleeder valve controls the amount of that pressure drop. The larger the exhaust opening, the greater the pressure drop, resulting in lower internal bladder pressure.
-
Page 9: Installation
D6X Differential Air Shaft Installation 1) Install shaft as required for your application. 2) Determine how many core stops are required. (2 per core in each tray) 3) Remove excess core stops or move them to the end of the tray. Ensure all core stop screws are tight to prevent motion while machine is running. - Page 10 D6X Differential Air Shaft Step 1 – Set the Core Stops Position core stops in each tray so that the core will have one stop on either side of the core per tray. Step 2 – Lock Sequence SET SCREW Use SET SCREW (M4 X 0.7mm) to lock the core stop in place axially.
-
Page 11: To Replace Bladders
D6X Differential Air Shaft To Replace Bladders • Bladder material supplied for replacement may be longer than the required finished length. Do not cut to length until instructed. • Use a small amount of LOCTITE 222 on the threads of all screws and tighten to torque specifications noted in brackets. - Page 12 D6X Differential Air Shaft • Bladder material supplied for replacement may be longer than the required finished length. Do not cut to length until instructed. • Use a small amount of LOCTITE 222 on the threads of all screws and tighten to torque specifications noted in brackets.
-
Page 13: Maintenance
• Do not attempt to remove the bleeder valve housing from the shaft. If repair is necessary, return the shaft to Maxcess (see Service at end of document). • Location of valve varies due to custom shaft configurations. - Page 14 D6X Differential Air Shaft 4) Using a 1/8" hex drive, carefully back the needle valve all the way out of its housing (counterclockwise). 5) Using compressed air, blow dust and debris out of the valve. 6) Carefully reinstall the needle valve in the housing. 7) Close the valve down until it just bottoms out in the housing, and then adjust as required for your application.
-
Page 15: Troubleshooting
D6X Differential Air Shaft Troubleshooting Problem Possible Cause Recommended Solution Leak or obstruction Remove core stop tray from shaft. Core stop tray does not lift in air system. Check bladder for holes, deformation or when air is applied. debris around air fittings. Air tubing not Remove cover from core stop tray and connected under... -
Page 16: Service
D6X Differential Air Shaft Service If you have any questions about one of our products or need to speak with a Customer Service representative, please use the contact information below. www.maxcessintl.com D6X Differential Air Shaft 270044468 1 Page 16...
Need help?
Do you have a question about the TIDLAND D6X and is the answer not in the manual?
Questions and answers